Frequent browser updates can disrupt workflows, introduce unwanted changes, or cause compatibility issues with legacy web applications. For system administrators and advanced users, controlling when browsers update is essential for stability and testing. Below, you’ll find concrete methods to disable auto updates in Google Chrome, Microsoft Edge, and Mozilla Firefox, along with explanations of why each step matters and what to watch for.
Disable Auto Update in Google Chrome
Network administrators can manage Chrome updates centrally using Group Policy on Windows. This method ensures that all managed devices follow the same update policy, preventing unexpected version changes across your organization.
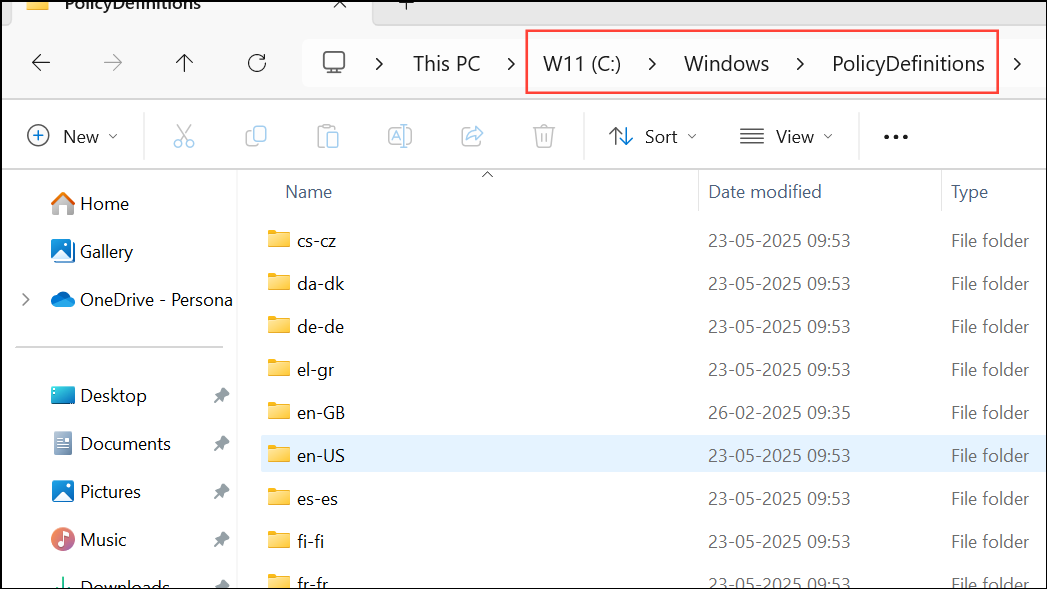
Step 1: Download the official Google Update policy templates. These files define the settings you’ll configure in Group Policy. Get the latest ADMX and ADML files from the Chrome Enterprise website and extract them to your C:\Windows\PolicyDefinitions folder. This makes the policies available in the Group Policy Management Editor.
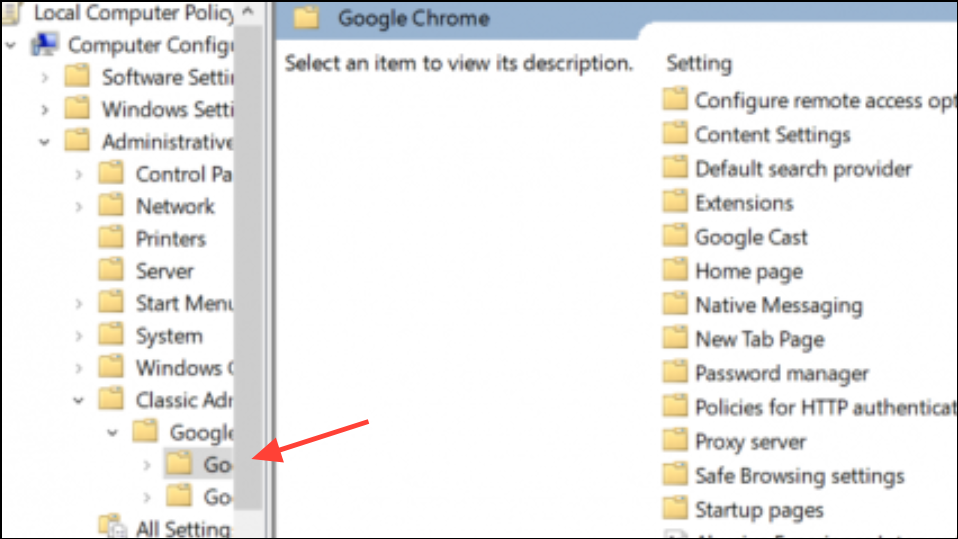
Step 2: Open the Group Policy Management Editor. Navigate to Computer Configuration > Policies > Administrative Templates > Google > Google Update > Applications > Google Chrome. Here, you’ll find the update policies for Chrome.
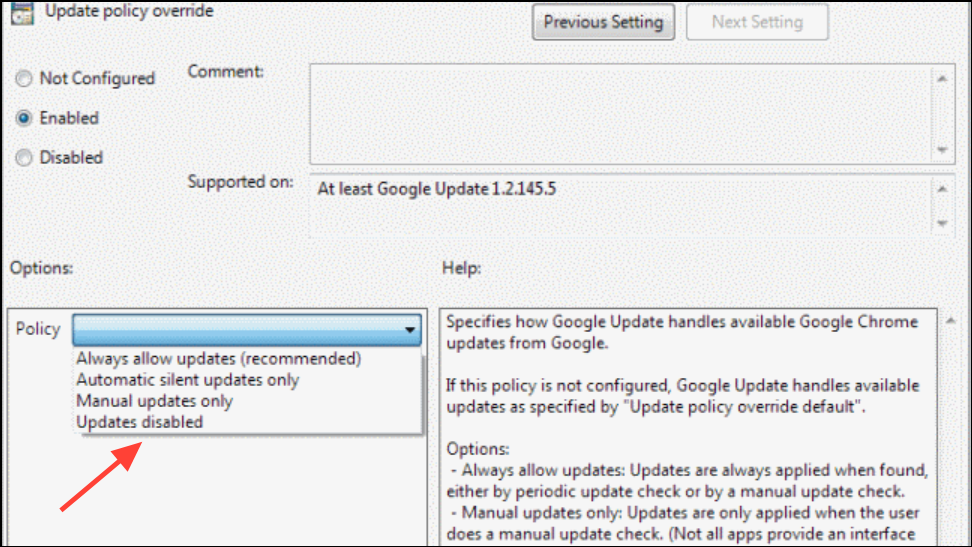
Step 3: Enable the Update policy override setting. Set the option to Disable updates. This stops Chrome from automatically updating and prevents users from manually updating through the browser interface.
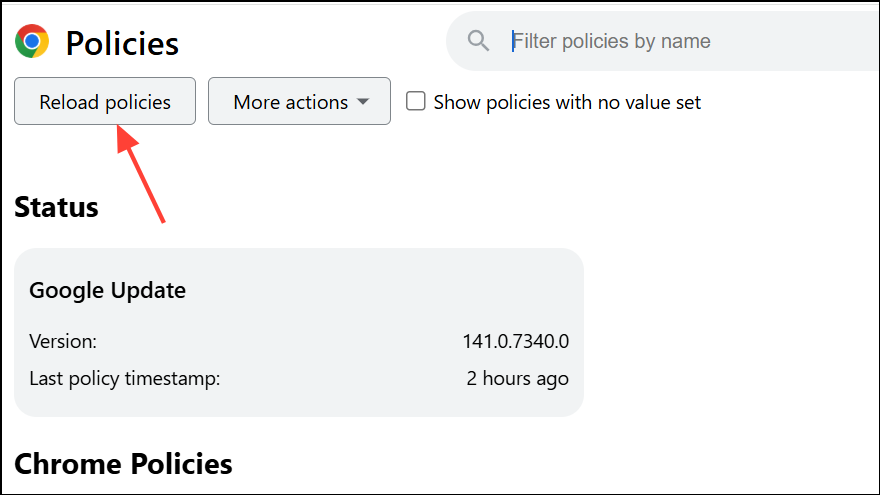
Step 4: To confirm the policy is active, open Chrome on a targeted machine and go to chrome://policy. Click Reload policies and verify that the policy appears with the correct setting.
Turning off updates may expose users to security risks, so plan periodic manual updates and re-enable updates when necessary to stay protected.
Disable Auto Update in Microsoft Edge
Edge updates are tightly integrated with Windows, but it’s possible to block or remove update mechanisms on standalone systems. This approach is suitable for advanced users who need to freeze Edge at a specific version for compatibility reasons.
Step 1: Open Task Manager using Ctrl + Shift + Esc. Go to the Startup tab and look for Microsoft Edge and Microsoft Edge Update. Right-click each and select Disable to prevent them from launching at startup.
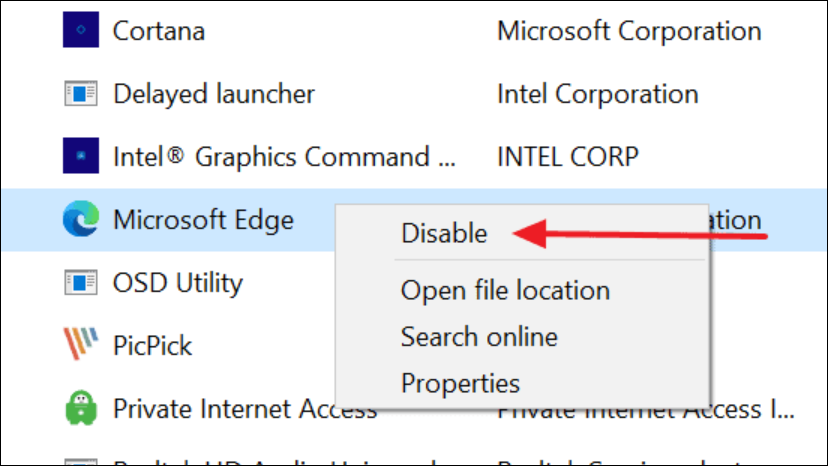
Step 2: Restart your computer. Edge should no longer update automatically, as the update service is disabled from starting with Windows.
Step 3: For a more permanent solution, advanced users can remove the Edge update directories. Open a Command Prompt as Administrator and delete the C:\Program Files (x86)\Microsoft\EdgeUpdate directory. Be aware that Windows Updates may restore these files, so this method may require repeating after major system updates.
Step 4: If you want to remove Edge entirely, you can use command-line instructions to delete Edge application directories. However, because Edge is deeply integrated with Windows, this can cause unexpected issues with system apps or Windows features that rely on Edge components.
Disabling Edge updates can lead to security vulnerabilities or breakage in Windows features. Only use these steps if you have a clear need and a plan to manage browser security manually.
Disable Auto Update in Mozilla Firefox
Firefox offers several ways to control or block automatic updates, ranging from built-in settings to advanced configuration changes and registry edits.
Method 1: Using Firefox Settings
Step 1: Open Firefox and click the menu button, then select Settings.

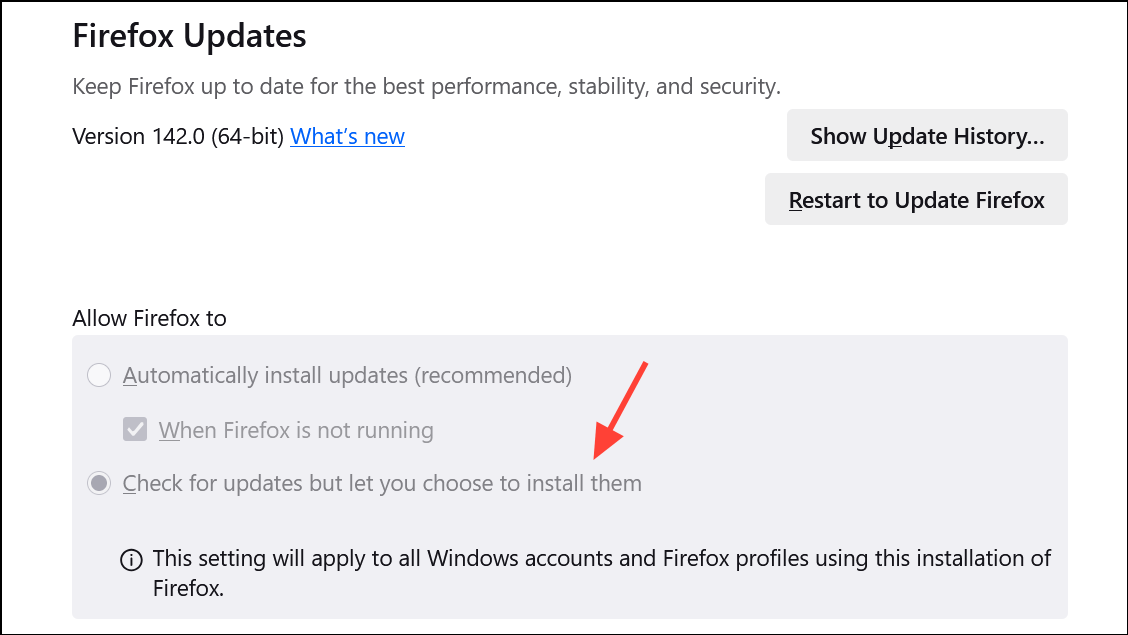
Step 2: Scroll to the General section and find Firefox Updates. Choose the option to Check for updates but let you choose to install them. This stops automatic installation and gives you manual control over when updates are applied.
Method 2: Using about:config
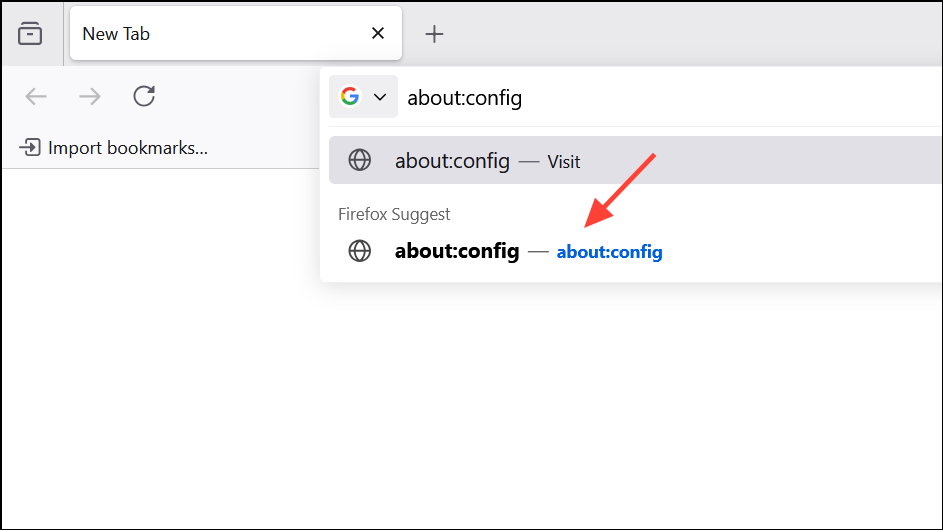
Step 1: In the Firefox address bar, type about:config and press Enter. Accept any warning that appears.
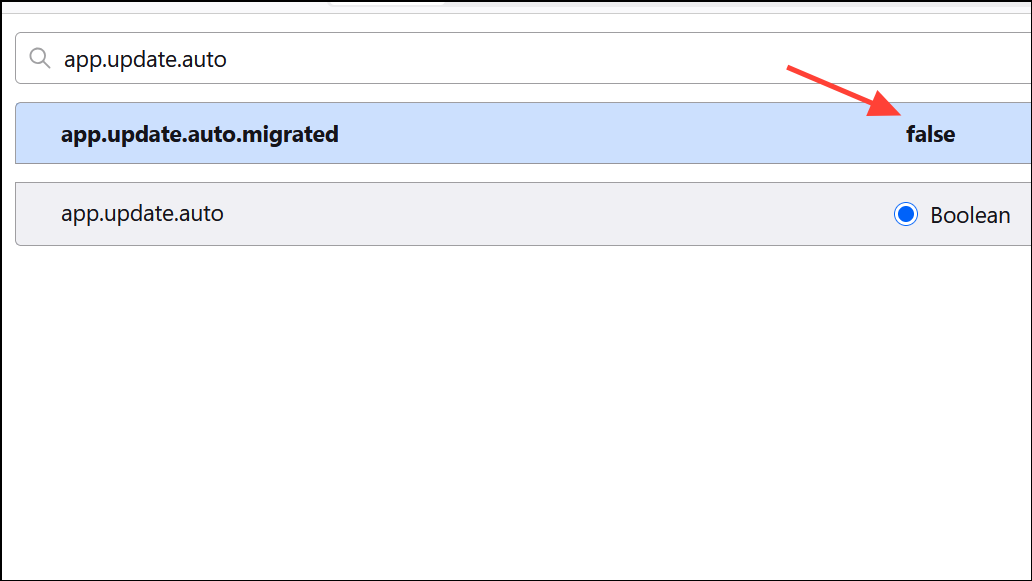
Step 2: Search for the preference app.update.auto. Double-click the entry to set its value to false. This disables automatic updates, but Firefox may still notify you when a new version is available.
Method 3: Uninstall or Disable the Mozilla Maintenance Service
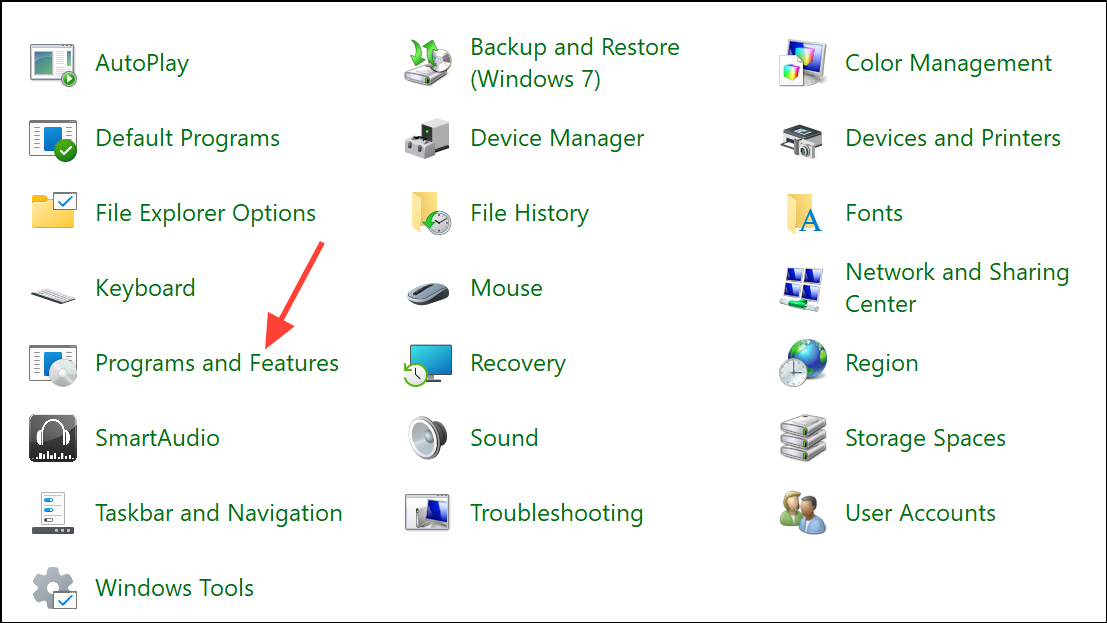
Step 1: Open the Windows Control Panel and go to Programs & Features.
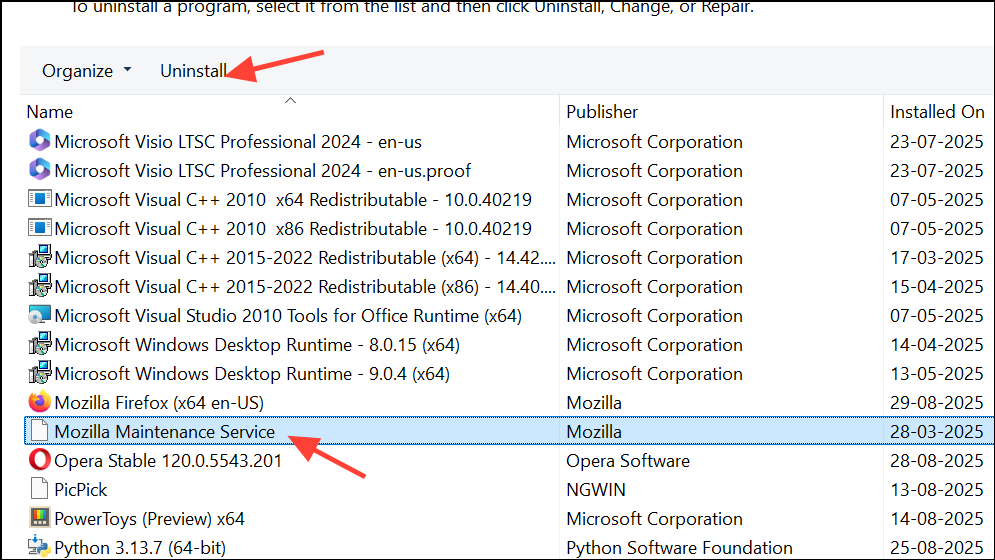
Step 2: Locate Mozilla Maintenance Service in the list. Uninstall it to stop Firefox from running updates in the background without user approval. Alternatively, within Firefox settings, uncheck the option to use the maintenance service.
Method 4: Registry Edit (for Windows)
Step 1: Close Firefox completely.
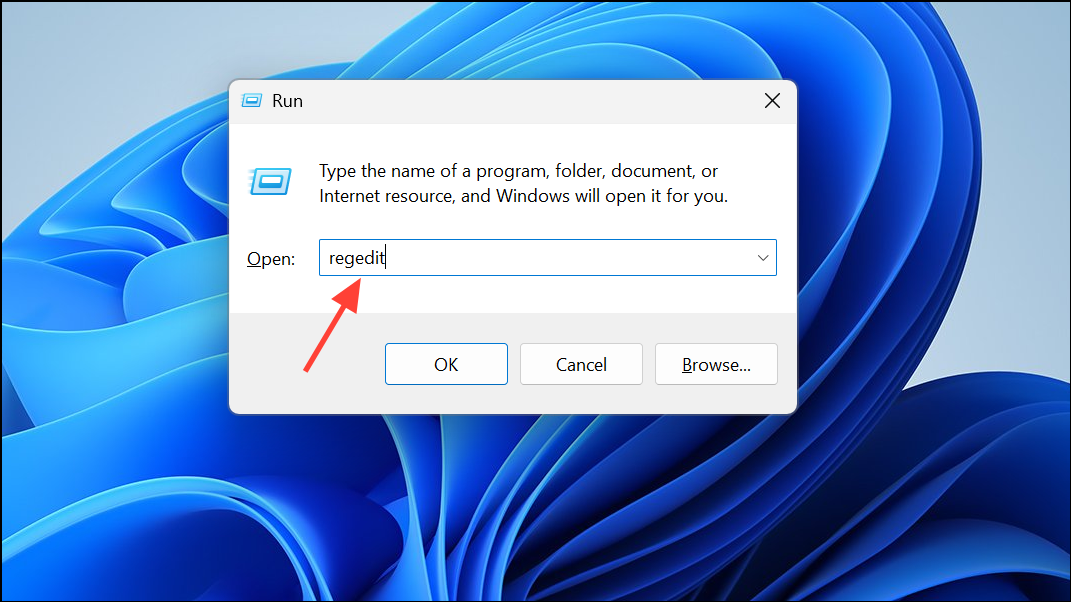
Step 2: Open the Registry Editor (regedit).
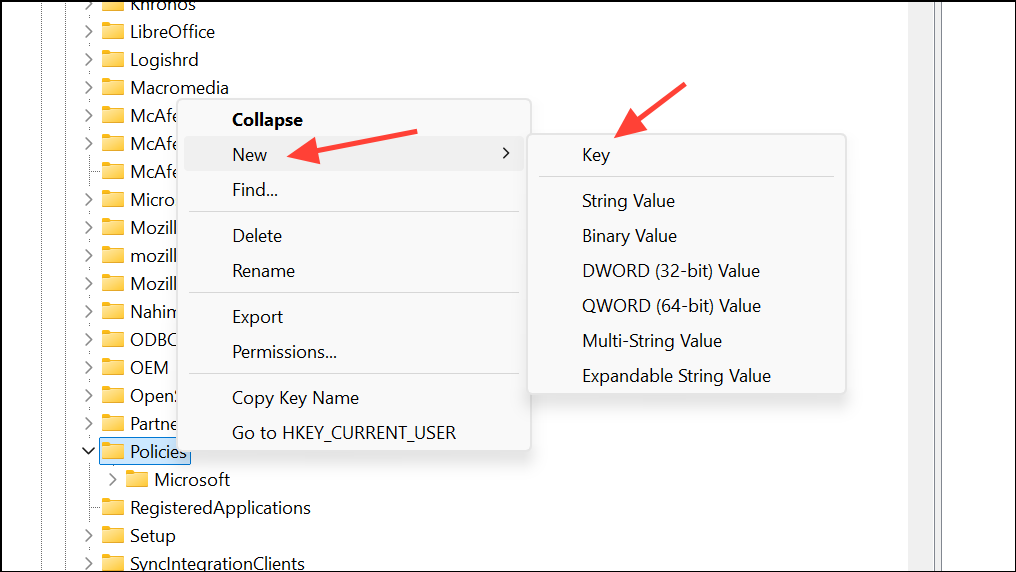
Step 3: Navigate to HKEY_LOCAL_MACHINE\Software\Policies. Create a new key called Mozilla, then under that, create a key called Firefox.
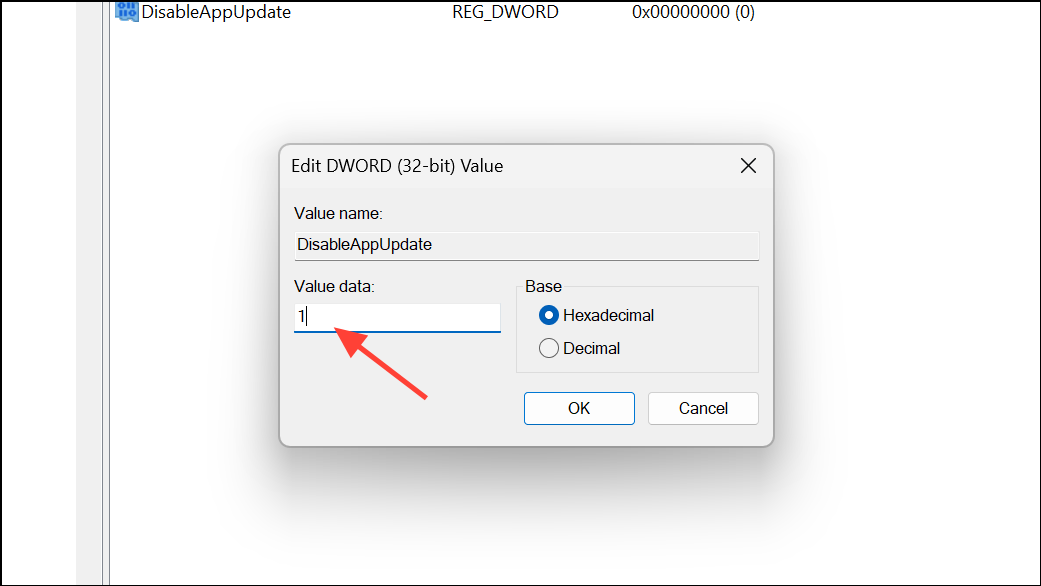
Step 4: In HKEY_LOCAL_MACHINE\Software\Policies\Mozilla\Firefox, create a new 32-bit DWORD value named DisableAppUpdate and set its value to 1. This blocks update checks and disables update notifications. When you open About Firefox, it should indicate that updates are disabled by an administrator.
Be cautious when editing the registry, as mistakes can cause system instability. Always back up the registry before making changes.
Disabling browser auto updates gives you more control over your environment, but it also requires you to monitor and apply security patches manually. Review your policies regularly and update browsers as needed to maintain a secure and reliable system.


