If you're looking to explore Linux without abandoning Windows 11, dual booting is an excellent way to have both operating systems on one computer. By setting up a dual-boot system, you can choose between Windows 11 and Linux each time you start your PC, giving you the flexibility to use the best tool for each task. In this guide, we'll walk you through the steps to successfully dual-boot Linux and Windows 11.
Prerequisites
- A computer running Windows 11
- A USB flash drive with at least 8GB of storage
- An internet connection
- Backup of important data (recommended)
Step 1: Prepare Your Windows 11 System
Before installing Linux, it's important to prepare your Windows 11 system to ensure a smooth dual-boot setup.
Disable Fast Startup
Fast Startup can interfere with the dual-boot process. To disable it:
- Press
Windows key + R, typecontrol panel, and pressEnter.

- In the Control Panel, select Power Options.

- Click Choose what the power buttons do from the left sidebar.

- Click Change settings that are currently unavailable.

- Uncheck Turn on fast startup (recommended).

- Click Save changes.

Disable Secure Boot (If Necessary)
Some Linux distributions require Secure Boot to be disabled. To disable Secure Boot:
- Restart your computer and enter the BIOS or UEFI settings. This is usually done by pressing a key such as
F2,F10,Delete, orEscduring startup. - Navigate to the Security or Boot tab.
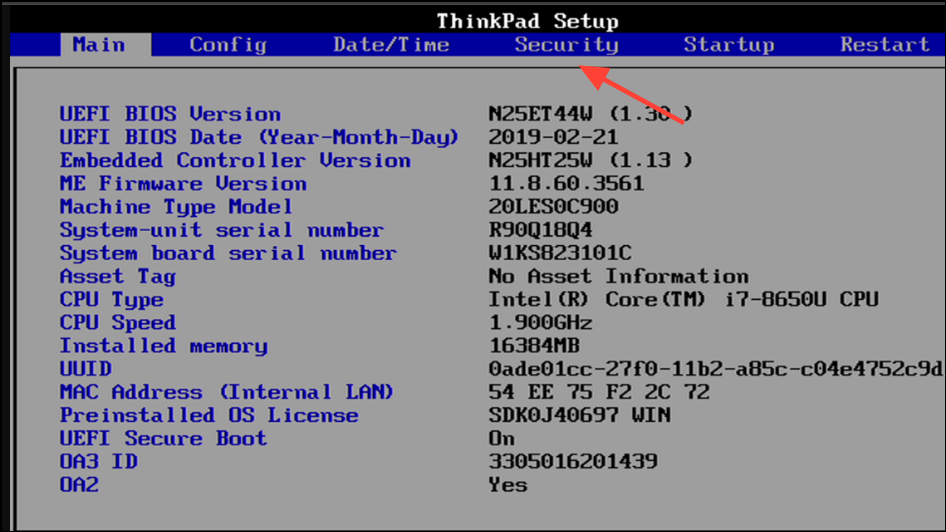
- Locate the Secure Boot option and set it to Disabled.
- Save the changes and exit the BIOS/UEFI settings.
Step 2: Create Space for Linux
You'll need to allocate space on your hard drive for the Linux installation. To shrink your Windows partition:
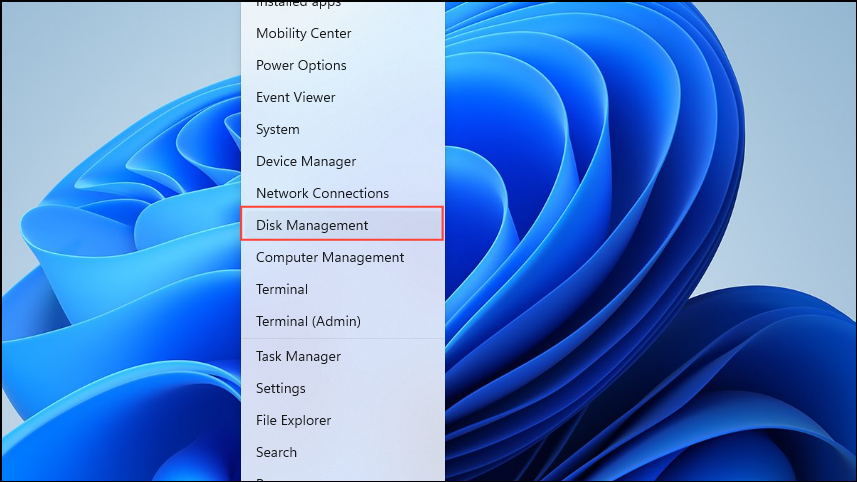
- Press
Windows key + Xand select Disk Management.
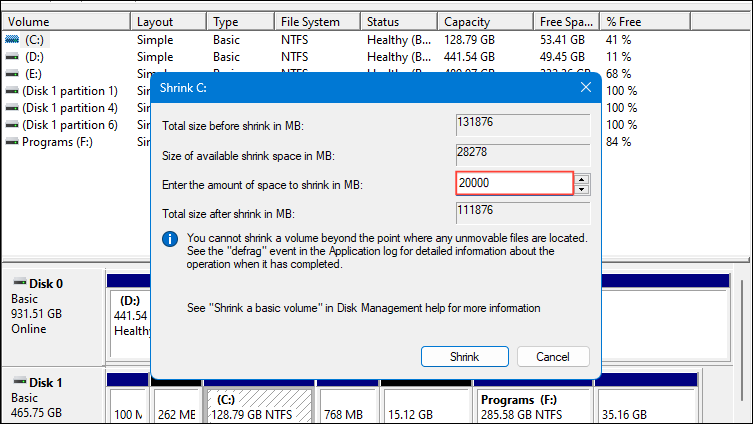
- Right-click on the main Windows partition (usually C:) and select Shrink Volume....
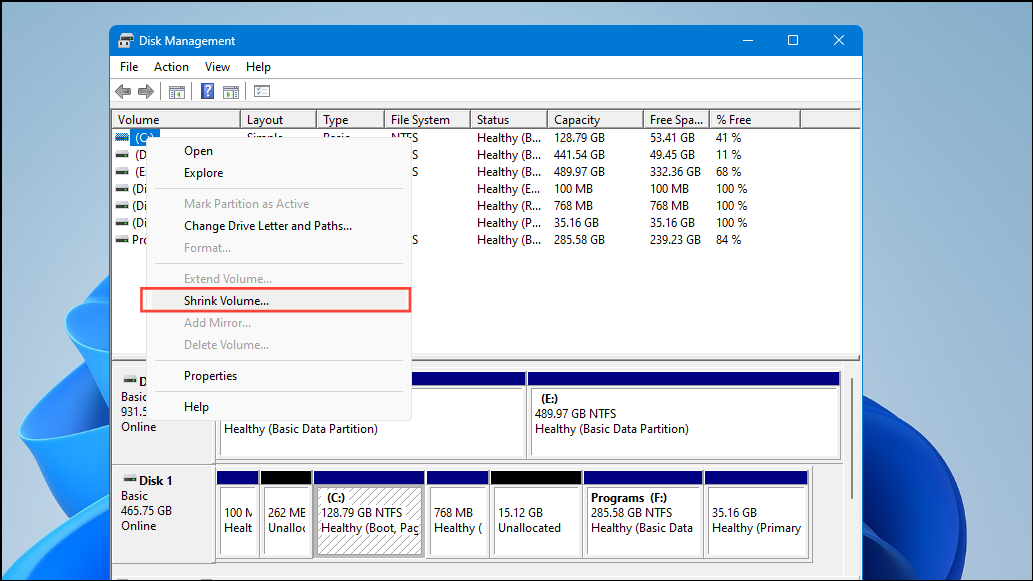
- Enter the amount of space to shrink in megabytes. At least 20,000MB (20GB) is recommended for Linux.
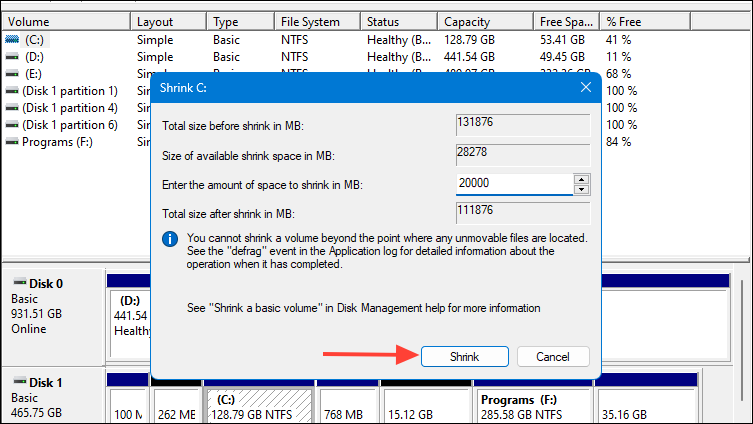
- Click Shrink. The unallocated space created will be used for the Linux installation.
Step 3: Download a Linux Distribution
Select a Linux distribution to install. For beginners, Ubuntu is a popular choice.
- Visit the Ubuntu website and download the latest ISO file.

Step 4: Create a Bootable USB Drive
To install Linux, you'll need to create a bootable USB drive with the Linux ISO file.
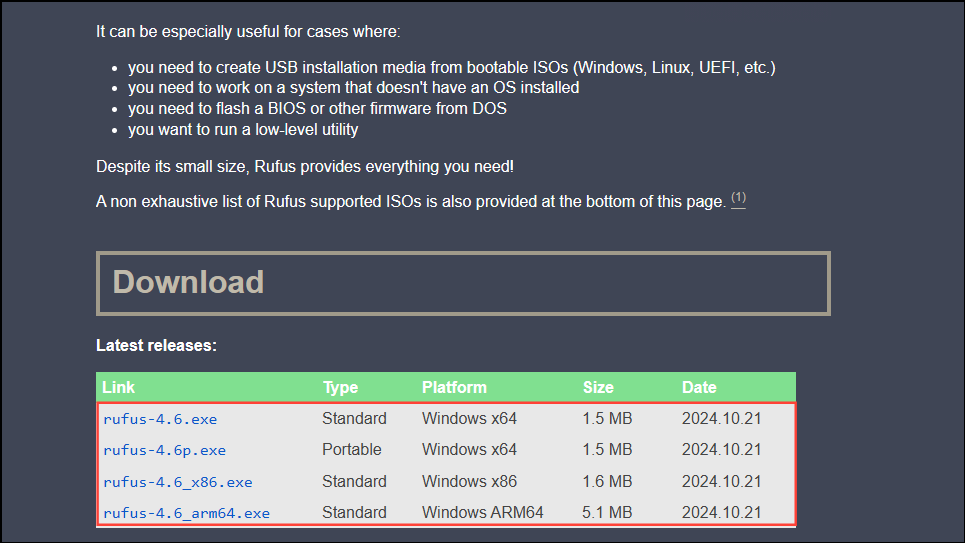
- Download and install Rufus from the official website.
- Insert your USB flash drive into the computer.
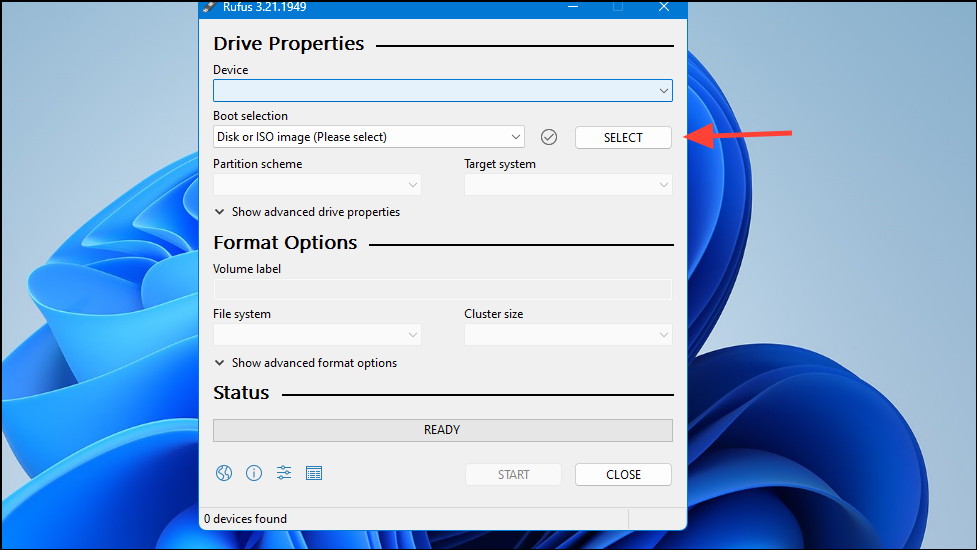
- Open Rufus.

- Under Device, select your USB drive.
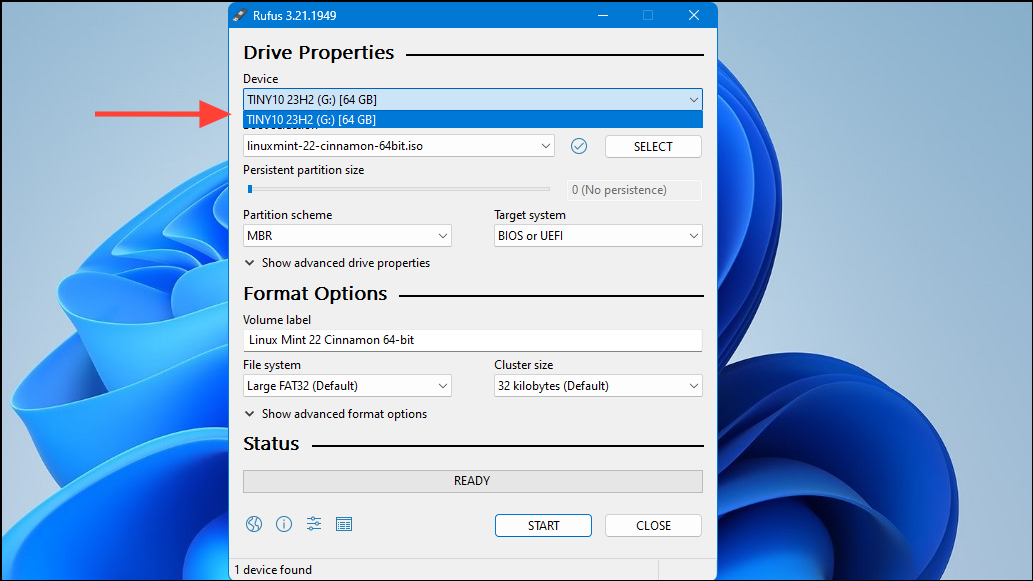
- Click SELECT and choose the Linux ISO file you downloaded.
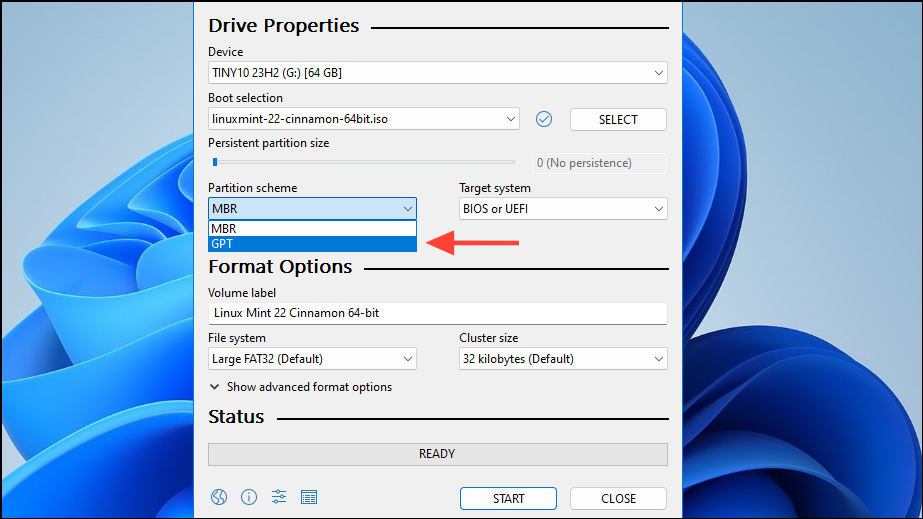
- Ensure the Partition scheme is set to GPT.
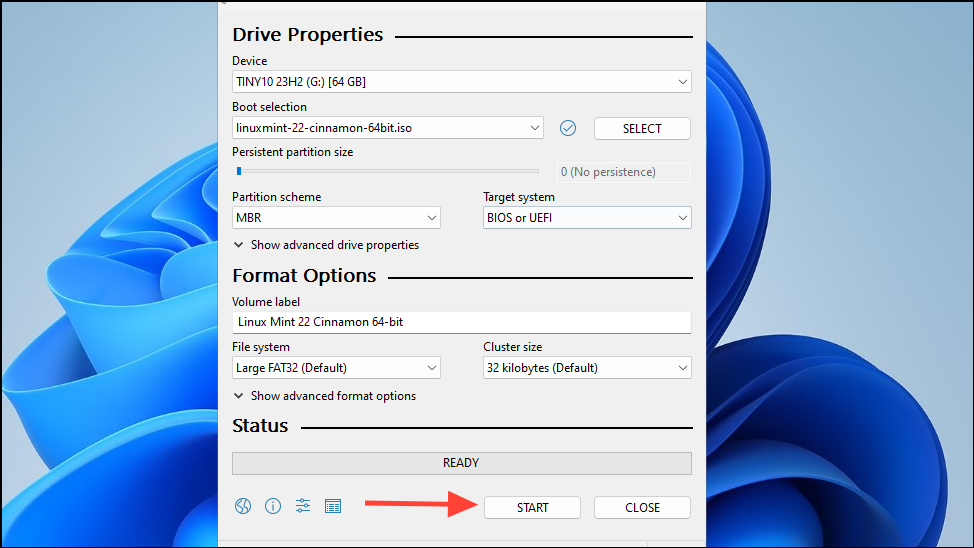
- Click START to begin creating the bootable USB drive.
- If prompted, select Write in ISO image mode and click OK.
Step 5: Install Linux Alongside Windows 11
Now you're ready to install Linux on your system.
- Insert the bootable USB drive into your computer.
- Restart your computer and boot from the USB drive. You may need to press a key such as
F12,F11, orEscduring startup to access the boot menu. - Select the option to Try Ubuntu without installing.
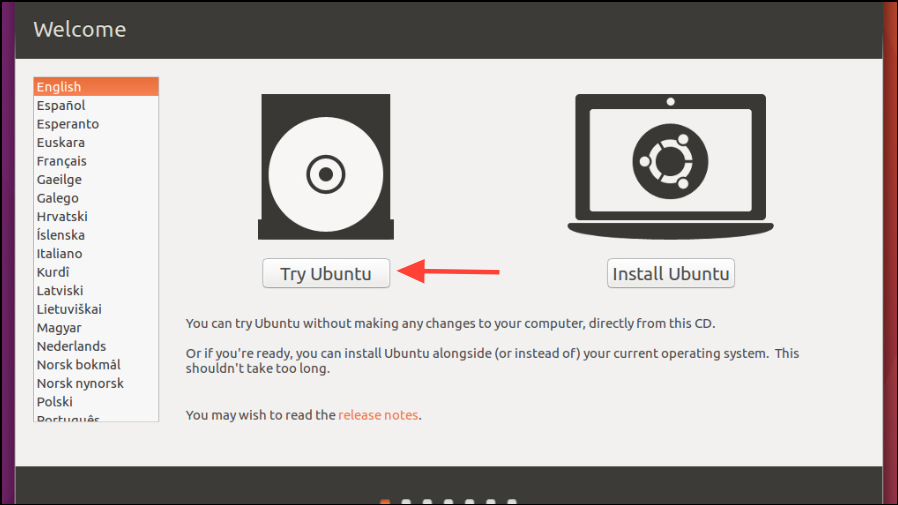
- Once the live desktop loads, double-click the Install Ubuntu icon.
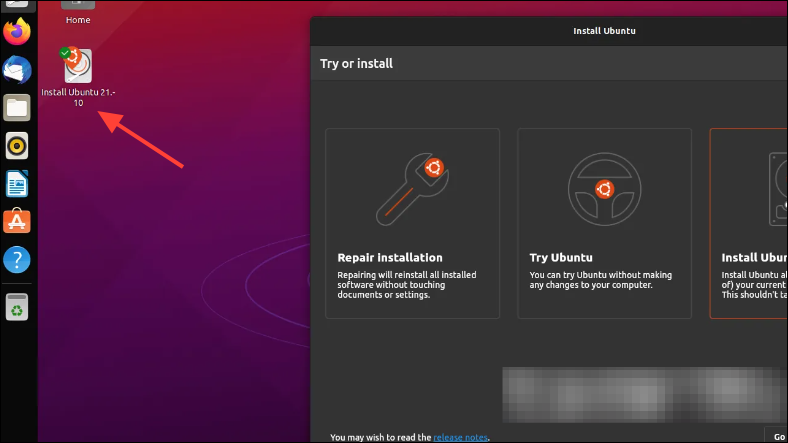
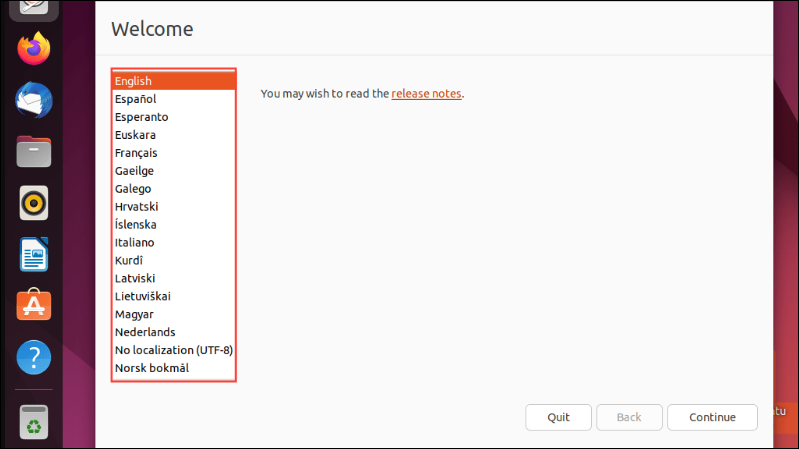
- Select your preferred language and click Continue.
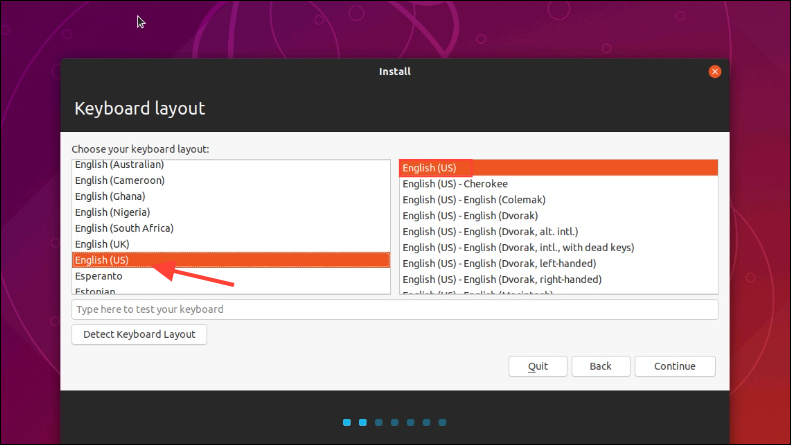
- Choose your keyboard layout and click Continue.
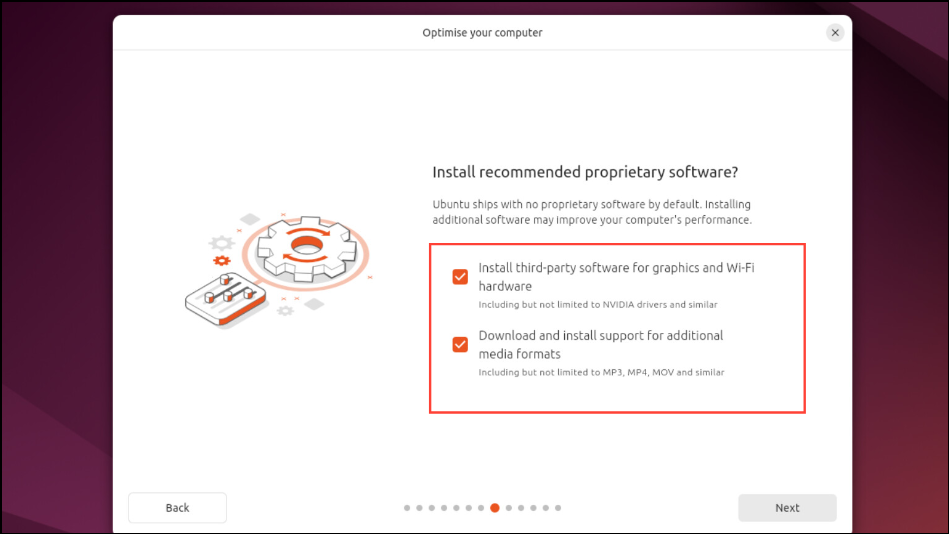
- Choose Normal installation and check the option to Install third-party software if desired. Click Continue.
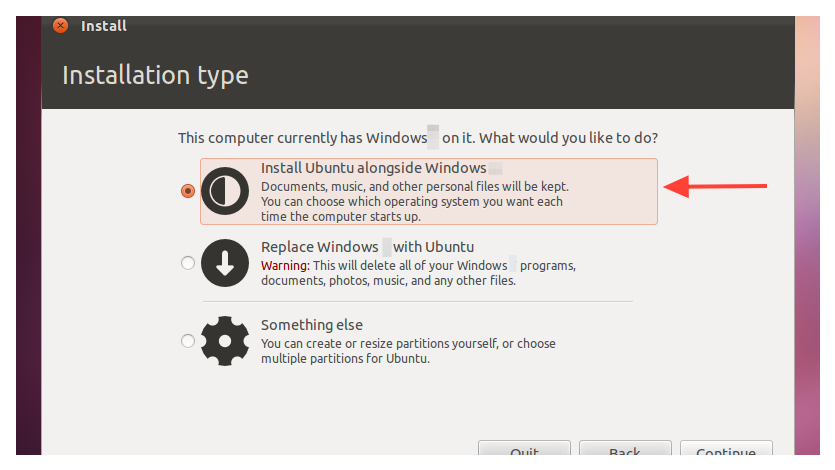
- When prompted for installation type, select Install Ubuntu alongside Windows Boot Manager and click Continue.
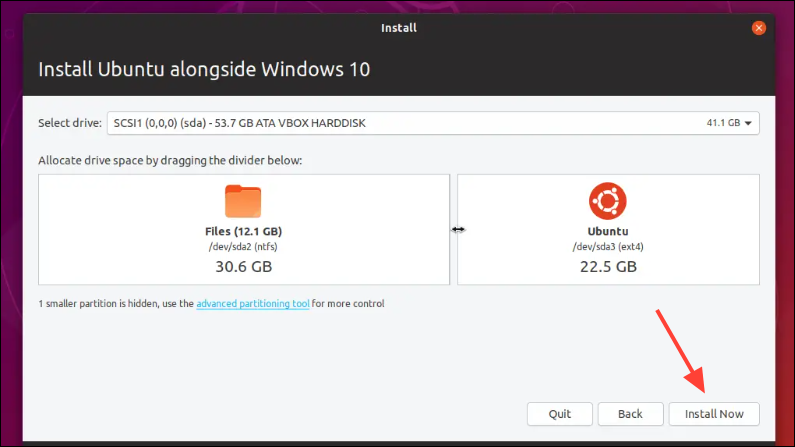
- Adjust the partition slider to allocate disk space for Ubuntu and Windows as needed. Click Install Now.
- Confirm any changes and click Continue.
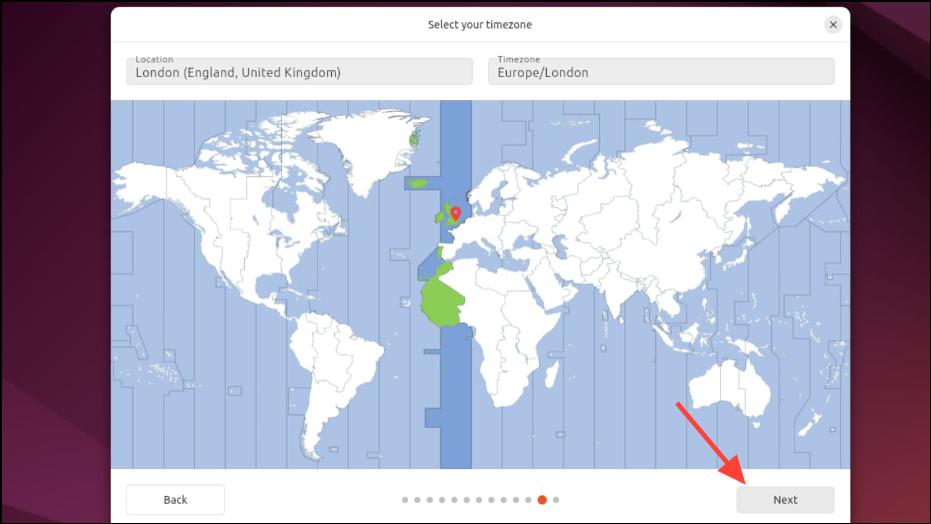
- Select your time zone and click Continue.
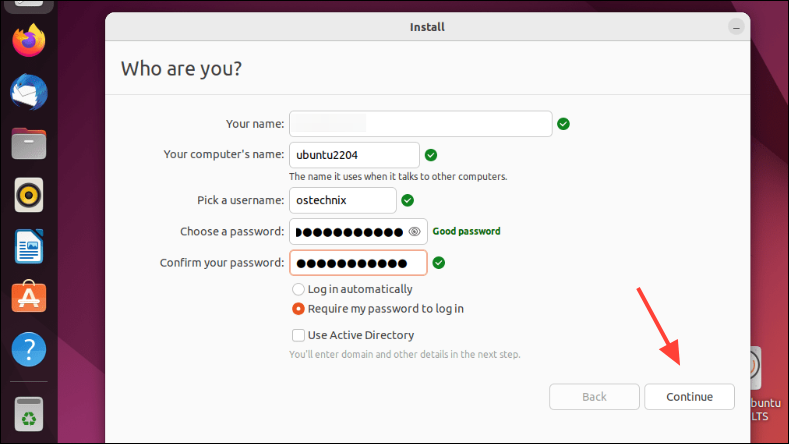
- Enter your name, computer name, username, and password. Click Continue.
- Wait for the installation to complete.
- Click Restart Now when prompted.
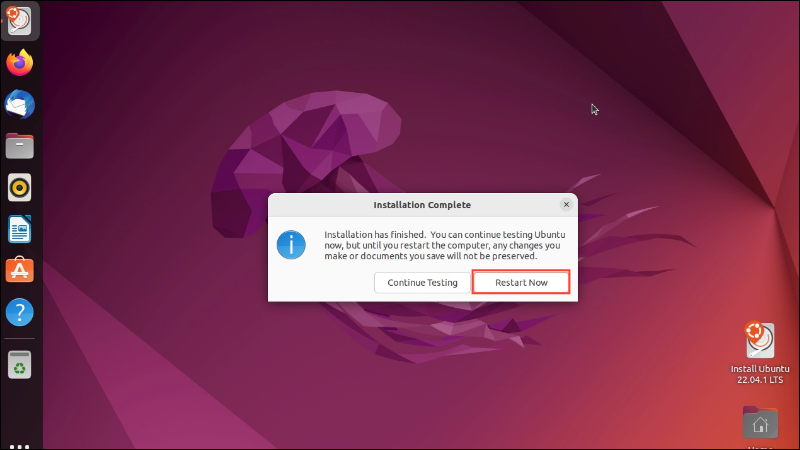
- Remove the USB drive when prompted and press
Enter.
Step 6: Configure Boot Order (If Necessary)
After installation, your computer should display a boot menu (GRUB) allowing you to choose between Ubuntu and Windows 11. If it doesn't, you may need to adjust the boot order in your BIOS/UEFI settings.
- Restart your computer and enter the BIOS/UEFI settings.
- Navigate to the Boot tab.
- Set Ubuntu or Linux Boot Manager as the first boot option.
- Save the changes and exit the BIOS/UEFI settings.
Step 7: Test the Dual-Boot Setup
Now, you can test your dual-boot system:
- Restart your computer.
- When the GRUB menu appears, select Ubuntu and press
Enter.
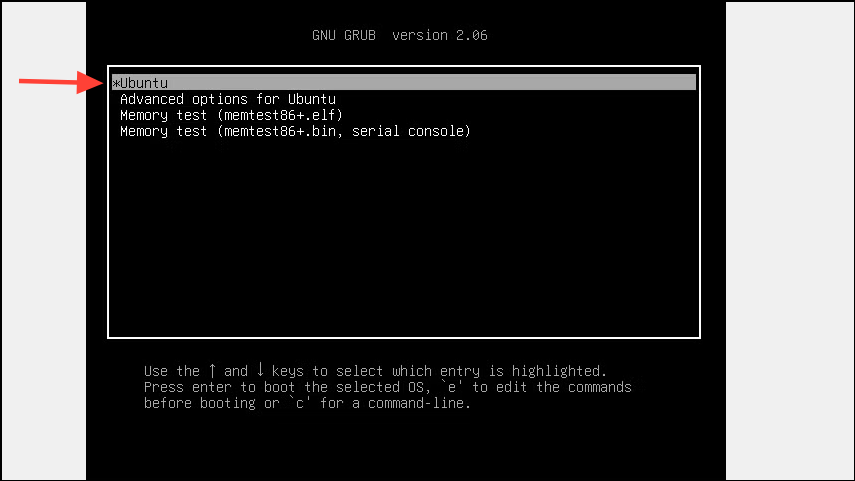
- Verify that Ubuntu loads correctly.
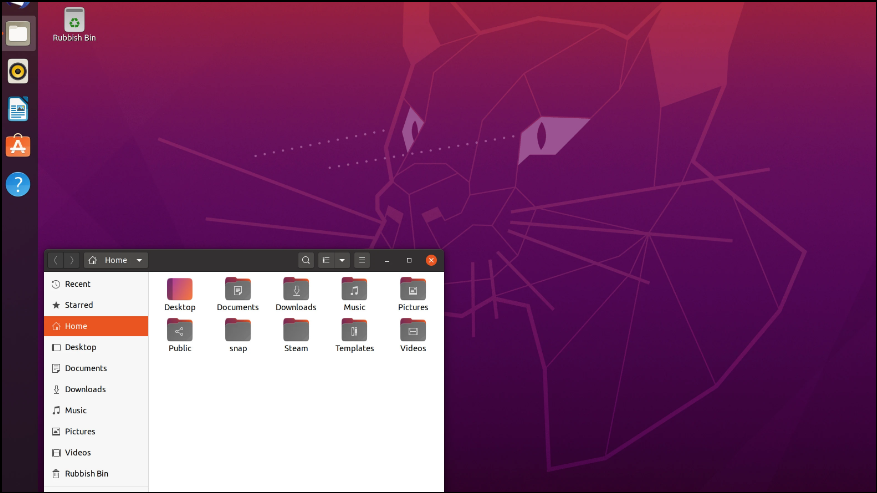
- Restart your computer again.
- From the GRUB menu, select Windows Boot Manager to boot into Windows 11.
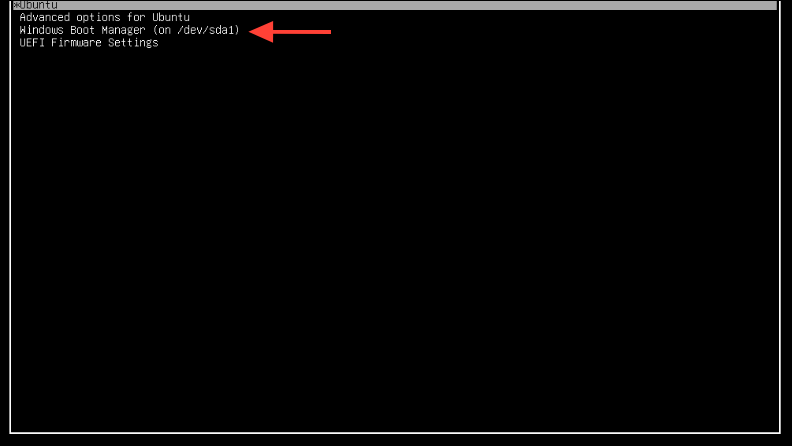
- Ensure that Windows 11 loads without issues.
By following these steps, you can enjoy the best of both worlds with Windows 11 and Linux on your PC. Whether you're exploring Linux for the first time or need Windows for specific applications, dual booting offers flexibility and convenience.

