Location service is very crucial when it comes to the user experience, as today, a whole lot of apps on your Mac are dependent on it. Not only apps many websites also use location service to provide you the best experience.
Though you might think, this can pose a serious risk to your privacy as your location would be accessible to everybody. Fortunately, that’s not the case. macOS gives you complete control over which apps can access the location service.
Now, some might say, why disclose your location just to see the weather on your mac, or just to tag your Facebook post with a location. Think again, what if you need to find your iPhone using Find my services on your Mac or vice-versa? Thus, it is important to learn how to enable or disable location service on your Mac.
Enable or Disable Location Service for Apps
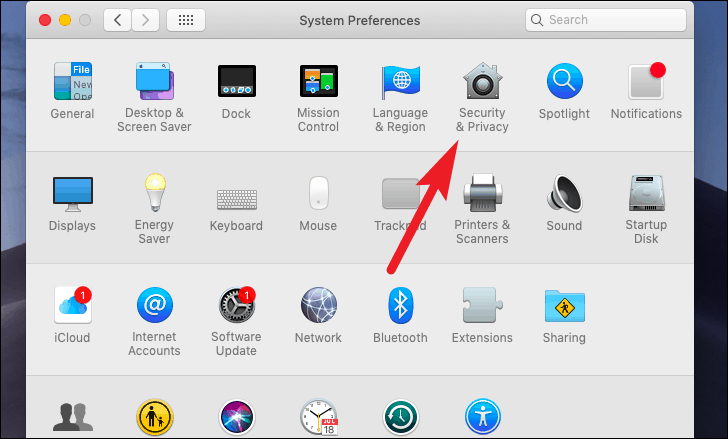
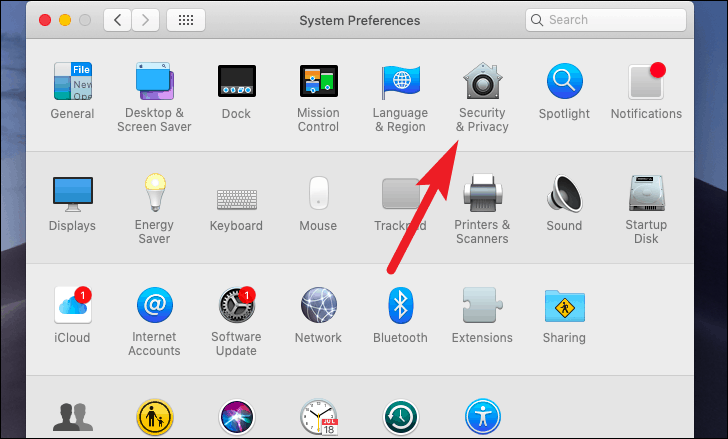
First, launch the ‘System Preferences’ app from Launchpad or dock of your Mac.
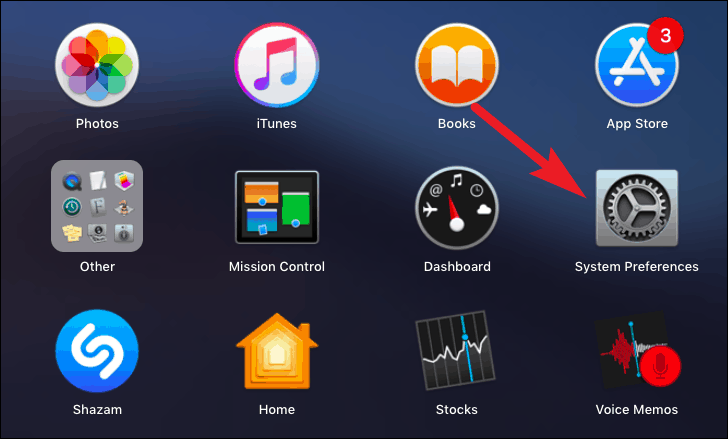
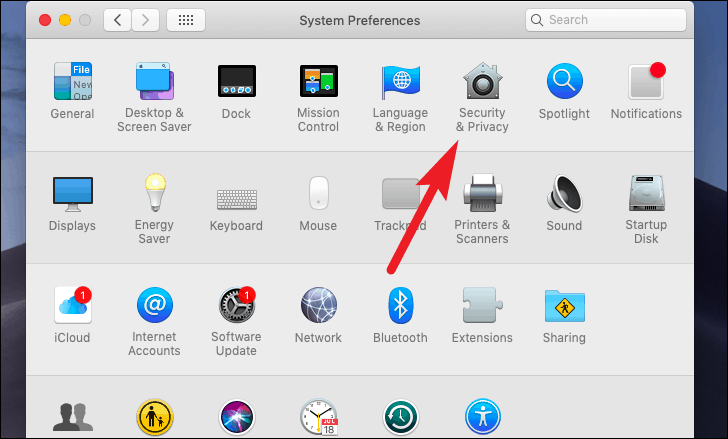
Now, go to ‘Security & Privacy’ option from the available options on the screen.
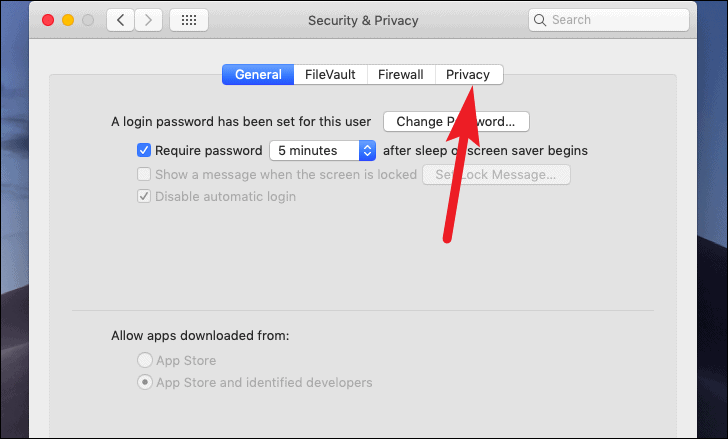
After that, click on the ‘Privacy’ tab. It is the last option on the tab row.
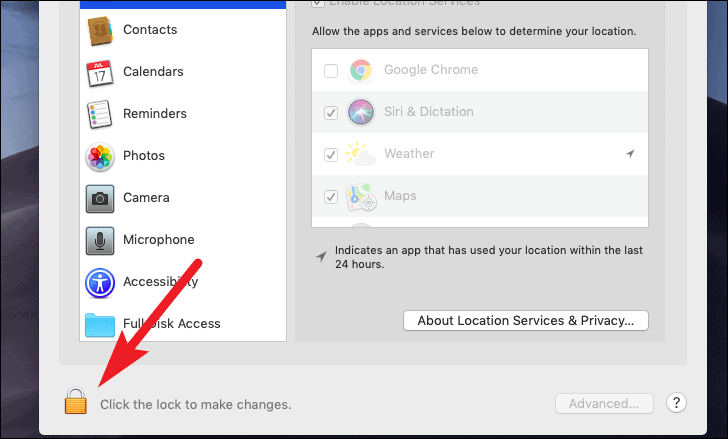
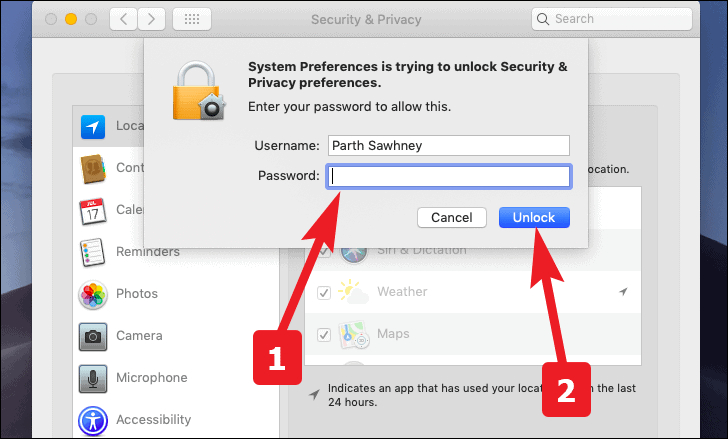
Now, click on the ‘lock icon from the left bottom corner of the screen to make changes to settings.
Next, enter your user account password. Then click on the ‘Unlock’ button to gain access to the settings.
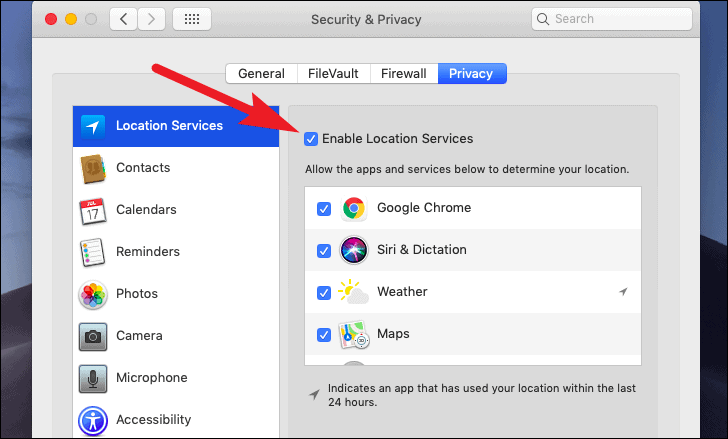
Now, select the ‘Location Services’ option from the list, and check the box preceding the ‘Enable Location Services’ option to enable location services.
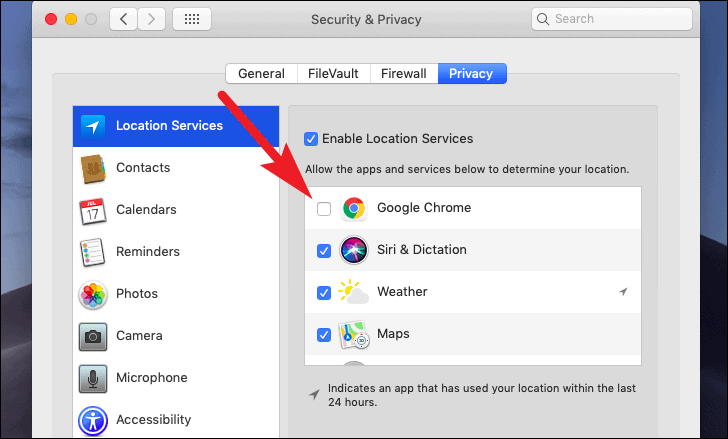
After that, if you want to revoke location services permission for any app. You can do that by unchecking it from the list.
Give Location Service Access to Find My Mac
No one, I repeat no one is spared from the wrath of forgetting their things here and there, and when that thing is your Mac. There is no shame in accepting that you will be worried about it.
Apple has done a fantastic job having such an easy way to find your other Apple devices should you misplace them. Not only that, but you can also perform a host of options like locking the device, displaying a message to exhibit the device is lost, and much more.
However, the important thing is it works with location services and it should be enabled to find your precious device and data with it. Thus, make it dead sure that the feature has access to location services. How do you ask? Well, let us show you.
First, go to the ‘Security & Privacy’ option from the System Preferences. As we did before in this guide.
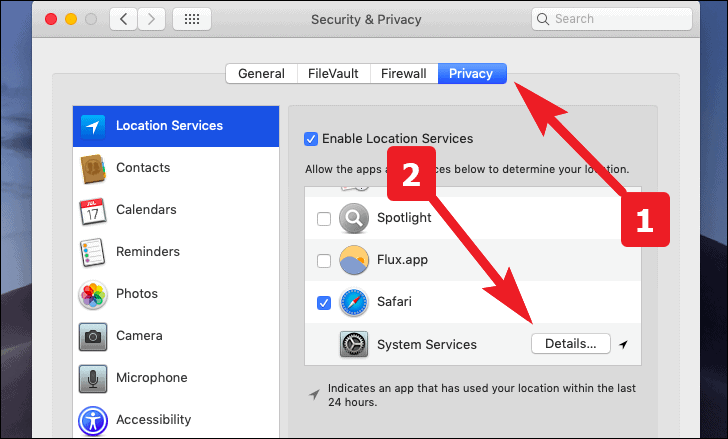
Next, click on the ‘Privacy’ tab. It is the last option on the tab row. After that, scroll down to the bottom of the list and click on the ‘Details…’ button.
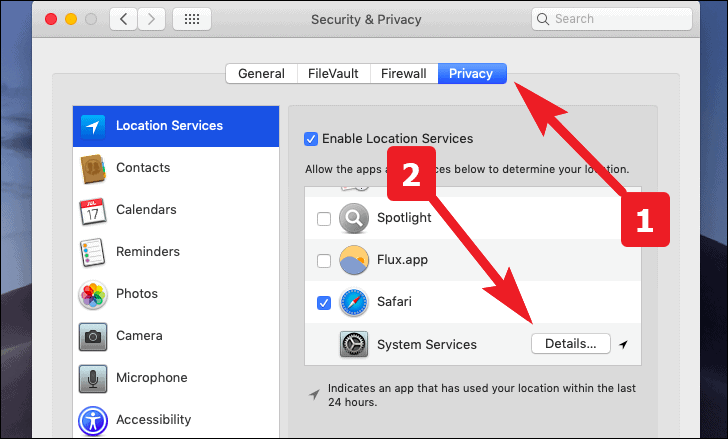
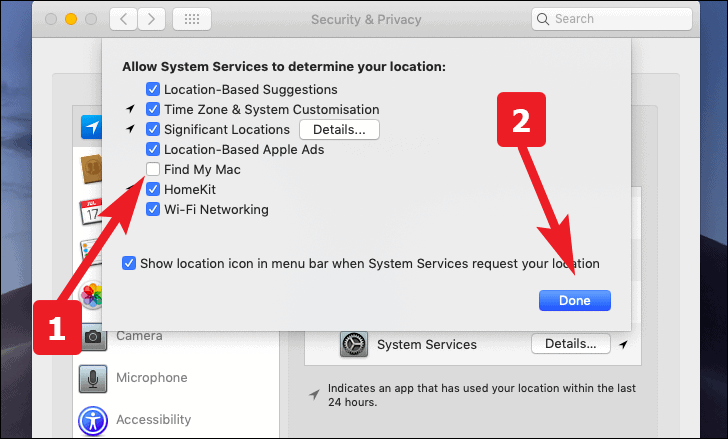
Now, click to check the ‘Find My Mac’ option from the list. If not checked already. Then click the ‘Done’ button to exit.
Clear Location History from System
When you have location history enabled on your Mac. It keeps a log of all significant locations it has been. It is gathered and used in system apps such as calendars, photos, and of course maps.
However, if you ever want to clear your location history or you want to see the places that your Mac knows. Take a look at these few quick steps.
First, go to the ‘Security & Privacy’ option from the System Preferences. As we did before in this guide.
Next, move to the ‘Privacy’ tab. It is the last option on the tab row. After that, scroll down to the bottom of the list and click on the ‘Details…’ button.
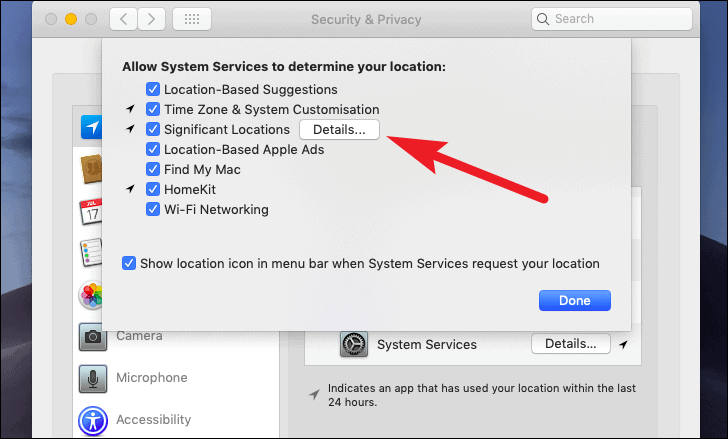
Now, click on the ‘Details’ button situated right next to the ‘Significant Locations’ option from the list.
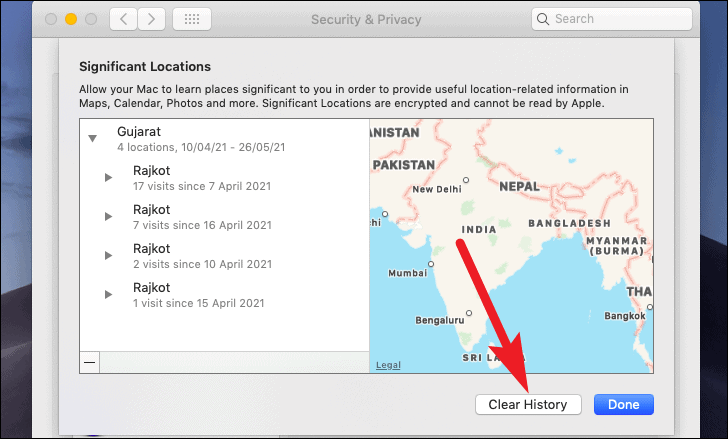
To delete all location history from your Mac. Click on the ‘Clear History’ option from the bottom right corner of the window.
Note: Clearing history from the system might remove geo-tags from reminders, photos, and saved map locations that were created using the specific Mac.
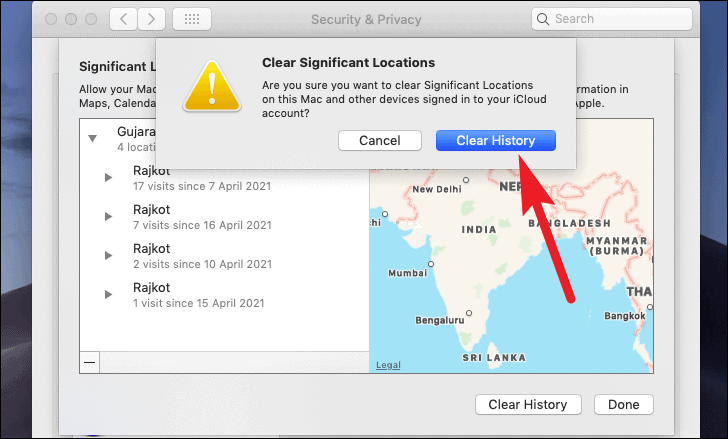
After that, click on the ‘Clear history’ option from the pop-up alert to confirm your action.
Since now you have complete and system-wide control over your location history. You can always locate your Mac from other Apple devices and be sure at the same time that your privacy is not being hindered!


