
The error message, “The program can’t start because d3dx9_43.dll is missing from your computer,” appears when Windows 11 cannot locate a required DirectX file. This issue interrupts the launch of games and graphics-heavy applications, often blocking access altogether. The d3dx.dll files are part of Microsoft’s DirectX runtime libraries, which are essential for running many modern games and multimedia programs. Windows 11 does not include all legacy DirectX files by default, so missing or corrupted d3dx.dll files can trigger this problem.
Install the Latest Microsoft DirectX End-User Runtime
Step 1: Download the latest DirectX End-User Runtime Web Installer directly from Microsoft’s official website. This installer includes all legacy DirectX files required by many games and older applications. Avoid downloading individual DLL files from unofficial sources, as these may contain malware or incompatible versions.
Step 2: Run the downloaded installer and follow the on-screen prompts to complete the installation. This process will add any missing DirectX components, including the d3dx.dll files, to your system folders.
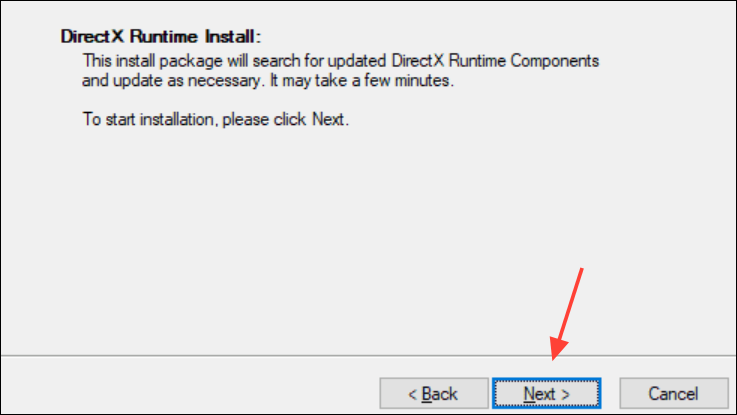
Step 3: Restart your computer after installation. This ensures that Windows 11 recognizes the newly installed files and loads them correctly for your applications.
Uninstall and Reinstall the Affected Program
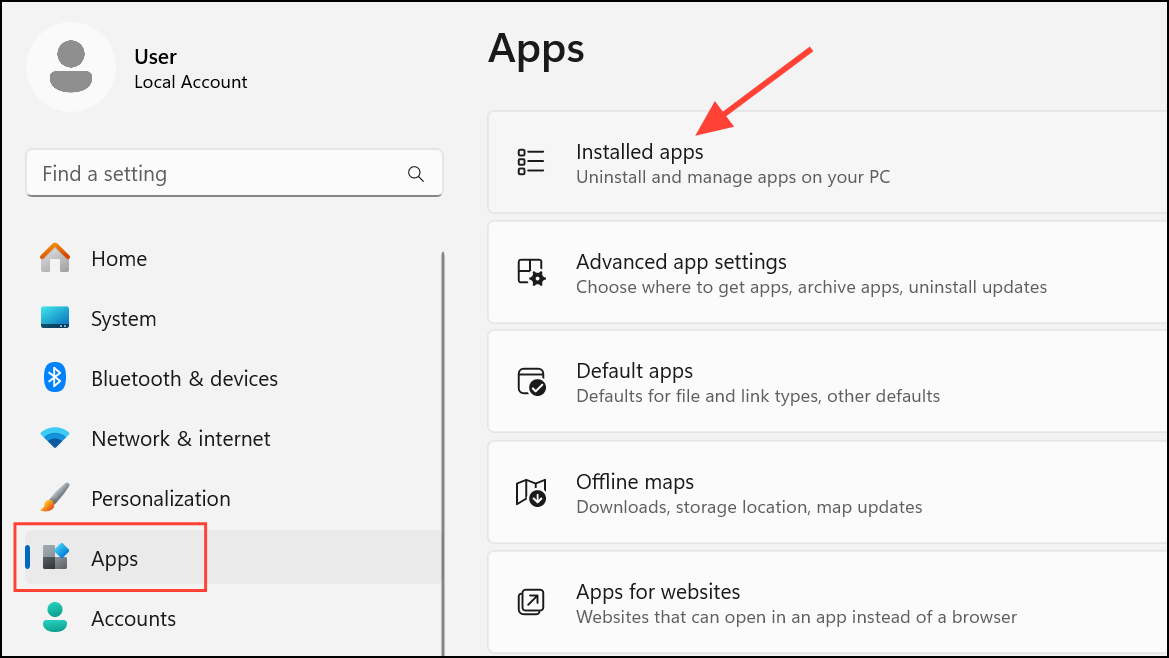
Step 1: Open the Windows Settings app by pressing Win + I. Navigate to Apps > Installed apps.
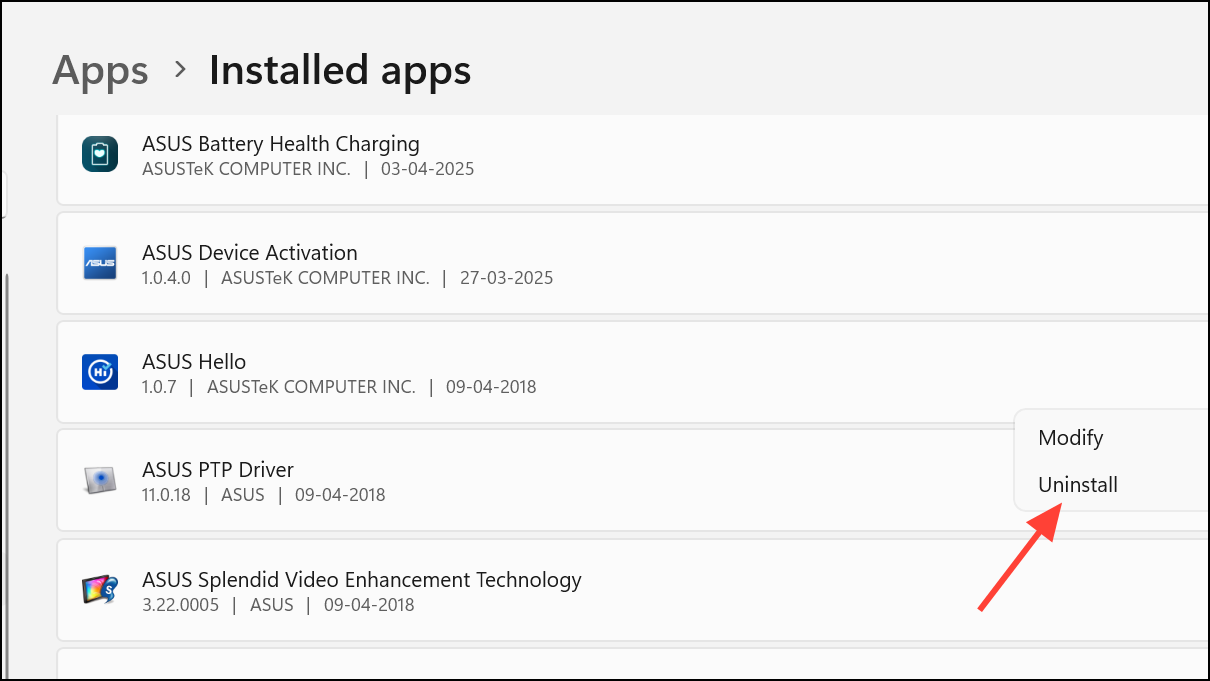
Step 2: Locate the program or game that displays the d3dx.dll error. Click the three-dot menu next to its name and select Uninstall. Confirm the action and wait for the process to finish.
Step 3: Download the latest version of the program from its official website or a trusted source. Install it following the provided instructions. This process replaces any missing or corrupted files in the application’s directory and can resolve DLL-related issues.
Step 4: Restart your computer and try launching the application again to verify if the error has been resolved.
Update Graphics Card Drivers
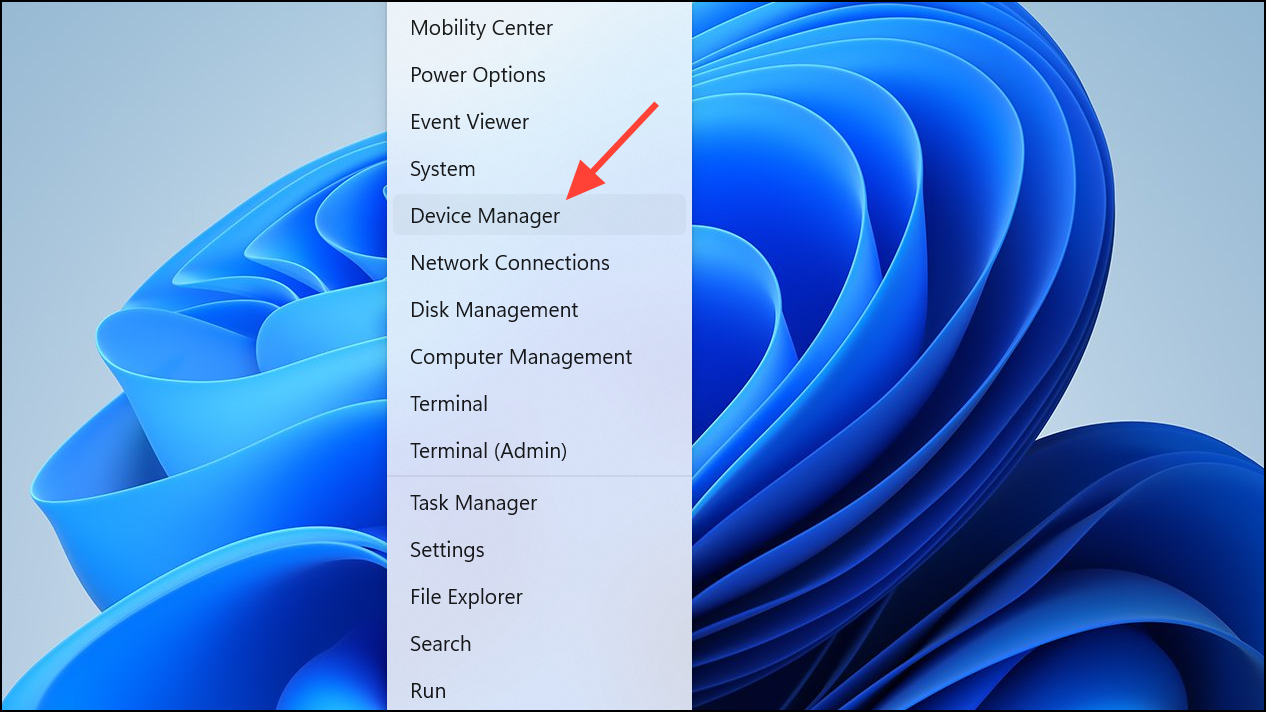
Step 1: Outdated or incompatible graphics drivers can prevent Windows from properly loading DirectX components. To update your graphics drivers, right-click the Start button and select Device Manager.
Step 2: Expand the Display adapters section. Right-click your graphics card and select Update driver. Choose Search automatically for drivers to allow Windows to find the latest version.

Step 3: If Windows does not find an update, visit the manufacturer’s website (such as NVIDIA, AMD, or Intel) and download the latest driver for your model. Follow the installation instructions provided.
Step 4: After updating, restart your computer and test the problematic program.
Repair System Files Using SFC and DISM Tools
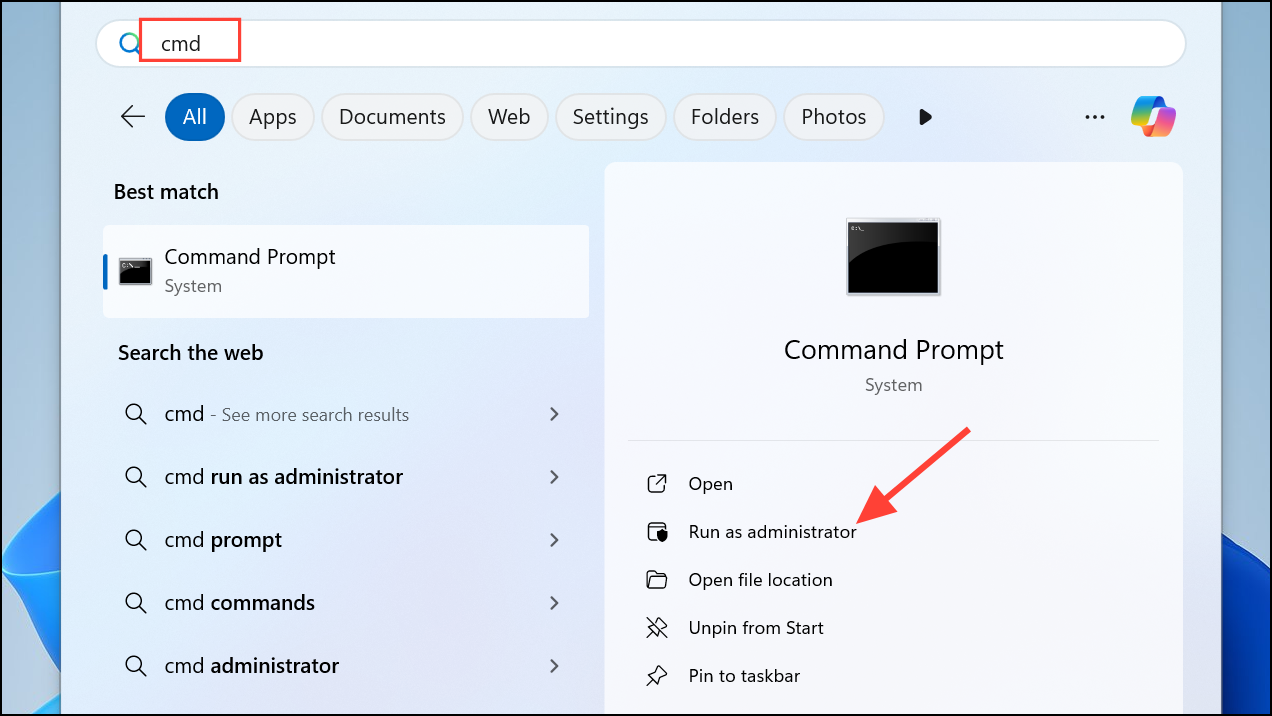
Step 1: Corrupted system files can prevent DLLs from being loaded correctly. Open the Command Prompt as Administrator by searching for cmd, right-clicking it, and selecting Run as administrator.
Step 2: Run the System File Checker tool by entering:
sfc /scannow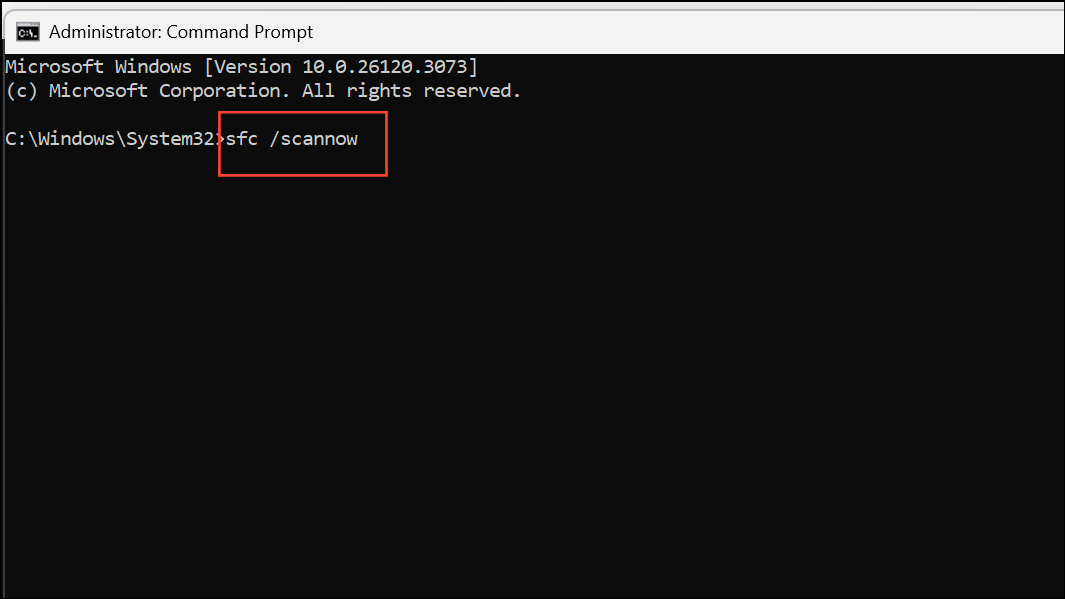
This tool scans for and repairs corrupted system files. Wait for the process to complete and follow any on-screen instructions.
Step 3: If SFC does not resolve the issue, run the Deployment Imaging Service and Management Tool (DISM) with the following command:
DISM /Online /Cleanup-Image /RestoreHealth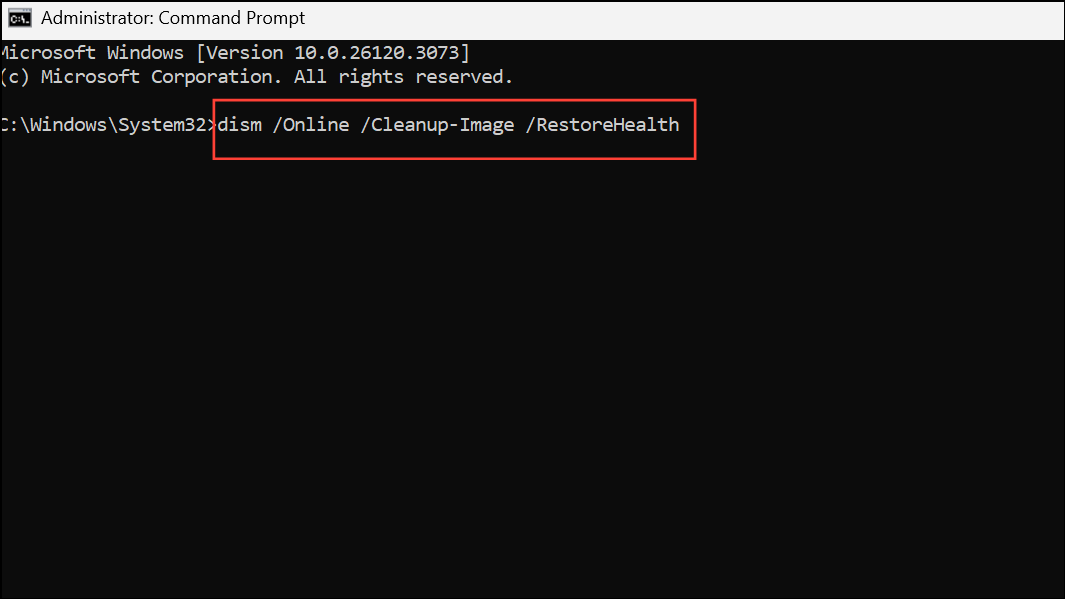
DISM will attempt to repair the Windows system image, which may restore missing or corrupted DLL files.
Step 4: Restart your computer after the scans. Try launching the application again.
Restore or Replace the d3dx.dll File from a Working System
Step 1: If the error persists, you can copy the missing d3dx.dll file from another Windows 11 computer where the application works correctly. On the working system, open File Explorer and navigate to C:\Windows\System32 or C:\Windows\SysWOW64 for 64-bit DLLs.
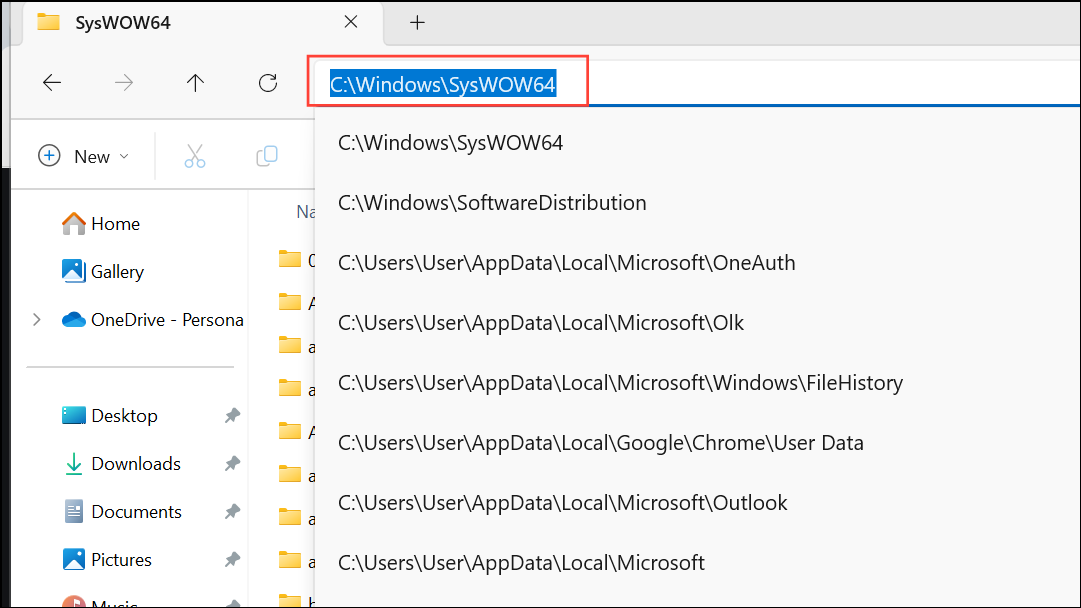
Step 2: Locate the required d3dx.dll file (such as d3dx9_43.dll). Copy it to a USB drive.
Step 3: On your affected system, paste the DLL file into the same directory. If prompted, choose to replace the existing file. You may need Administrator privileges to complete this step.
Step 4: Restart your computer and check if the application now runs without error.
Scan for Malware and Perform a System Restore
Step 1: Malware infections can delete or corrupt DLL files. Run a full antivirus scan using Windows Defender or a reputable third-party antivirus tool. Remove any detected threats and restart your computer.
Step 2: If the error began after a recent update or software installation, consider performing a System Restore.
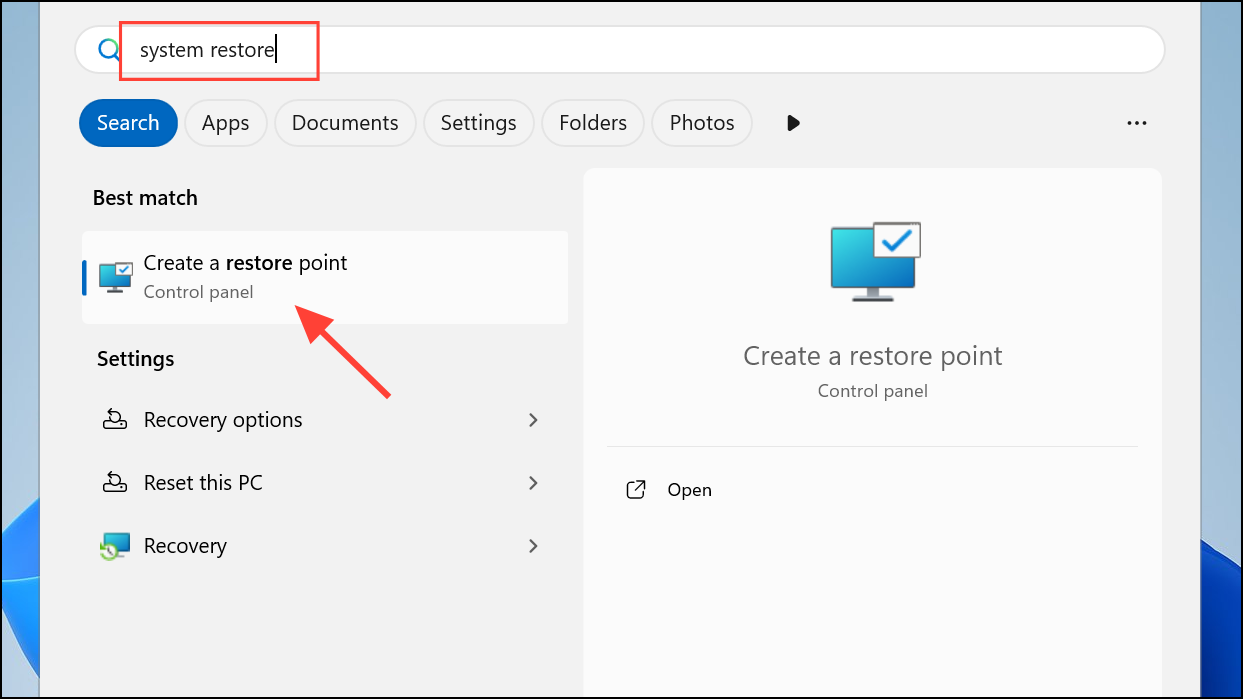
Step 3: Search for System Restore in the Start menu, select Create a restore point, then click System Restore.
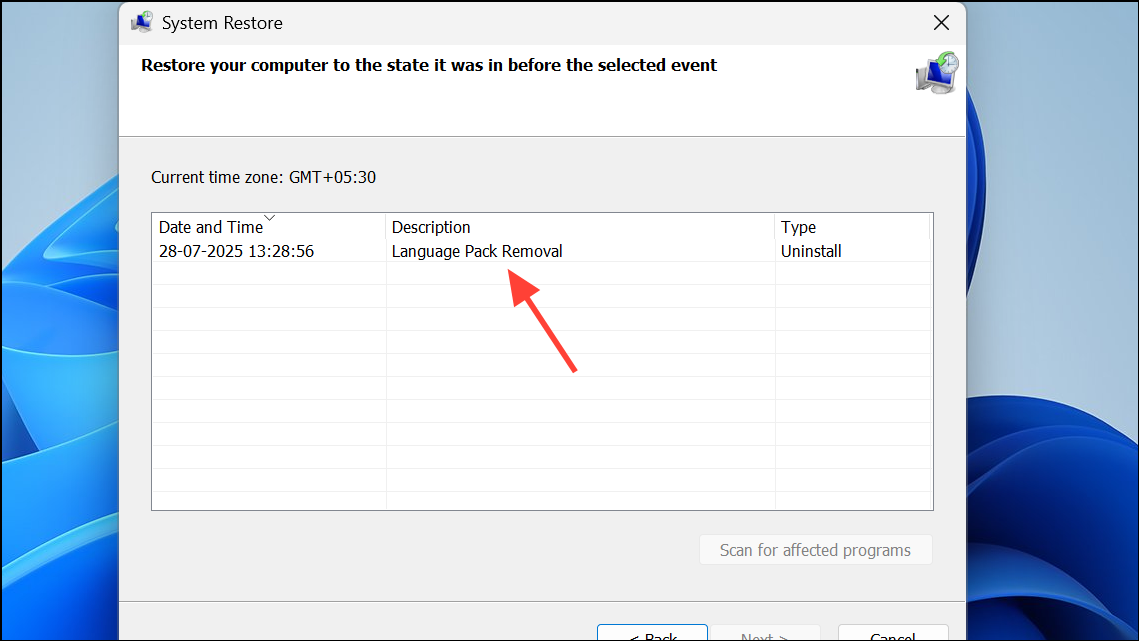
Step 4: Choose a restore point from before the issue started and follow the prompts to revert your system configuration.
Addressing the missing d3dx.dll error on Windows 11 typically involves reinstalling DirectX, repairing system files, updating drivers, or restoring missing files. These steps restore compatibility for games and multimedia apps, getting you back up and running.