
The 0x00000050 error, also known as PAGE_FAULT_IN_NONPAGED_AREA, occurs when Windows 11 tries to access invalid system memory. This typically points to driver issues, faulty hardware, or corrupted system files. Here's how you can fix this error and restore your system's stability.
Method 1: Update Your Device Drivers
Outdated or corrupted drivers often cause the 0x00000050 BSOD error. Updating your device drivers can resolve compatibility issues and stabilize your system.
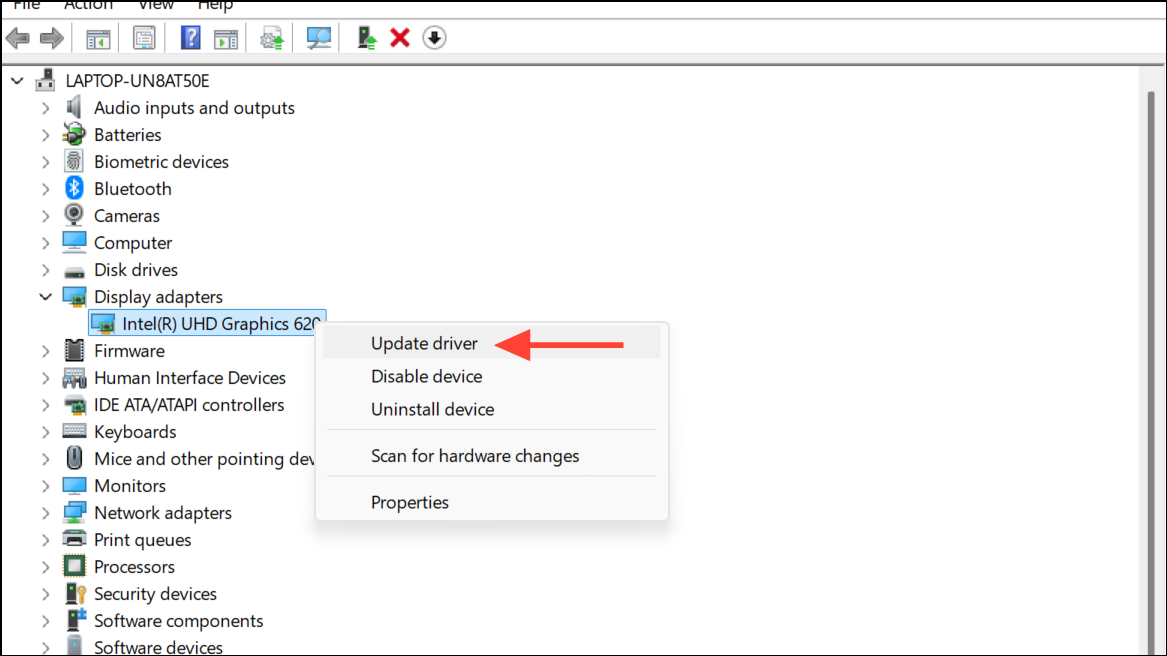
Step 1: Press Win + X and select "Device Manager" from the menu.

Step 2: Look for devices with a yellow exclamation mark. Right-click on the suspicious device (commonly graphics or network adapters) and choose "Update driver."
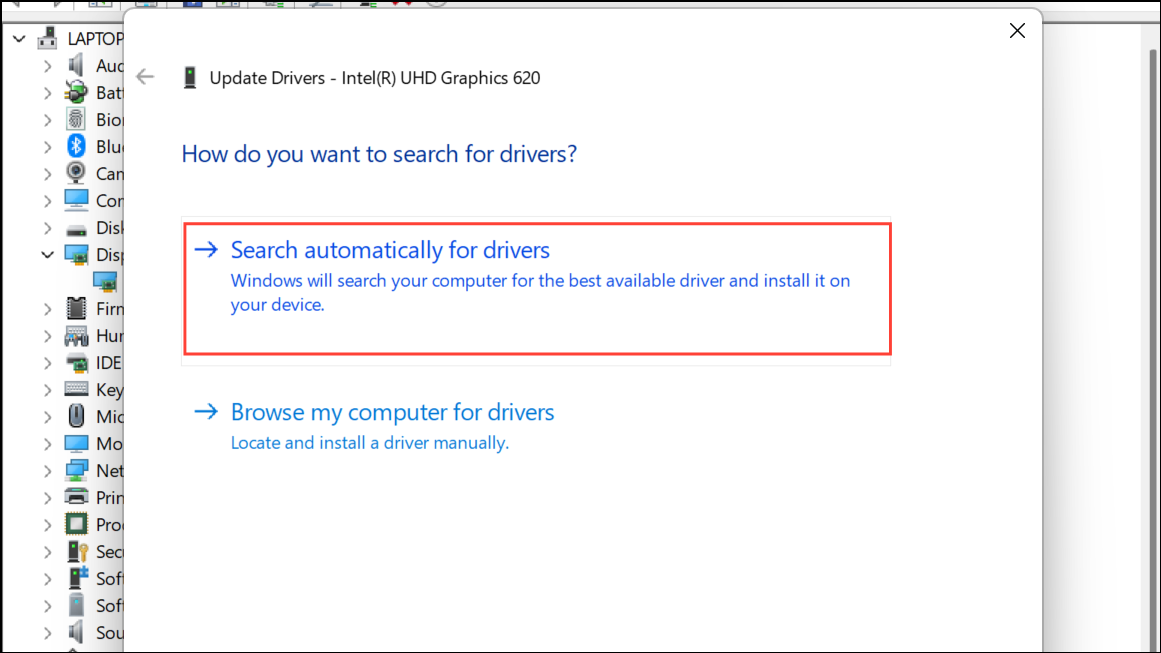
Step 3: Select "Search automatically for updated driver software" and follow the on-screen instructions. Alternatively, download drivers directly from your manufacturer's official website.
Restart your system after updating the drivers and verify if the issue persists.
Method 2: Run Windows Memory Diagnostic
Memory-related issues frequently trigger the 0x00000050 error. Windows Memory Diagnostic can identify and help you resolve these problems.
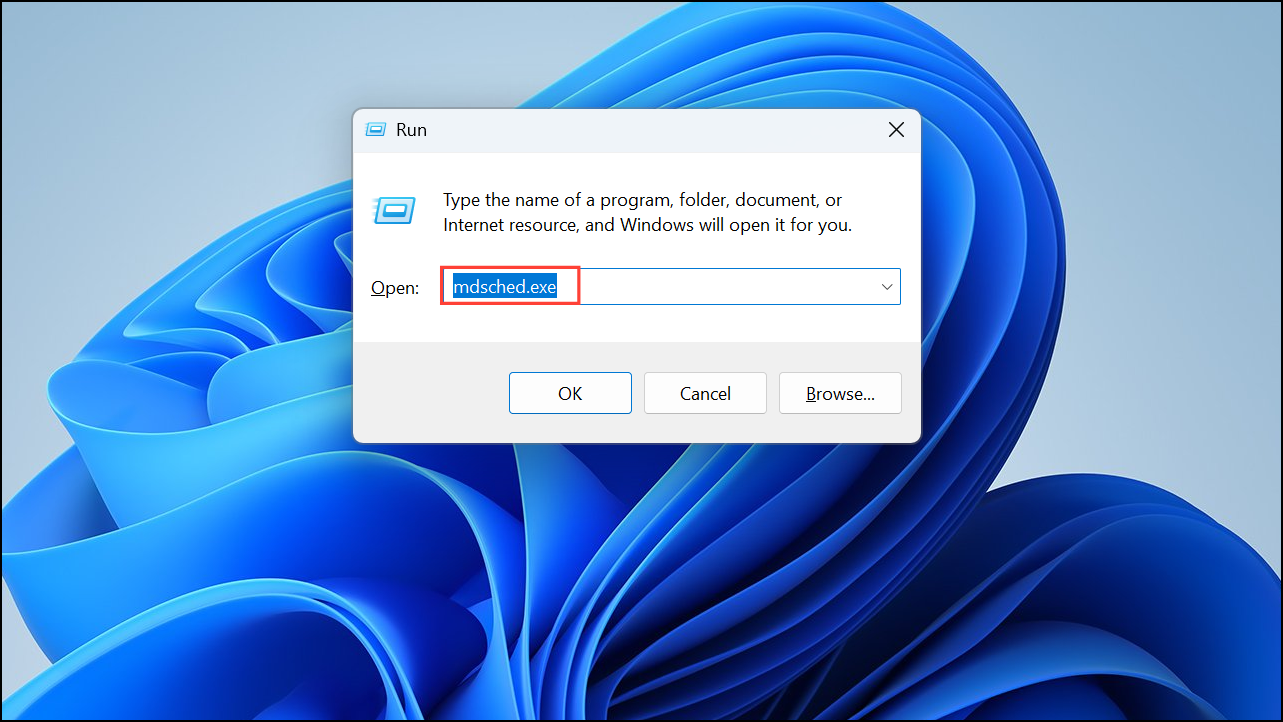
Step 1: Press Win + R, type mdsched.exe, and press Enter.
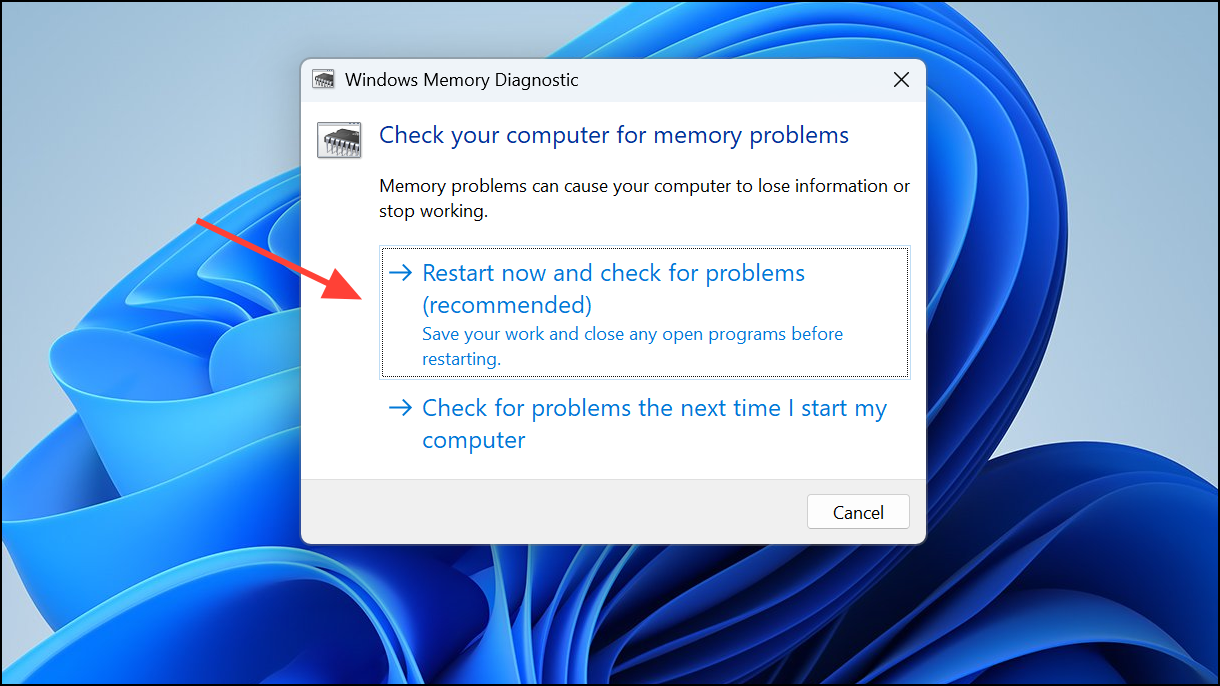
Step 2: Choose "Restart now and check for problems (recommended)." Your computer will reboot and run the diagnostic tool automatically.
Once the test finishes, Windows will restart. Check the results in Windows Event Viewer under "Windows Logs" → "System" → "MemoryDiagnostics-Results."
Method 3: Run System File Checker (SFC)
Corrupted system files can also trigger the PAGE_FAULT_IN_NONPAGED_AREA error. The built-in System File Checker tool scans your system files and repairs any corruption found.
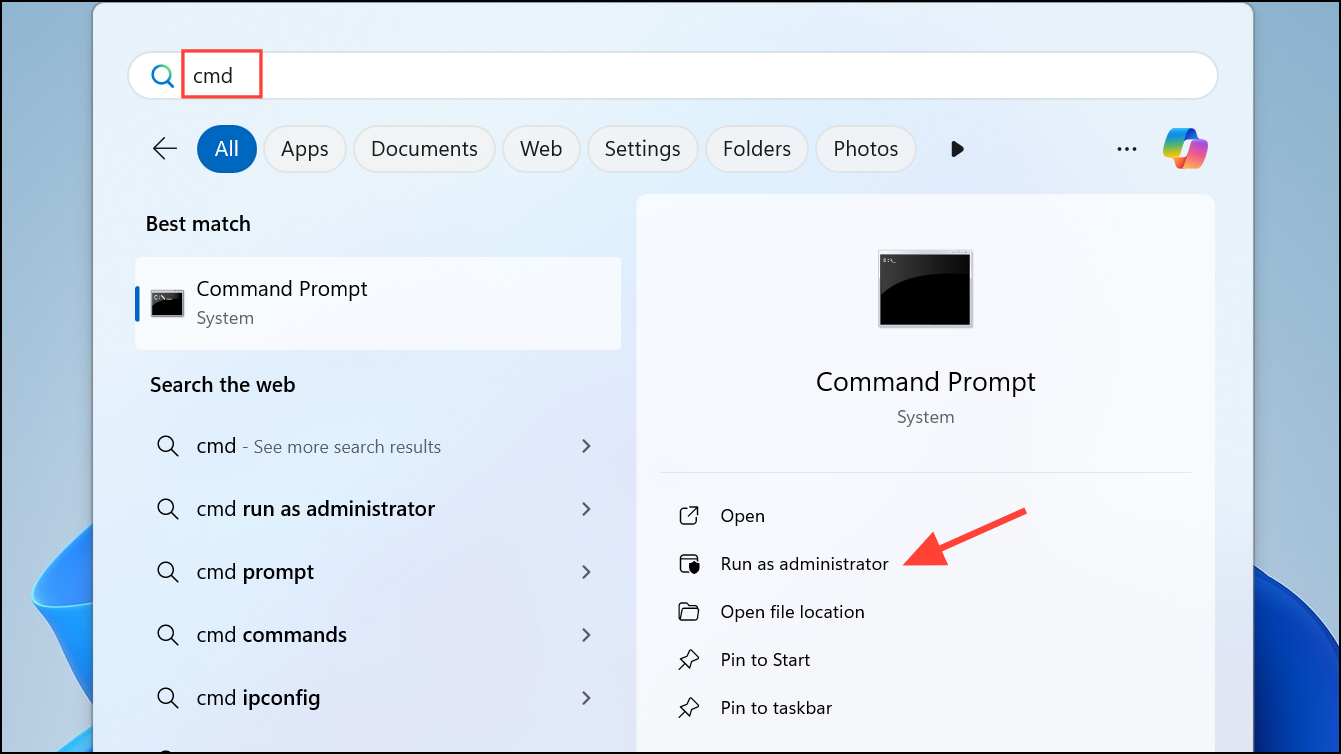
Step 1: Click Start, type cmd, right-click "Command Prompt" and select "Run as administrator."
Step 2: Type the following command and press Enter:
sfc /scannow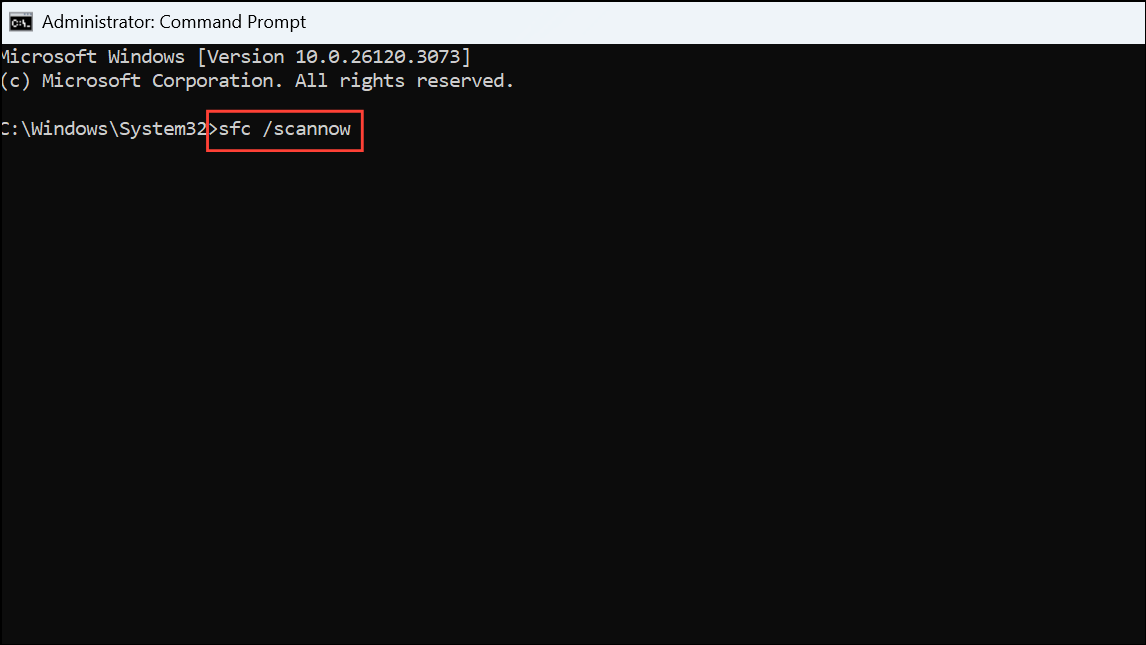
Allow the scan to complete, then restart your computer.
Method 4: Check Disk for Errors (CHKDSK)
Disk errors or bad sectors can cause memory access issues leading to error 0x00000050. Running CHKDSK can detect and repair these issues.
Step 1: Open Command Prompt as administrator.
Step 2: Type the following command and press Enter:
chkdsk C: /f /r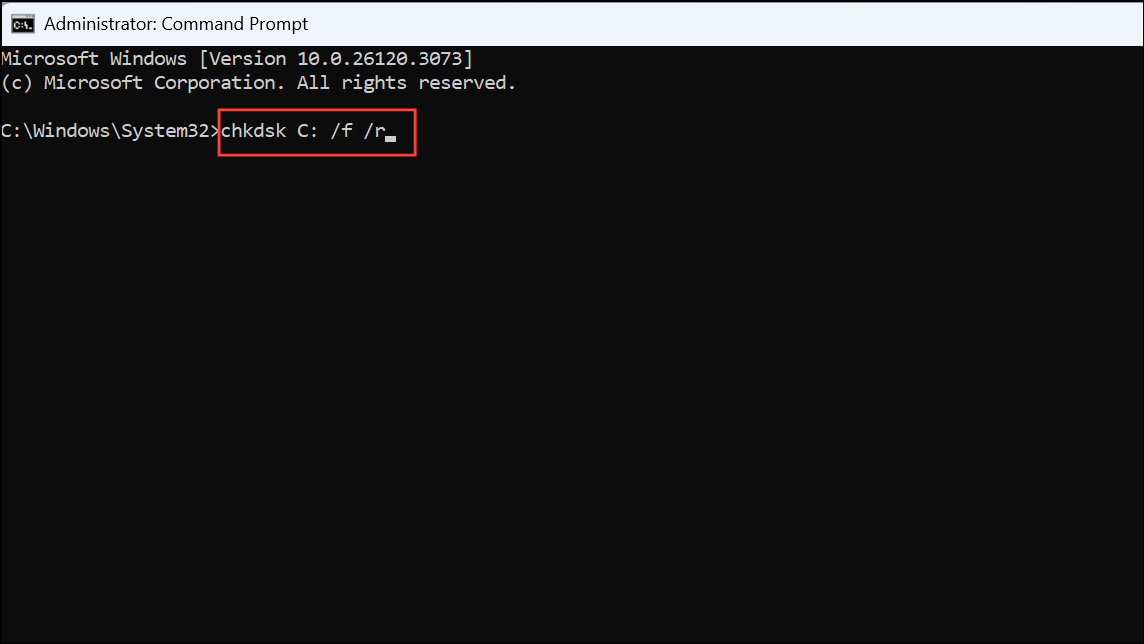
If prompted, type Y to schedule the check at next restart. Restart your computer to allow CHKDSK to scan and repair errors.
Method 5: Disable Overclocking
Overclocking can cause system instability and trigger the 0x00000050 error. Restoring your BIOS settings to default can resolve this.
Step 1: Restart your PC and enter BIOS settings (usually pressing F2, DEL, or ESC during startup).
Step 2: Locate and reset all overclocking settings (CPU, GPU, RAM) to default.
Save changes and exit BIOS. Restart your system to see if the error is resolved.
Method 6: Perform a System Restore
If the error began after recent system changes, reverting to a previous restore point can fix the issue.
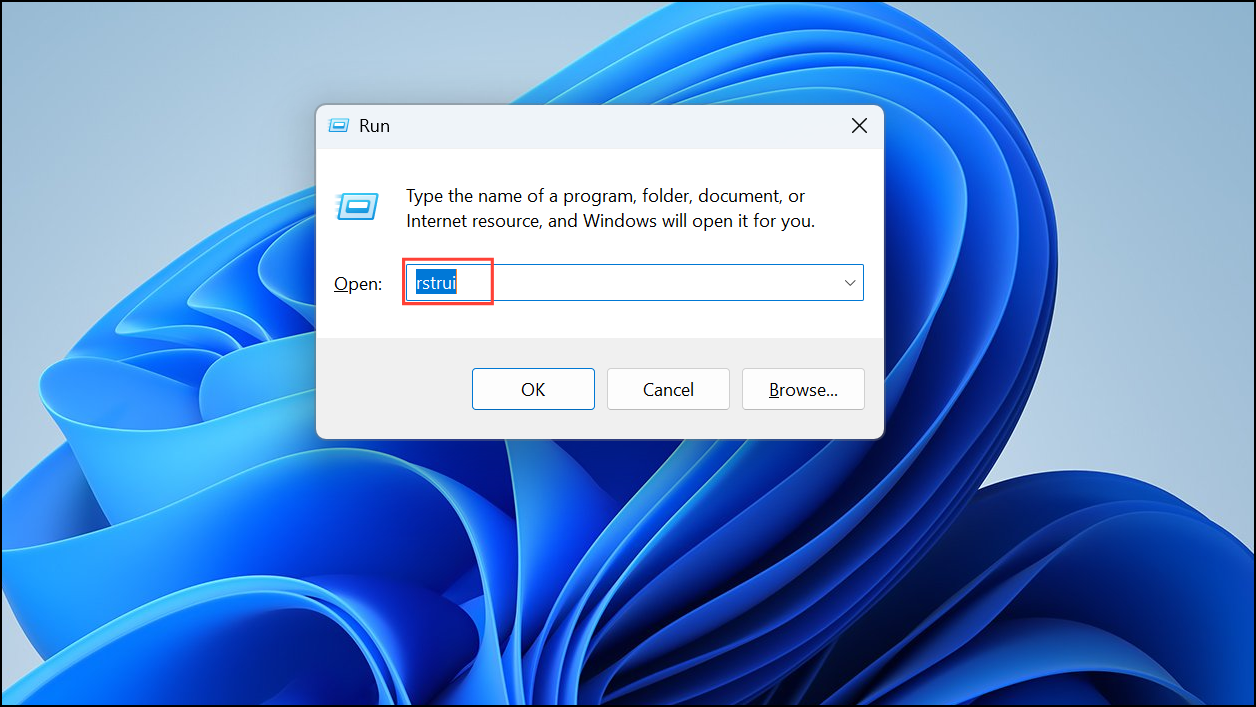
Step 1: Press Win + R, type rstrui, and press Enter.
Step 2: Follow the on-screen instructions to select a restore point prior to the error occurrence. Complete the restoration and restart your system.
Method 7: Disable or Uninstall Antivirus Software
Third-party antivirus programs sometimes cause conflicts leading to the 0x00000050 error. Temporarily disable or uninstall your antivirus software to check if it's causing the issue.
If the error resolves after disabling antivirus, consider updating or switching to another security solution.
Method 8: Reset or Reinstall Windows 11
If all other methods fail, resetting or reinstalling Windows 11 can effectively resolve deep-rooted system issues.
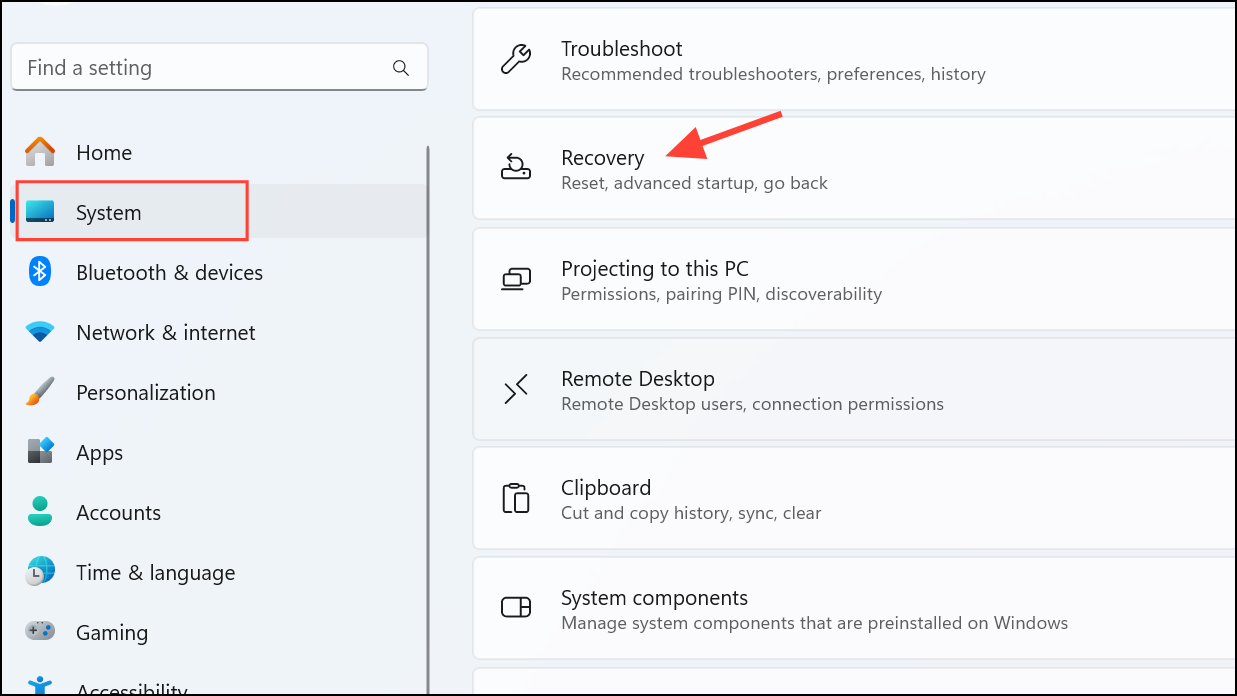
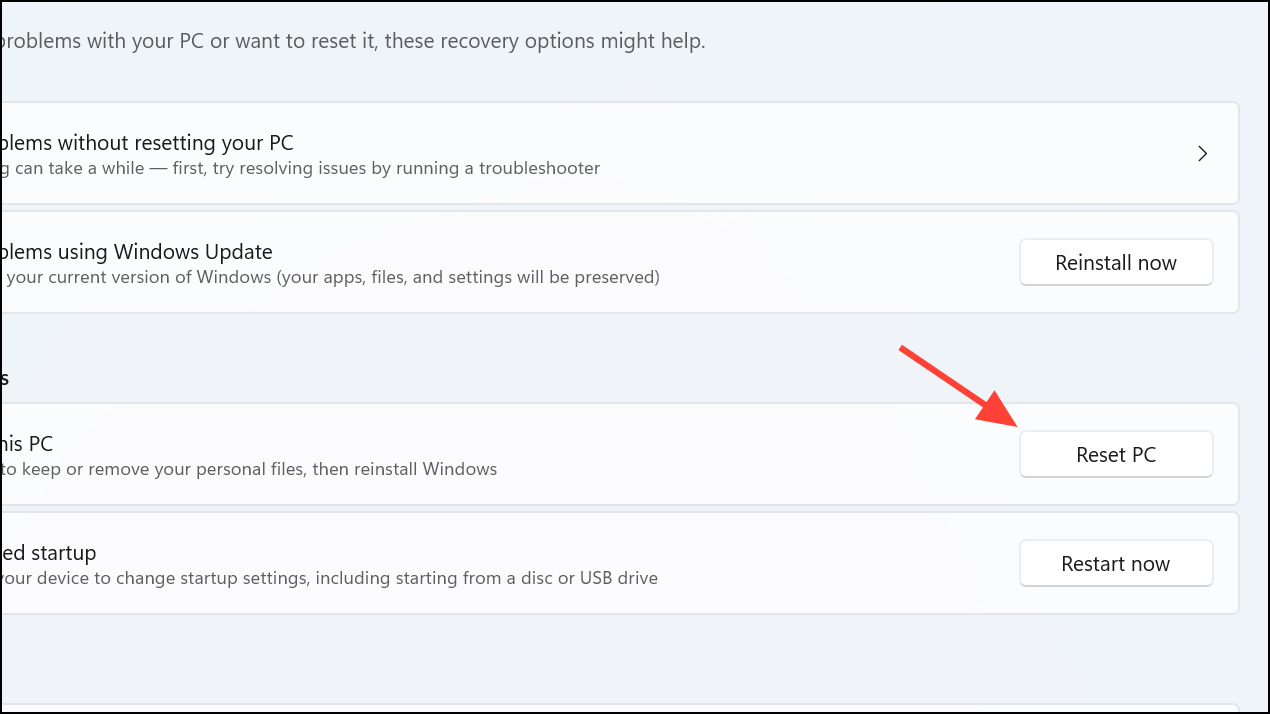
Step 1: Open "Settings" → "System" → "Recovery."
Step 2: Click "Reset PC" and follow the prompts. Choose to keep your files or remove everything based on your preference.
After the reset completes, set up your system again and verify the error has been resolved.
Following these methods will help you effectively resolve the 0x00000050 BSOD error in Windows 11. If the issue persists despite all efforts, consider consulting a professional technician to inspect your hardware more thoroughly.