
Steam’s “Error Code: -7 Failed to load web page (unknown error)” blocks access to in-client web pages like the Store, Inventory, or News, even while your internet connection appears normal. This issue often points to network configuration problems, corrupted cache, or interference from security software. Addressing these root causes restores full Steam functionality and prevents further connectivity disruptions.
Correct Your System Date and Time Settings
Incorrect system time or time zone settings frequently disrupt secure connections, causing Steam and other online services to fail. SSL certificates depend on accurate clocks; mismatches can block web content inside Steam.
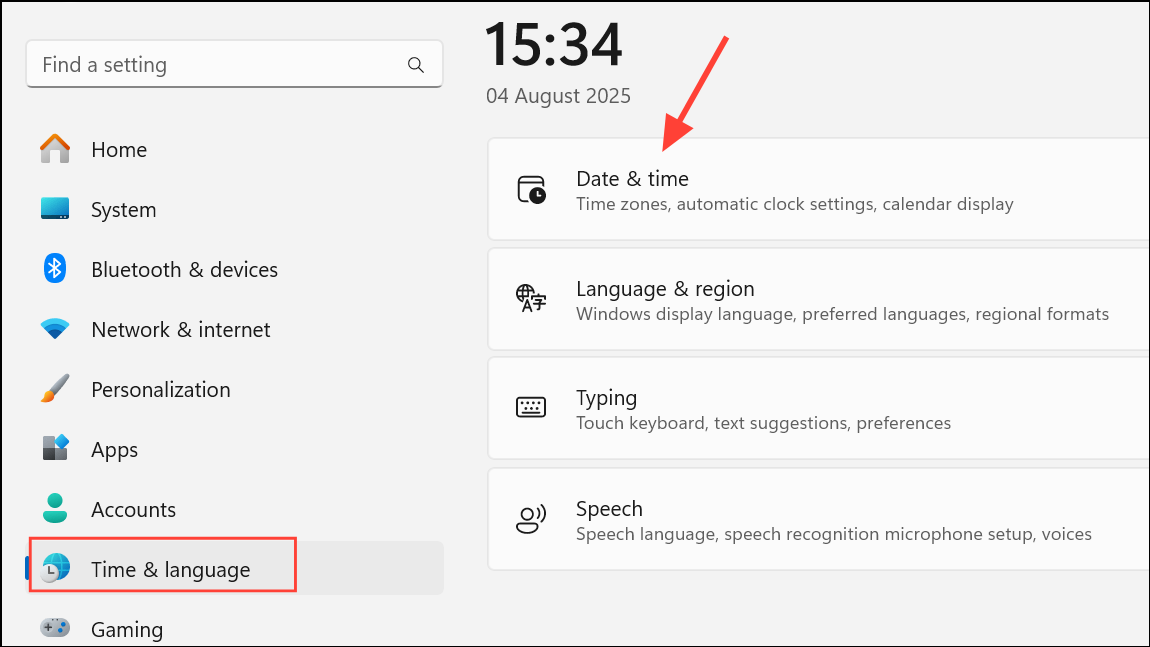
Step 1: Open Windows Settings by pressing Windows key + I.
Step 2: Navigate to Time & Language > Date & Time.
Step 3: Enable Set time automatically and Set time zone automatically. If these options are greyed out, ensure location services are enabled under Privacy & Security > Location.
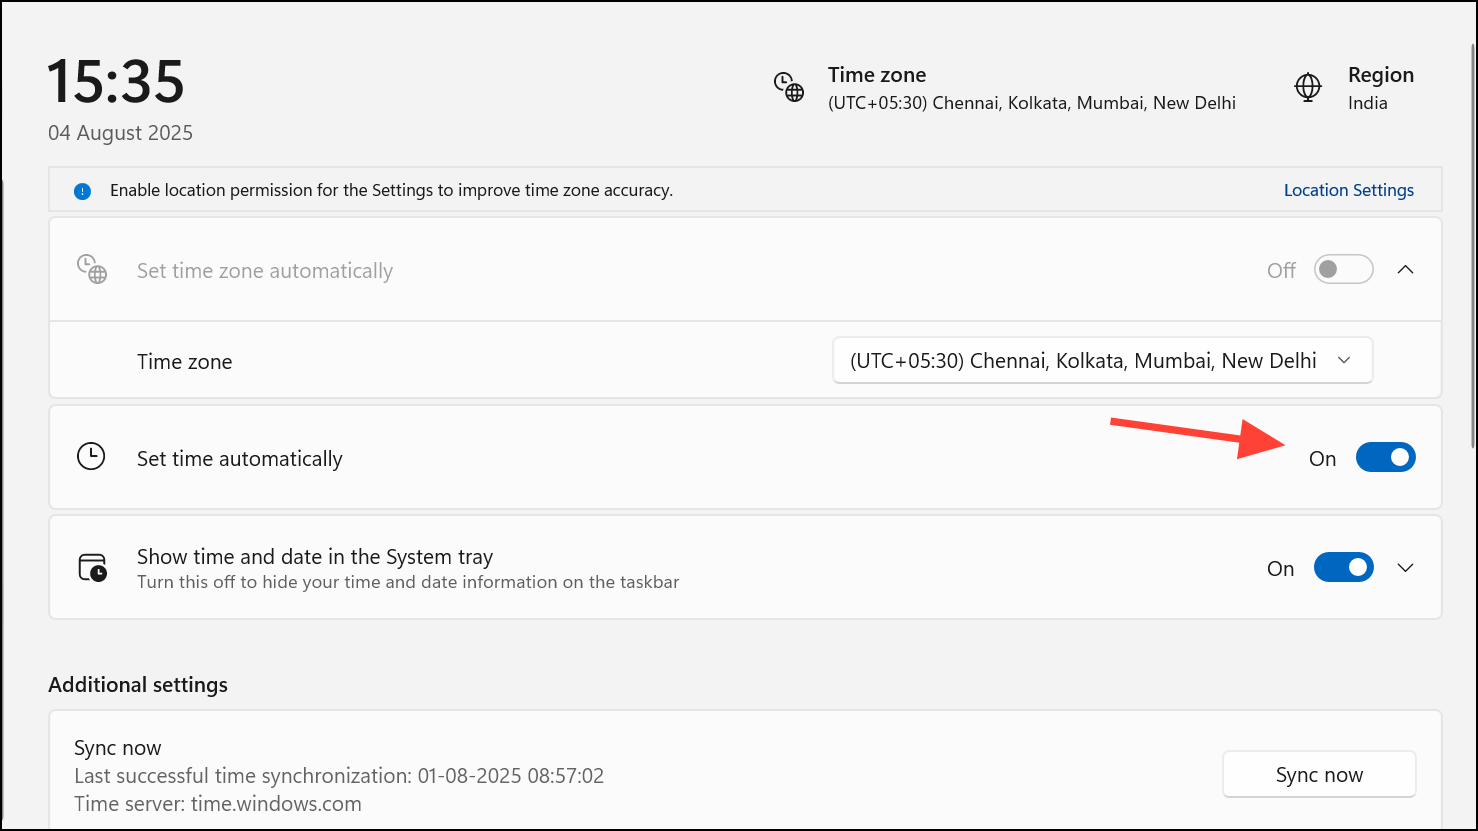
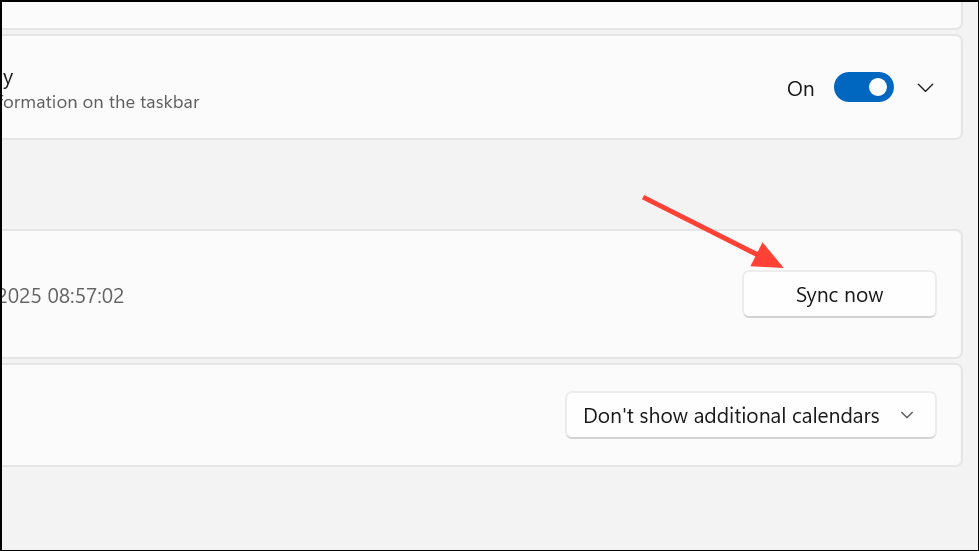
Step 4: Click Sync now under Additional settings to force a time update.
After adjusting, restart your PC and relaunch Steam. This change resolves the error for many users, especially after power outages or hardware changes that reset the system clock.
Flush DNS Cache and Reset Network Settings
Corrupted DNS cache or misconfigured network adapters can block Steam from reaching its web services, even if other apps work normally.
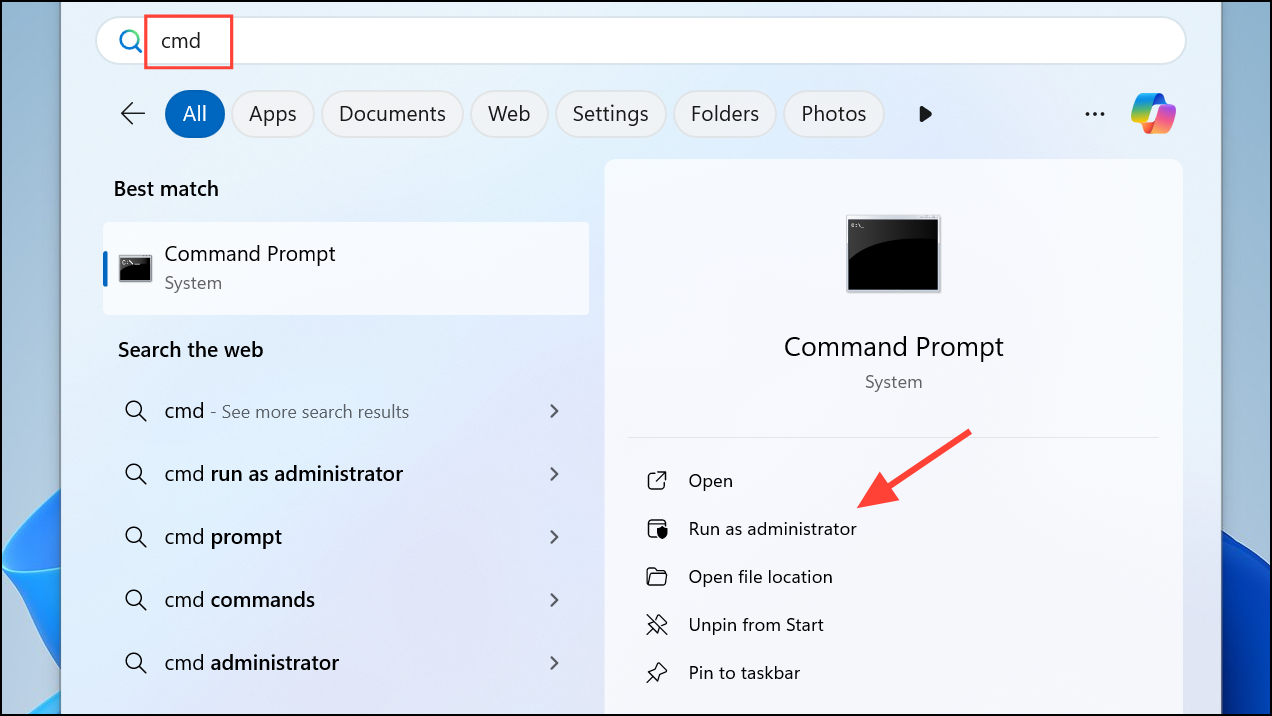
Step 1: Open Command Prompt as an administrator by searching cmd in the Start menu, right-clicking, and selecting Run as administrator.
Step 2: Enter the following commands one at a time, pressing Enter after each:
netsh int tcp set heuristics disabled
netsh int tcp set global autotuninglevel=disabled
netsh int tcp set global rss=enabled
netsh winsock reset
netsh int ip reset
ipconfig /release
ipconfig /renew
ipconfig /flushdns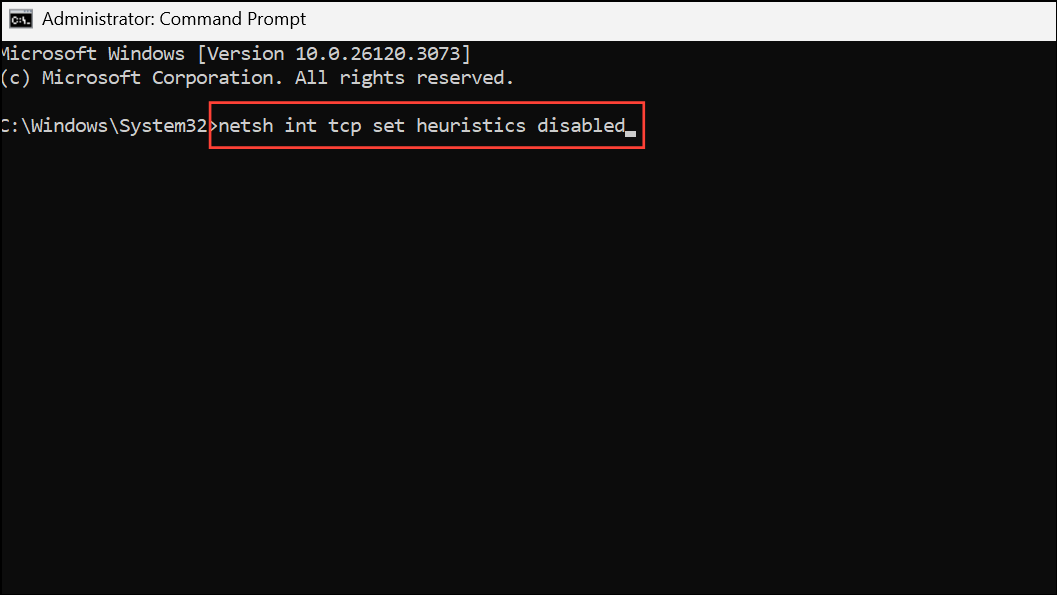
Step 3: Restart your computer to apply network changes.
This process clears outdated DNS information and resets network stacks, improving Steam’s ability to connect to its servers.
Restart or Reset Network Adapters
Temporary glitches in network adapters can block Steam’s web requests. Disabling and re-enabling your active adapter often restores connectivity.
Step 1: Go to Settings > Network & Internet > Advanced network settings.
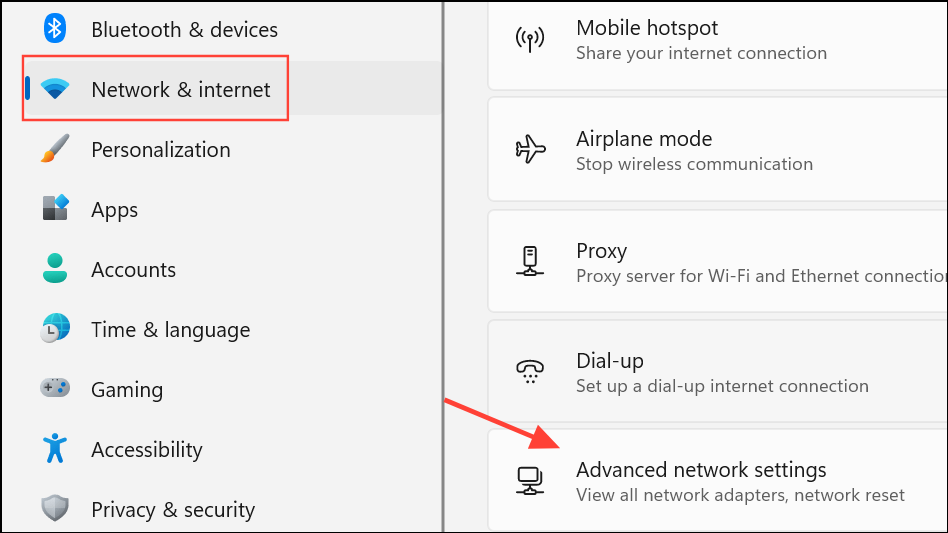
Step 2: Under Network adapters, select your active adapter (Wi-Fi or Ethernet), click Disable, wait a few seconds, then click Enable.
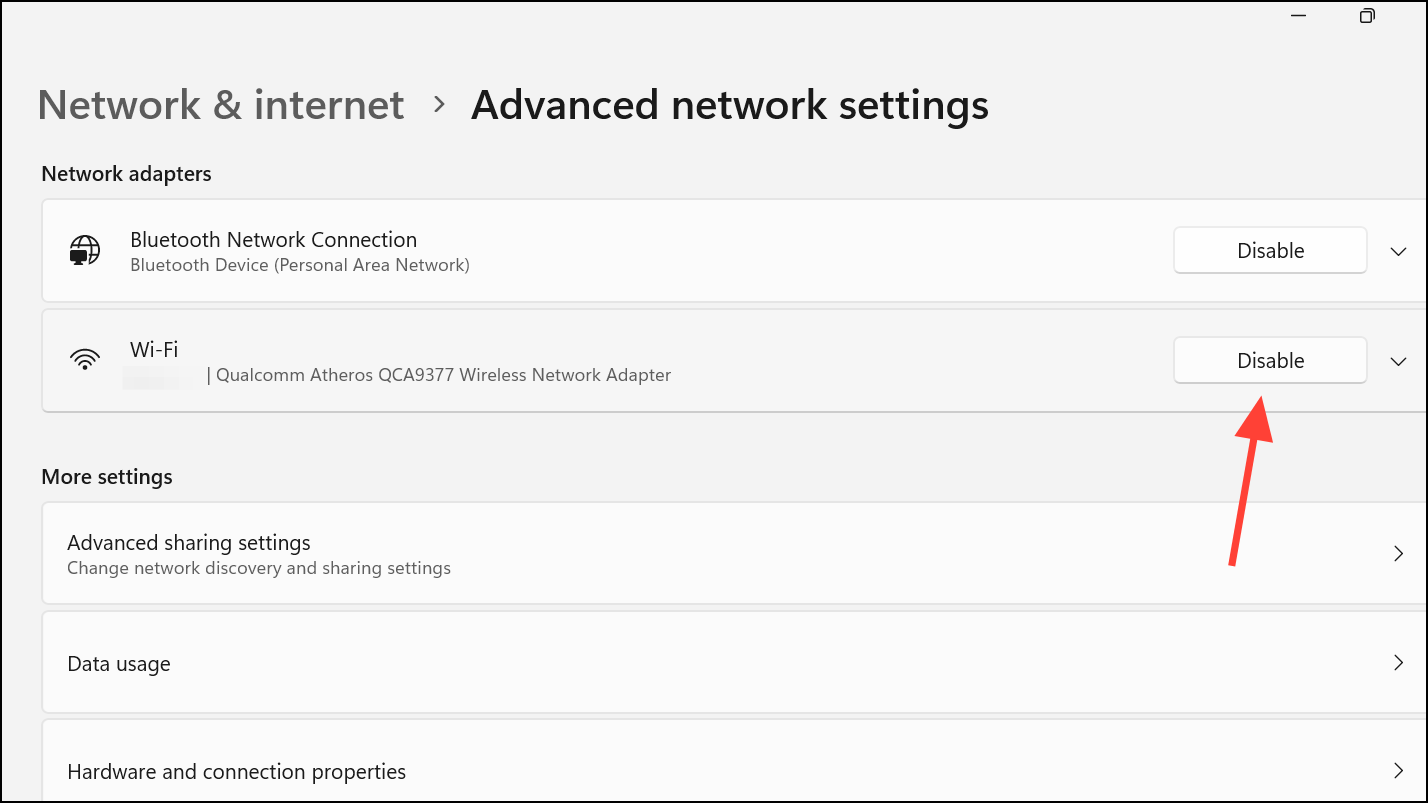
Step 3: Optionally, use Network reset at the bottom of the page to reinstall all network drivers and restore defaults. Note: This will disconnect you temporarily and remove saved Wi-Fi passwords.

After resetting, open Steam to check if the error is resolved.
Verify Firewall and Antivirus Permissions
Security software can mistakenly block Steam’s web components, especially after updates or reinstalls.
Step 1: Open Control Panel > System and Security > Windows Defender Firewall.
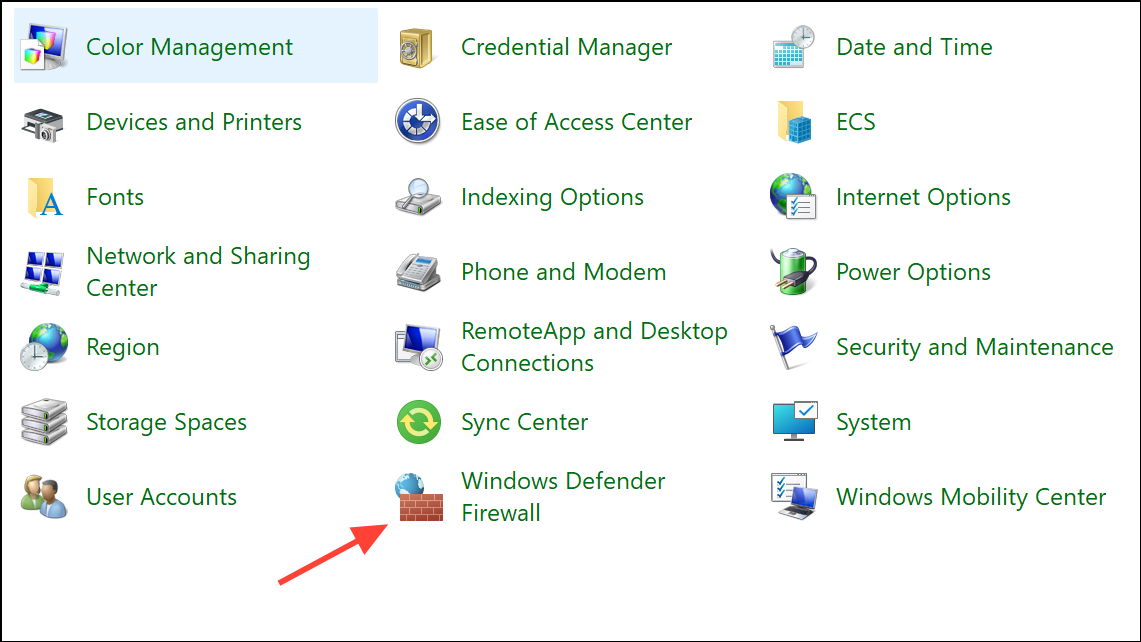
Step 2: Click Allow an app or feature through Windows Defender Firewall.
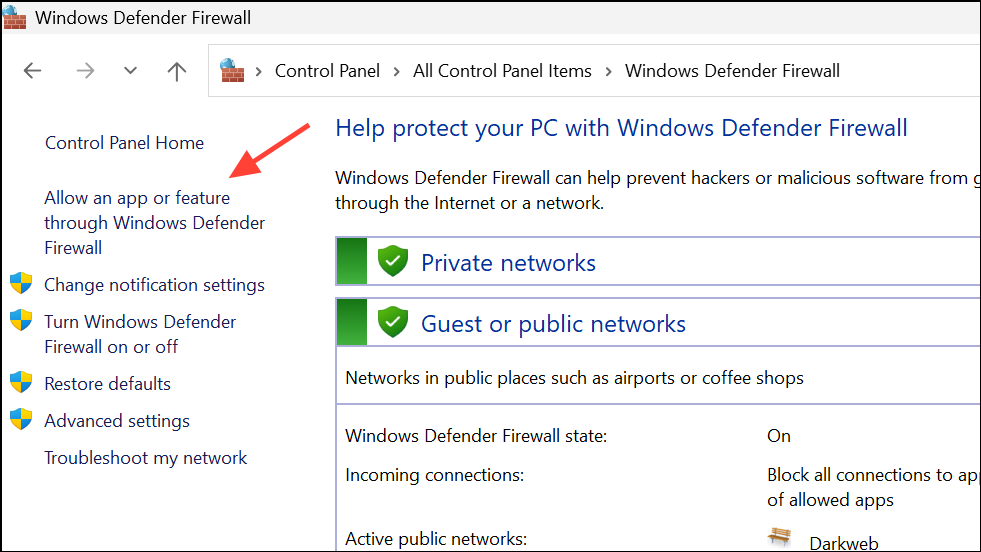
Step 3: Locate Steam in the list and ensure both Private and Public boxes are checked. If missing, add steam.exe manually.
Step 4: If using third-party antivirus, add Steam as an exception or temporarily disable the antivirus to test if it’s causing the issue.
Restoring Steam’s permissions allows it to communicate with its servers for web content and updates.
Clear Steam’s Download Cache
Corrupted cache files often block Steam’s in-client browser from loading pages.
Step 1: Open the Steam client and click Steam in the top-left corner, then select Settings.
Step 2: Go to the Downloads section.
Step 3: Click CLEAR DOWNLOAD CACHE and confirm when prompted. Steam will log you out, so have your credentials ready to sign back in.

After clearing the cache, Steam rebuilds the necessary files, resolving many web page loading issues.
Reinstall Steam Client (with Data Backup)
Persistent or recurring error code 7 can result from corrupted installation files. Reinstalling Steam often restores normal operation. Back up your steamapps folder first to avoid losing installed games.
Step 1: Close Steam completely via Task Manager if needed.
Step 2: Copy the steamapps folder (usually in C:\Program Files (x86)\Steam) to a safe location.
Step 3: Open Settings > Apps > Installed apps, find Steam, and select Uninstall. Remove any remaining Steam folders manually.
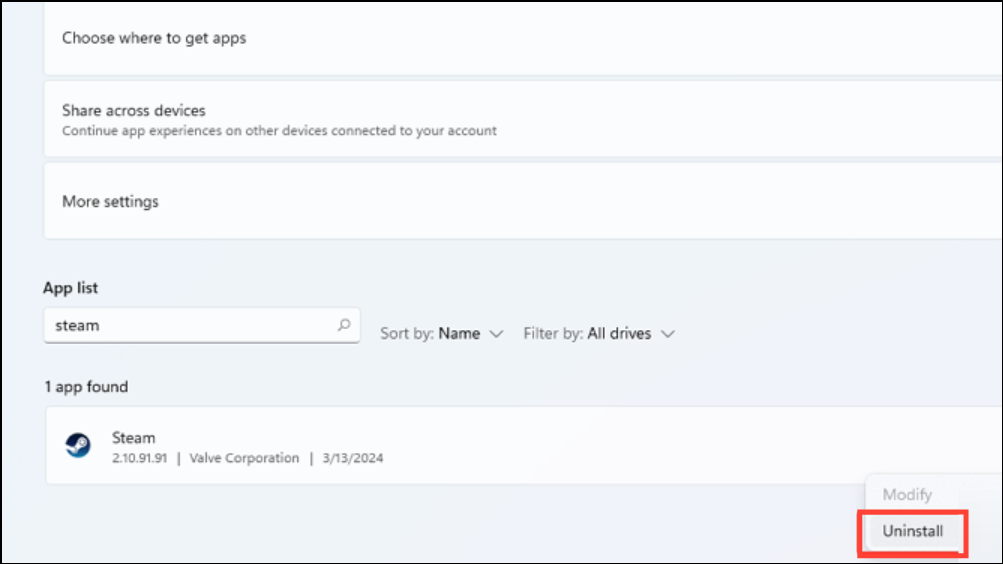
Step 4: Download the latest Steam installer from the official website and run it.
Step 5: Once installed, move your backup steamapps folder back to the new Steam directory.
Reinstalling ensures all program files are intact, eliminating issues from corrupted components.
Additional Troubleshooting Steps
- Try running Steam as an administrator by right-clicking the shortcut and selecting Run as administrator.
- If Steam is installed in
Program Files, move it to a different folder such asC:\Steamto avoid permission conflicts. - Disconnect external monitors or docking stations, as these can sometimes interfere with Steam’s UI on Windows 11.
- Temporarily connect through a VPN if your ISP or region blocks Steam web services. Remember to disconnect the VPN after logging in to avoid account issues.
- Perform a clean boot by disabling all non-Microsoft startup services in msconfig to rule out software conflicts.
These steps address less common but occasionally critical causes of error code 7.
Resolving Steam error code 7 on Windows 11 usually comes down to correcting system time, refreshing network settings, and ensuring Steam isn’t blocked by firewall or corrupted cache. A thorough approach restores access to all Steam web features and keeps your library running smoothly.