
Steam displays the “Steam is having trouble connecting to the Steam servers” error when its client cannot establish a stable connection, even if your internet is otherwise working. This issue can block game downloads, multiplayer access, and even basic account login, often due to corrupted configuration files, network misconfigurations, or temporary server outages.
Delete Corrupted Configuration Files
Corrupted or outdated user configuration files frequently cause Steam’s connection error. Removing the localconfig.vdf file in your Steam userdata directory prompts Steam to rebuild fresh settings, resolving persistent connectivity problems for many users.
Step 1: Close Steam completely. Ensure it is not running in the background by checking the Task Manager (Ctrl + Shift + Esc) and ending any Steam-related processes.
Step 2: Navigate to your Steam installation directory, typically located at C:\Program Files (x86)\Steam\userdata.
Step 3: Inside the userdata folder, look for a subfolder named with a long string of numbers (this is your Steam user ID). Open this folder, then open the config directory within it.
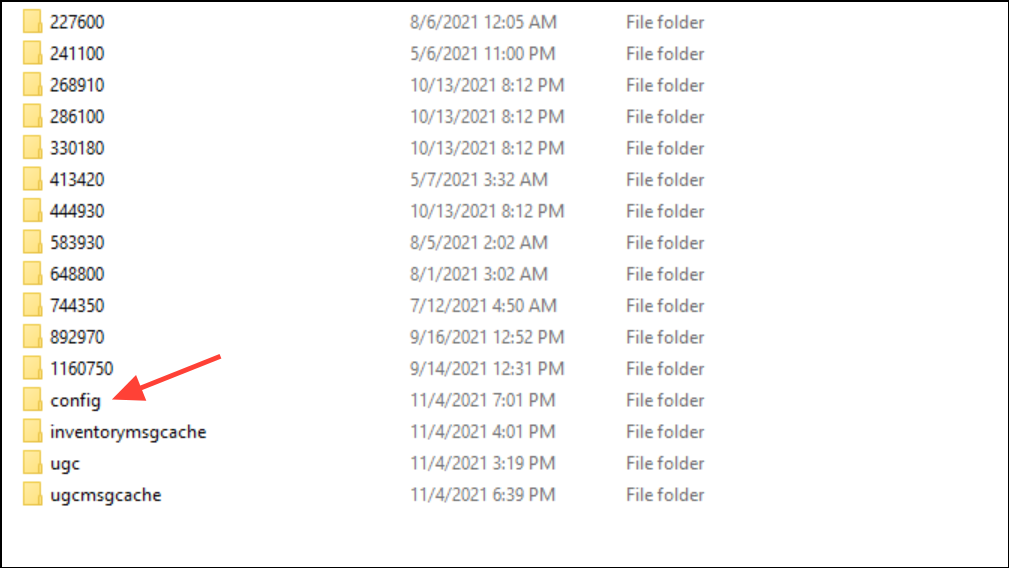
Step 4: Find and delete the localconfig.vdf file. If you have multiple user ID folders, repeat this step for each.
Step 5: Restart your computer. Once rebooted, launch Steam. The client will rebuild the missing configuration files, often resolving the connection issue immediately.
Flush DNS and Reset Network Settings
Network misconfigurations or stale DNS cache can prevent Steam from communicating with its servers. Flushing the DNS, renewing your IP, and resetting Winsock settings can restore proper connectivity.
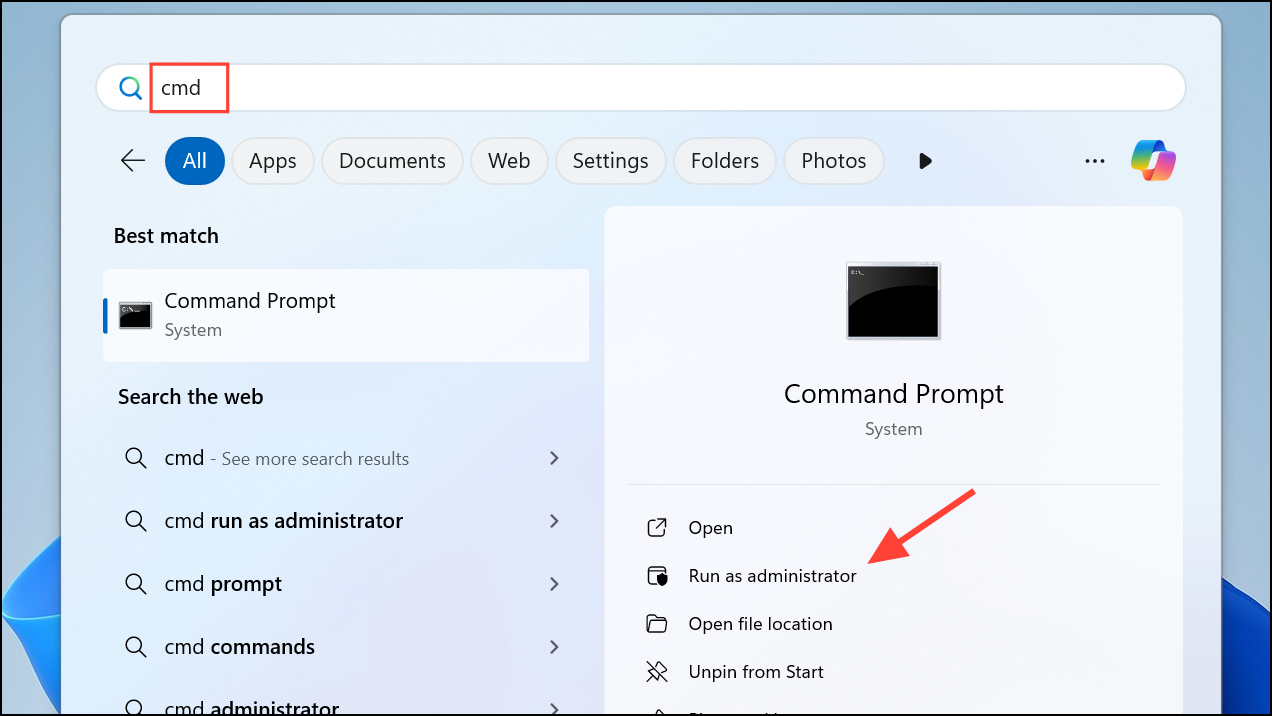
Step 1: Open the Command Prompt as an administrator. Press the Windows key, type cmd, right-click Command Prompt, and choose Run as administrator.
Step 2: Enter each of the following commands one at a time, pressing Enter after each:
ipconfig /release
ipconfig /all
ipconfig /flushdns
ipconfig /renew
netsh int ip set dns
netsh winsock reset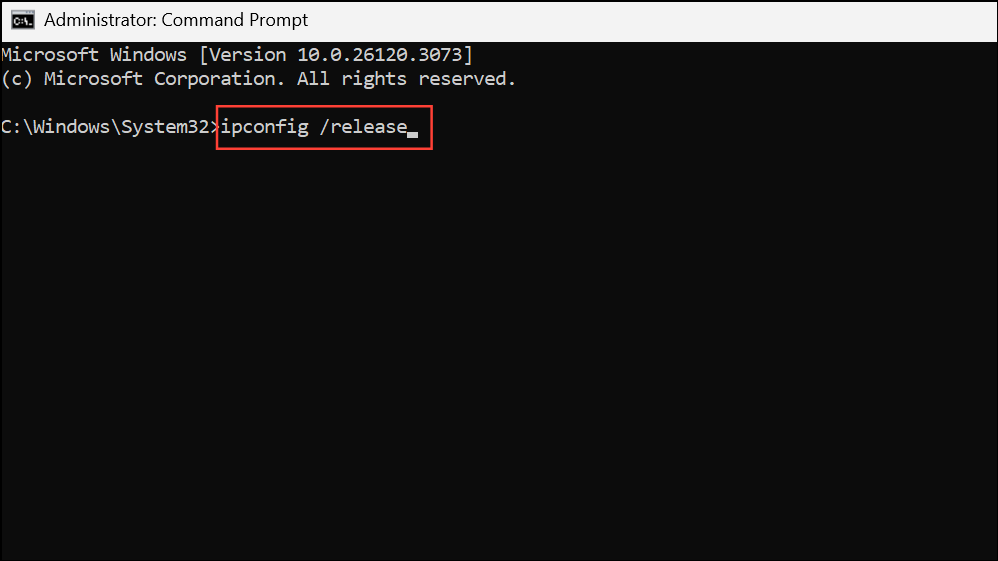
Step 3: After completing all commands, restart your computer. Open Steam to check if the error is resolved.
Check Steam Server Status
Sometimes, Steam’s servers are undergoing maintenance or experiencing outages. If this is the case, connection errors will affect all users, not just your system.
Step 1: Visit the official Steam status page at https://steamstat.us/ to verify if Steam servers are operational.
Step 2: If the servers are down or under maintenance, you will need to wait until service is restored. No local troubleshooting will fix the issue during an outage.
Restart Network Devices
Overloaded or misbehaving network hardware can disrupt Steam’s ability to connect. Restarting your modem and router clears temporary glitches and refreshes your internet connection.
Step 1: Unplug your modem and router from the power outlet. Wait at least 60 seconds to allow the devices to fully power down and reset.
Step 2: Plug your modem and router back in, and wait until all indicator lights return to their normal state.
Step 3: Restart your computer, then launch Steam to check for improved connectivity.
Modify Steam Launch Properties
Steam typically uses the UDP protocol for network communication. For some users, forcing Steam to use TCP instead can bypass connection issues caused by restrictive networks or ISPs.
Step 1: Right-click your Steam shortcut on the desktop and select Properties.
Step 2: In the Target field, add a space after the closing quotation mark and type -tcp so it reads something like "C:\Program Files (x86)\Steam\steam.exe" -tcp.
Step 3: Click OK to save changes, then launch Steam using this shortcut.
Allow Steam Through Firewall and Antivirus
Windows Firewall or third-party security software can block Steam’s network traffic, resulting in persistent connection errors. Granting Steam permission restores its ability to communicate with its servers.
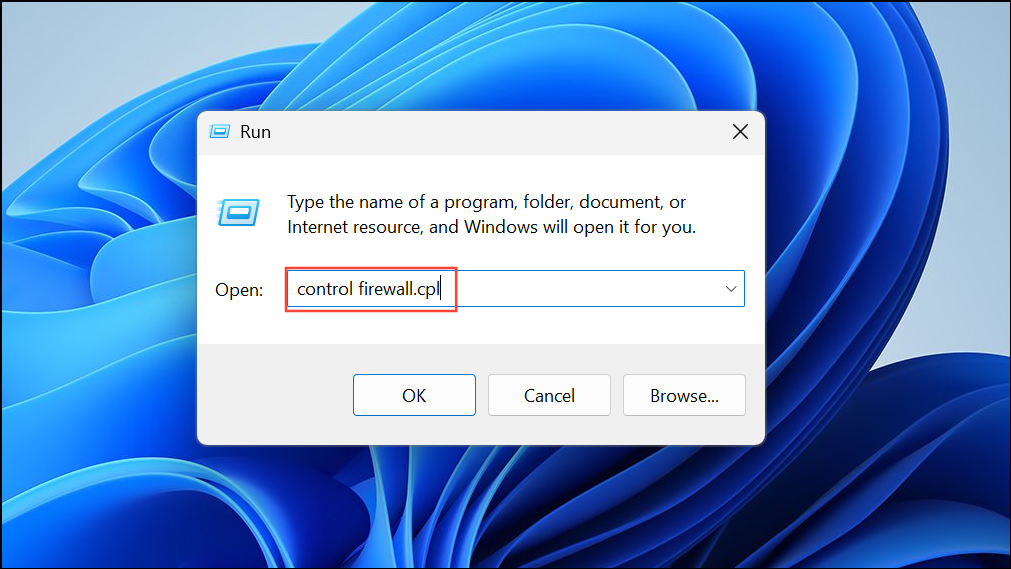
Step 1: Press Windows + R, type control firewall.cpl, and press Enter to open Windows Defender Firewall settings.
Step 2: Click Allow an app or feature through Windows Defender Firewall.
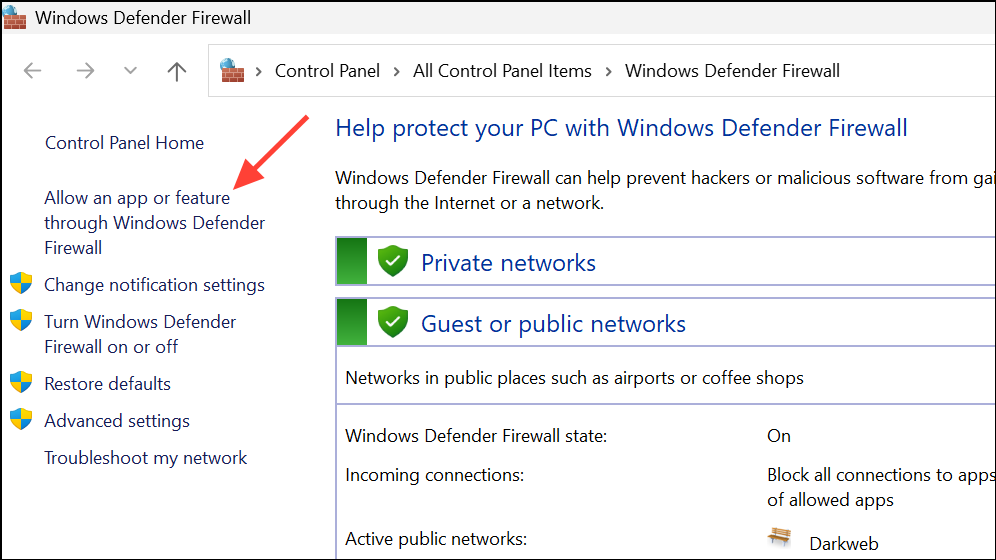
Step 3: Ensure Steam is listed and both Private and Public boxes are checked. If not, click Change settings, then Allow another app… to add Steam manually.
Step 4: If you use third-party antivirus, temporarily disable it and test Steam. If the connection error disappears, add Steam as an exception in your security software before re-enabling antivirus protection.
Adjust LAN and Proxy Settings
Misconfigured proxy settings or automatic LAN detection can interfere with Steam’s network access. Disabling these options can restore proper connectivity.
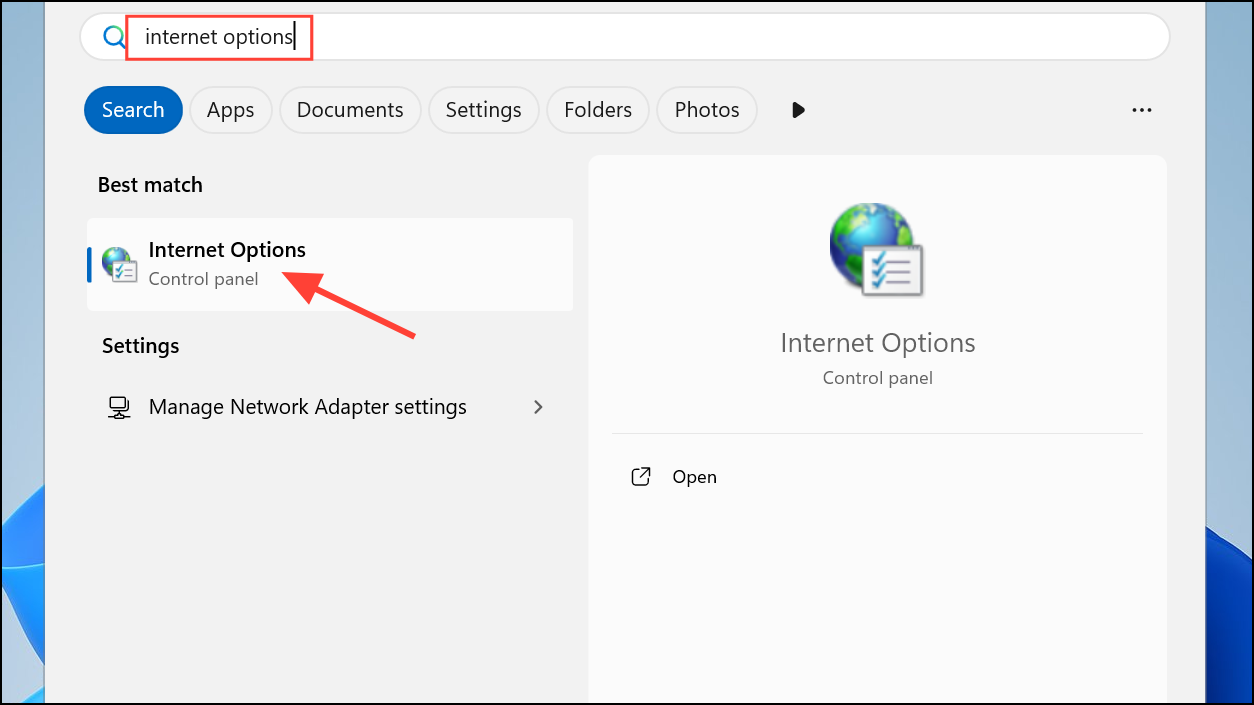
Step 1: Open Windows Internet Options by searching for it in the Start menu.
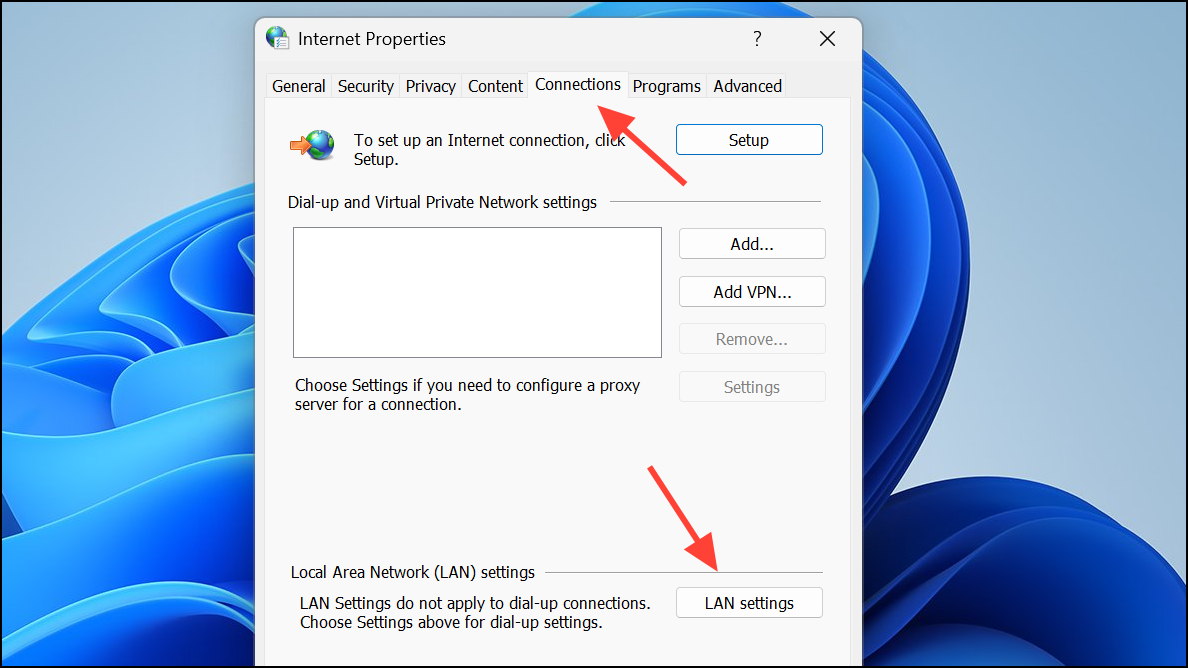
Step 2: Go to the Connections tab and click LAN settings.
Step 3: Uncheck Automatically detect settings and ensure no proxy server is enabled unless required by your network.
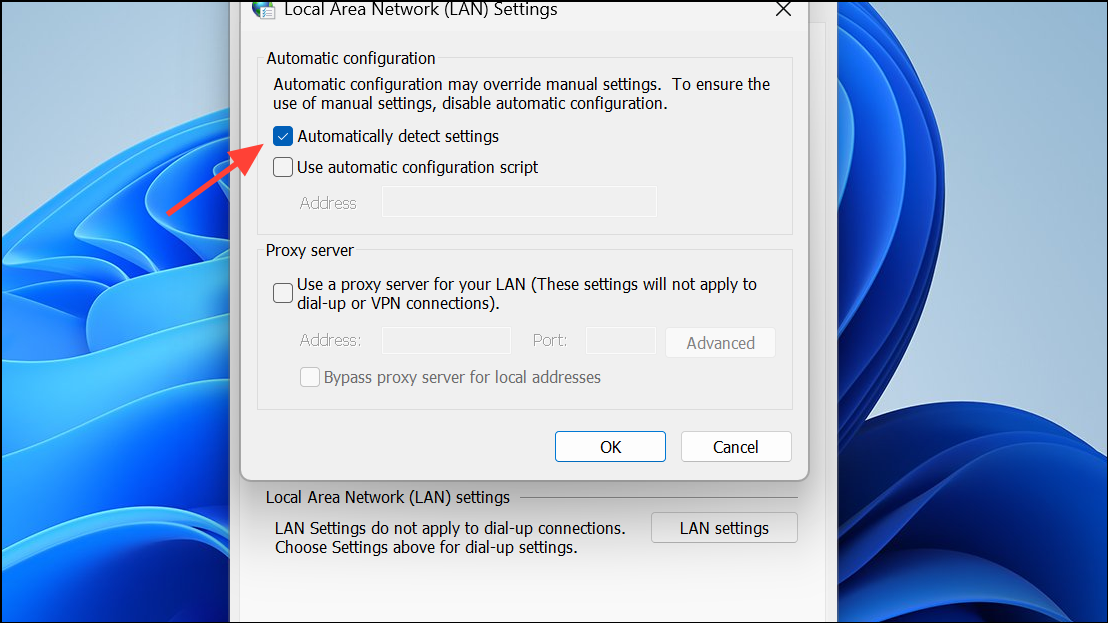
Step 4: Click OK to apply the changes, then restart Steam.
Update Network Adapter Drivers
Outdated or faulty network drivers can cause connectivity problems for Steam and other online services. Updating these drivers can restore stable network performance.
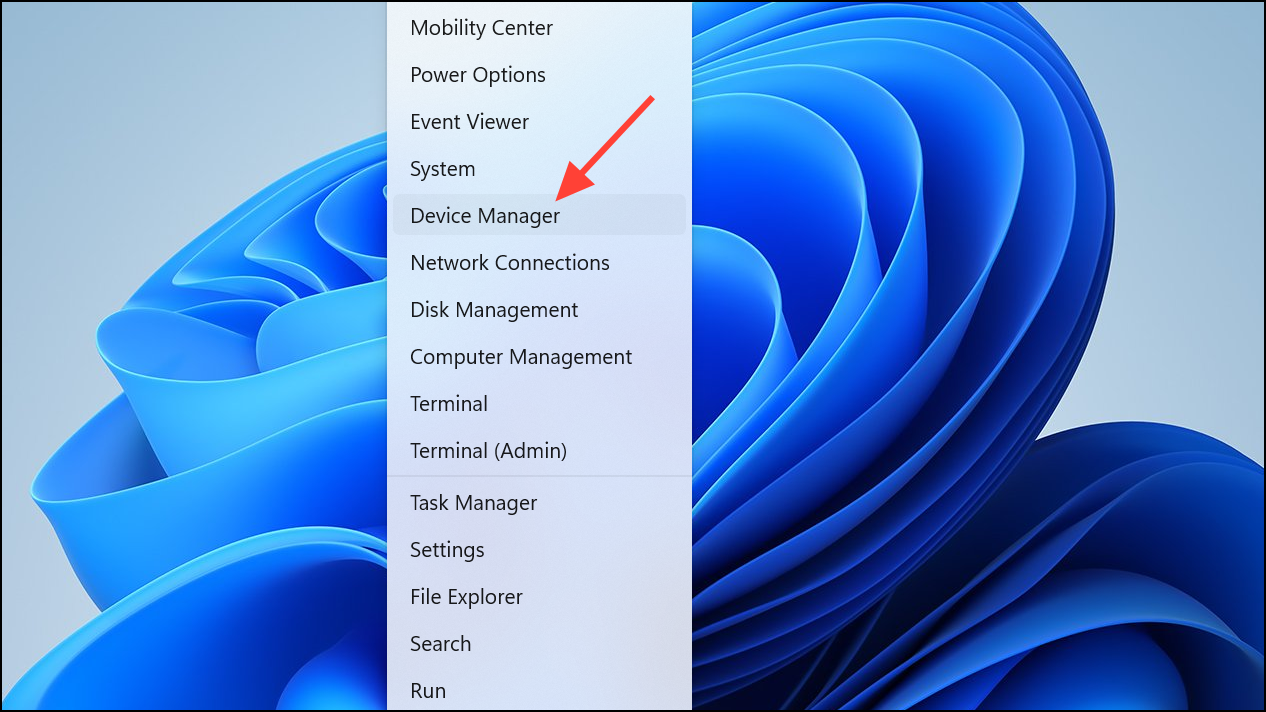
Step 1: Open Device Manager by pressing Windows + X and selecting Device Manager.
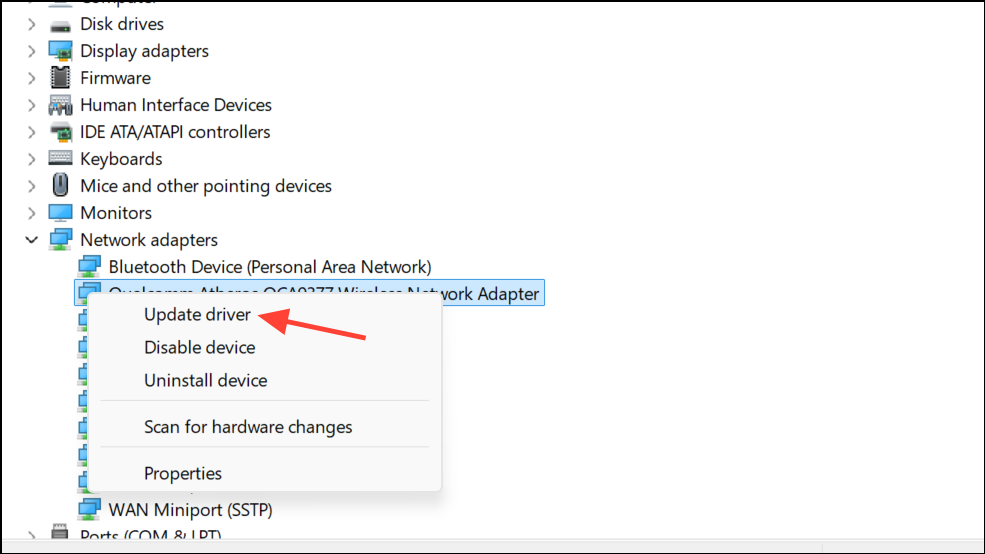
Step 2: Expand Network adapters, right-click your active network adapter, and select Update driver.
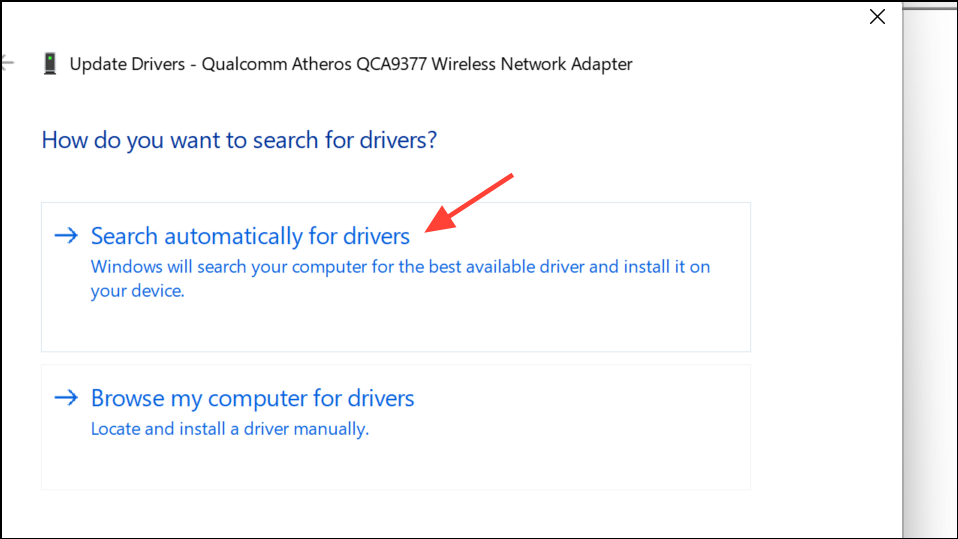
Step 3: Choose Search automatically for updated driver software and follow the prompts. Restart your computer when finished and test Steam’s connection.
Resolving the “Steam is having trouble connecting to the Steam servers” error typically restores full access to your games and online features. If none of these solutions work, consider checking your system for malware or contacting Steam Support for further assistance.