Getting the "Memory couldn't be written" error on Windows 11 is a real pain, especially when you're in the middle of something. This usually happens because a program is trying to access a part of memory it shouldn't. Here are some ways to fix it and get back to what you were doing.
Common Causes of the Error
This error can be caused by various factors, including:
- Corrupted system files or applications.
- Faulty or mismatched RAM modules.
- Outdated or incompatible device drivers.
- Conflicting Windows updates.
- Incorrect virtual memory settings.
Methods to Fix "The Memory Could Not Be Written" Error
1. Run Windows Memory Diagnostic Tool
This built-in tool checks your system's memory for errors and helps identify faulty RAM modules.
- Press
Win + Rto open the Run dialog. - Type
mdsched.exeand click OK.
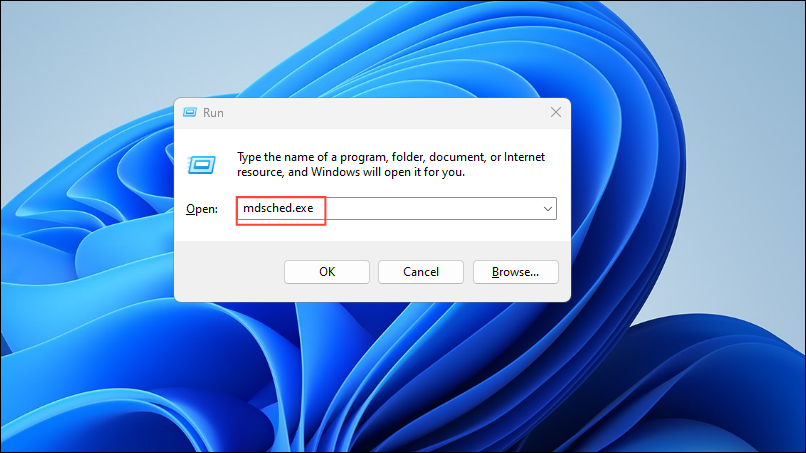
- Select Restart now and check for problems (recommended).
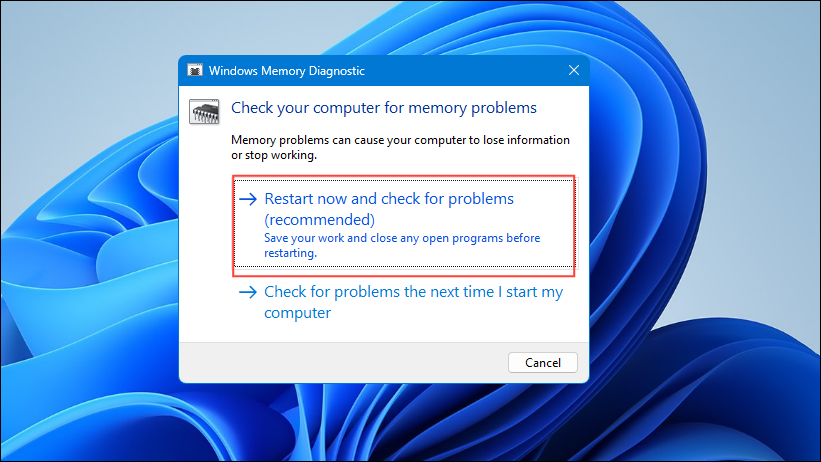
- Your computer will restart, and the diagnostic tool will run automatically.
- Wait for the scan to complete and check the results for any memory errors.
2. Update or Reinstall Problematic Drivers
Outdated or corrupt device drivers can cause memory errors. Updating them may resolve the issue.
- Press
Win + Xand select Device Manager.
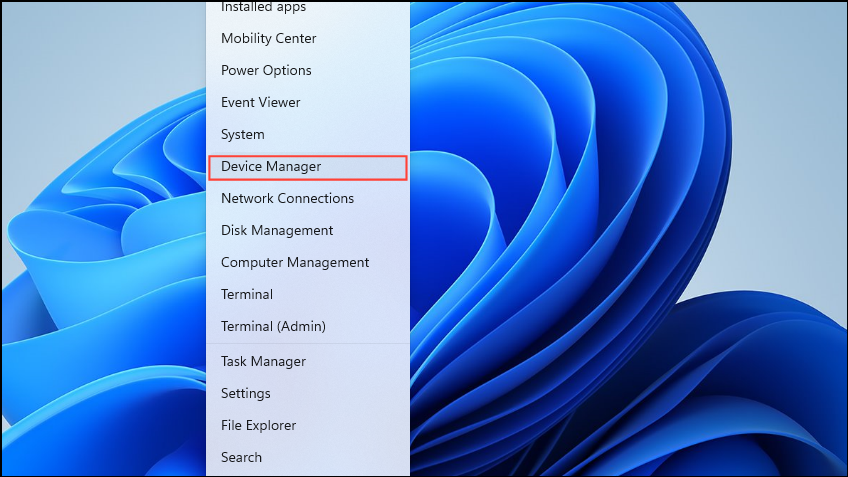
- Expand each category and look for devices with a yellow exclamation mark.
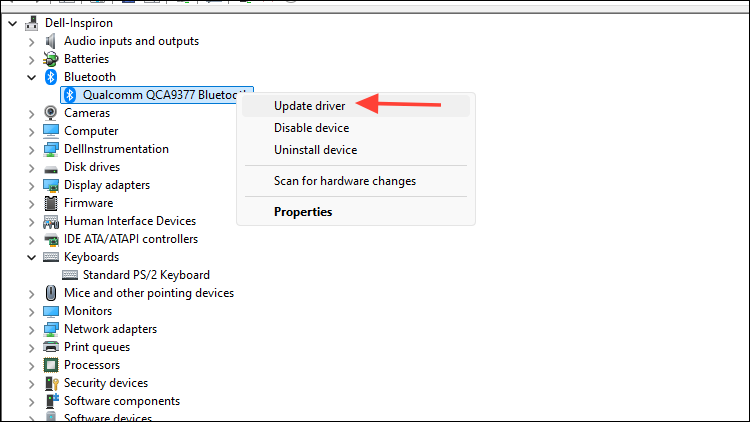
- Right-click the problematic device and choose Update driver.
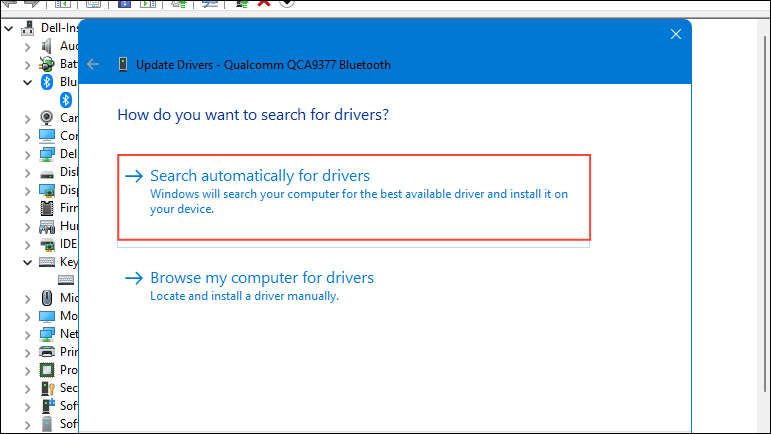
- Select Search automatically for updated driver software.
- Follow the on-screen instructions to complete the update.
3. Uninstall Recent Windows Updates
Sometimes, recent Windows updates can cause system instability. Uninstalling them might fix the error.
- Open Settings by pressing
Win + I.
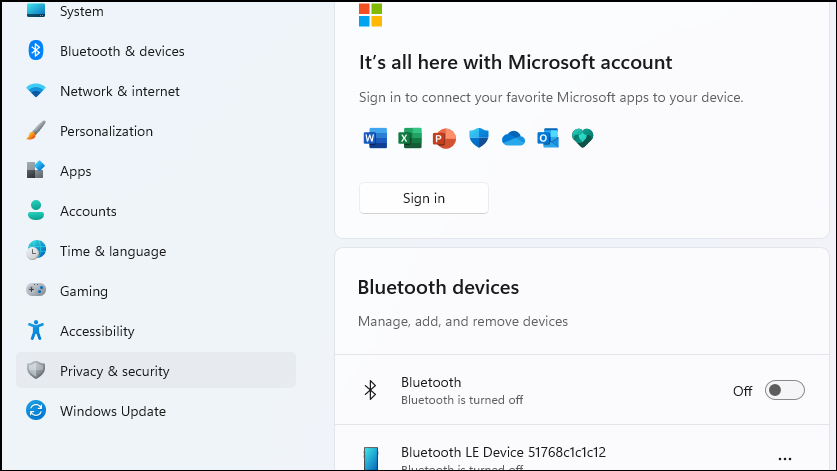
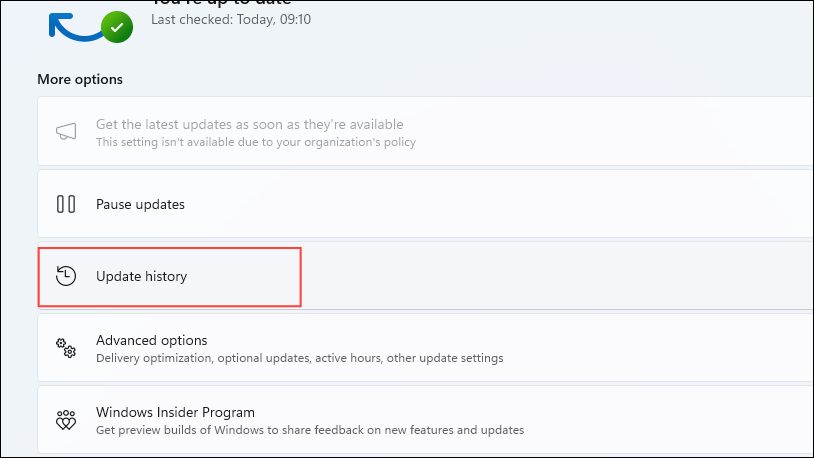
- Go to Windows Update and click on Update history.
- Scroll down and click Uninstall updates.
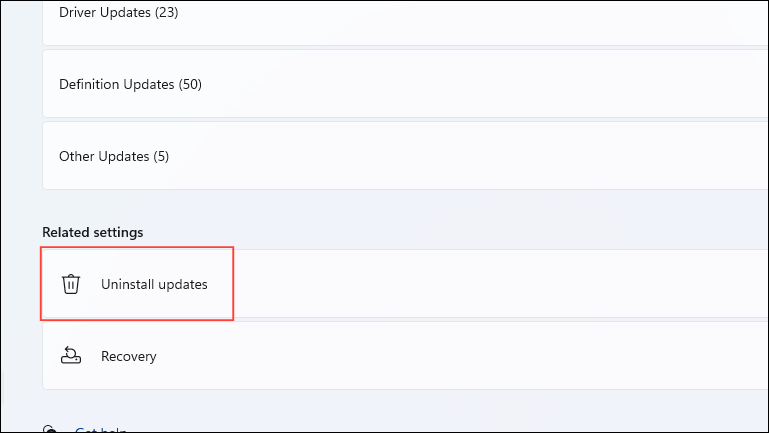
- Select the most recent update (e.g., KB5034204) and click Uninstall.
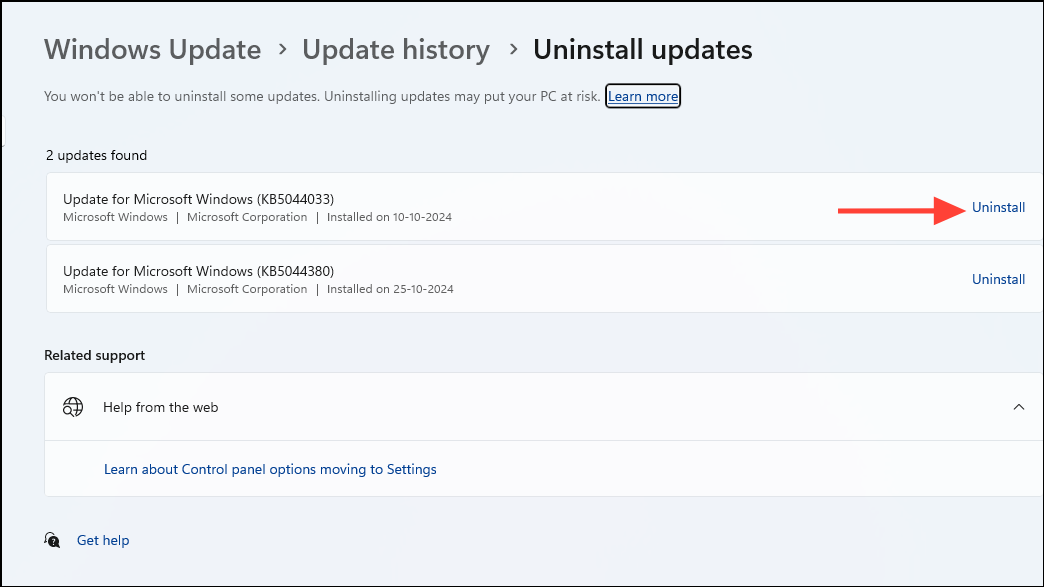
- Restart your computer to apply the changes.
4. Run System File Checker and DISM Tools
Corrupted system files can lead to memory errors. Use SFC and DISM tools to repair them.
- Type
cmdin the Windows search bar and select Run as administrator.
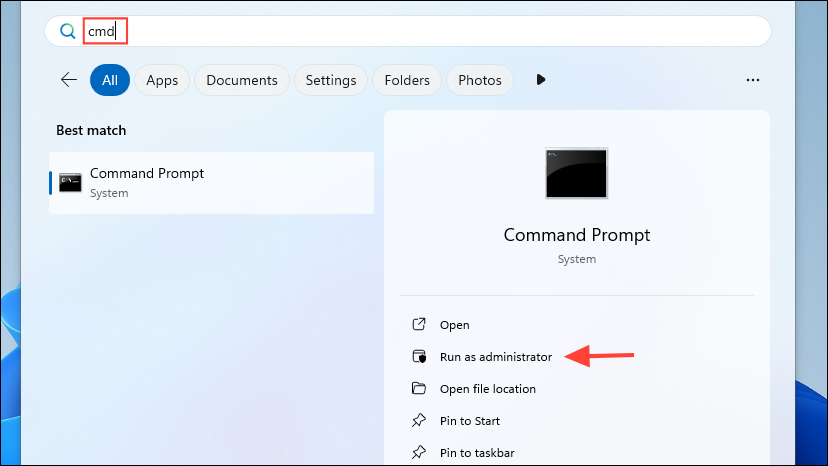
- In the command prompt, type
sfc /scannowand press Enter.
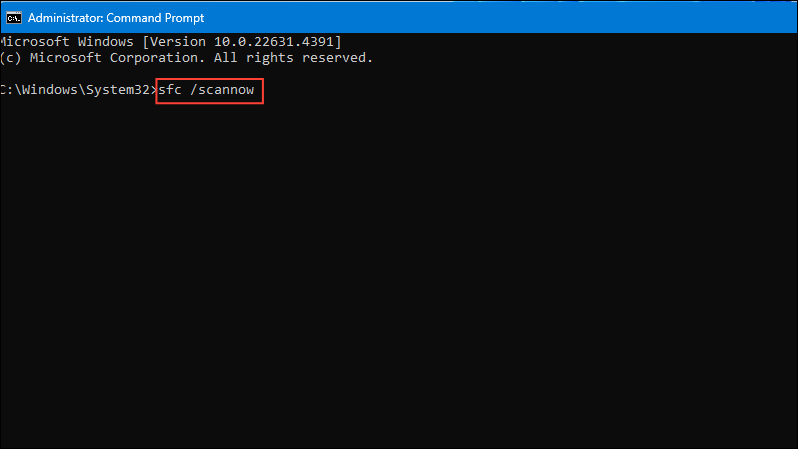
- Wait for the scan to complete and follow any on-screen instructions.
- Next, type
DISM /Online /Cleanup-Image /RestoreHealthand press Enter.
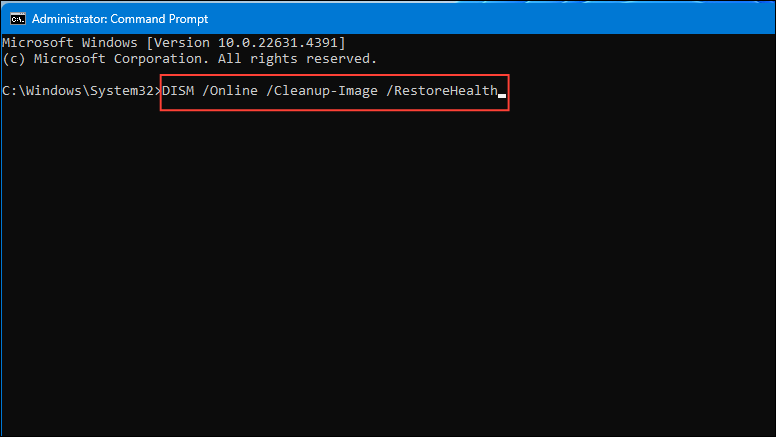
- Allow the process to finish, then restart your computer.
5. Reseat or Replace RAM Modules
Faulty or improperly seated RAM can cause memory errors. Reseating or replacing the RAM may help.
- Shut down your computer and disconnect all cables.
- Open the computer case to access the RAM slots.
- Carefully remove the RAM modules from their slots.
- Inspect the modules for damage or dust.
- Reinsert the RAM modules firmly into their slots.
- Close the case, reconnect the cables, and power on your computer.
6. Adjust Virtual Memory Settings
Incorrect virtual memory settings can lead to memory errors. Adjusting them may resolve the issue.
- Press
Win + R, typesysdm.cpl, and click OK.
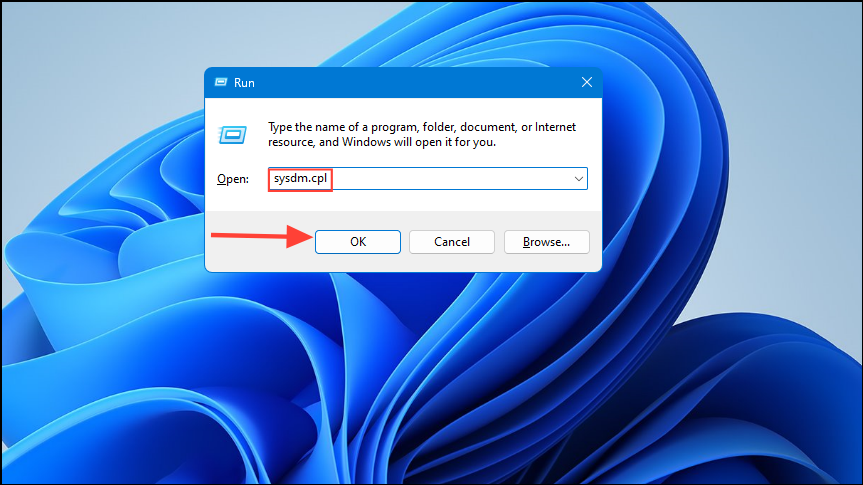
- In the System Properties window, go to the Advanced tab.
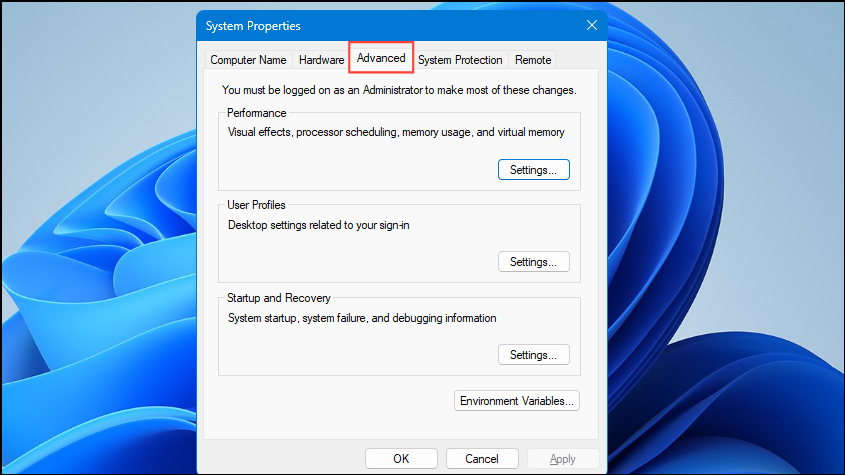
- Under the Performance section, click Settings.
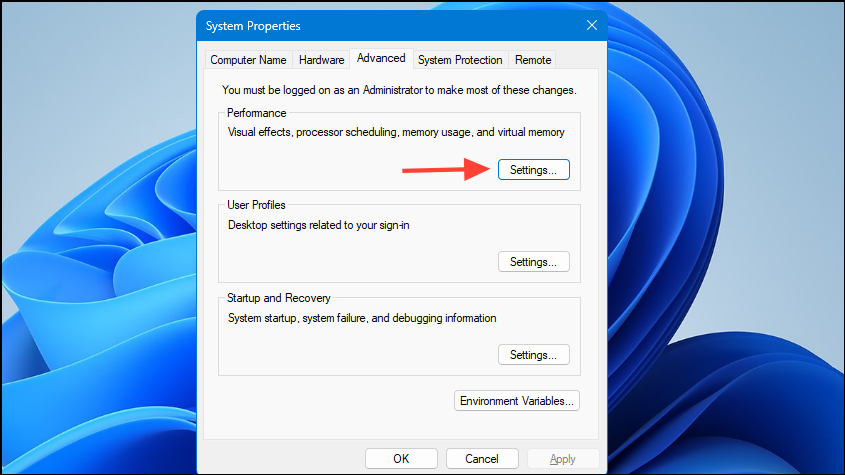
- Switch to the Advanced tab and click Change under Virtual memory.
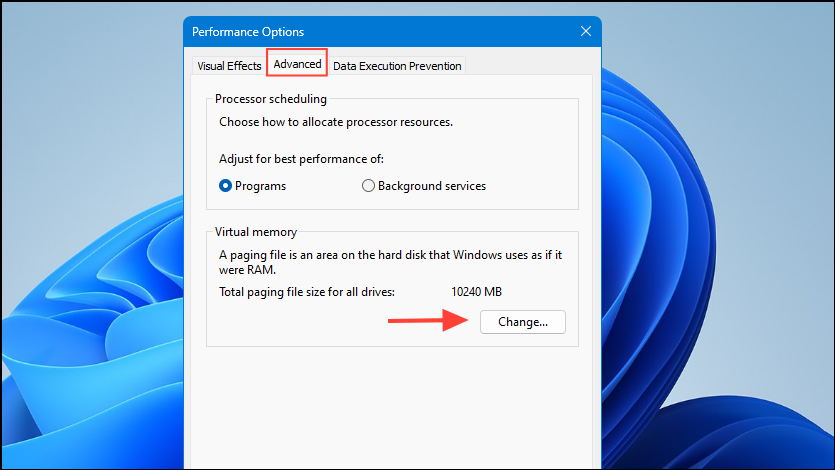
- Uncheck Automatically manage paging file size for all drives.
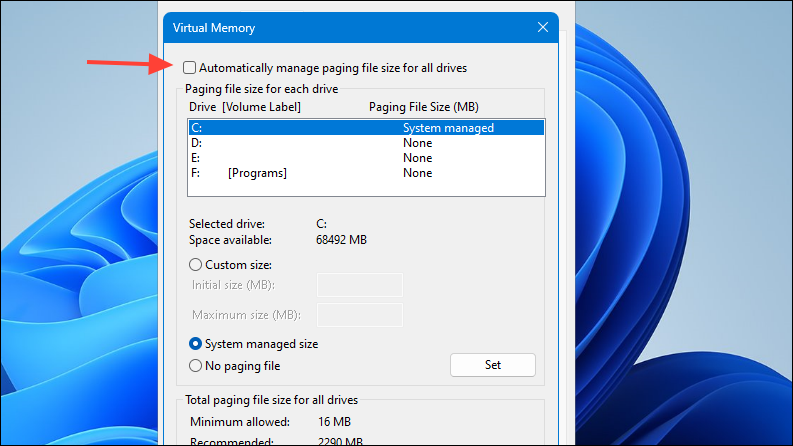
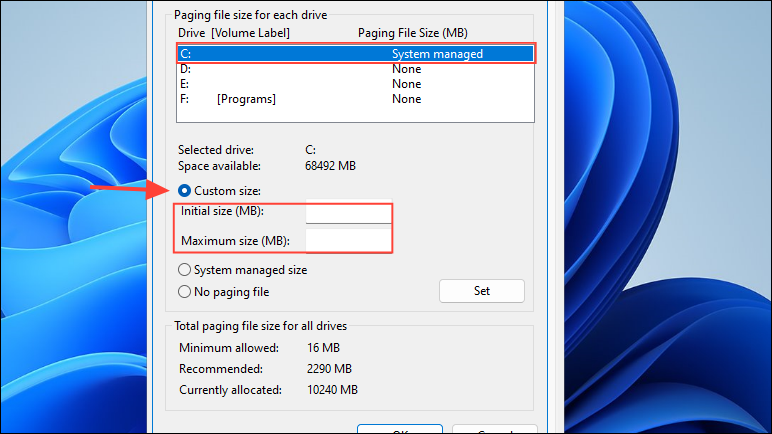
- Select your system drive (usually C:), choose Custom size, and enter initial and maximum sizes (in MB).
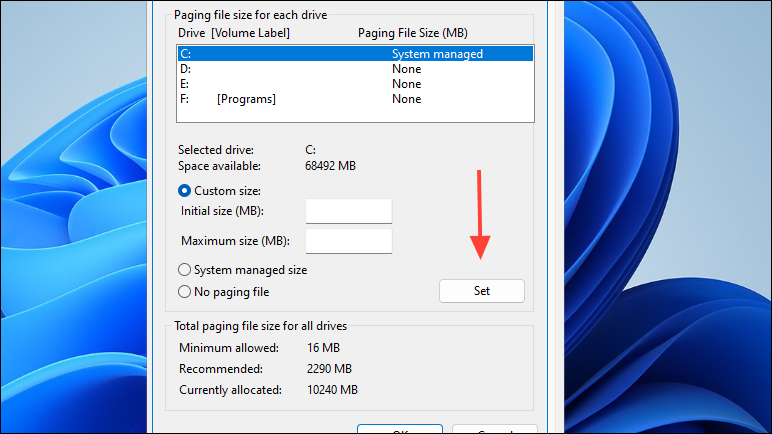
- Click Set, then OK to apply the changes.
- Restart your computer.
7. Perform a Clean Boot
A clean boot starts Windows with a minimal set of drivers and startup programs, which can help eliminate software conflicts.
- Press
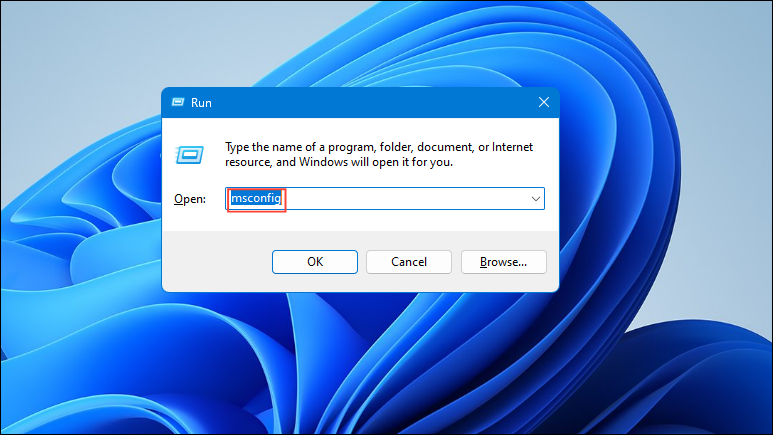
Win + R, typemsconfig, and click OK.
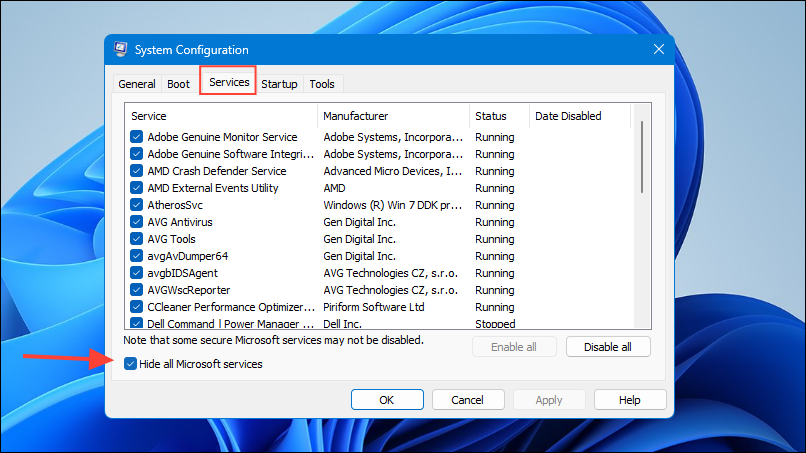
- Go to the Services tab and check Hide all Microsoft services.
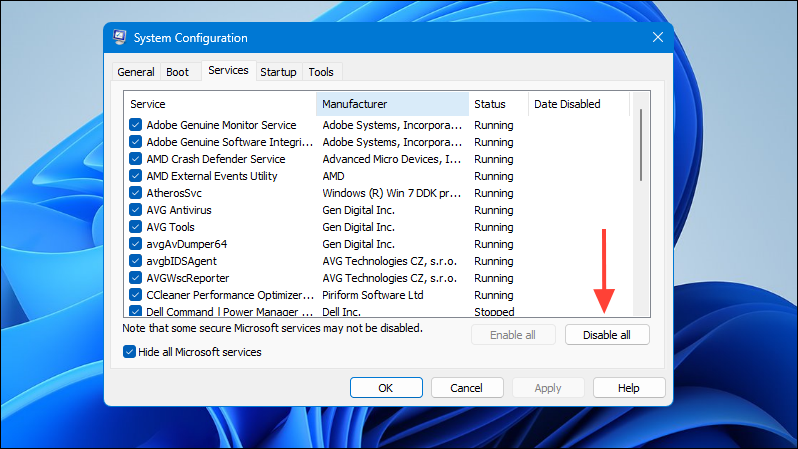
- Click Disable all.
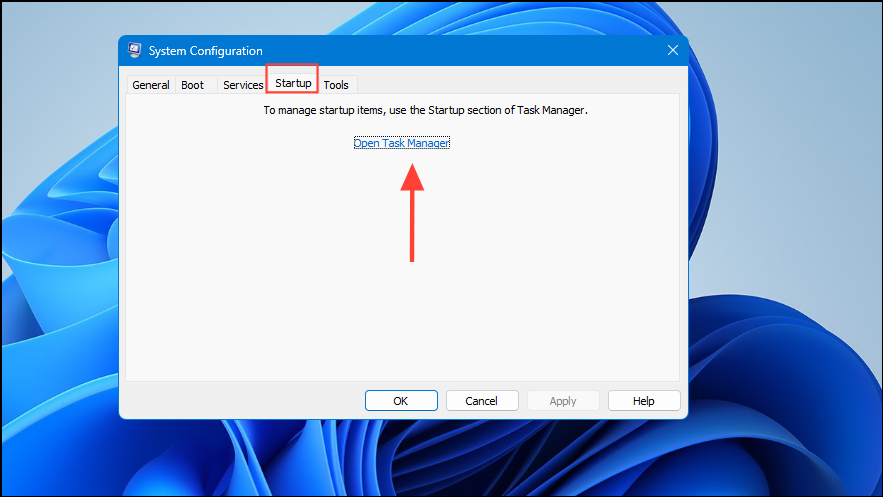
- Switch to the Startup tab and click Open Task Manager.
- In Task Manager, disable all startup items.
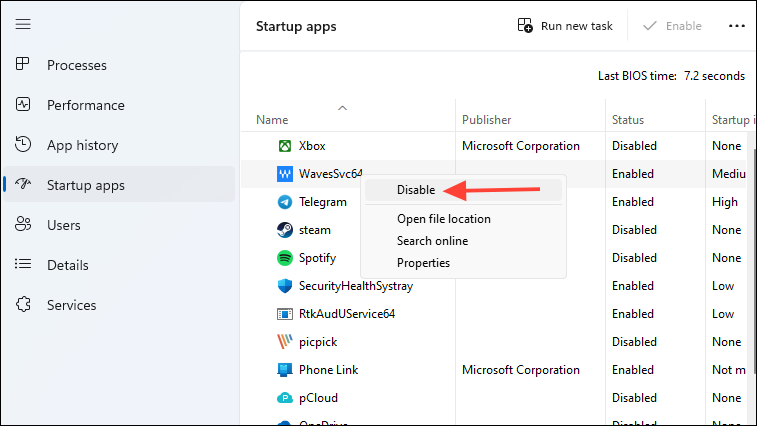
- Close Task Manager and click OK in the System Configuration window.
- Restart your computer.
8. Update BIOS and Firmware
An outdated BIOS can cause hardware compatibility issues. Updating it may resolve memory errors.
- Identify your motherboard model and current BIOS version.
- Visit the manufacturer's official website and navigate to the support section.
- Download the latest BIOS update compatible with your motherboard.
- Follow the manufacturer's instructions carefully to update the BIOS.
- Restart your computer after the update is complete.
9. Perform a System Restore
Restoring your system to an earlier point in time can undo recent changes that may have caused the error.
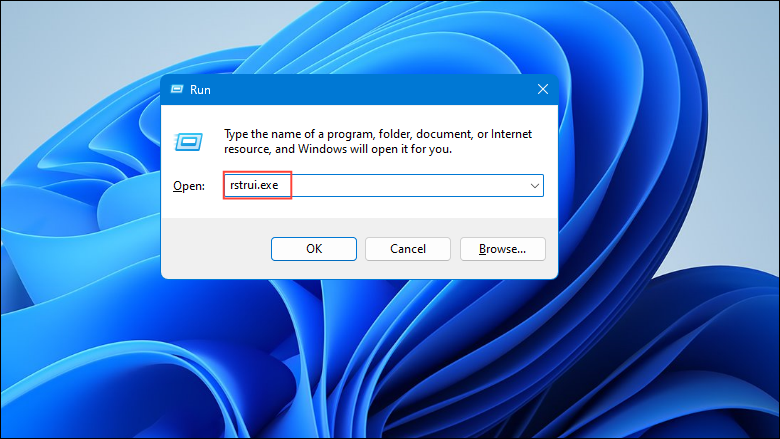
- Press
Win + R, typerstrui.exe, and click OK.
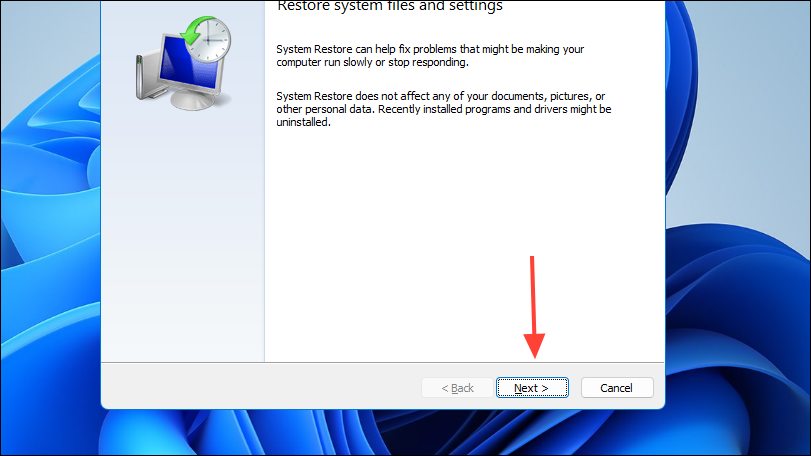
- In the System Restore window, click Next.
- Select a restore point dated before the issue began.
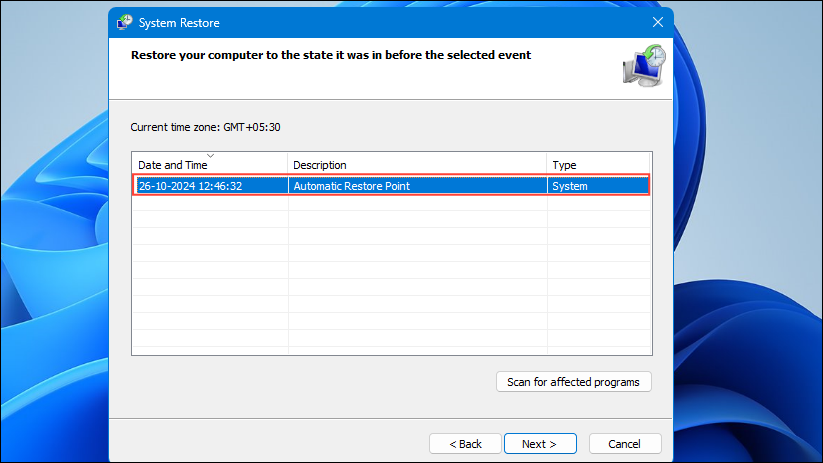
- Click Next and then Finish to start the restoration process.
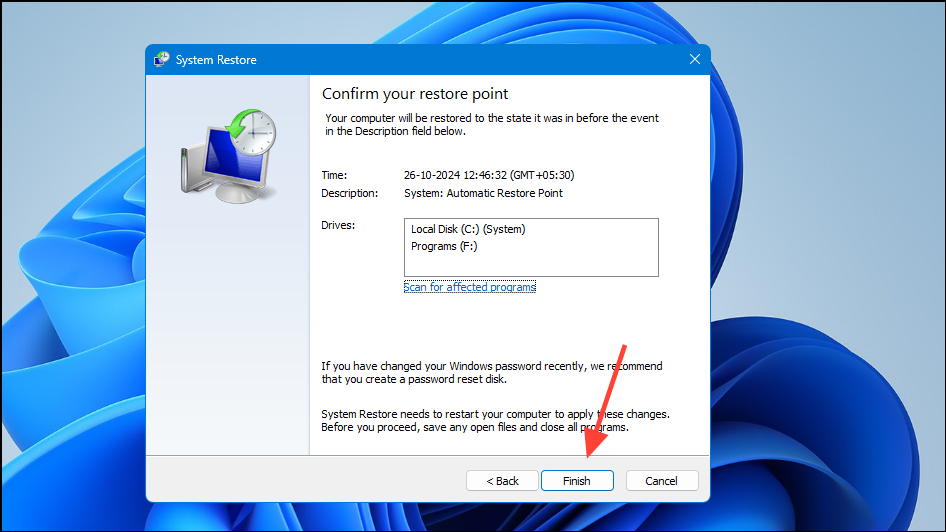
- Your computer will restart to apply the restoration.
By following these methods, you should be able to resolve the "The memory could not be written" error in Windows 11. If the problem persists, it may be necessary to consult a professional technician to diagnose potential hardware issues.

