
- If you're getting a blank Windows Update page in Windows 11 settings, try running the Windows Update troubleshooter first for an easy fix.
- In case that does not work, you may need to try other solutions, such as running a DISM/ SFC scan, cleaning up your disk, cleaning the update cache, etc.
- You can also try restoring your system to an earlier time if you have a restore point available.
- Before making changes to your PC, make sure to create a backup so you can undo the changes if something goes wrong.
Fix 1: Run the Windows Update Troubleshooter
If there's a problem with Windows Update, such as the Update page appearing completely blank, you should first try running the Windows Update Troubleshooter.
- Open the Settings app and type
troubleshootin the search box on the top left.
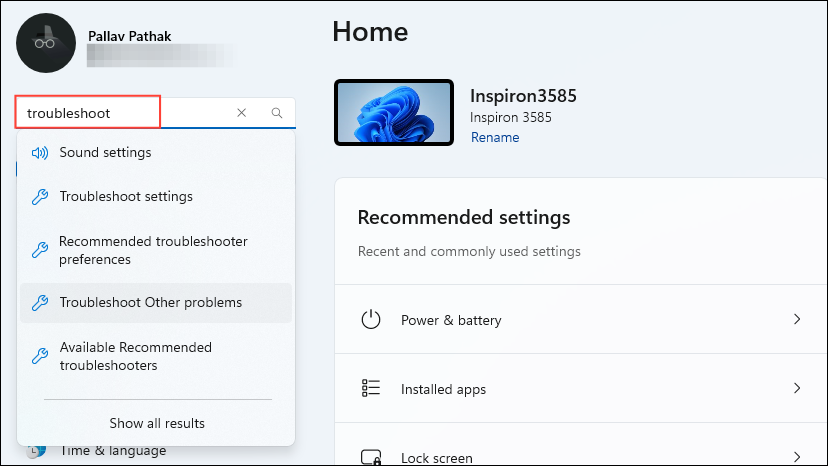
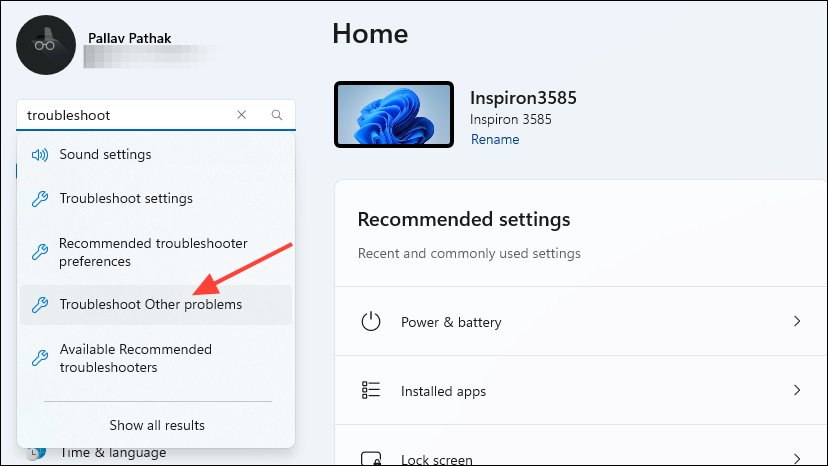
- Click on 'Troubleshoot Other Problems' from the list of options that appear.
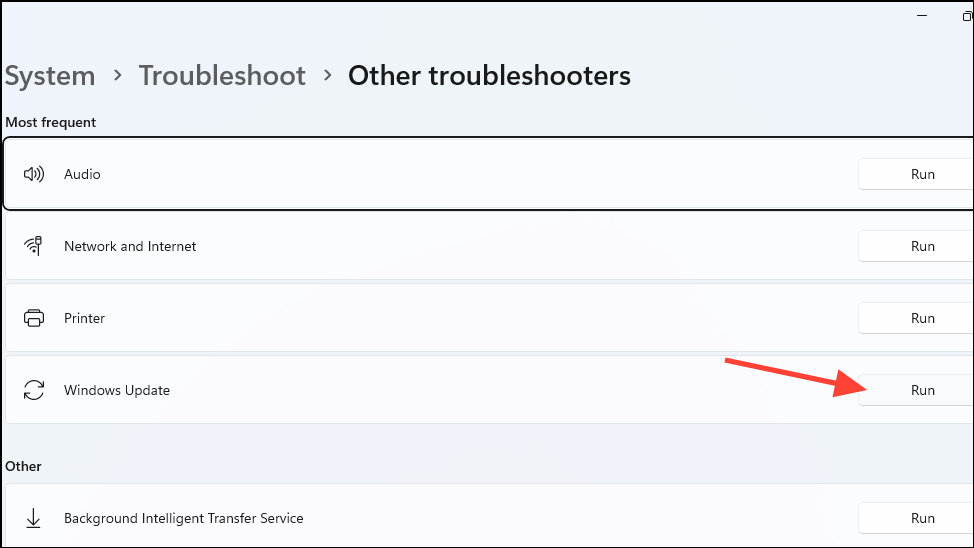
- On the next page, click on the 'Run' button on the right of the Windows Update option.
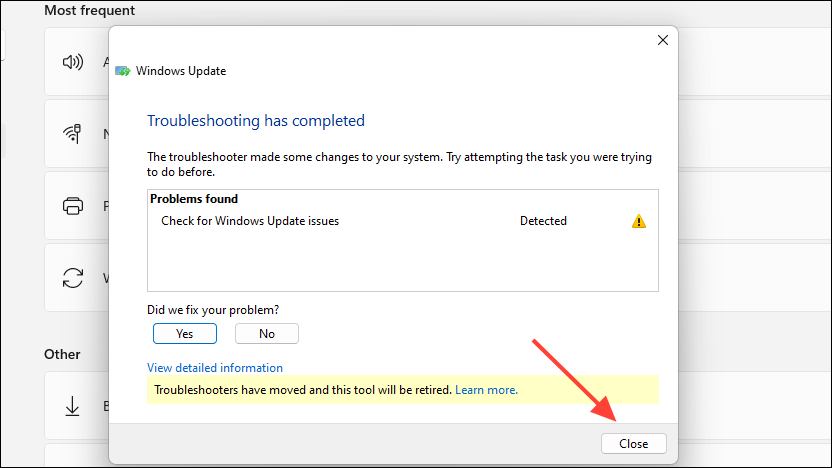
- Allow the troubleshooter to run. It may recommend certain actions, such as restarting your PC. Close the troubleshooter before performing the actions recommended and see if that fixes the blank page issue.
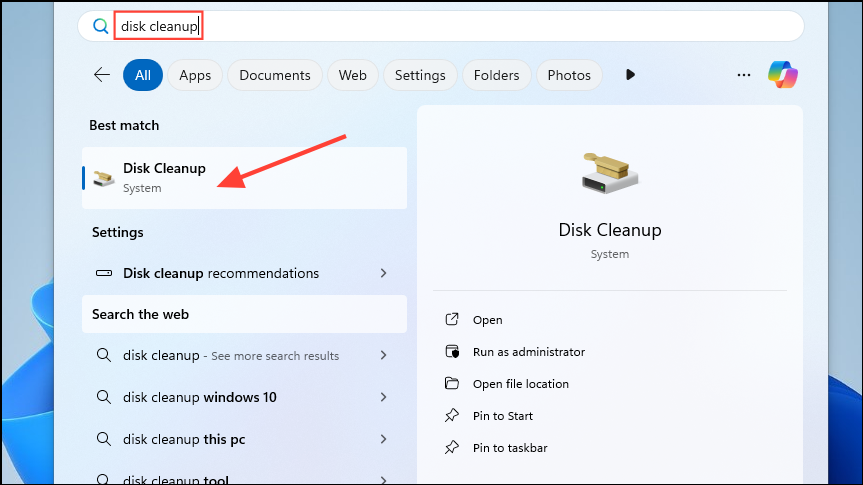
Fix 2: Run Disk Cleanup
- Search for 'Disk Cleanup' in the Start menu or search box and click on it when it appears.
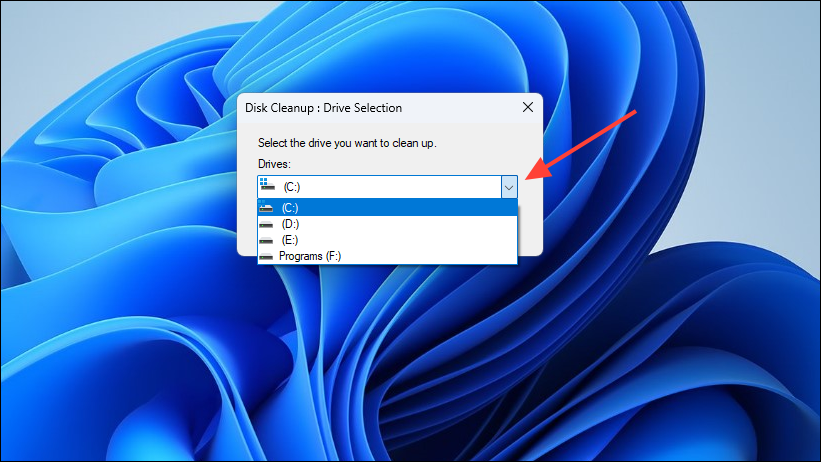
- The Disk Cleanup utility will first let you select the drive you want to clean up. Click on the arrow to access the drop-down menu which lists all the drives and click on the drive you want to select.
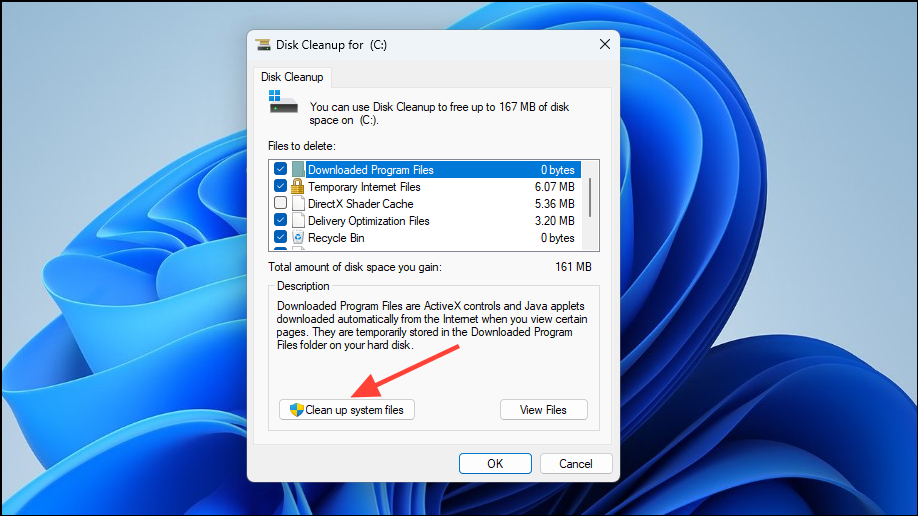
- Once you click on OK, a new dialog box will appear where you can choose the files to delete. Click on the checkboxes next to the ones you want to remove before clicking on the 'OK' button.

- If you want, you can also remove system files by clicking on the 'Clean up system files' button.
- Again you will have to select the drive from where you want to remove the files and then select the files from the dialog box that appears. Then click on OK.
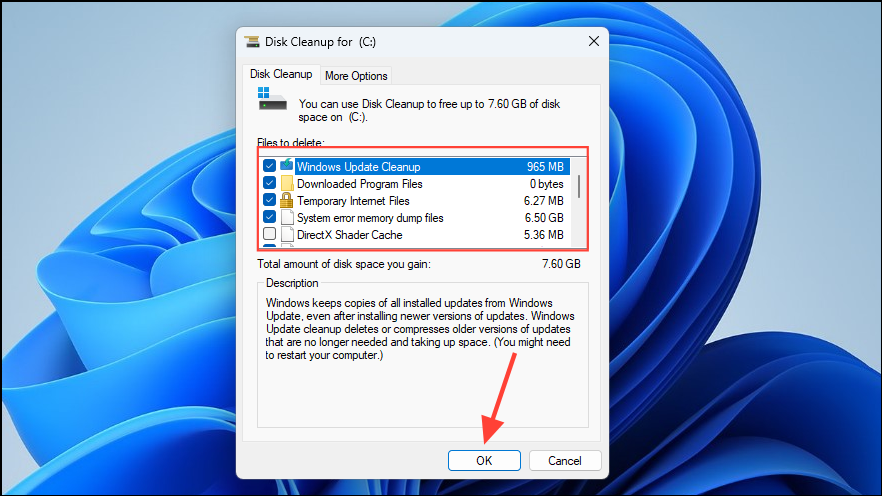
- Depending on the size of the files you have selected for deletion, it can take a few minutes for Windows to get rid of them. Once the process is complete, check the Windows Update page again and see whether it is still blank.
Fix 3: Run SFC and DISM scans
SFC or System File Checker scans your system files and checks for problems that can affect the functioning of your PC, while DISM repairs the corrupted files.
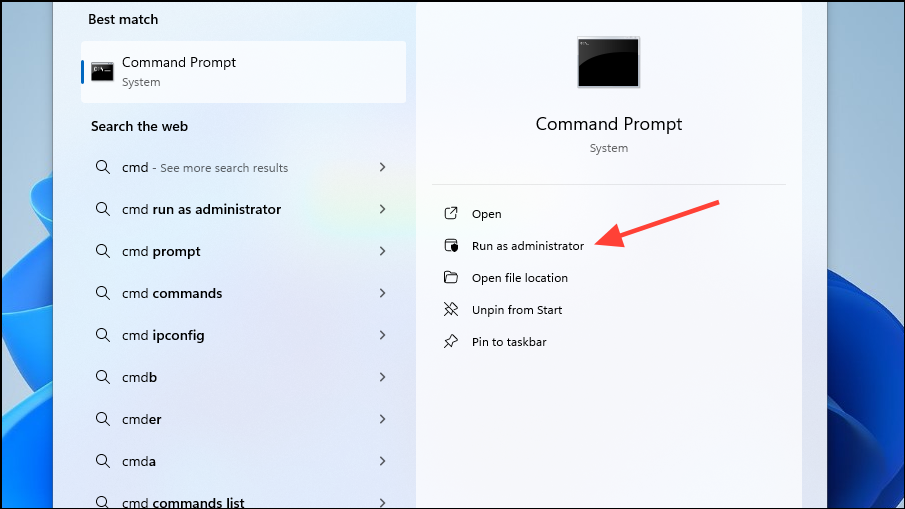
- In the Start menu, type
cmdand then launch the Command Prompt utility as an administrator.
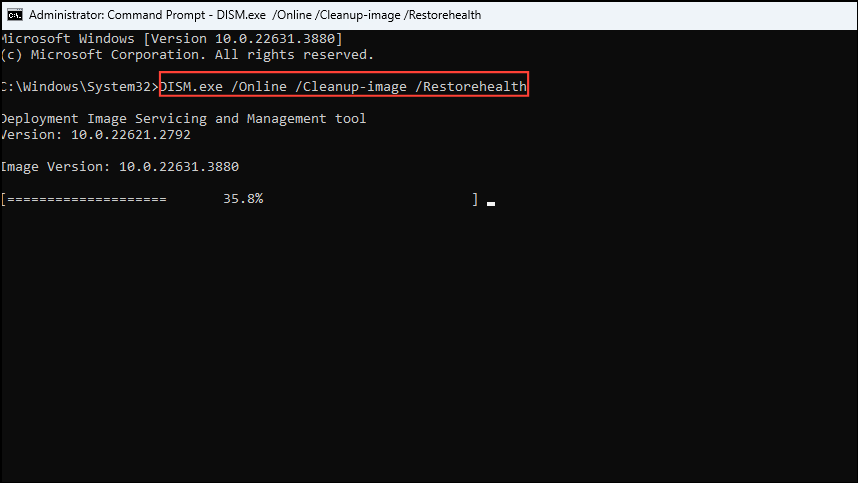
- In the command prompt window that appears, type
DISM.exe /Online /Cleanup-image /Restorehealthand press the 'Enter' key and the scan will start.
- Once the scan is complete, type
sfc /scannowand press Enter again. This scan can take some time, depending on your system.
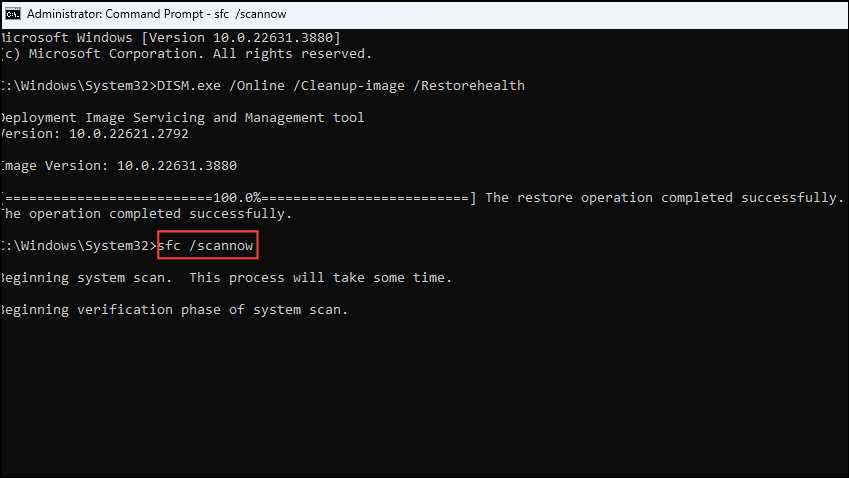
- Once the process completes, close the command prompt window and check the Windows Update page again.
Fix 4: Clear Windows Update Cache
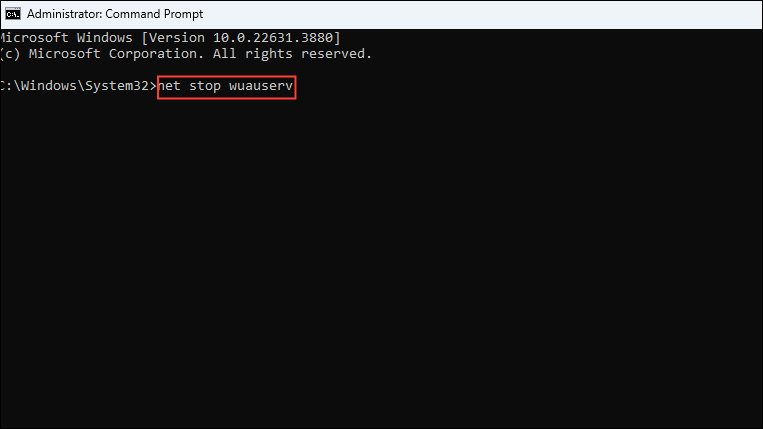
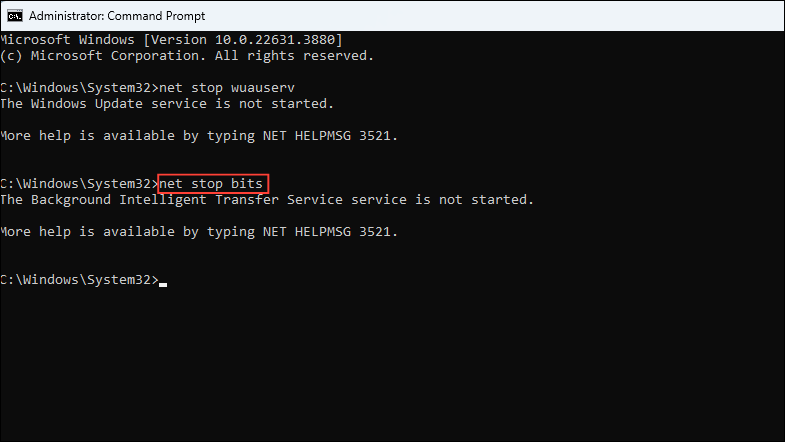
- Open Command Prompt as an administrator and then type
net stop wuauservbefore pressing the 'Enter' key.
- Follow this with the command
net stop bitsand press Enter again.
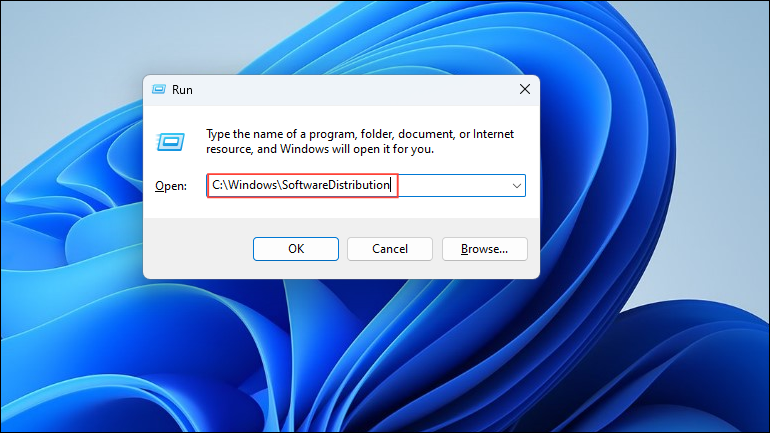
- Next, open the 'Run' utility using the
Win + Rshortcut. When it opens, typeC:\Windows\SoftwareDistributionand press Enter.
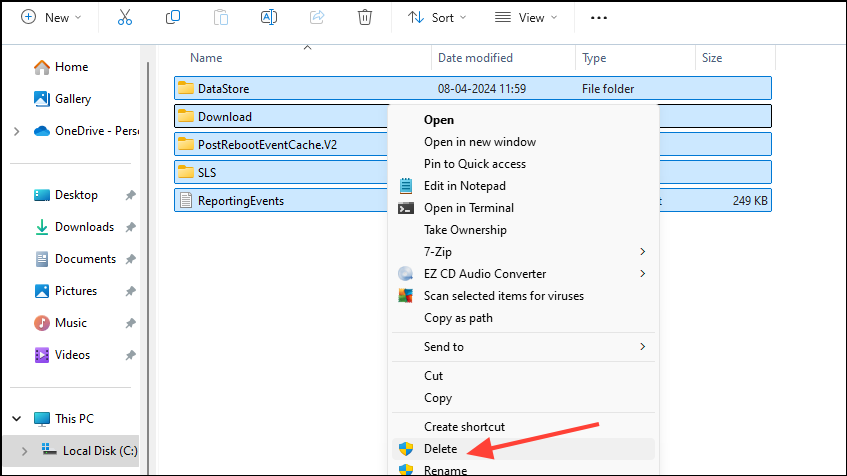
- In the new window that opens up, select all the folders and delete them.
- Open the command prompt utility as administrator again and type
net start wuauservbefore pressing the 'Enter' key.
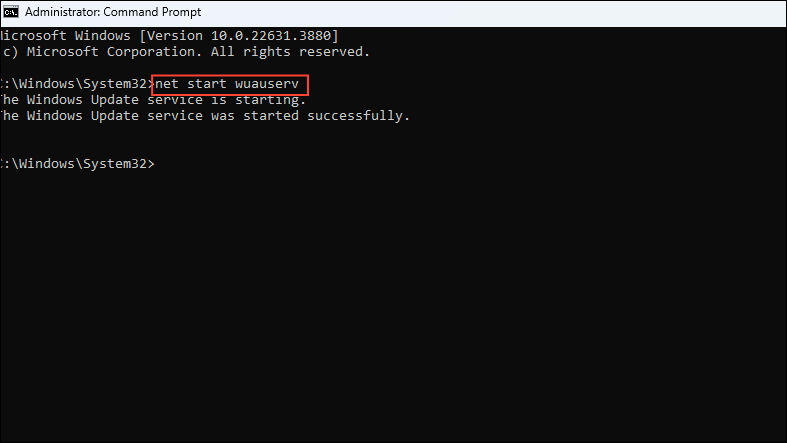
- Then type
net start bitsand press Enter again. Then restart your PC and check the Windows Update page again.

Fix 5: Use Startup Repair
Startup Repair lets you repair system files that may be causing your Windows Update page to appear blank.
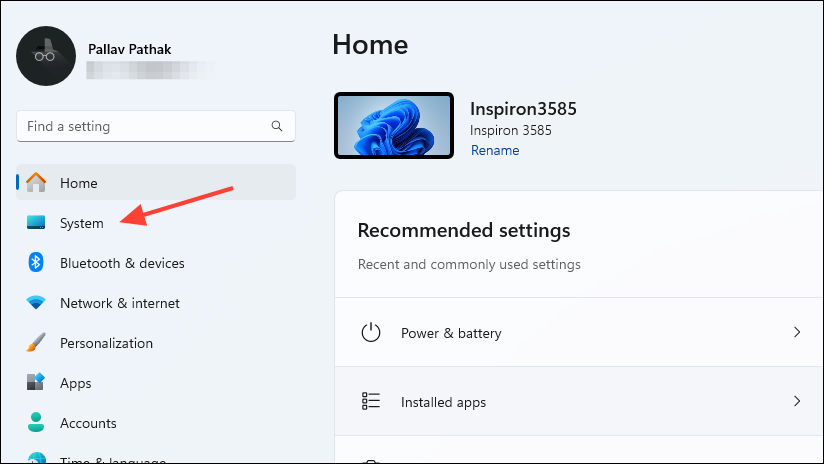
- Open the Settings app and click on 'System' on the left.
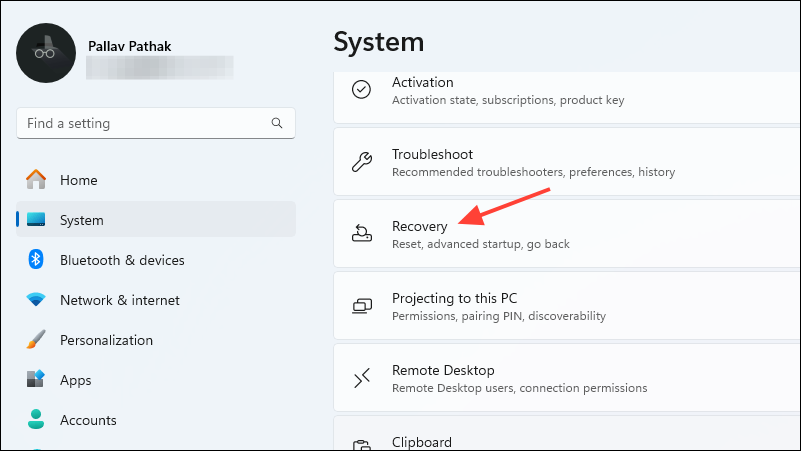
- On the System page, click on the 'Recovery' option.
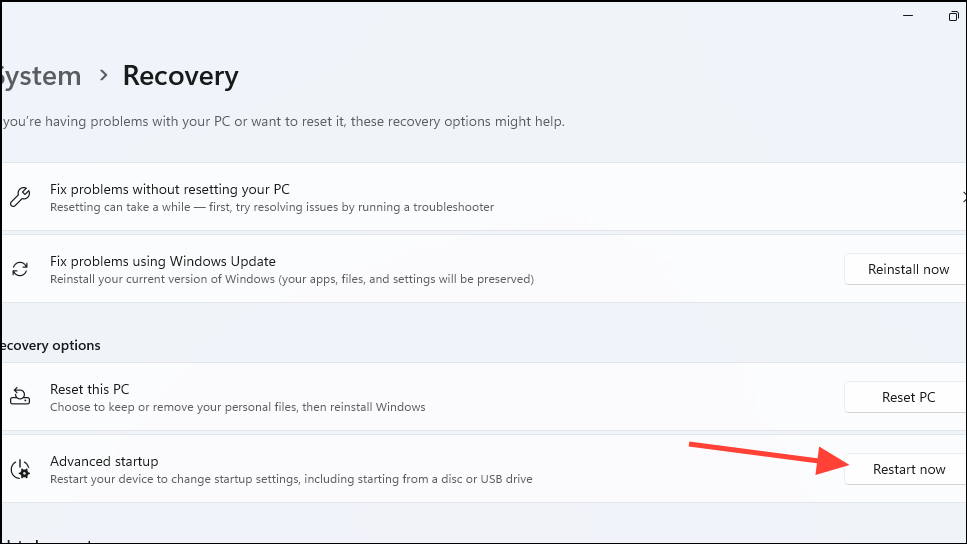
- Click on the 'Restart Now' on the right of the 'Advanced Startup' option.
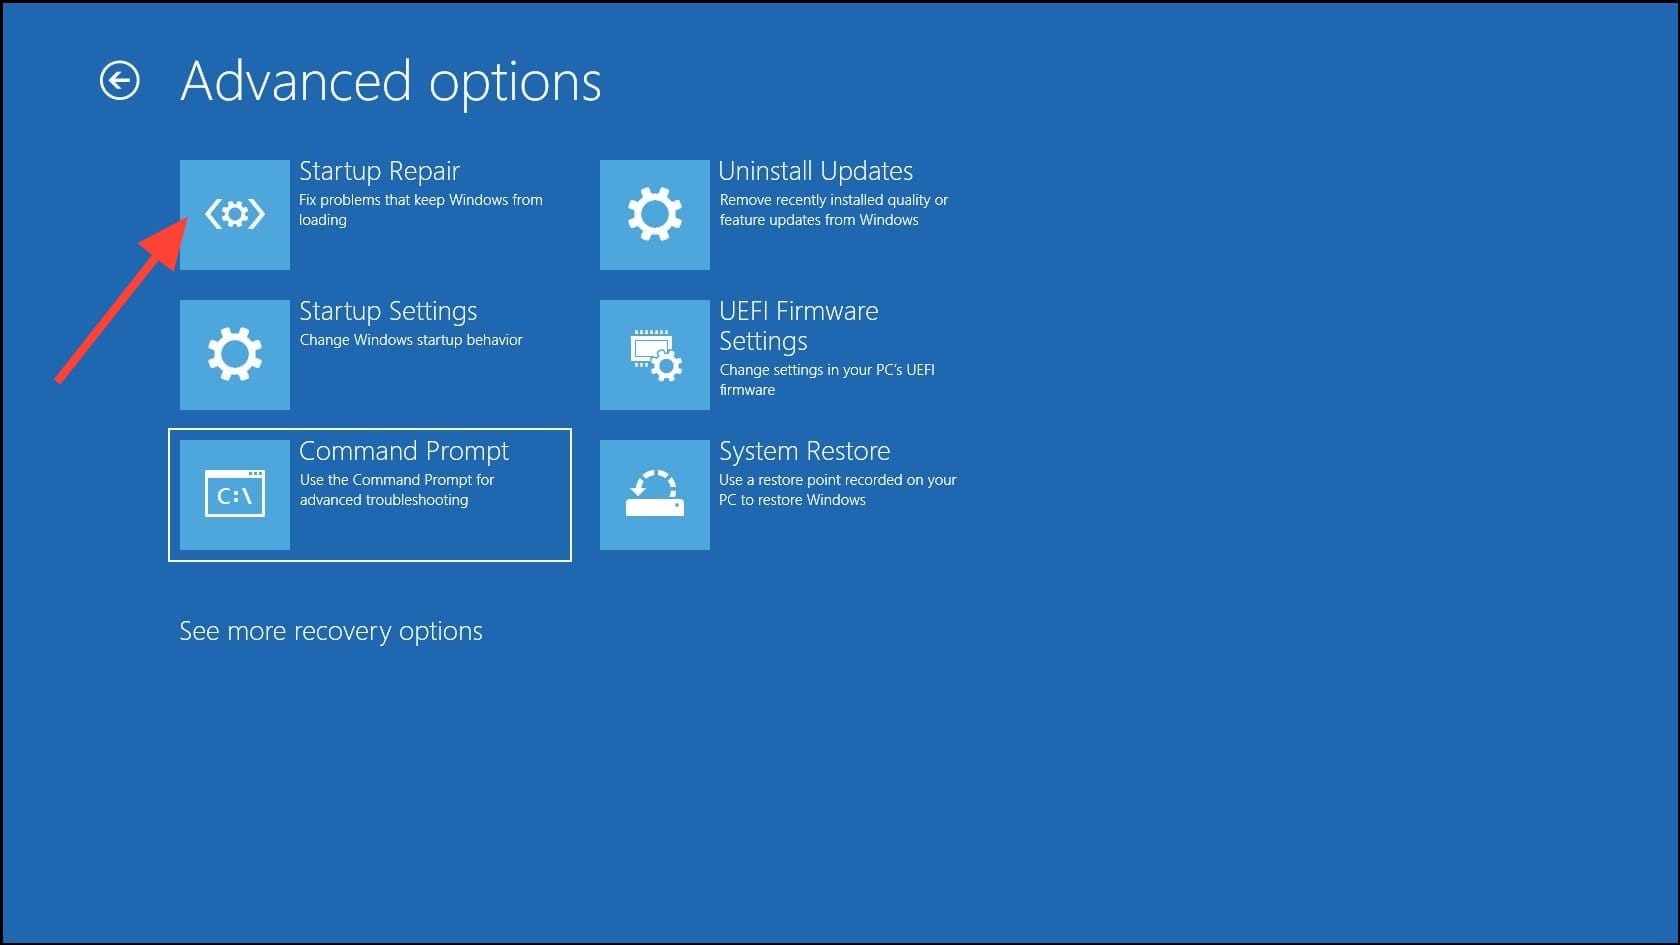
- When your computer restarts and you see the Advanced Options screen, click on 'Startup Repair'. Windows will try to repair your PC after which you can restart and check the Windows Update page again.
Fix 6: Use System Restore
If you had created a restore point earlier, you can use the System Restore feature to revert your PC to an earlier state when Windows Update was working perfectly.
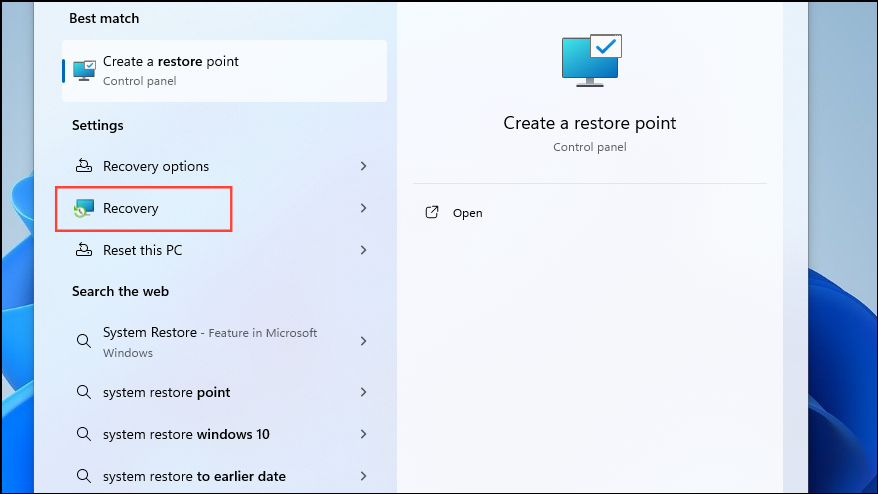
- Open the Start menu, type
System Restore, and click on 'Recovery'.
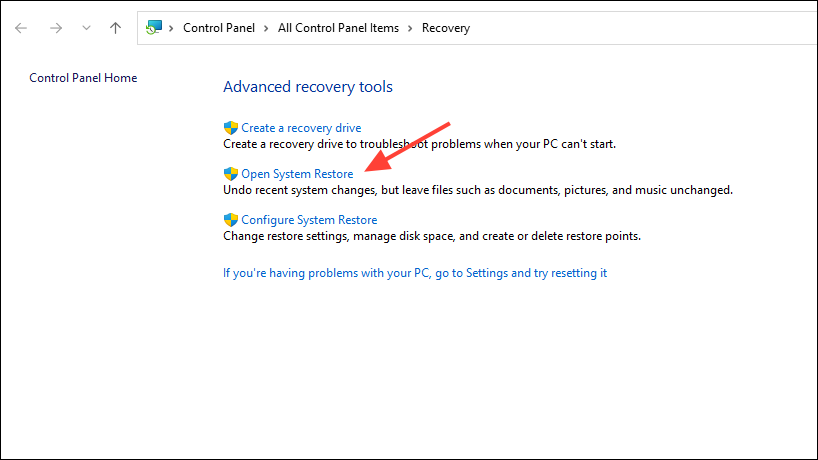
- On the Recovery page, click on 'Open System Restore'.
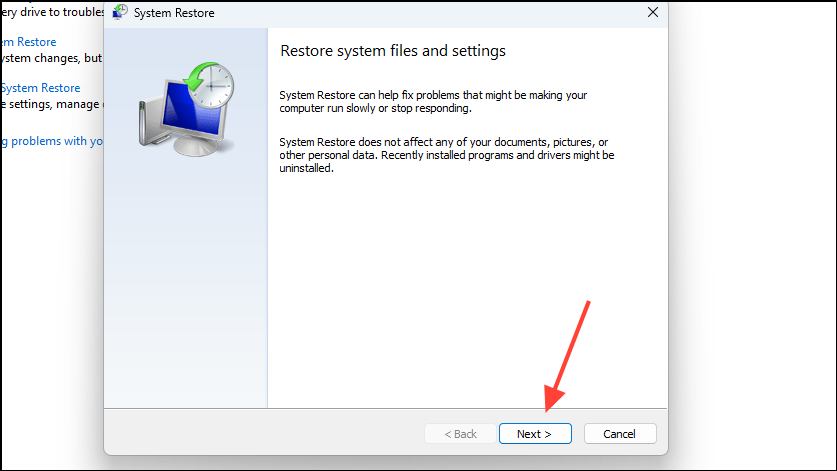
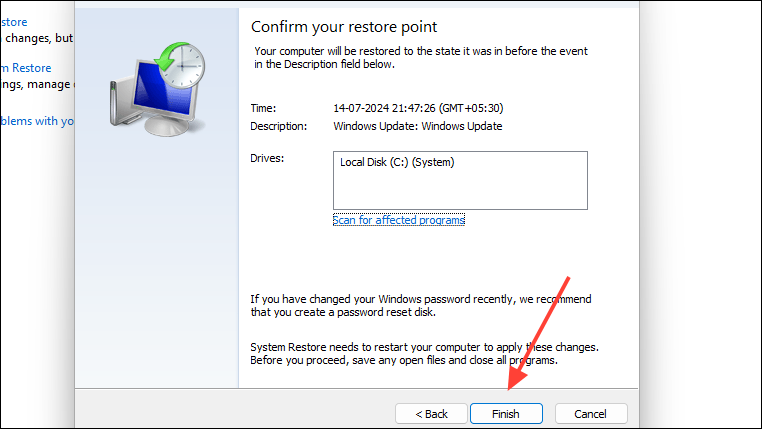
- This will open up the System Restore utility. Click on the 'Next' button.
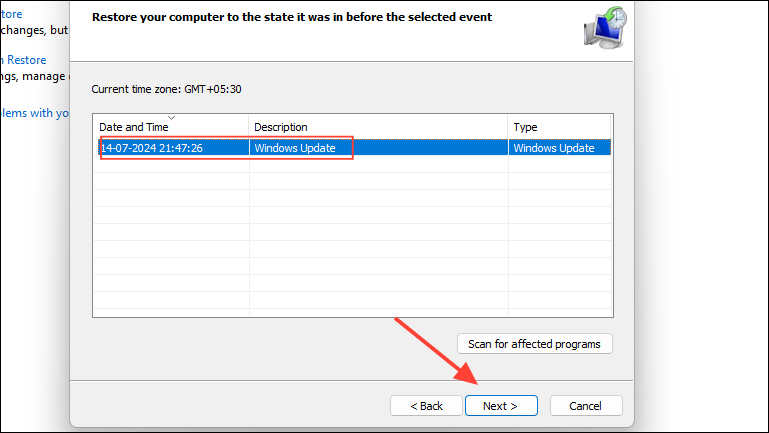
- On the next page, you will see all your previously created restore points. Click on the restore point you want to select and then click on the 'Next' button.
- Finally, click on the 'Finish' button, and your PC will restart and go back to the restore point you selected. You can check whether Windows Update is working properly now.
Fix 7: Delete the Windows Update Store folder
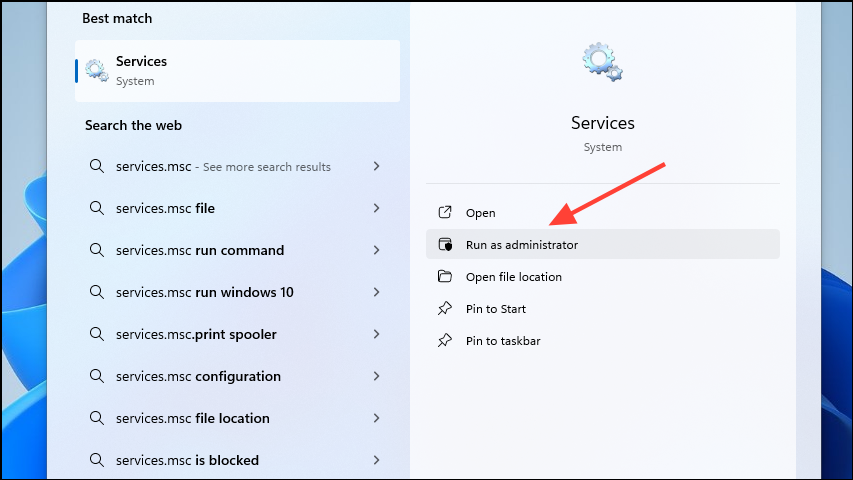
- Open the Start menu, type
services.msc, and click on 'Run as administrator'.
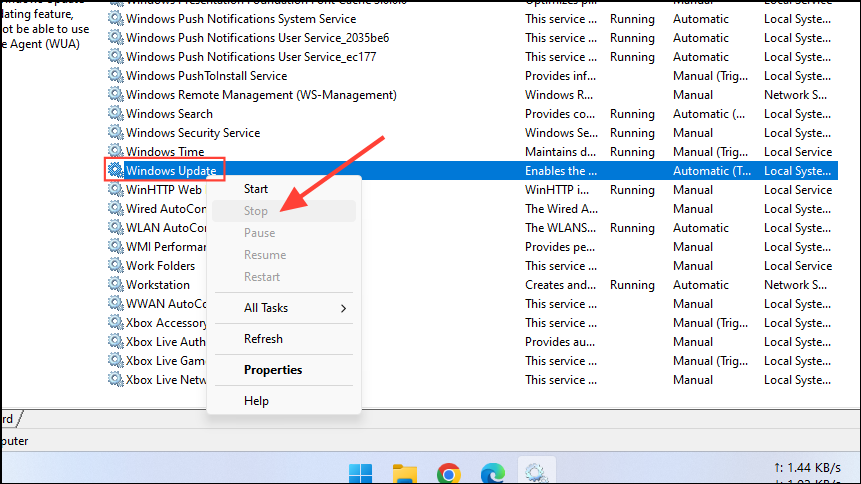
- In the list of services that appear, look for Windows update and right-click on it before clicking on the 'Stop' option. If the service is already stopped, the option will be grayed out.
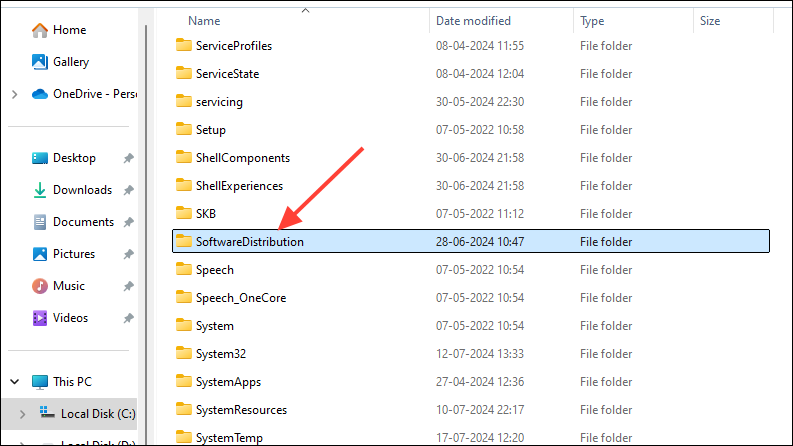
- Open Windows Explorer, navigate to
C:\Windowsand delete the 'SoftwareDistribution' folder. Windows will recreate the folder the next time you run Windows Update. Restart your PC and check the update page again.
Fix 8: Restore default permissions to Windows Update files
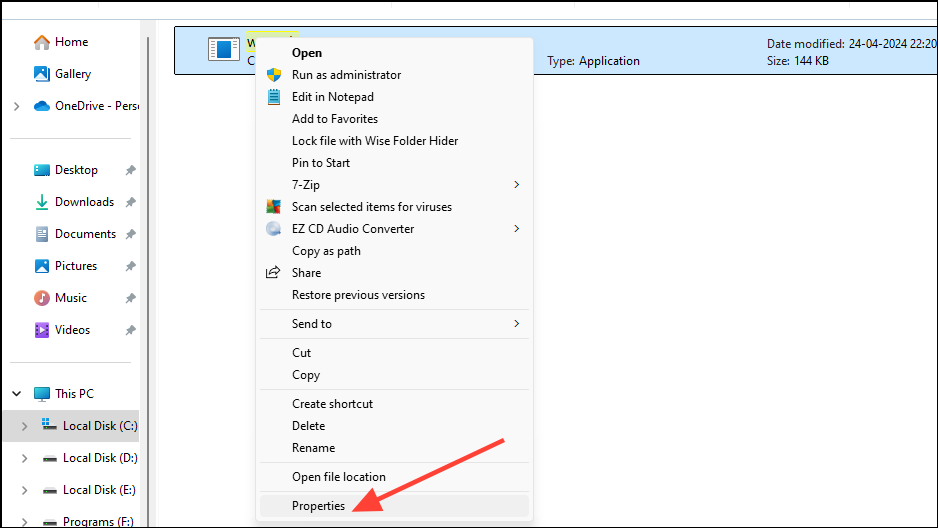
- Navigate to the
C\Windows\System32folder using Windows Explorer. - Search for the 'wuauclt.exe' file within the folder. When you've located it, right-click on it and click on 'Properties'.
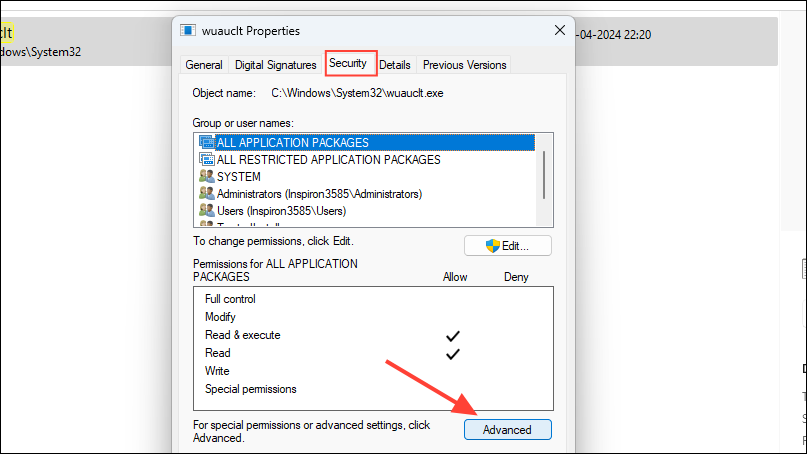
- In the Properties menu, click on the 'Security' tab at the top and then on the 'Advanced' button.
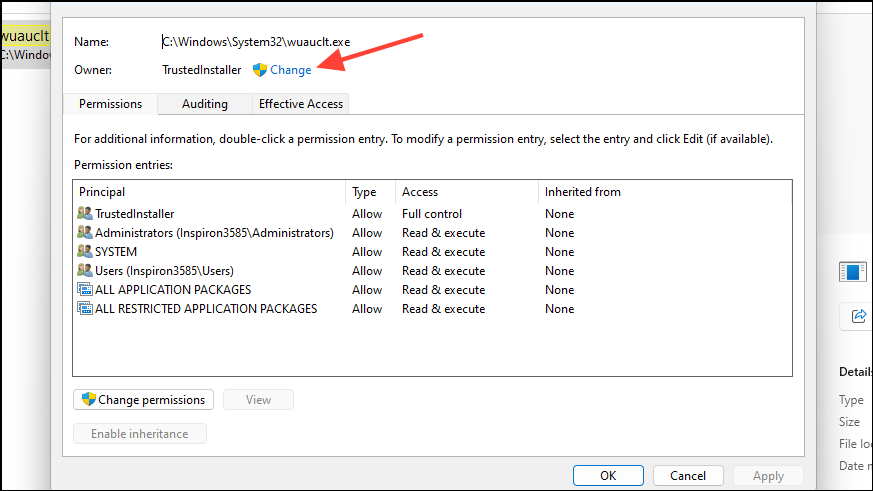
- Next, click on 'Change' on the window that appears.
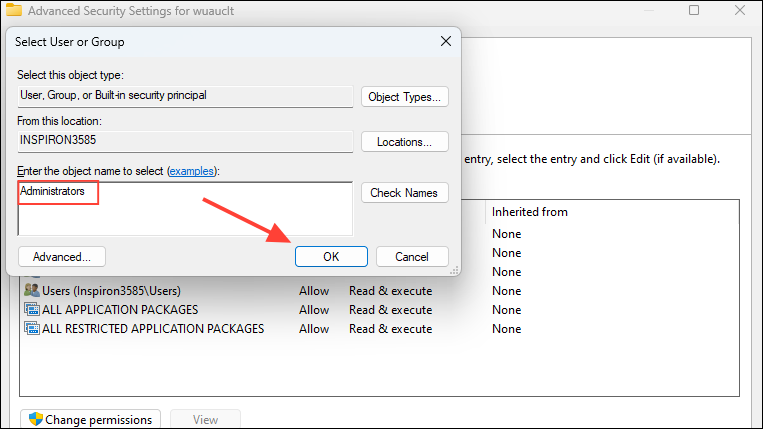
- In the box that appears, type
Administratorsand click on the 'OK' button.
- Click on OK again to close the Properties box and open it again once the changes are applied.
- Go to the 'Security' tab again and click on 'Administrators' in the list of users. Then click on the 'Edit' button.
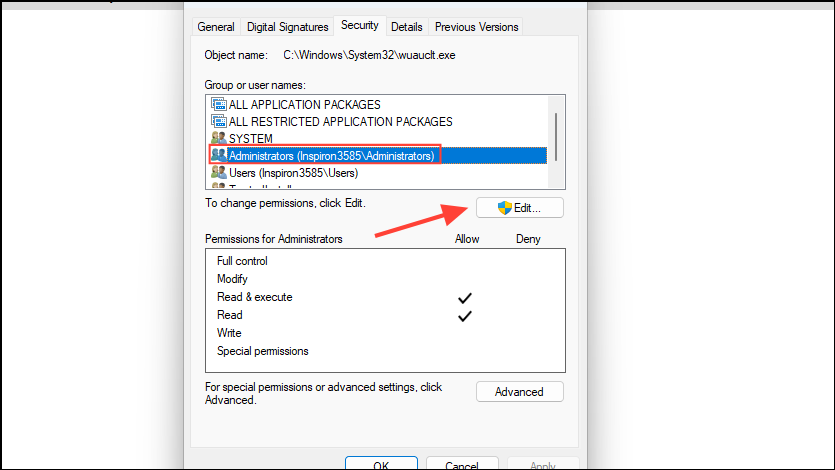
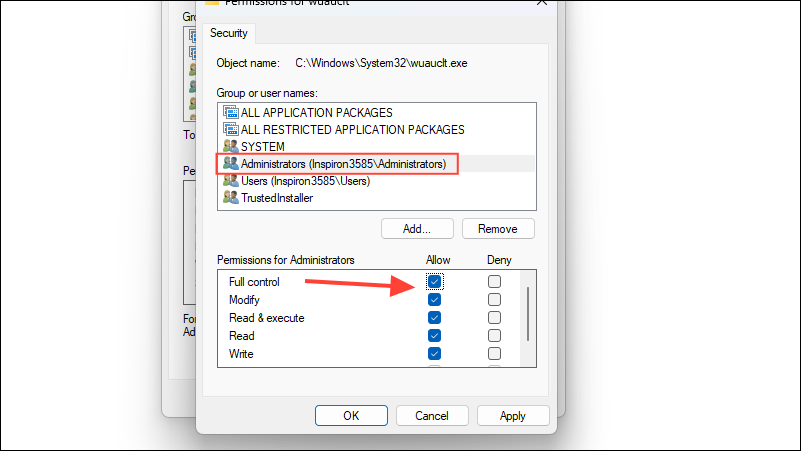
- In the list of Permissions, click on 'Full Control' and click on OK. Repeat the steps for the 'SYSTEM' account while ensuring it has 'Read and execute' permissions.
- Click on the 'OK' button before restarting your PC and checking the Windows Update page.
Fix 9: Perform a clean boot
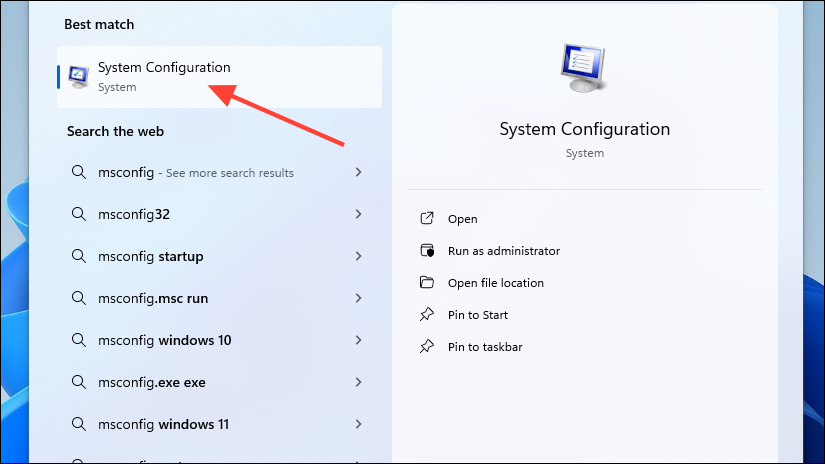
- Open the Start menu, type
msconfig, and click on System Configuration.
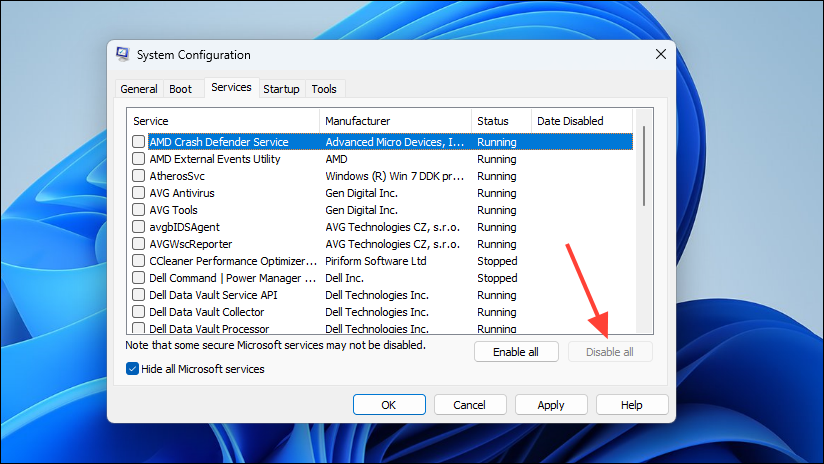
- In the System Configuration tool, click on the 'Services' tab and then click on the checkbox next to 'Hide all Microsoft services'.
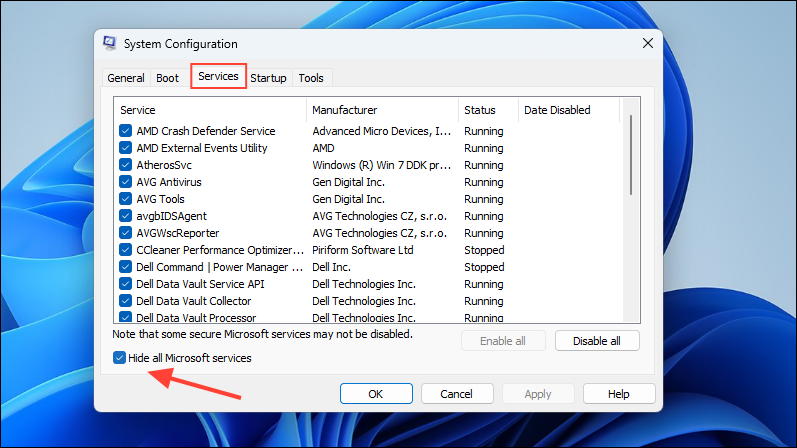
- Then click on the 'Disable all' button to disable all non-Microsoft services.
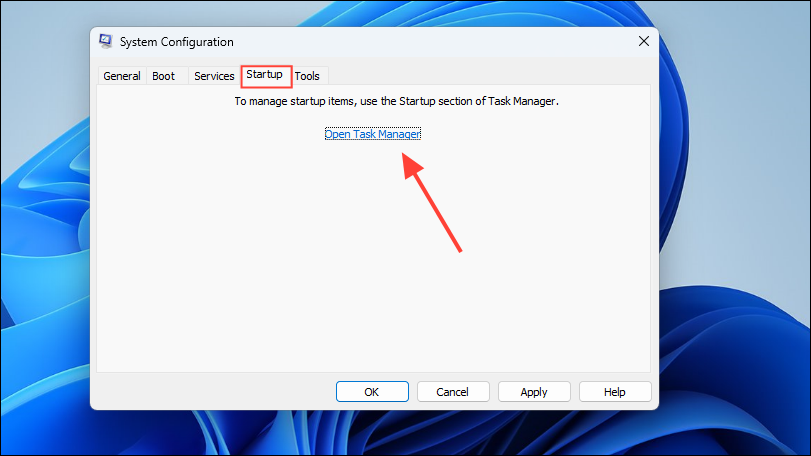
- Next, click on the 'Startup' tab at the top and then on 'Open Task Manager'.
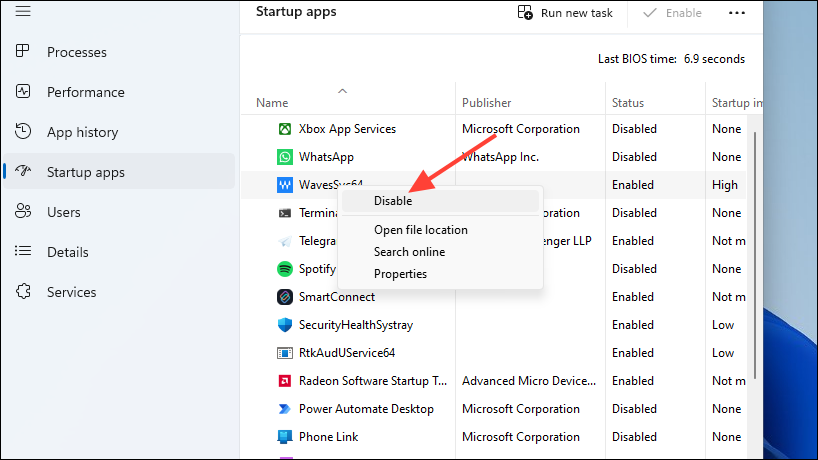
- Once the Task Manager opens, right-click on each application on the right side and click on 'Disable'.
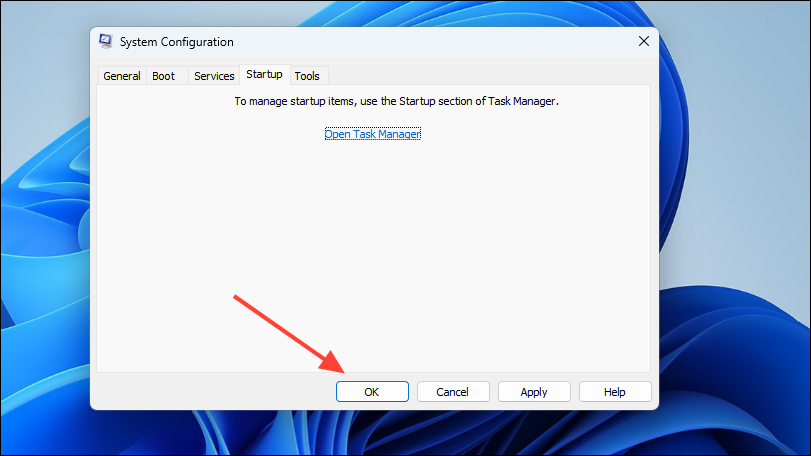
- Close the Task Manager, and click on the 'OK' button in the System Configuration utility before rebooting your PC.
Fix 10: Restore the Windows Store and app
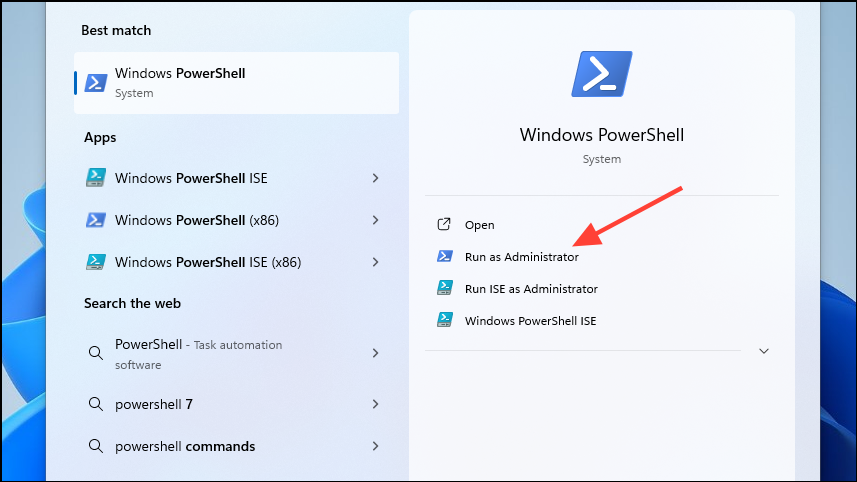
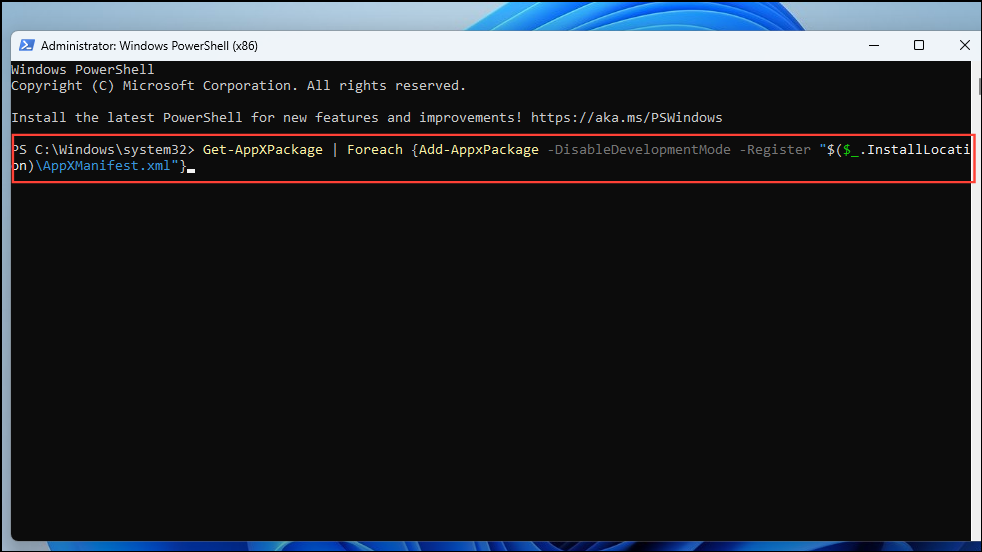
- Search for Windows Powershell or Terminal in the Start menu and launch it with administrator privileges.
- In the Powershell window, type
Get-AppXPackage | Foreach {Add-AppxPackage -DisableDevelopmentMode -Register "$($_.InstallLocation)\AppXManifest.xml"}and press the 'Enter' key.
- Restart your PC once the process is complete and then open Powershell again. Type the following commands into the Powershell window one by one, pressing Enter after each one.
net stop bitsnet stop wuaservnet stop appidsvcnet stop cryptsvcDel %ALLUSERSPROFILE%\ApplicationData\Microsoft\Network\Downloader\*.*"rmdir %systemroot%\SoftwareDistribution /S /Qrmdir %systemroot%\system32\catroot2 /S /Qregsvr32.exe /s atl.dllregsvr32.exe /s urlmon.dllregsvr32.exe /s mshtml.dllnetsh winsock resetnetsh winsock reset proxynet start bitsnet start wuauservnet start appidsvcnet start cryptsvc
- Reboot your PC and check the Windows Update page.
Fix 11: Add Microsoft Windows Update Sites to Trusted Sites
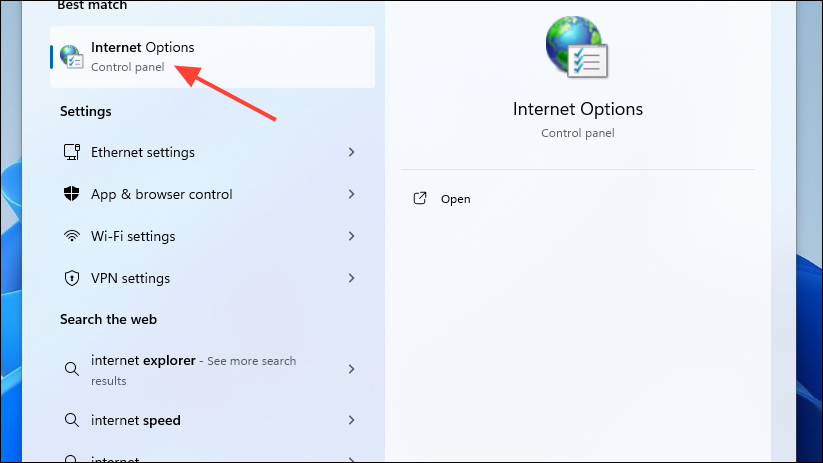
- Open the Start menu, type
Internet Optionsand click on it when it appears.
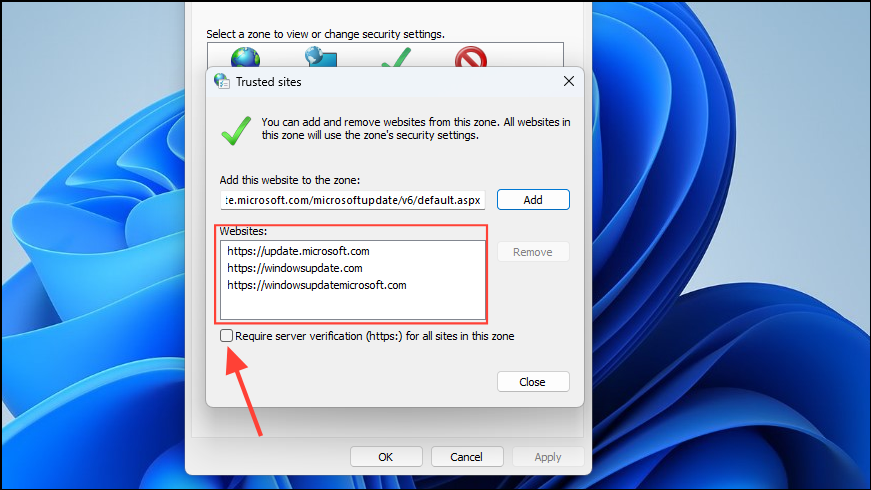
- When the Internet Options dialog box appears, go to the Security tab at the top, then click on 'Trusted Sites' before clicking on the 'Sites' button.

- In the pop-up that appears, uncheck the 'Require server verification' option and paste the following websites before clicking on the 'Apply' button:
https://*.windowsupdate.microsoft.comhttps://*.windowsupdate.comhttps://update.microsoft.comhttps://update.microsoft.com/microsoftupdate/v6/default.aspx
- Restart your computer after adding the website and check the Windows Update page again.
Some additional tips
- Make sure you haven't installed third-party programs that interfere with Windows Updates.
- Perform a virus and malware check to ensure your PC does not have a virus that may be causing the problem.
- Create a new user and check whether the Windows Update page appears for that user.
- Check that SSL 2 and SSL 3 are enabled in Internet Options.
- Disconnect external peripherals and update third-party drivers.
- Make sure your PC has enough space to install updates.
In many cases, a blank Windows Update page problem can be fixed with simple solutions, like running the Windows Update troubleshooter. However, this may not always be the case, and you may have to try out other fixes to get the issue resolved. As always, we recommend having a backup in place in case something goes wrong. If none of the above solutions work, consider reinstalling Windows 11 by downloading the official ISO from Microsoft's website.