
The “Windows Security Center service can’t be started” error disrupts built-in system protection and leaves your PC vulnerable to threats. On Windows 11, this issue often appears when launching the Windows Security app, attempting to activate Microsoft Defender, or after malware removal. The error may result from misconfigured services, corrupted system files, incorrect registry settings, or interference from third-party antivirus tools. Resolving this problem restores real-time monitoring and system health notifications, ensuring your device remains protected.
Repair Windows Using In-Place Upgrade Installation
When the Security Center service is missing from the Services list or cannot be started after system file repairs, performing an in-place upgrade installation is the most reliable method. This process reinstalls Windows core files and services—including Security Center—without affecting your personal files or installed applications.
Step 1: Sign in with an administrator account and ensure at least 20 GB of free space is available on your system drive (C:).
Step 2: Download the Media Creation Tool from the official Microsoft site: https://aka.ms/Windows10 (this tool works for both Windows 10 and 11).
Step 3: Run the Media Creation Tool, accept the license agreement, and select Upgrade this PC now. Wait while the tool downloads setup files.
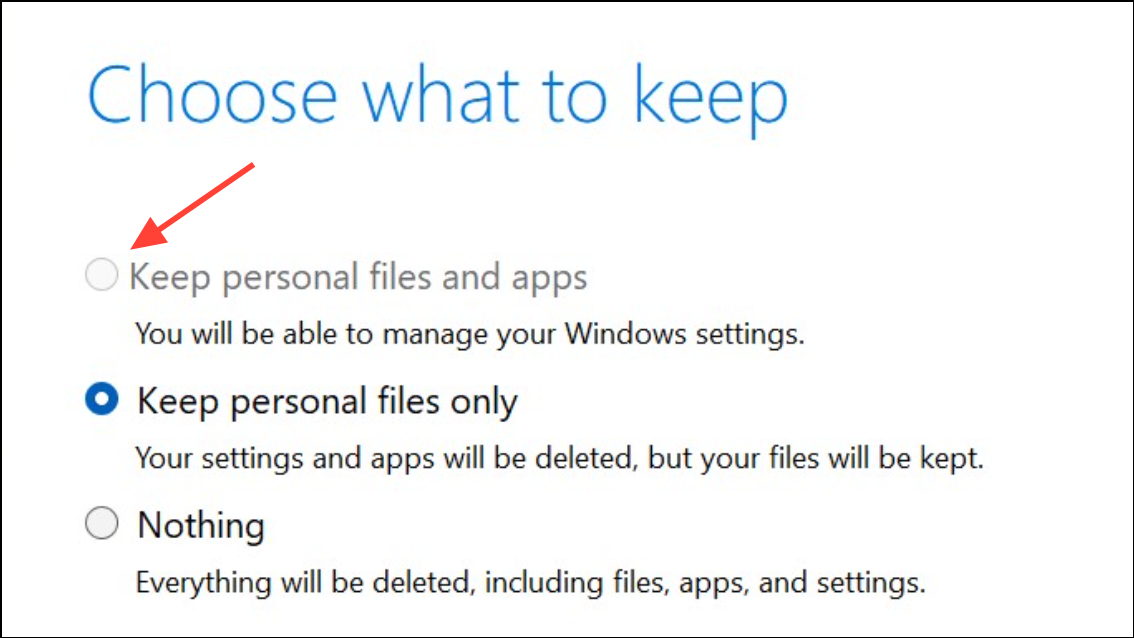
Step 4: When prompted, choose Keep personal files and apps to preserve your data and programs.
Step 5: Follow the on-screen instructions to complete the upgrade. The system will restart several times during the process.
After the upgrade, open the Windows Security app to check if the Security Center service works correctly. This method restores missing or corrupted system components that prevent the service from running.
Enable Windows Security Center in the Registry Editor
If the Security Center service is present but fails to start, incorrect registry values may be disabling it. Adjusting these values reactivates the service.
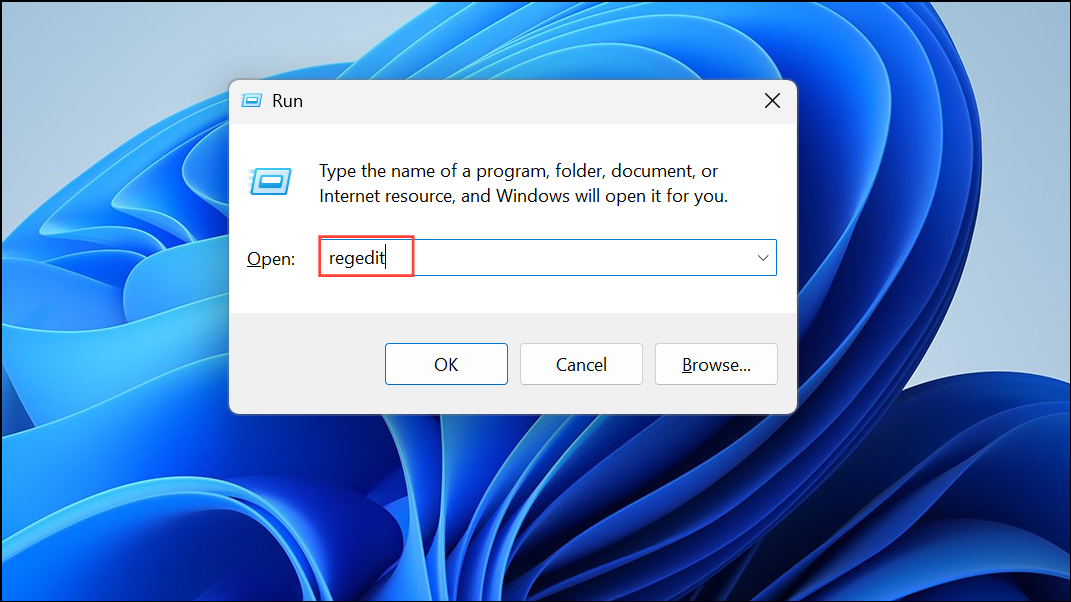
Step 1: Press Win + R to open the Run dialog, type regedit, and press Enter. Approve the User Account Control prompt.
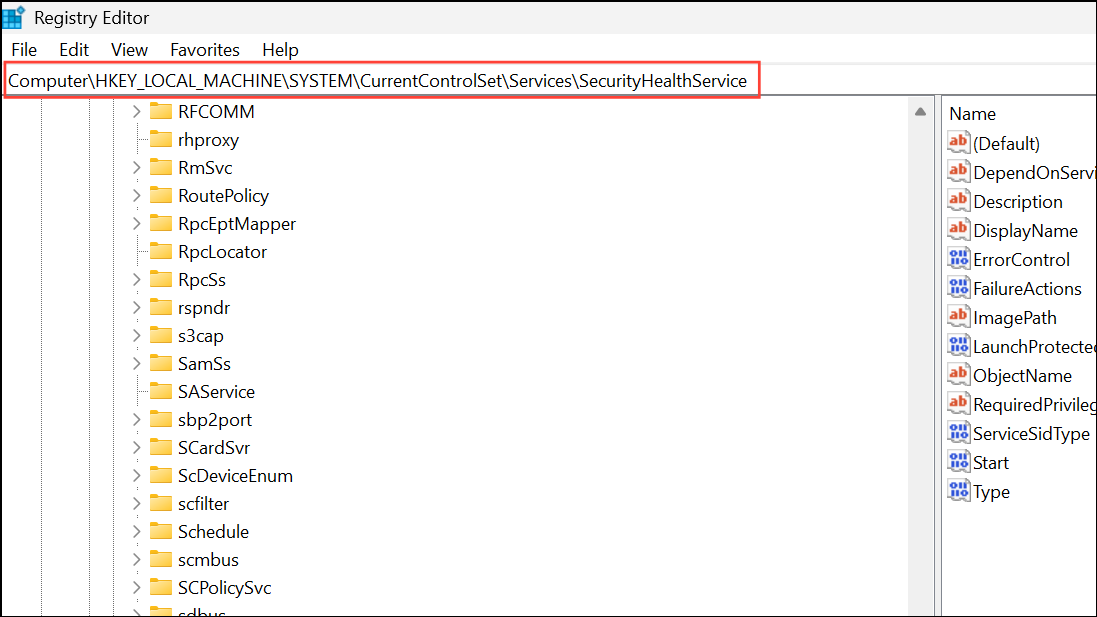
Step 2: Navigate to HKEY_LOCAL_MACHINE\SYSTEM\CurrentControlSet\Services\SecurityHealthService in the Registry Editor.
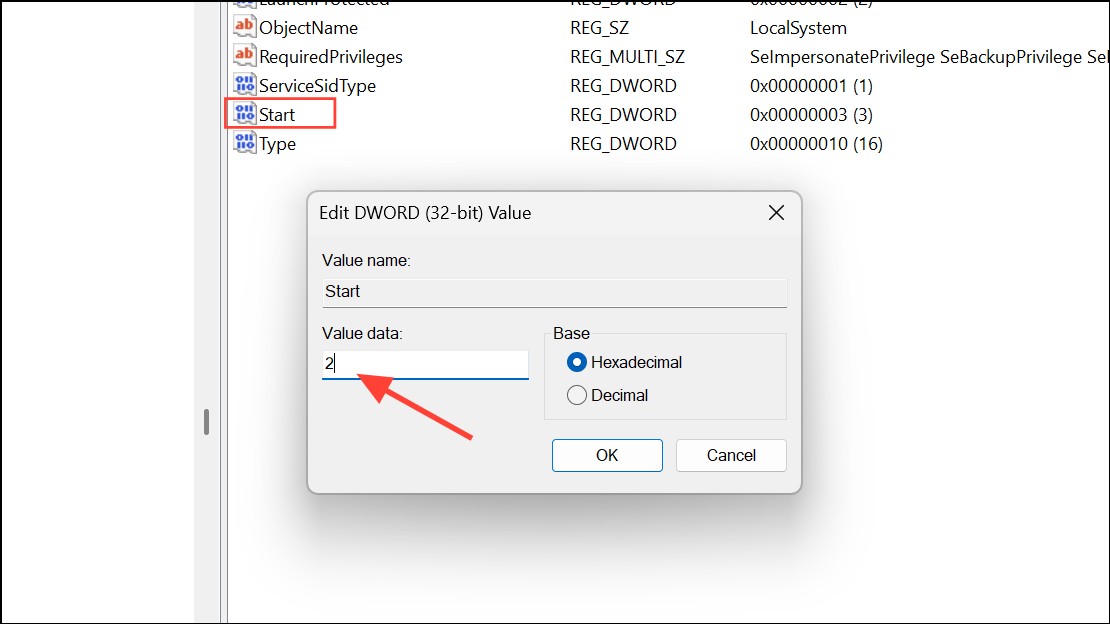
Step 3: Double-click the Start value in the right pane. If the value is set to 4, change it to 2 and click OK. This sets the service to start automatically.
Step 4: Repeat the process for HKEY_LOCAL_MACHINE\SYSTEM\CurrentControlSet\Services\wscsvc.
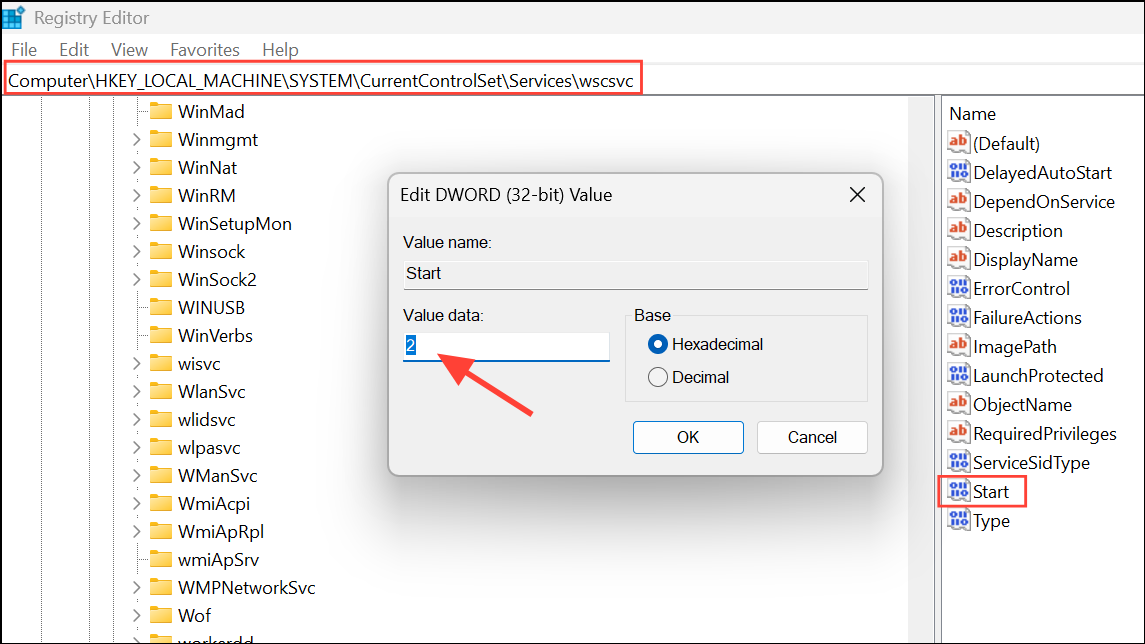
Step 5: Close the Registry Editor and restart your computer. This action restores the service’s ability to start with Windows.
Configure Security Center and Dependent Services
Security Center relies on specific system services and correct logon settings. Misconfigurations can prevent it from starting or cause it to stop automatically.
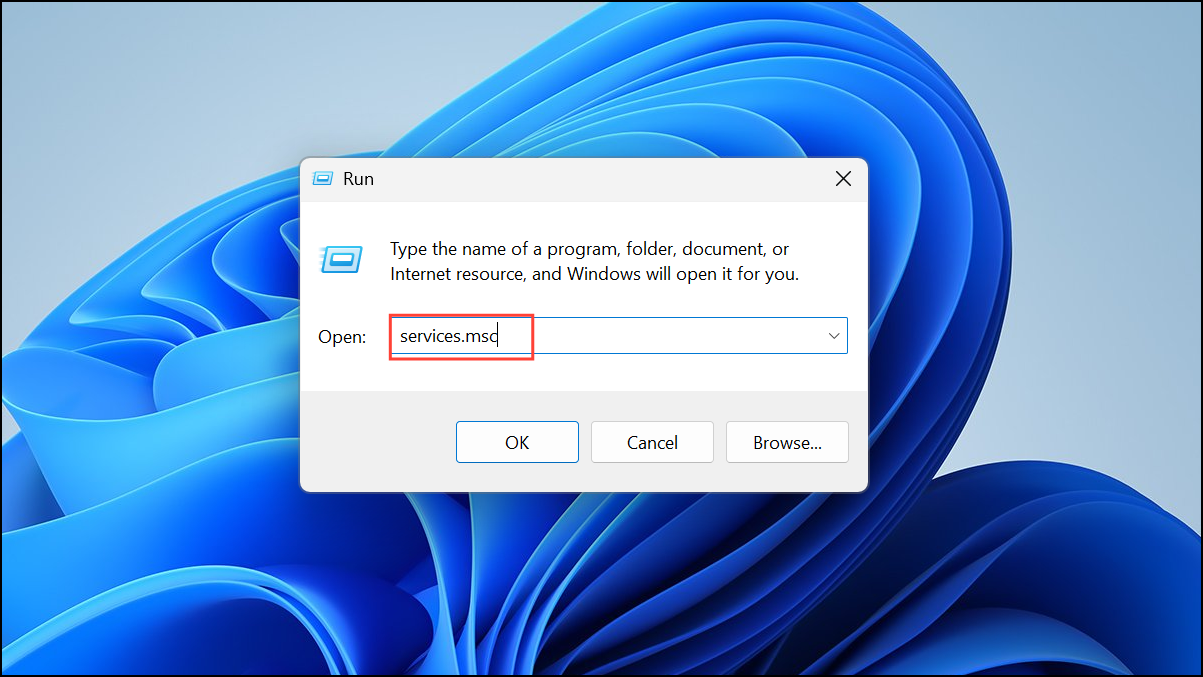
Step 1: Press Win + R, type services.msc, and press Enter to open the Services window.
Step 2: Locate Security Center. If it’s missing, use the in-place upgrade method above.
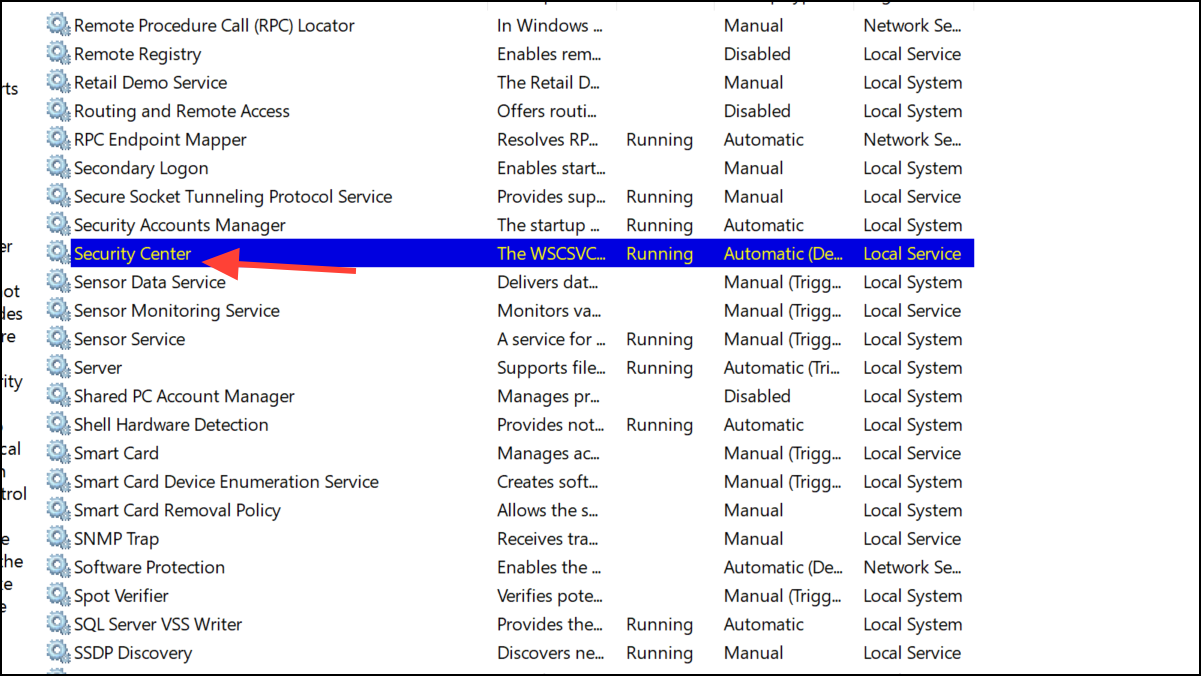
Step 3: Right-click Security Center and select Properties. Set Startup type to Automatic (Delayed Start) and click Start if the service is not running.
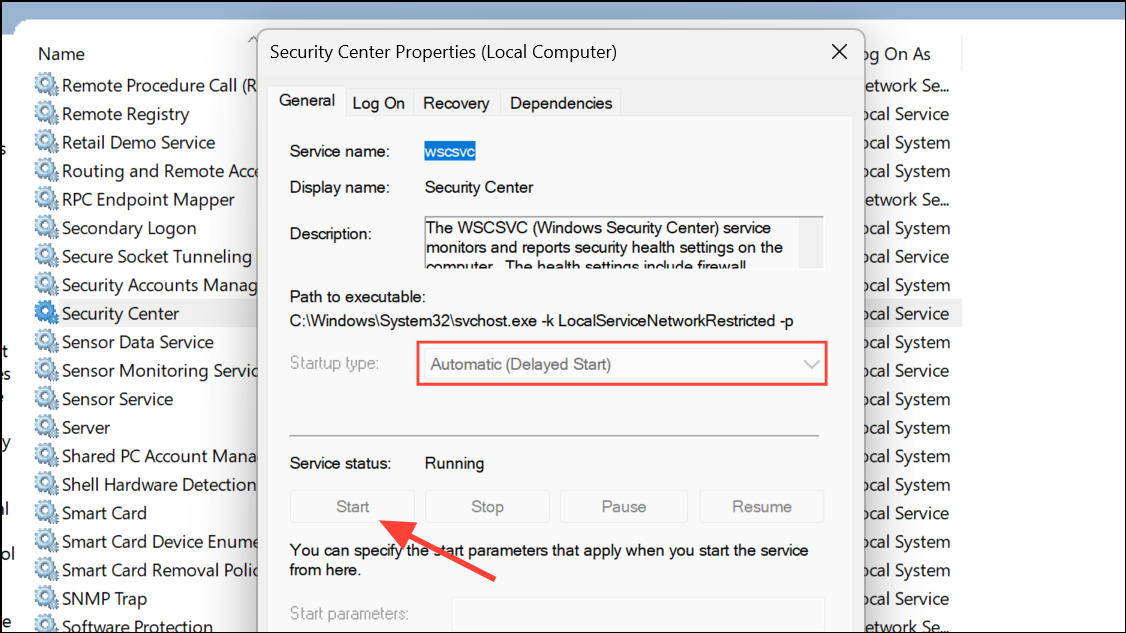
Step 4: Switch to the Log On tab. Select This account, click Browse, enter Local Service, and confirm. Enter the password if prompted, then apply changes.
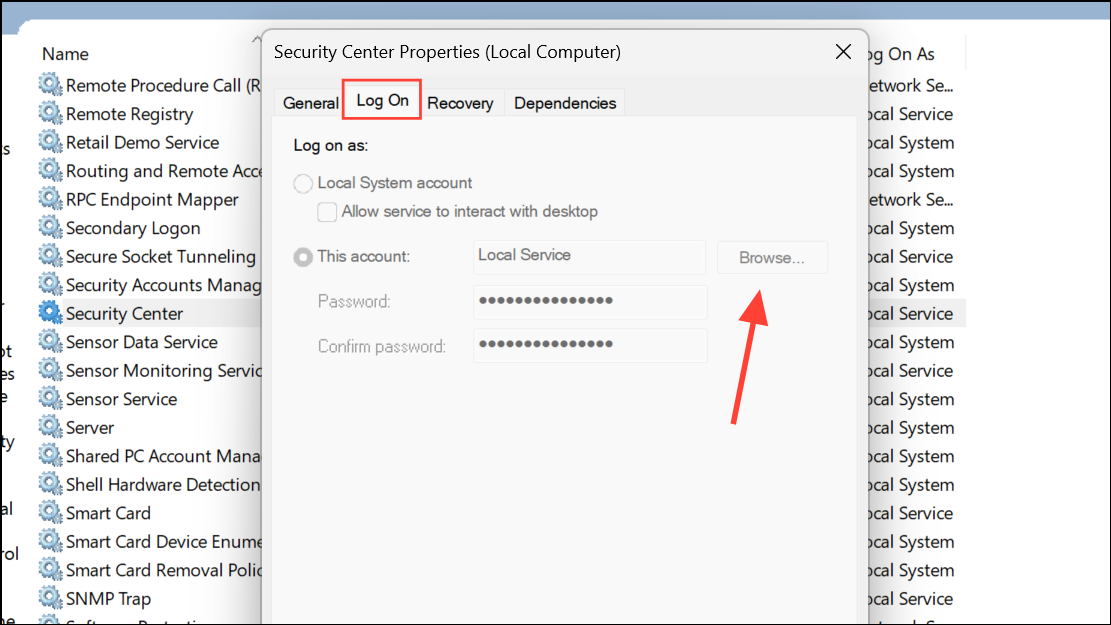
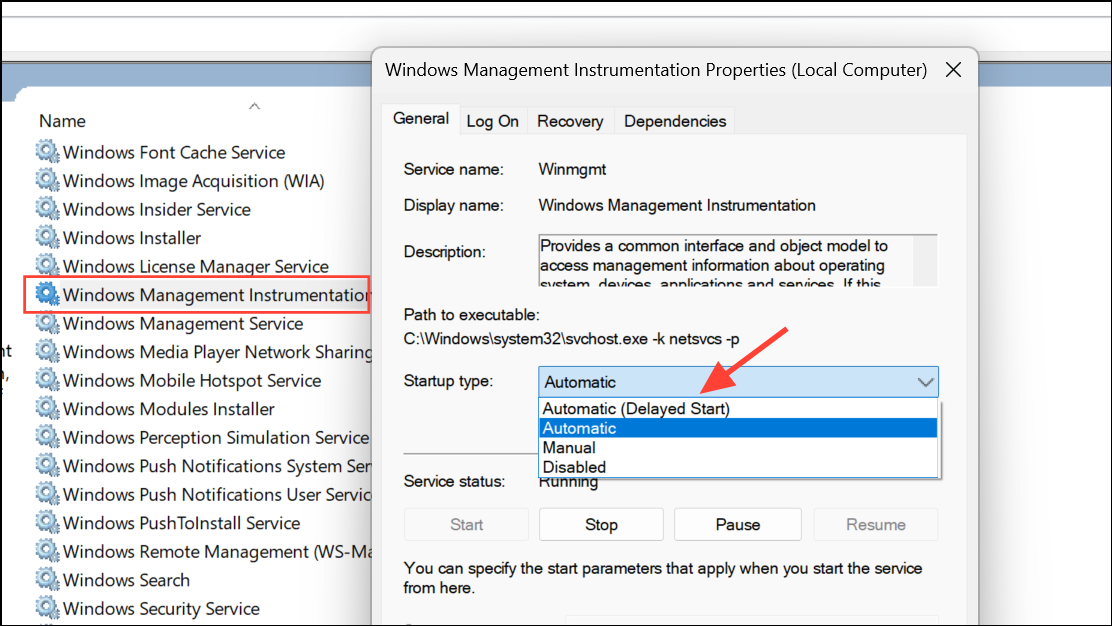
Step 5: Repeat these steps for Windows Management Instrumentation and Remote Procedure Call (RPC) services, ensuring they are set to Automatic and running.
Restart your computer to apply changes. This configuration ensures all necessary services are available for Security Center to function properly.
Repair System Files and WMI Repository
Corrupted system files or a damaged Windows Management Instrumentation (WMI) repository can block the Security Center service. Built-in tools can repair these issues.
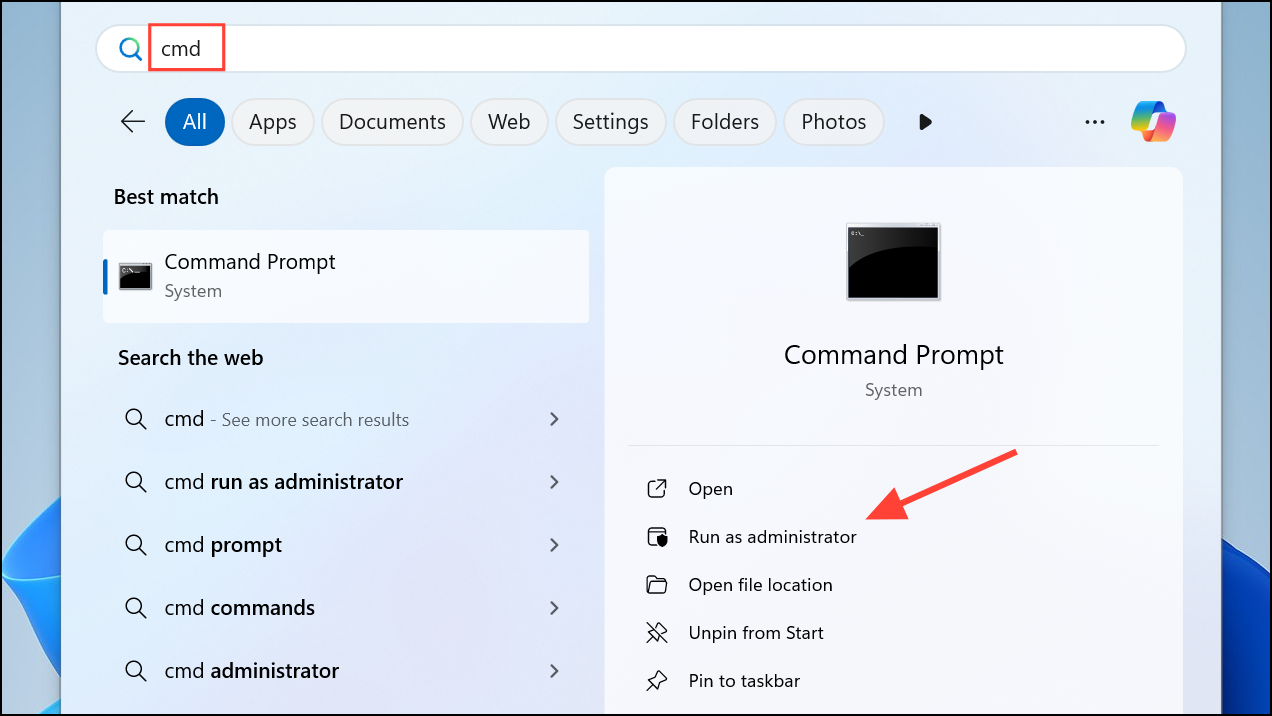
Step 1: Open the Start menu, type cmd, right-click Command Prompt, and select Run as administrator.
Step 2: Run Deployment Image Servicing and Management (DISM) with the command:
dism /online /cleanup-image /restorehealth

This command downloads and replaces corrupted system components from Windows Update.
Step 3: After DISM completes, run System File Checker with:
sfc /scannow
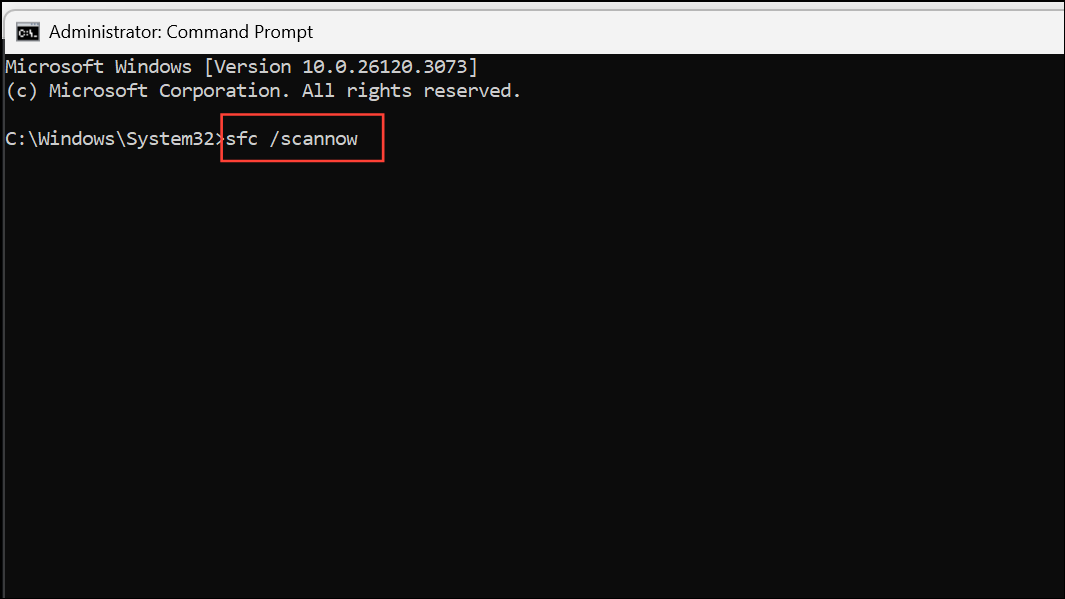
This scans for and repairs corrupted Windows system files.
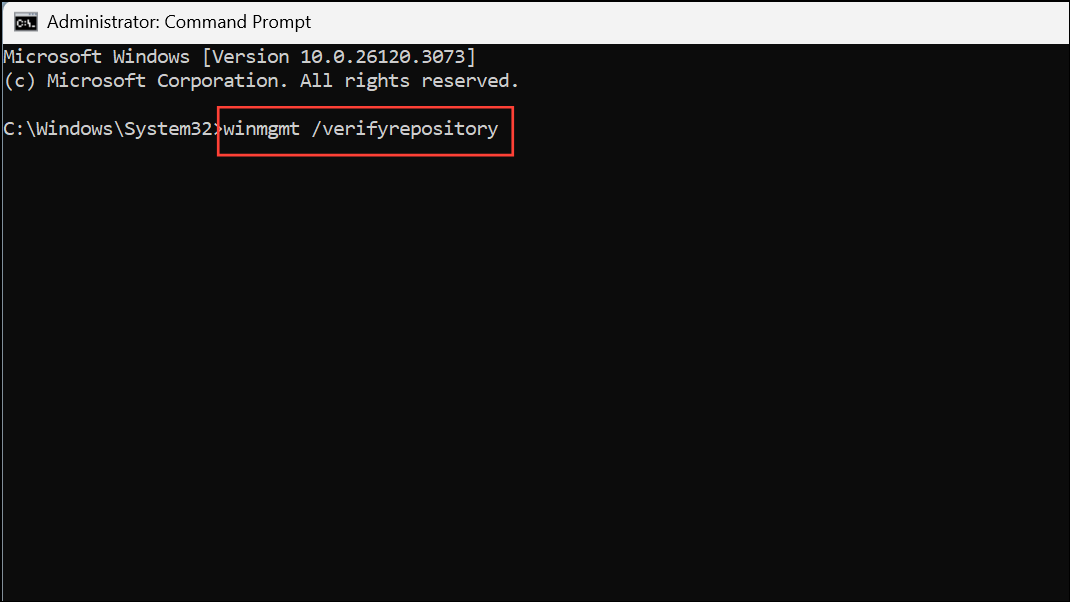
Step 4: To repair the WMI repository, enter:
winmgmt /verifyrepository
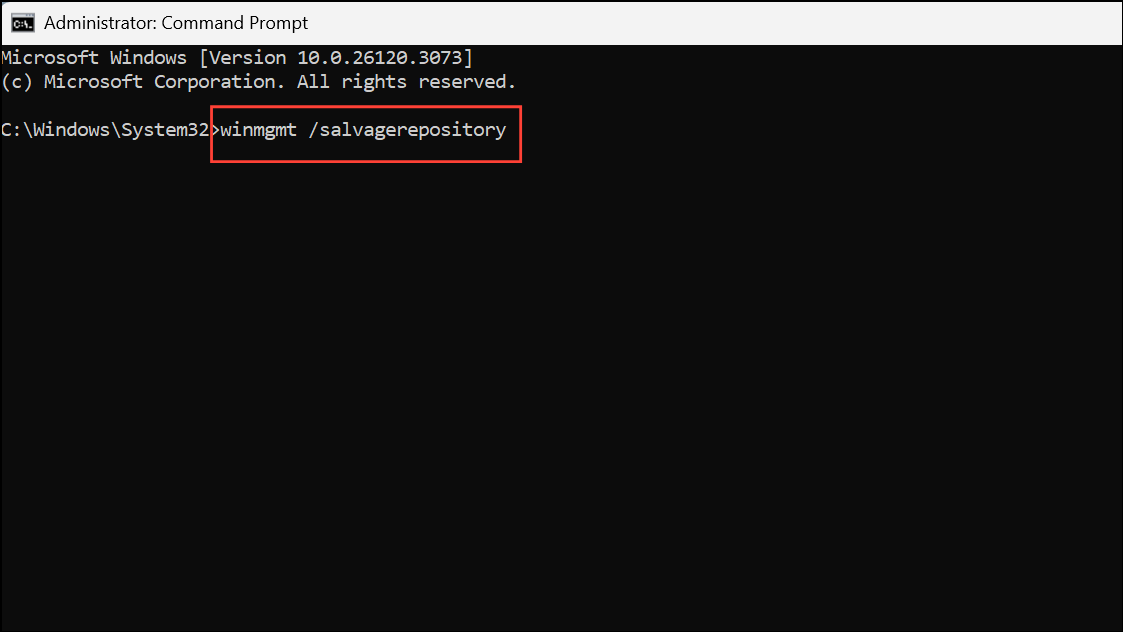
If the repository is inconsistent, repair it with:
winmgmt /salvagerepository
Restart the computer after these repairs. These steps restore dependencies required for Security Center to start.
Remove Conflicting Third-Party Antivirus or Security Software
Some third-party antivirus applications disable Windows Security Center and Microsoft Defender to avoid conflicts. If you have another security program installed, it may prevent Security Center from running.
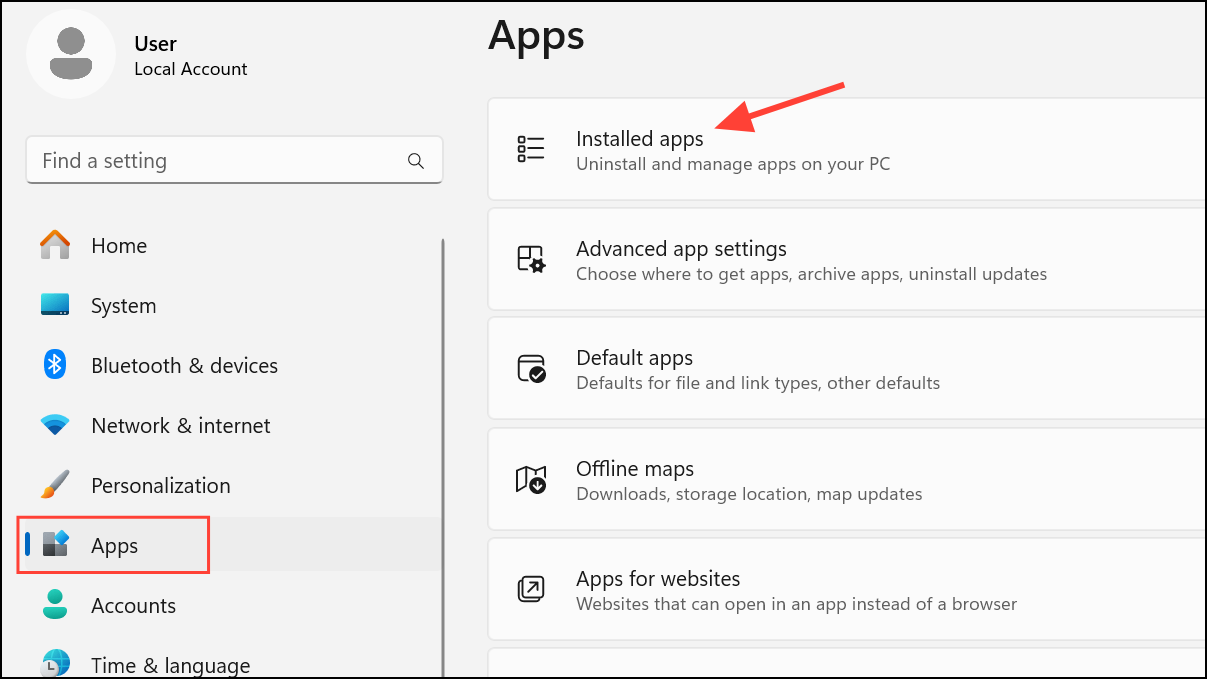
Step 1: Uninstall any non-Microsoft antivirus or security tools from Settings > Apps > Installed apps.
Step 2: Restart your PC after removal to ensure changes take effect.
Step 3: Open Windows Security to verify if the Security Center service starts normally.
If you need to use a third-party antivirus, check its settings for options to allow Windows Defender and Security Center to operate alongside it.
Perform a Clean Boot to Identify Software Conflicts
Background applications or non-Microsoft services may interfere with Security Center. A clean boot starts Windows with only essential services, helping isolate the cause.
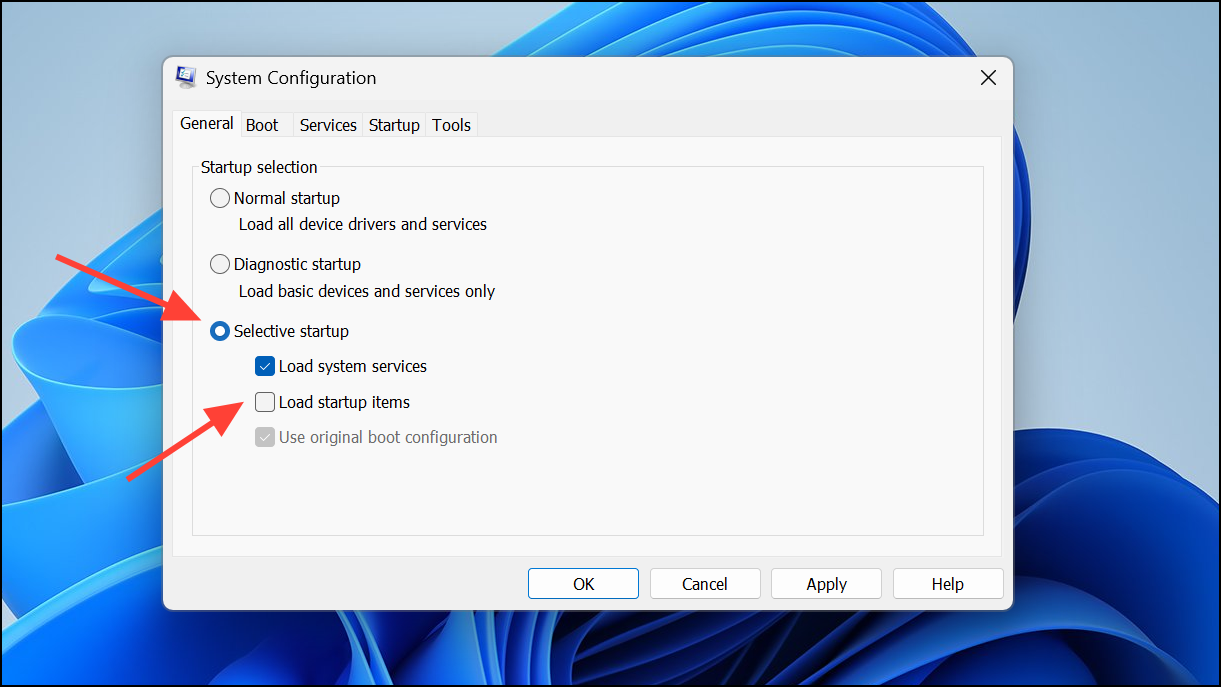
Step 1: Press Win + R, type msconfig, and press Enter to open System Configuration.

Step 2: Under the General tab, select Selective startup and uncheck Load startup items.
Step 3: Go to the Services tab, check Hide all Microsoft services, then click Disable all.
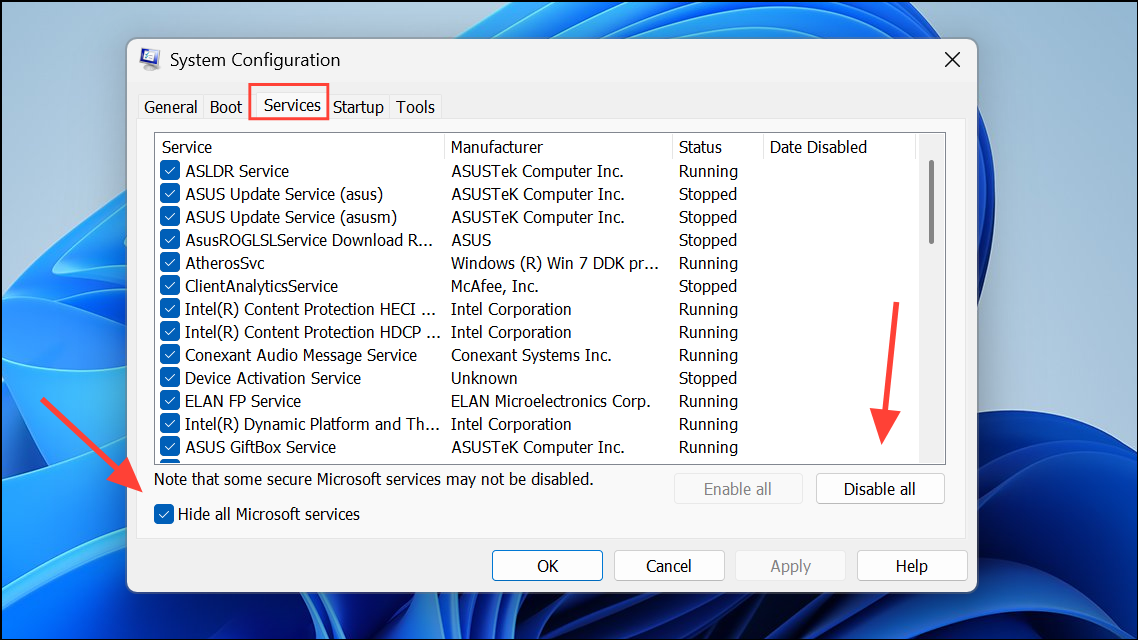
Step 4: On the Startup tab, open Task Manager, disable all enabled startup items, and close Task Manager.

Step 5: Click Apply and OK, then restart your computer.
If Security Center works in a clean boot state, gradually re-enable services and startup items to identify the conflicting program.
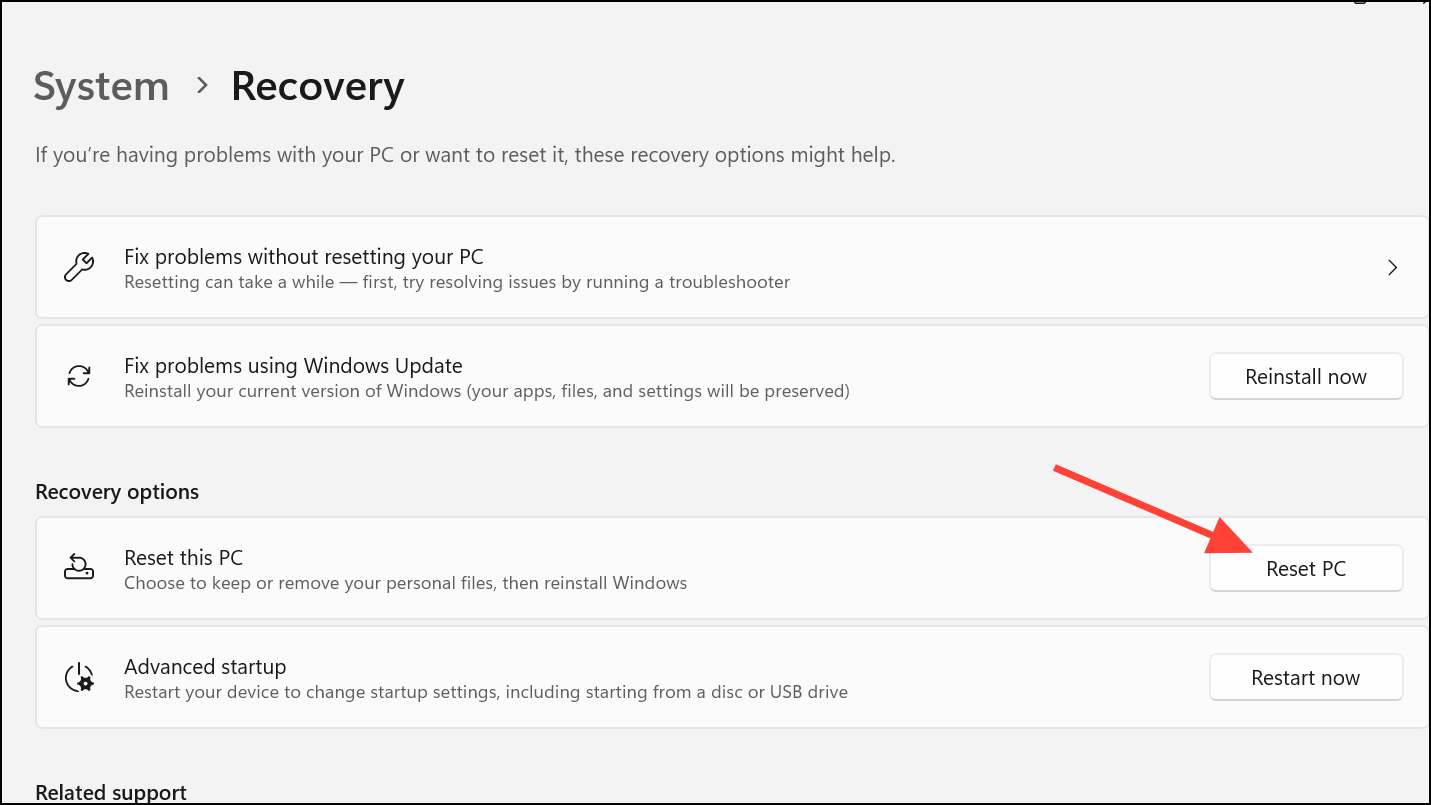
Reset Windows as a Last Resort
If all other methods fail, resetting Windows reinstalls the operating system and restores all default services, including Security Center. This step removes installed applications, but you can choose to keep your personal files.
Step 1: Open Settings > System > Recovery.

Step 2: Under Recovery options, click Reset PC.
Step 3: Select Keep my files or Remove everything based on your preference.
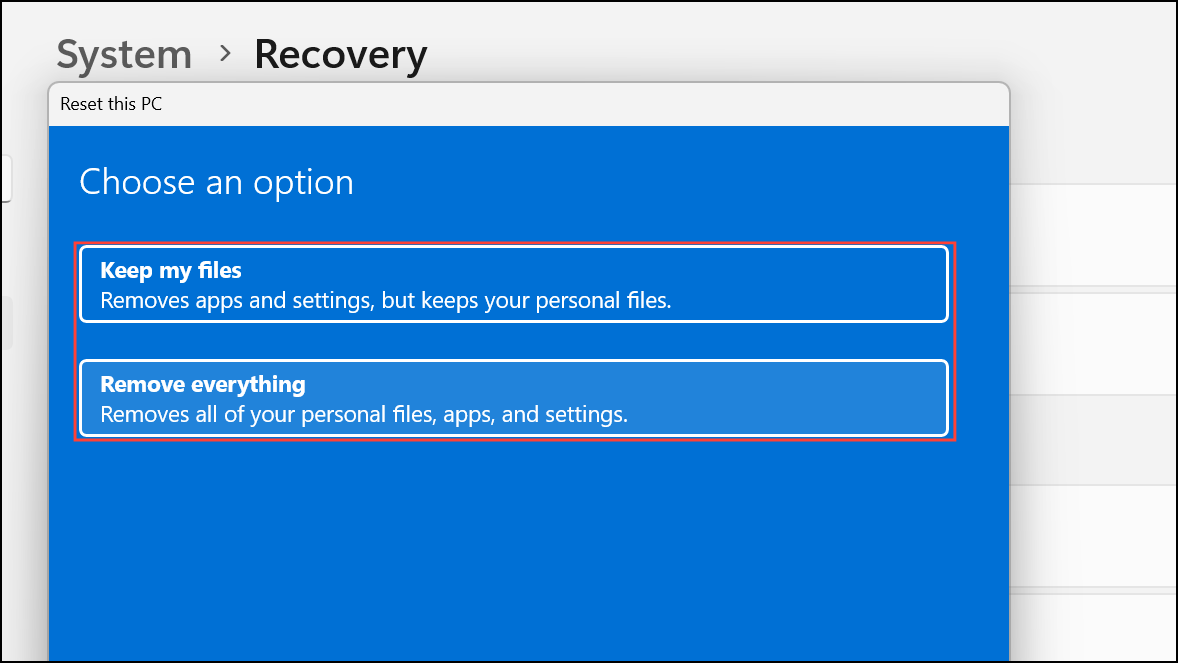
Step 4: Follow the on-screen instructions to complete the reset. The process reinstalls Windows and restores all default services.
After resetting, Security Center should be restored and operational.
Resolving the “Windows Security Center service can’t be started” error restores essential system protection and ensures your PC can monitor threats and vulnerabilities. Regularly updating Windows and keeping backups of important data further reduces the risk of similar issues in the future.