
Webpages failing to load with the message "Your connection was interrupted. A network change was detected" often point to issues in Windows 11’s network configuration or hardware. This error disrupts browsing in Chrome, Edge, Opera, and other browsers, and is commonly tied to changes in network adapters, DNS problems, proxy settings, or interference from security software. Addressing these root causes restores consistent internet connectivity and prevents further interruptions.
Reset Network Settings
Step 1: Open the Windows Settings app by clicking the Start menu and selecting Settings.
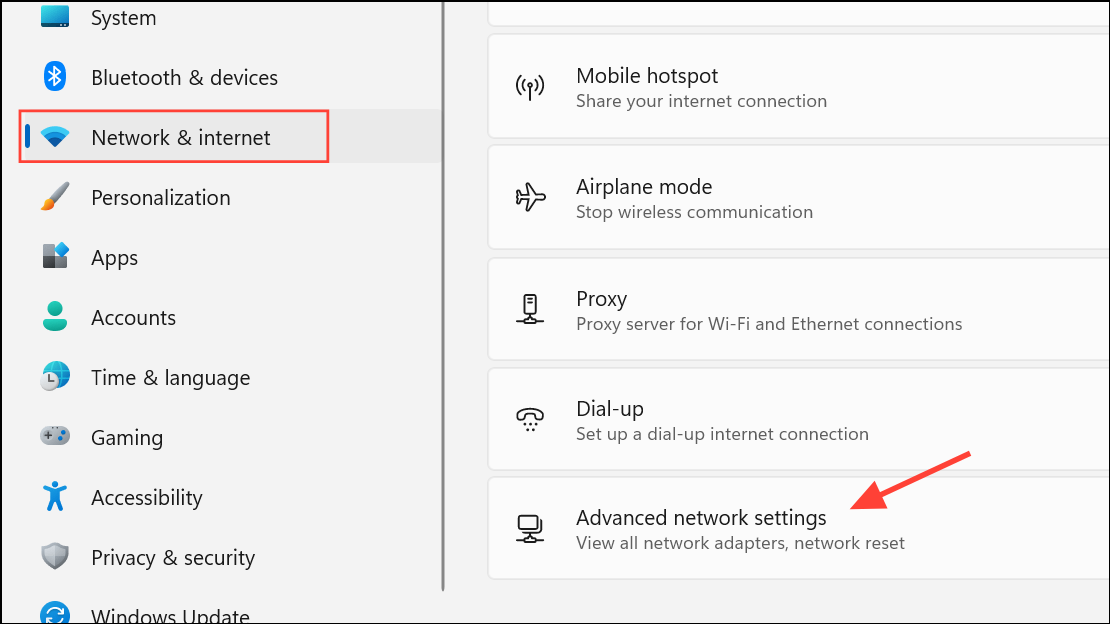
Step 2: Navigate to Network & Internet. Scroll down and select Advanced network settings.
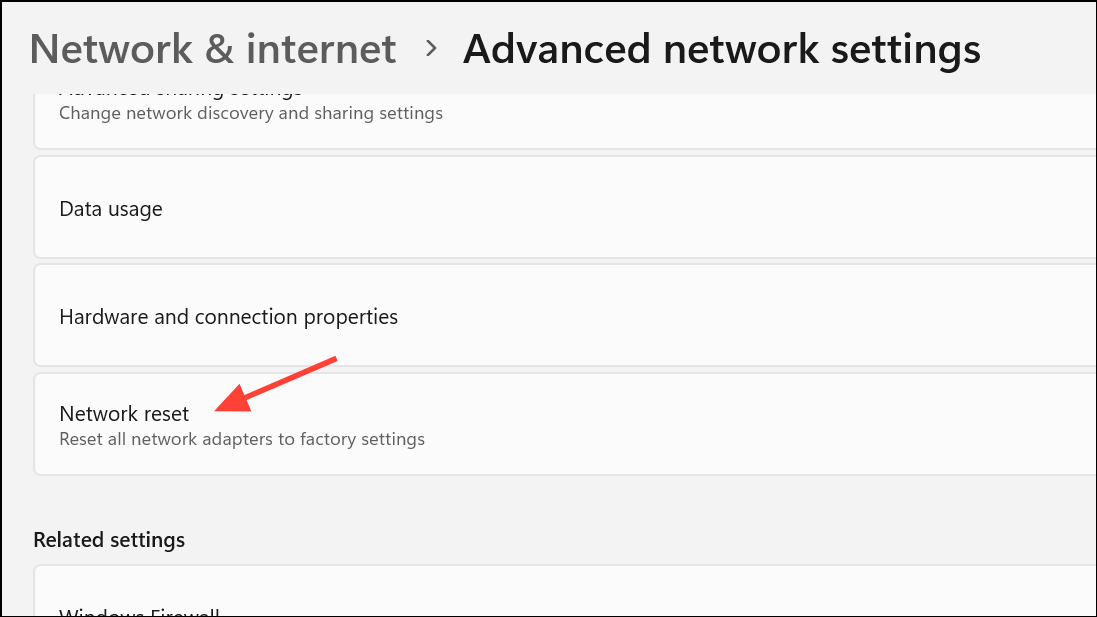
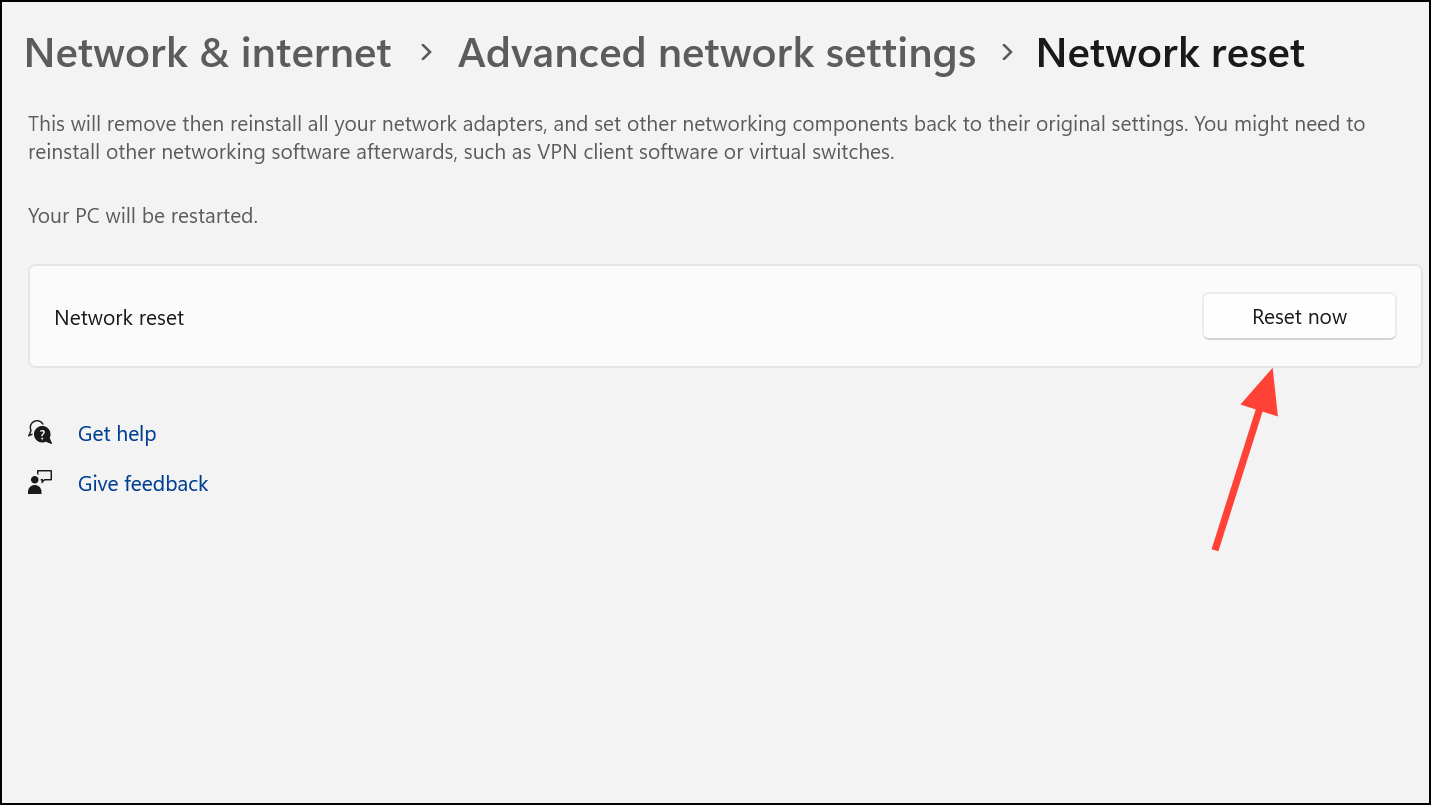
Step 3: Click Network reset. This will remove and reinstall all network adapters and reset networking components to their default settings.
Step 4: Click Reset now to confirm. Your system will require a restart. After restarting, reconnect to your Wi-Fi or Ethernet network and test your browser.
Flush DNS Cache and Reset TCP/IP Stack
Corrupted DNS cache or TCP/IP stack can cause network interruptions. Flushing these resets can resolve hidden connectivity issues.
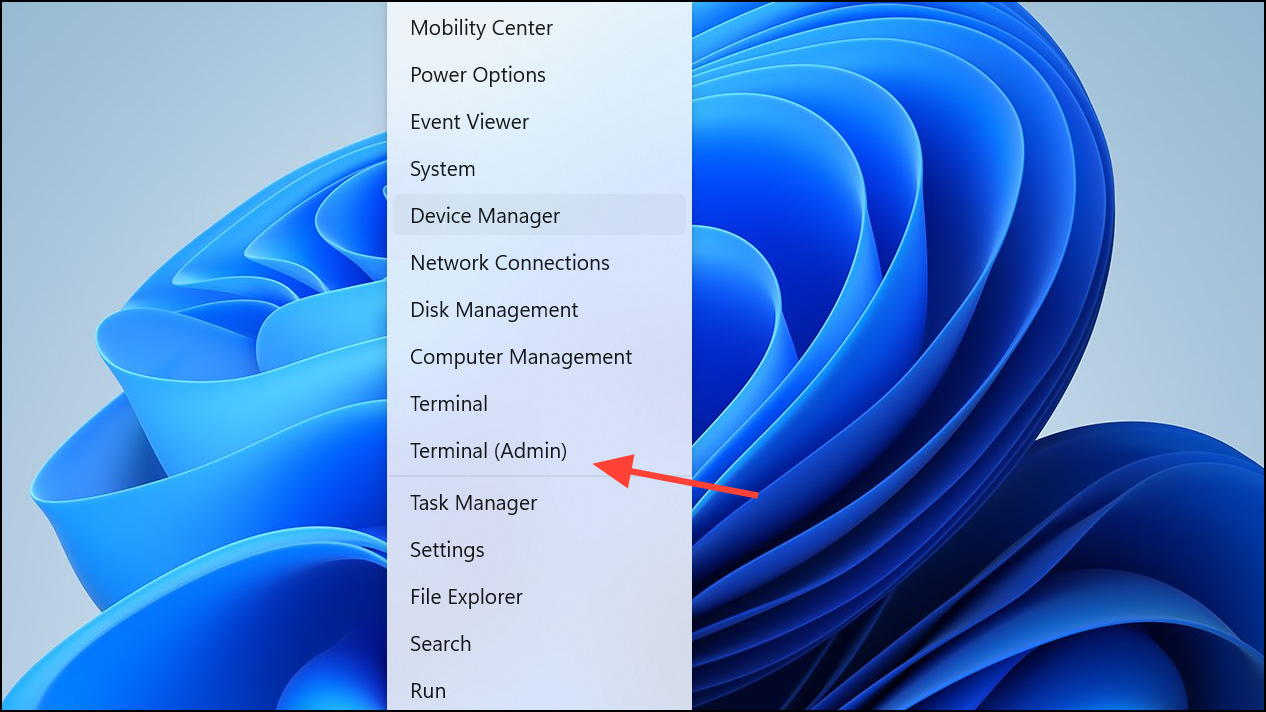
Step 1: Right-click the Start button and select Windows Terminal (Admin) or Command Prompt (Admin).
Step 2: Enter the following commands one at a time, pressing Enter after each:
netsh winsock reset
netsh int ip reset
ipconfig /release
ipconfig /renew
ipconfig /flushdns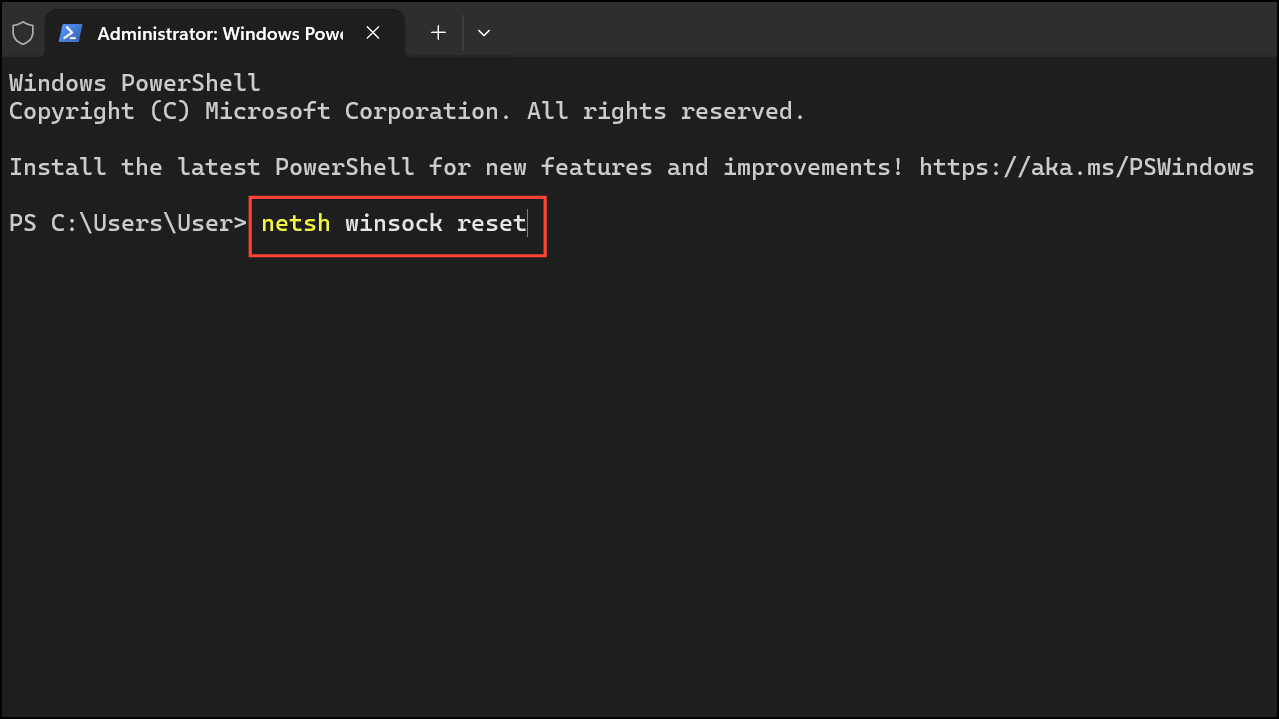
Each command targets a different aspect of your network configuration. netsh winsock reset restores Winsock settings. netsh int ip reset resets TCP/IP. The ipconfig commands release and renew your IP address and clear DNS cache.
Step 3: Restart your PC to apply changes and check if the error persists.
Disable Unused Network Adapters
Switching between Wi-Fi and Ethernet or having multiple adapters enabled can cause Windows 11 to mismanage connections, leading to network change errors.
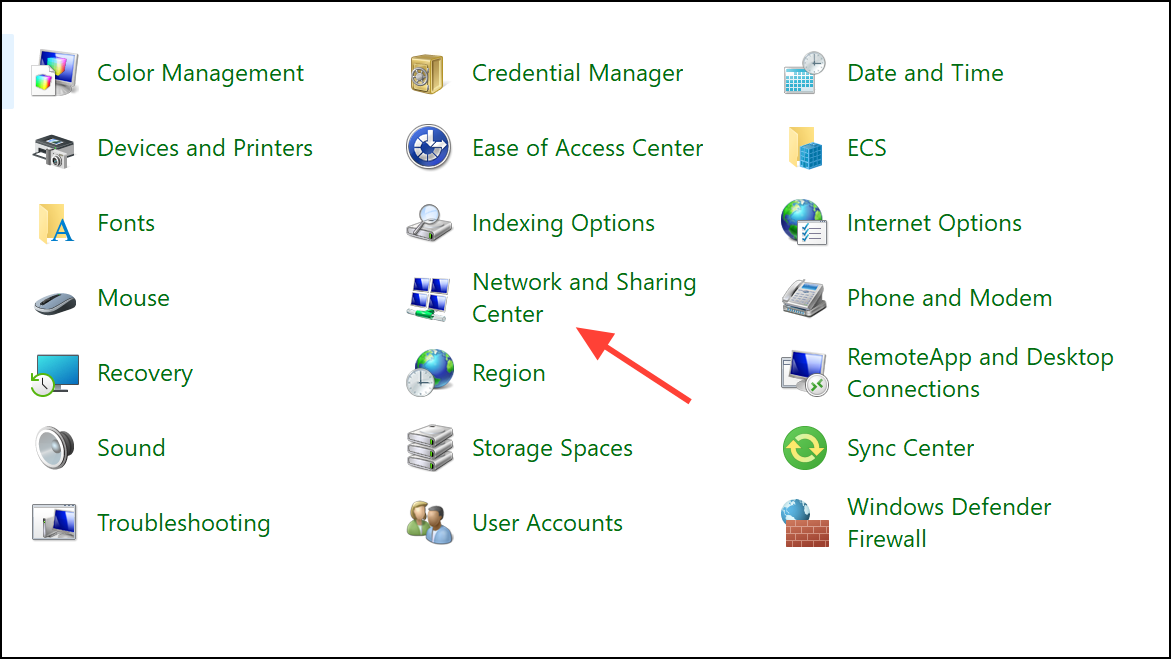
Step 1: Open Control Panel and select Network and Internet, then Network and Sharing Center.
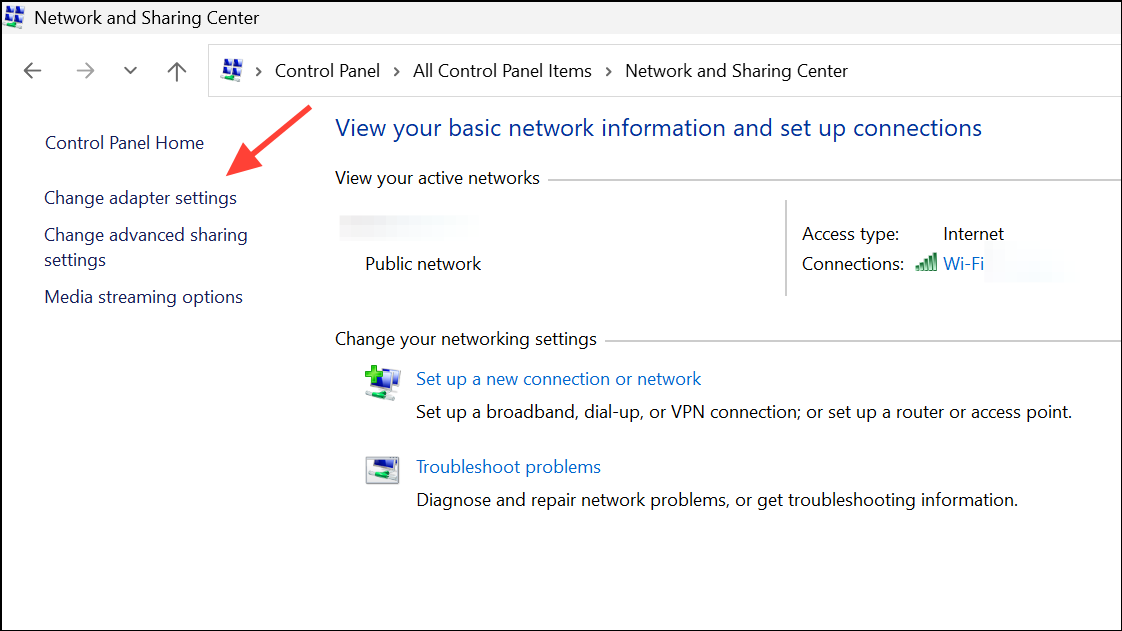
Step 2: Click Change adapter settings.
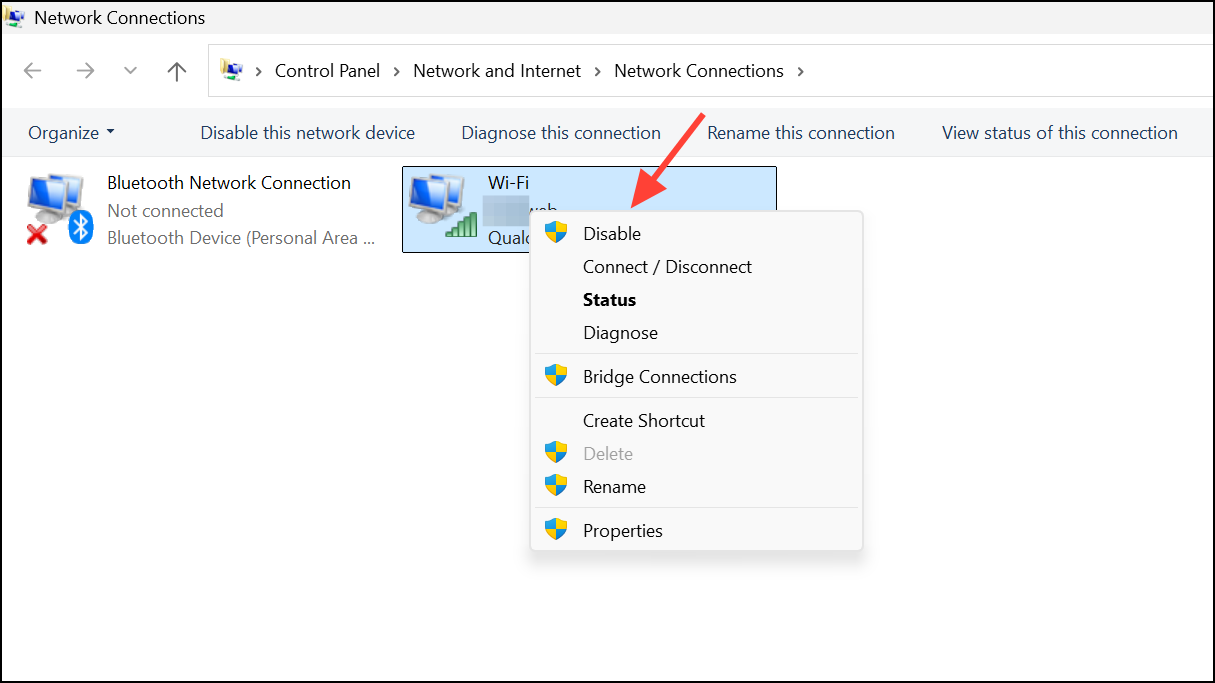
Step 3: Review the list of network adapters. If both Wi-Fi and Ethernet are enabled but you only use one, right-click the unused adapter and select Disable.
Step 4: If your device has hardware issues, such as a failing network card, try using a different adapter or USB dongle to rule out hardware faults.
Change DNS Settings
Your Internet Service Provider’s DNS servers may be unreliable. Switching to a public DNS like Google’s can improve connection stability and resolve "network change" errors.
Step 1: Go to Settings → Network & Internet → Advanced network settings.
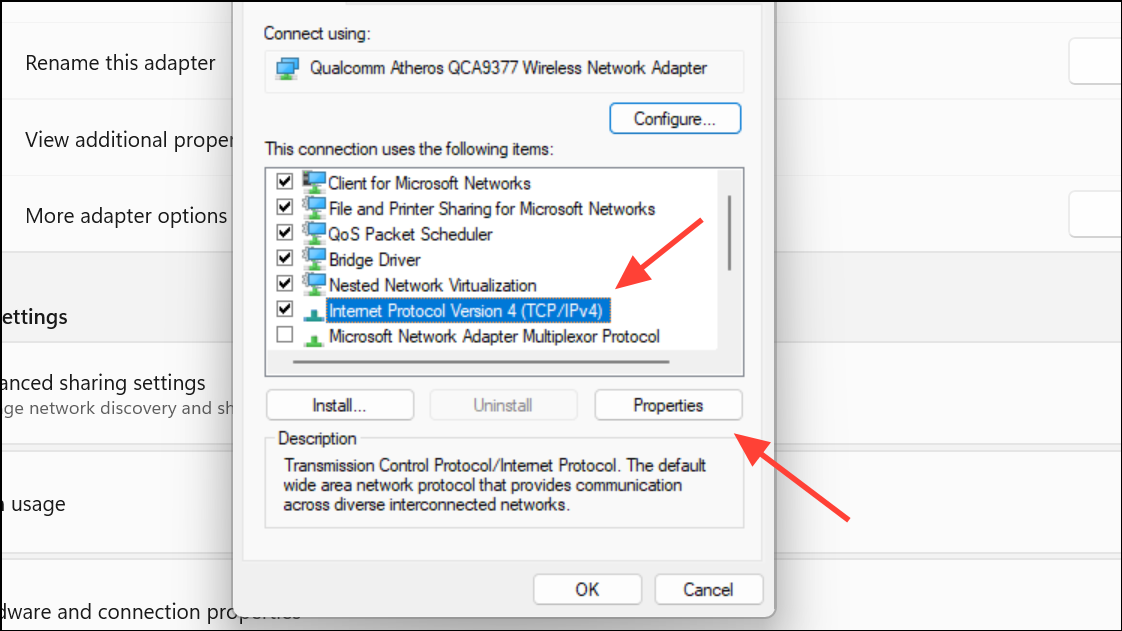
Step 2: Select your network, Wifi or Ethernet, and then click the Edit button next to More adapter options.

Step 3: This will open the Properties dialog box. Select Internet Protocol Version 4 (TCP/IPv4) and click Properties again.
Step 4: Select Use the following DNS server addresses and enter:
- Preferred DNS server:
8.8.8.8 - Alternate DNS server:
8.8.4.4
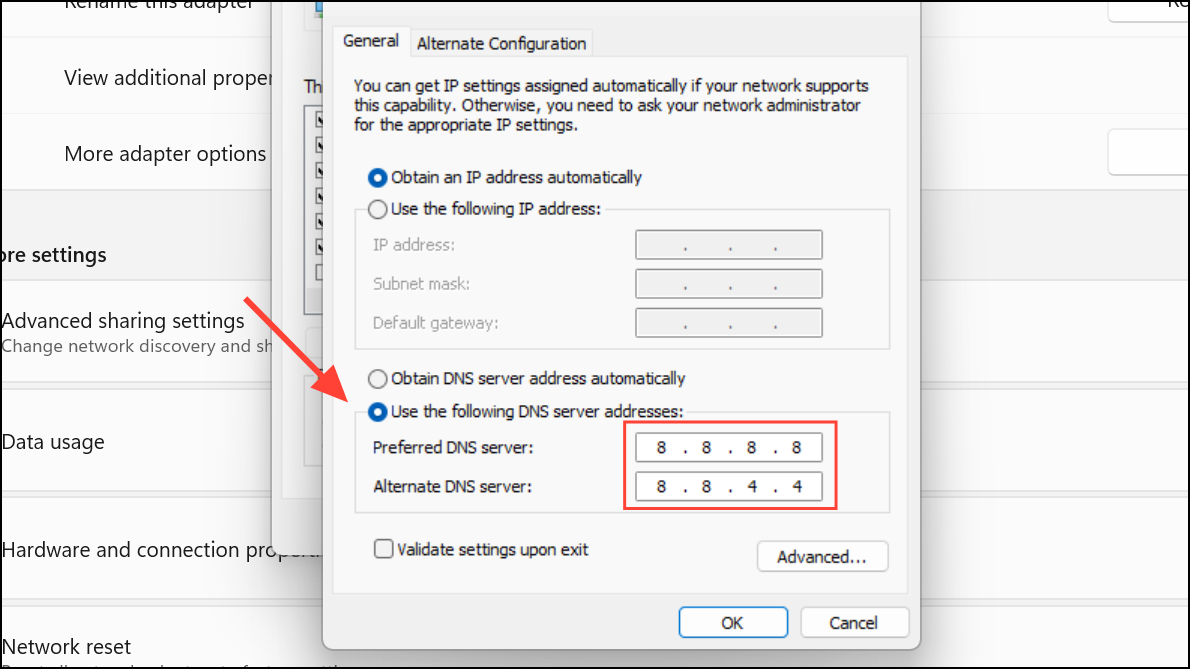
Step 5: Click OK to save changes and restart your browser.
Check Proxy and VPN Settings
Proxy servers and VPN software may disrupt standard connections or cause Windows to interpret network changes incorrectly.
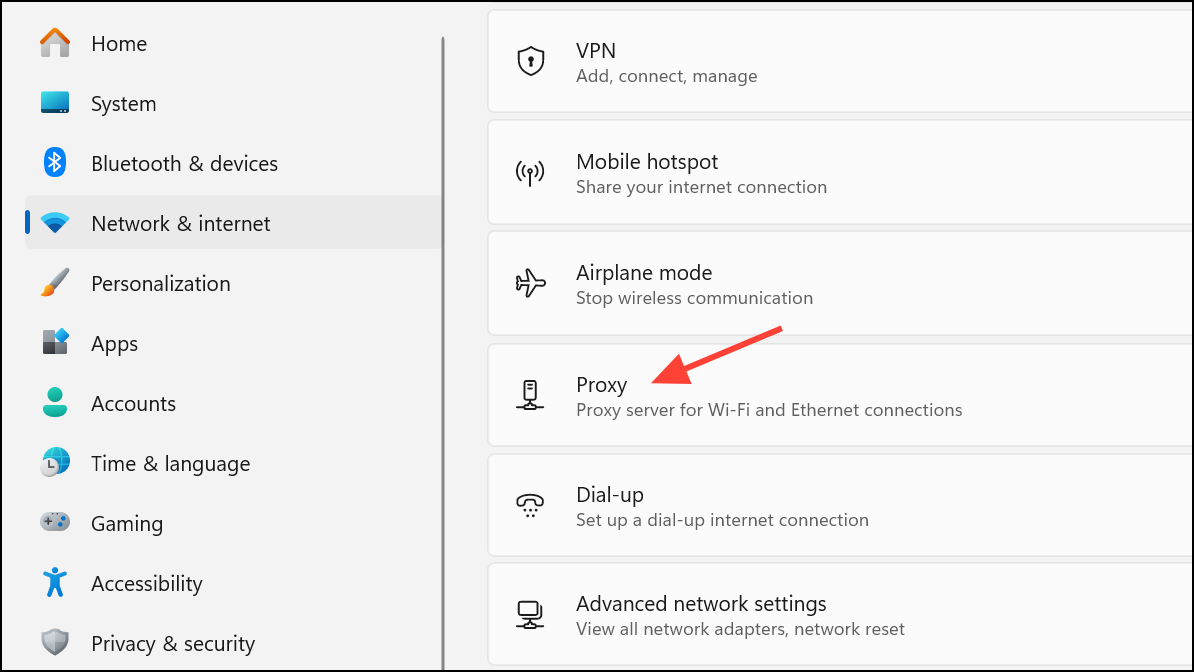
Step 1: Open Settings → Network & Internet → Proxy.
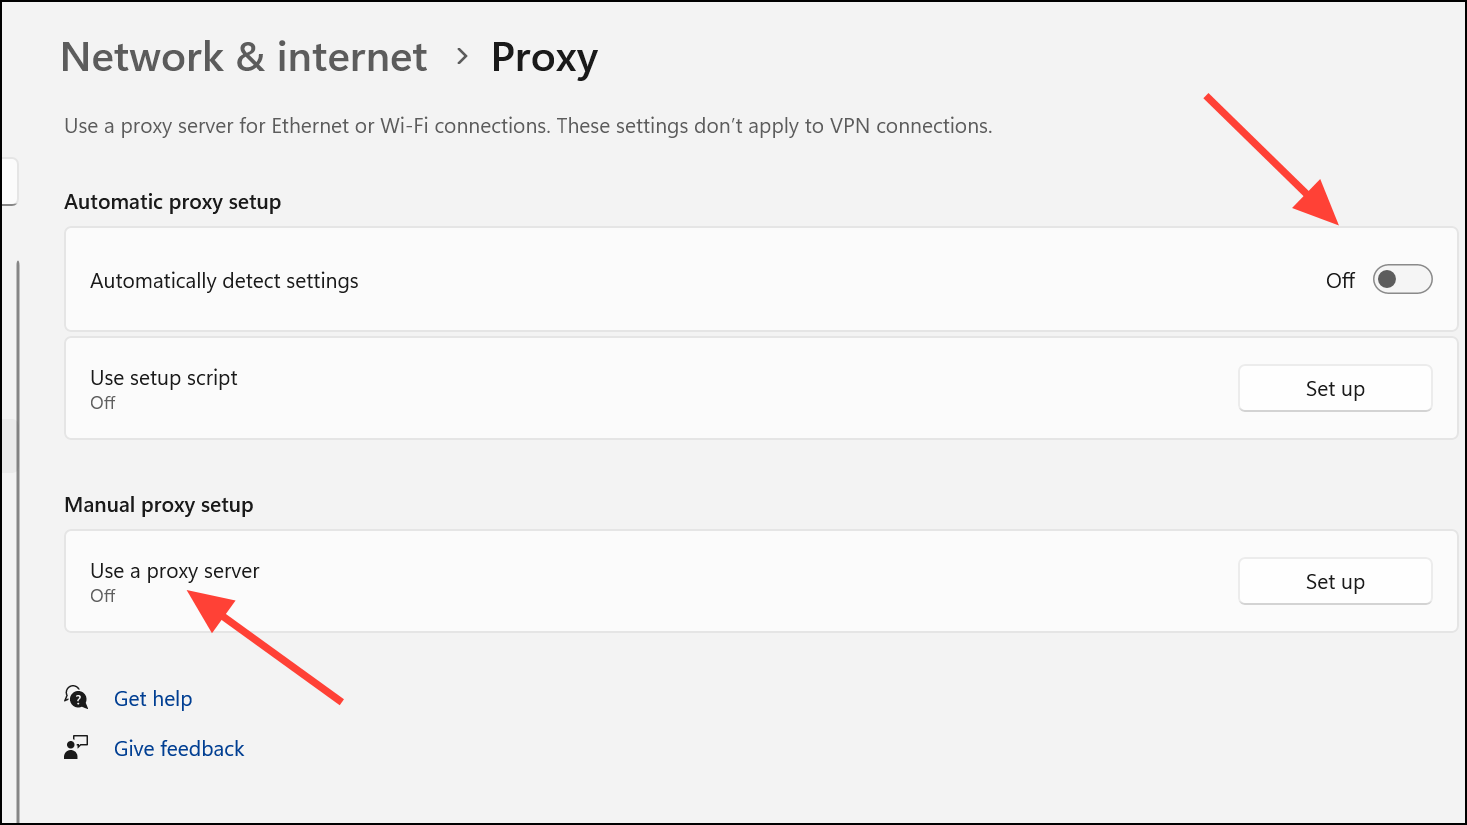
Step 2: Turn off Use a proxy server and Automatically detect settings if they are enabled. If you use a VPN, temporarily disable it to see if the error resolves.
Step 3: Some browsers, such as Edge or Opera, may have their own proxy or VPN settings. Check browser-specific options under Privacy & Security and disable any network-related features that might interfere.
Temporarily Disable Firewall and Antivirus
Security software can block network traffic or interfere with browser connections, especially after updates or configuration changes.
Step 1: Go to Settings → Privacy & Security → Windows Security → Firewall & Network protection.
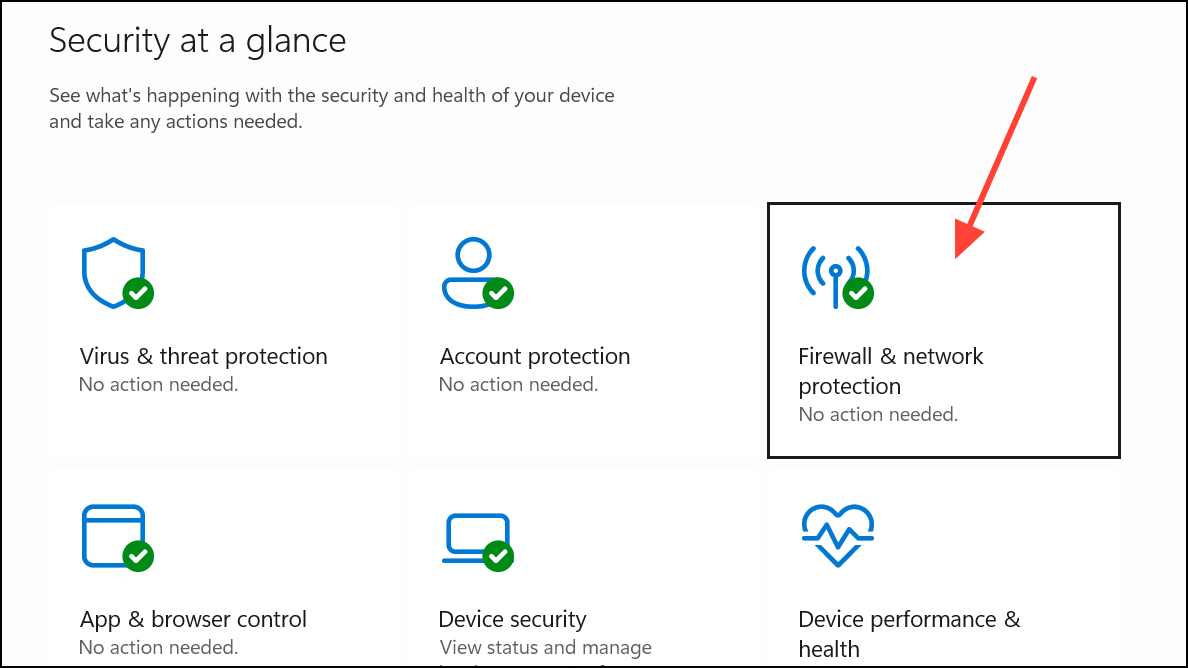
Step 2: Temporarily turn off Microsoft Defender Firewall for all active network profiles. If you use third-party antivirus, right-click its icon in the system tray and select the option to disable it temporarily.

Step 3: Test your browser. If the error disappears, adjust your firewall or antivirus settings to allow browser traffic, then re-enable protection.
Clear Browser Cache and Data
Corrupted browser cache or cookies can cause loading failures and persistent error messages.
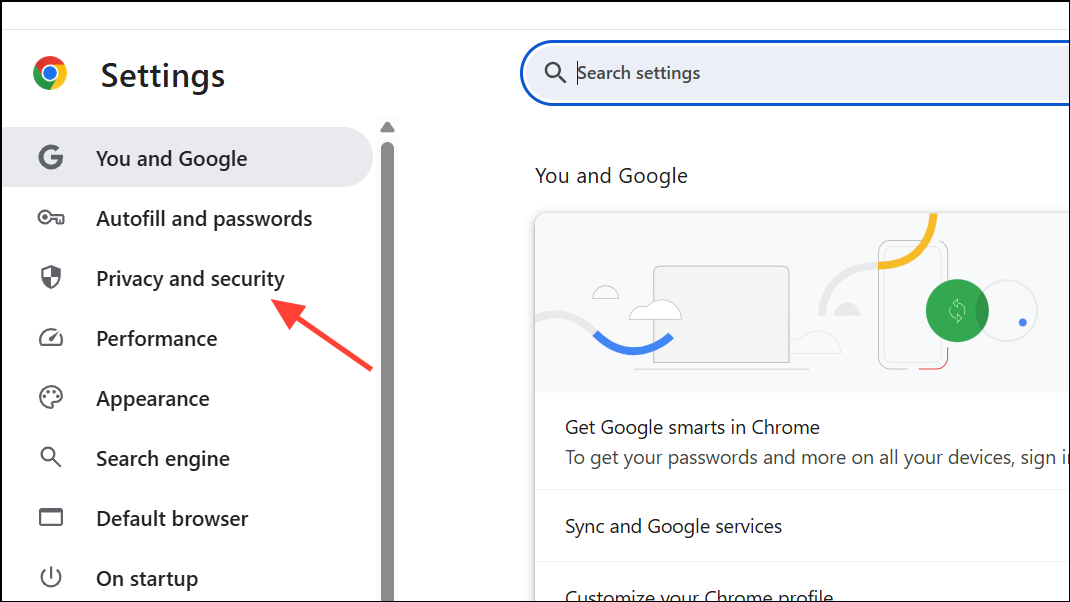
Step 1: In your browser, open the settings menu (three dots in Chrome or Edge) and go to Privacy and Security.
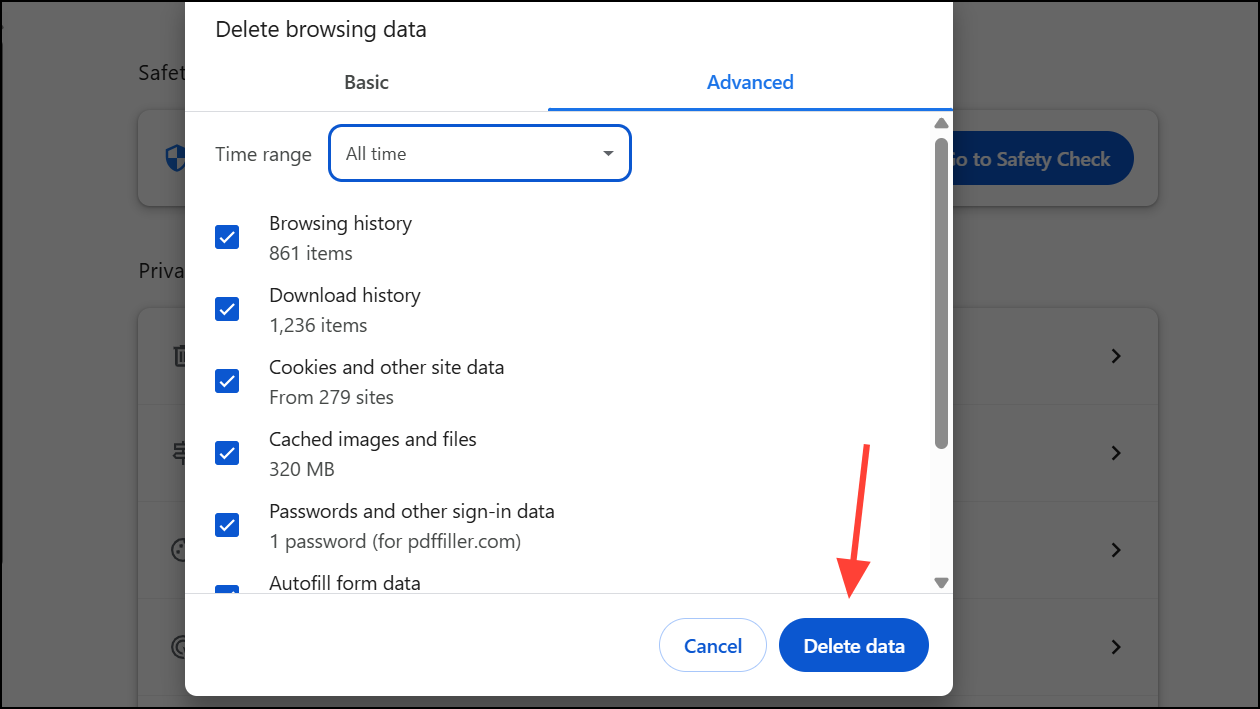
Step 2: Select Clear browsing data. Check the boxes for Browsing history, Cookies and other site data, and Cached images and files.

Step 3: Click Delete data. Restart the browser and test for the error.
Update or Reinstall Network Drivers
Outdated or corrupt network drivers can cause persistent connection drops and errors.
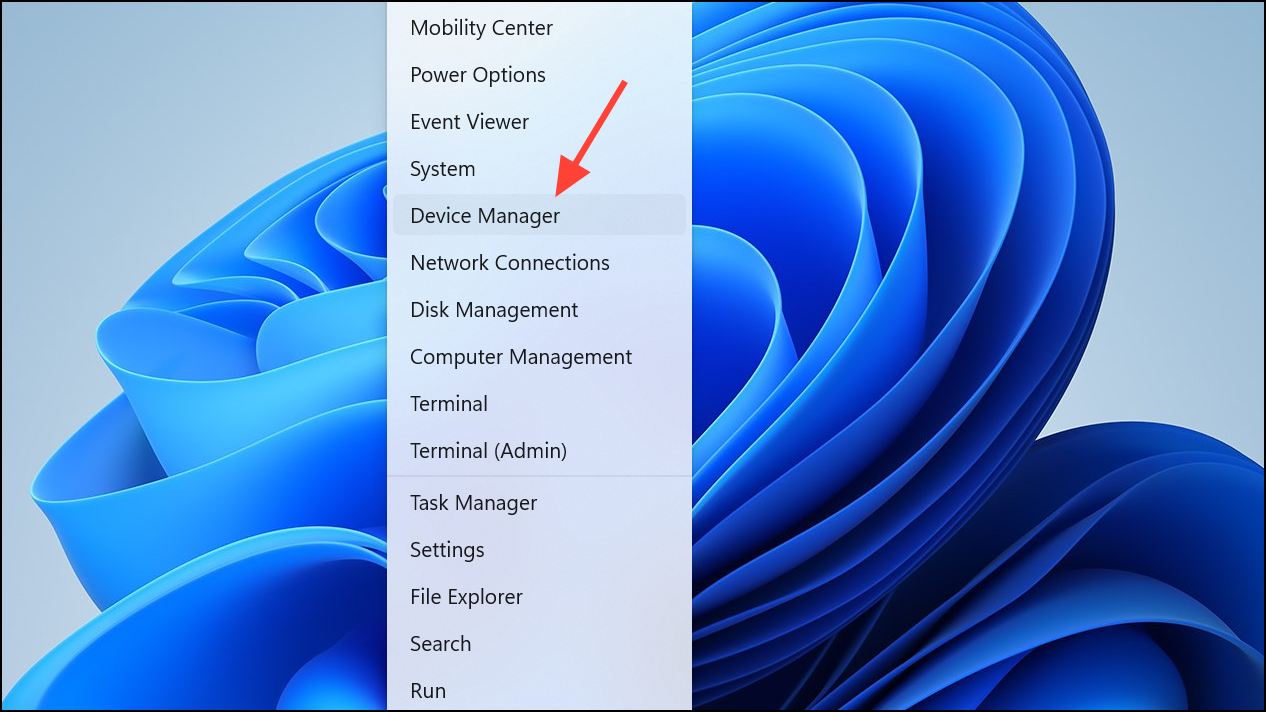
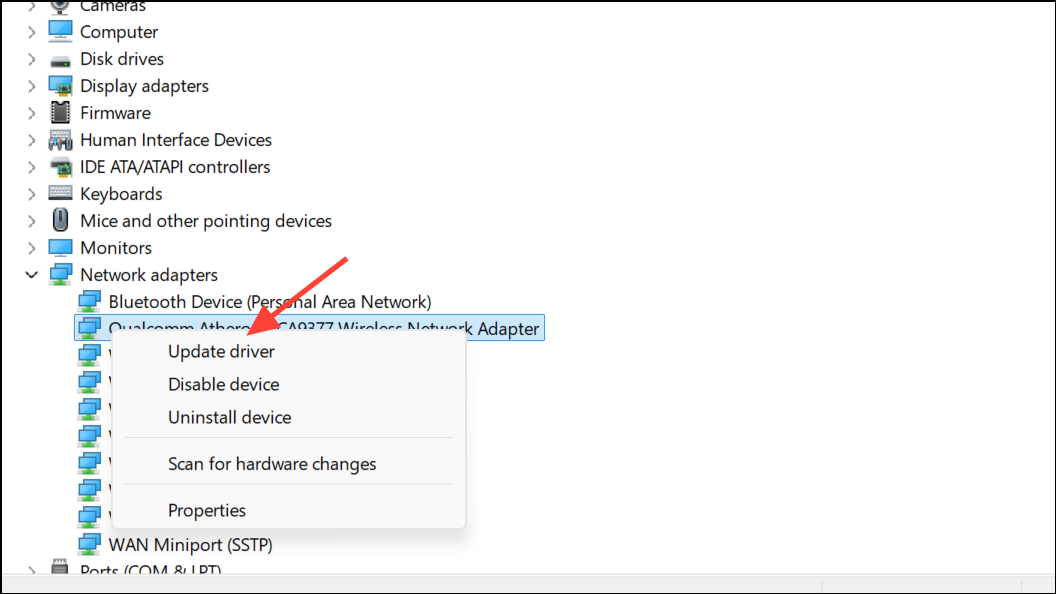
Step 1: Right-click the Start button and select Device Manager.
Step 2: Expand Network adapters, right-click your primary adapter, and choose Update driver. Select Search automatically for drivers. If no update is found, you can uninstall the driver and restart your PC to force Windows to reinstall it.
Step 3: If issues persist, visit your device manufacturer’s website to download and install the latest driver for your network adapter.
Restore Windows to an Earlier State
If the error appeared after a recent Windows update or software installation, rolling back to a previous restore point can resolve configuration conflicts.
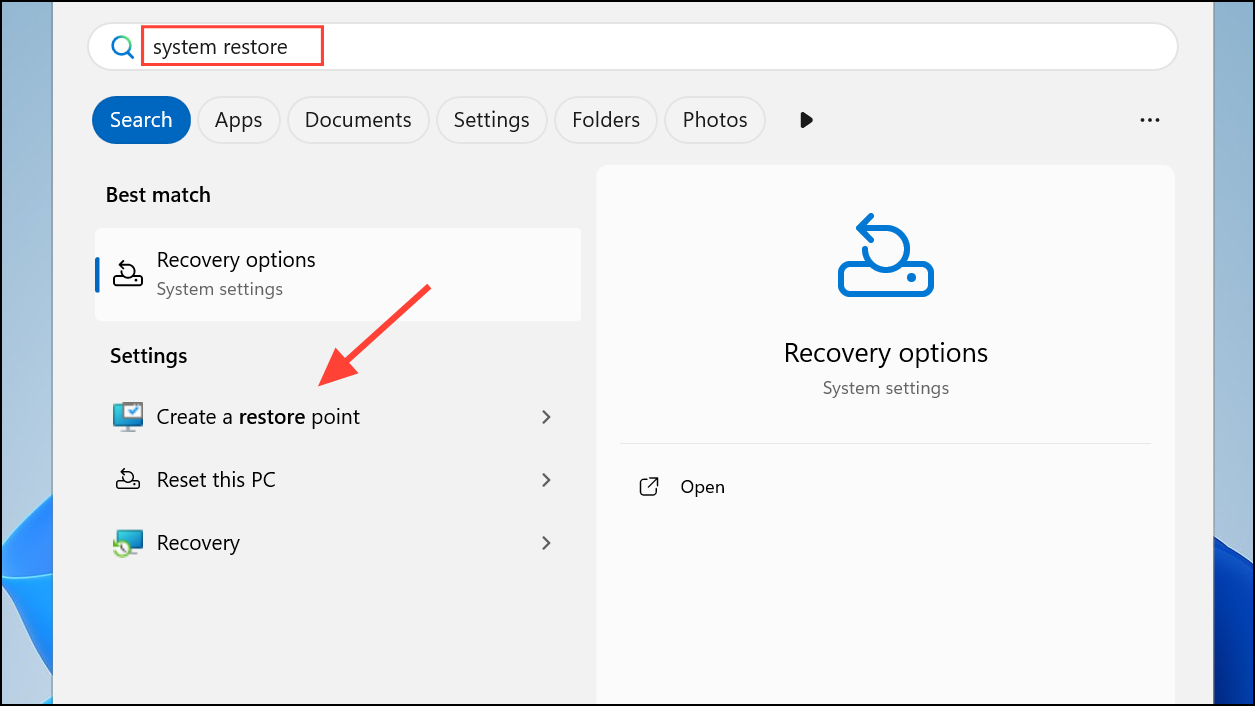
Step 1: Search for System Restore in the Start menu and open Create a restore point.
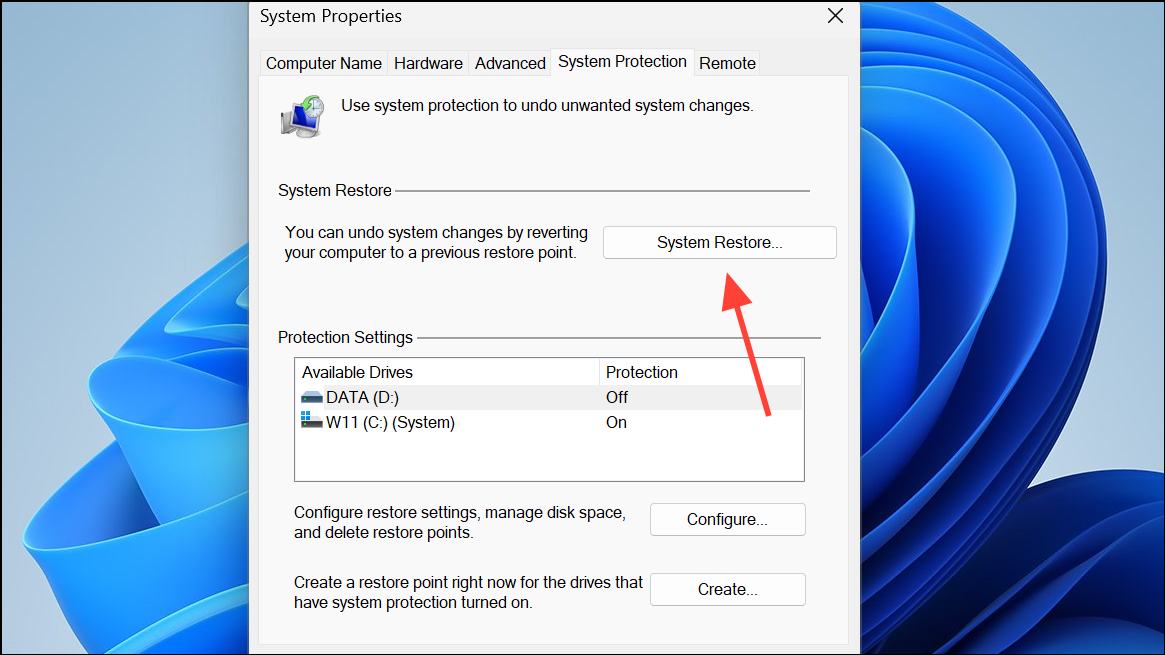
Step 2: Click System Restore, then follow the prompts to select a restore point from before the network issue began. Complete the process and restart your PC.
Resolving the "Your connection was interrupted" error in Windows 11 often requires a combination of network resets, adapter adjustments, and configuration checks. Once these steps are completed, your browsing should return to normal without unexpected disconnects.