
Grouping objects in Microsoft PowerPoint allows you to move, resize, and animate several elements as a single unit, which simplifies slide management and saves time when applying consistent effects. When multiple shapes, images, or text boxes need to share the same animation, grouping them first ensures the animation runs uniformly. This approach is especially effective for creating coordinated entrances, emphasis, or exit effects. However, PowerPoint’s grouping and animation features have some limitations—such as not allowing individual animations within a group—so understanding the process and available workarounds is important.
Group Objects and Apply a Single Animation
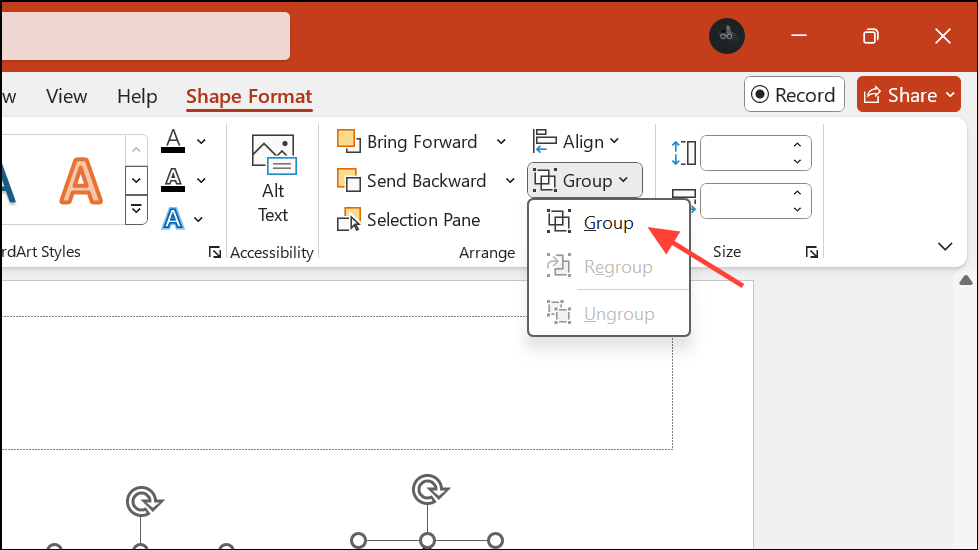
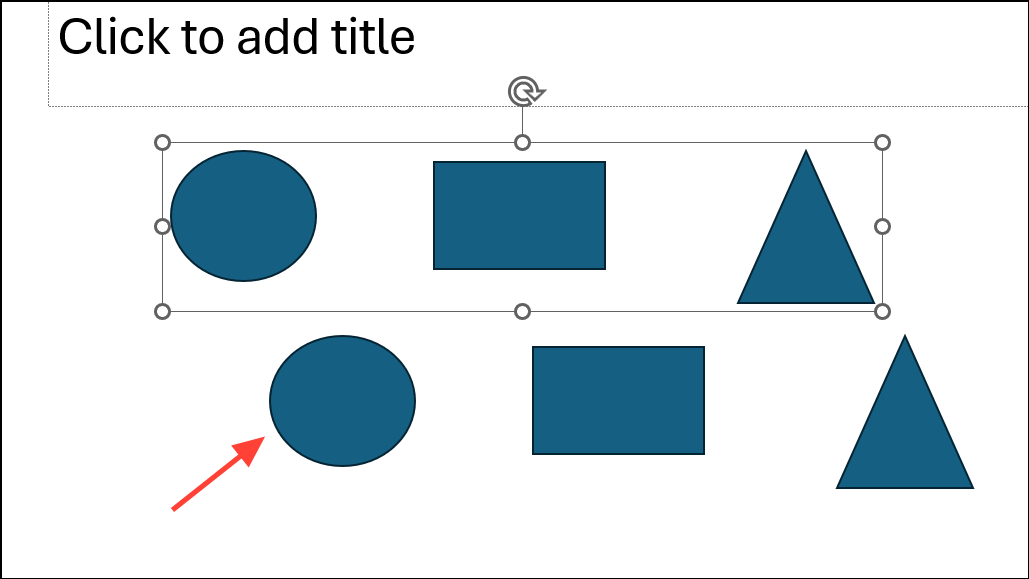
Step 1: Select each object you want to include in the group. Hold the Ctrl key (or Cmd on Mac) and click each object. Objects do not need to be adjacent, and you can select any combination of shapes, images, or text boxes.
Step 2: Once all desired objects are selected, go to the Shape Format tab (or Format tab, depending on your version). Click Group > Group. This action combines the selected objects into a single group, making them act as one for movement and formatting.
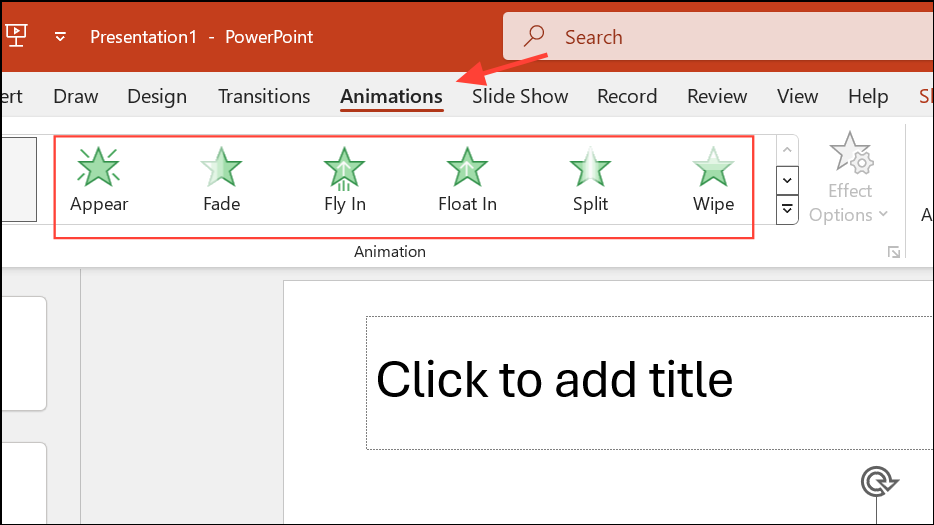
Step 3: With the group still selected, navigate to the Animations tab. Choose your preferred animation effect from the available options. The animation will now apply to the entire group, causing all included objects to animate together in the sequence you selected.
When you preview the slide, the grouped items will move, appear, or disappear as a single entity, streamlining the animation process and ensuring consistency across your presentation.
Apply Animations to Individual Objects Without Grouping
PowerPoint does not support animating individual objects separately within a group. If you need different animations on items that would otherwise be grouped, you must animate each object individually. This approach is necessary for scenarios where objects need to move independently or require distinct effects.
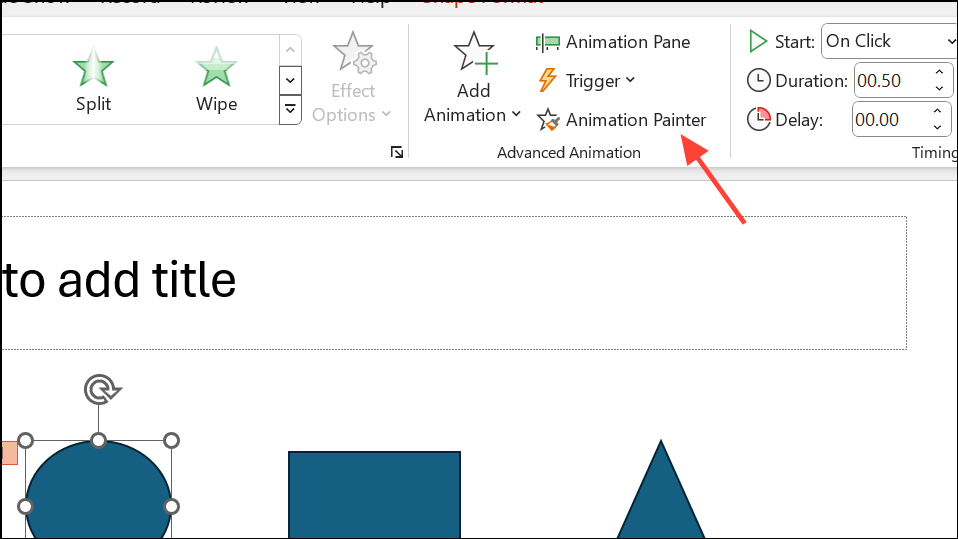
Step 1: Select an object you wish to animate and go to the Animations tab. Choose the desired animation effect.
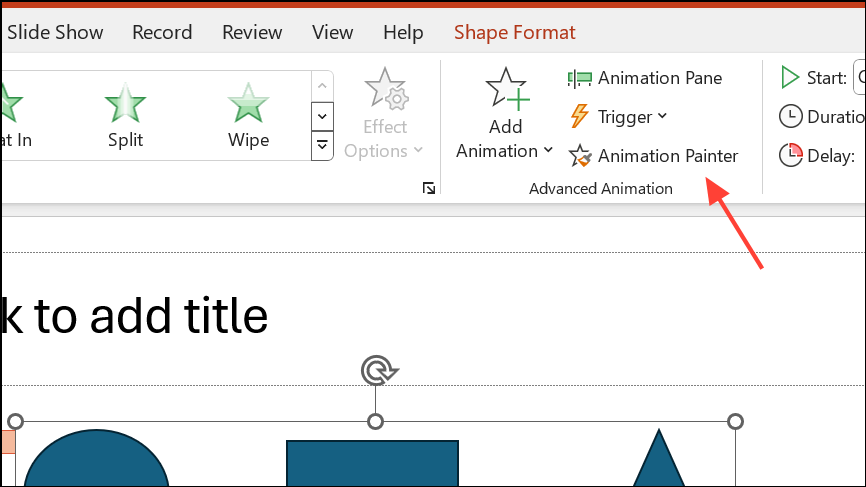
Step 2: To replicate the same animation on other objects, use the Animation Painter tool. With the animated object selected, click Animation Painter on the Animations tab, then click another object to copy the animation settings.
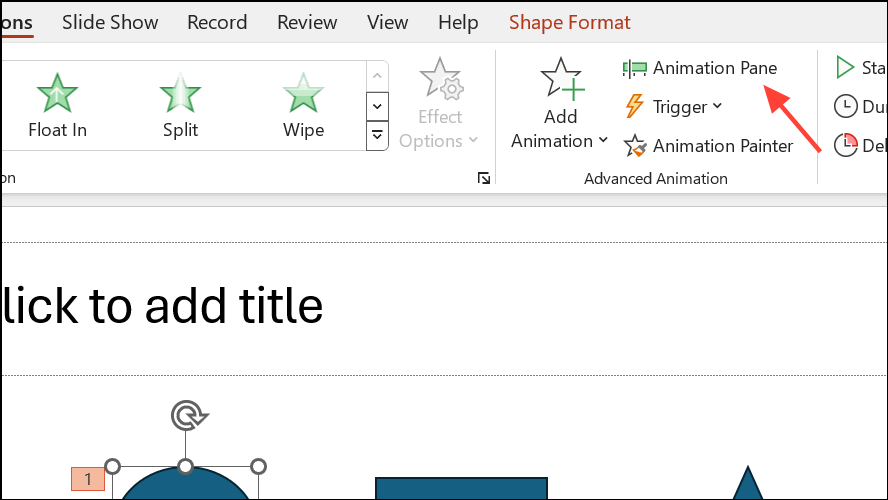
Step 3: Repeat the process for each object, adjusting animation options as needed. You can use the Animation Pane to fine-tune the timing, order, and triggers for each effect.
This method gives you granular control over the animation sequence, allowing each object to move or appear according to your specific requirements. However, it requires more manual setup compared to grouping.
Workarounds for Animating Parts of a Group
When you want both group-level and individual object animations—such as moving a group together while also animating an individual object within that group—PowerPoint’s built-in features do not support this directly. There are creative workarounds:
- Duplicate and Overlay: Place a duplicate of the object you want to animate separately over the group. Make the original object within the group invisible (by setting its fill and outline to none), then animate the overlay independently. This creates the illusion that an object within the group is animated differently.
- Slide Cloning for Complex Effects: For advanced scenarios, such as animating subgroups or combining group and individual animations, duplicate the slide and make incremental changes between slides. Set slide transitions to none for a seamless effect. This method is useful for simulating complex motion paths or layered animations, but requires precise alignment and careful planning.
These approaches are not as straightforward as using groups but can achieve more complex animation sequences when needed.
Adding Objects to an Existing Group with Animations
PowerPoint does not allow you to add new objects to an existing group without losing applied animations. If you need to include an additional item in a group that already has animations, follow these steps to preserve your animation settings:
Step 1: Duplicate the original group by selecting it and copying/pasting or using Ctrl+D. Add the new object to this duplicated group.
Step 2: Select the original group (the one with the desired animation), then go to the Animations tab and click Animation Painter. Click the new group (which now includes the additional object) to copy the animation settings.
Step 3: Test the animation to ensure it was applied correctly. If satisfied, delete the original group and use the updated group in your presentation. You may need to reorder animations in the Animation Pane to maintain the correct sequence.
This process preserves your animation work and saves time compared to recreating complex animations from scratch.
Organizing and animating groups in PowerPoint streamlines your workflow and keeps presentations visually consistent. For more intricate effects, use individual animations or creative workarounds to achieve the desired results.