
Laravel is a very popular open-source PHP framework with the expressive and elegant syntax used to design modern and beautiful web applications. Laravel aims to take the pain out of web development and make it an enjoyable and creative experience, turning web devs into web artisans.
In this guide, you are going to learn how to install Laravel with LAMP stack on a Ubuntu 20.04 server to get your web application up & running.
Prerequisites
To follow this guide, you’ll need a Ubuntu 20.04 LTS server and be logged in as a sudo user. Before we begin, update and upgrade the Ubuntu 20.04 packages by running:
sudo apt update && sudo apt upgradeInstalling LAMP Stack
LAMP is an acronym for Linux operating system, Apache web server, MySQL database and PHP programming language. We are already on Ubuntu 20.04 which ticks the Linux in LAMP stack. So we are going to install the rest of three packages to complete LAMP stack for our Laravel application.
There is no meta-package available to install LAMP stack in the Ubuntu 20.04 repositories. But we can use a neat little feature of apt package manager called tasks. Tasks are denoted using the name of the available task with a cadet (^) appended to it.
sudo apt install lamp-server^This command will search the package list files for all the “Task:” field and install all packages with “lamp-server” in their task field. So the LAMP stack consisting of Apache, MySQL and PHP packages with all their dependencies will be installed on your Ubuntu server.
Configure Firewall
Once you have installed LAMP stack, you also need to configure the uncomplicated firewall (UFW) and change its rules so that you can access the Apache server from the internet.
UFW provides simple application profiles that can be used to change rules and toggle traffic on the network ports. Run the following command to list all the application that access the network ports:
sudo ufw app listYou will see an output such as this:
Available applications:
 Apache
 Apache Full
 Apache Secure
 OpenSSH
The network ports these profiles open on your Ubuntu 20.04 server are listed below:
- Apache: This profile only open the port
80(allows HTTP traffic) - Apache Full: This profile opens both
80&443ports (allows HTTP & HTTPS traffic) - Apache Secure: This profile opens only the port
443(allows HTTPS traffic) - OpenSSH: This profile opens port
22which allows SSH protocol
You need to enable the ‘Apache Full’ profile which will allow traffic to the Apache web server from the internet. Additionally, you will also need to enable ‘OpenSSH’ profile which allows the traffic on port 22 (SSH) on your Ubuntu 20.04 server. If you enable UFW without allowing ‘OpenSSH’ profile you would not be able to connect to your server using SSH.
To change the UFW rule and allow traffic on port 80 and 22, run:
sudo ufw allow 'Apache Full'
sudo ufw allow 'OpenSSH'
Then enable the UFW firewall using the following command:
sudo ufw enableYou may get a prompt saying “command may disrupt existing ssh connections. Proceed with operations (y|n)?”. Press Y to continue as we have already added a rule to allow SSH in UFW.
Now you can access the Apache default web page using the IP address of your Ubuntu server from the internet. To do so open your browser and type the IP address of your Ubuntu 20.04 server in the URL bar and hit enter.
http://Your_ubuntu_server_ip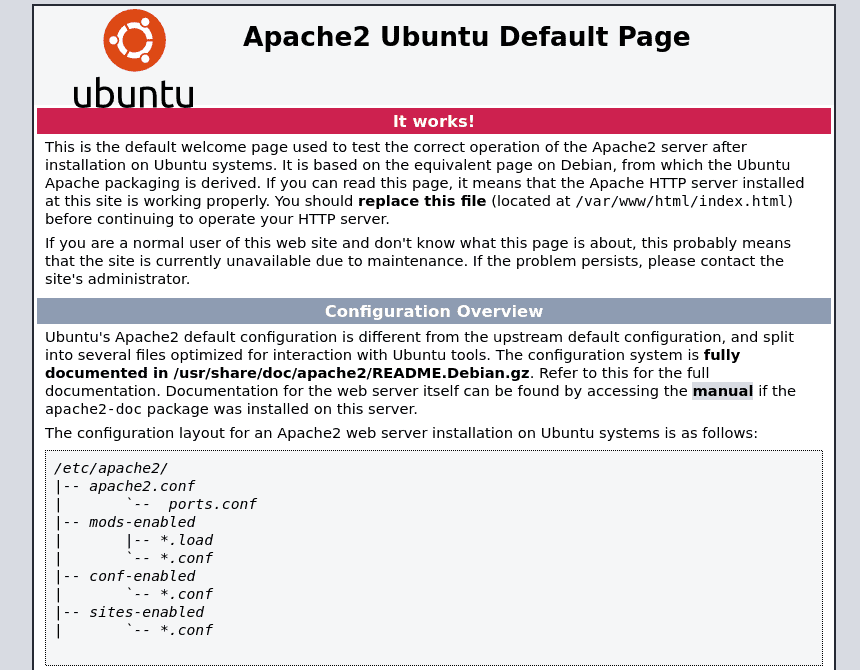
This page confirms that Apache web server is running correctly and the UFW rules are set up properly.
Setting up MySQL Database for Laravel
Laravel 7 makes interacting with databases extremely simple across the various database backends it supports such as MySQL version 5.6+, PostgreSQL 9.4+, SQLite 3.8.8+ and SQL Server 2017+. We already have the latest MySQL package installed with the lamp-sever^ task. So in this section, we will configure the MySQL server and then look at how to set up a new MySQL user and database for Laravel application.
Configure MySQL
The MySQL database comes with a security script preinstalled that can be used to remove some insecure default settings. It is recommended that you run this script before you deploy your Laravel application.
sudo mysql_secure_installationThe above command will execute the security script which will prompt you a series of questions for configuring the MySQL server.
First, you will be asked if you want to setup the VALIDATE PASSWORD plugin. This plugin checks your password and ranks them as secure or insecure based on the password validation policy level you will choose soon. So press Y if you want to enable this plugin.
Output:

Securing the MySQL server deployment.

Connecting to MySQL using a blank password.

VALIDATE PASSWORD COMPONENT can be used to test passwords
and improve security. It checks the strength of password
and allows the users to set only those passwords which are
secure enough. Would you like to setup VALIDATE PASSWORD component?

Press y|Y for Yes, any other key for No: Y
Then set the password validation policy level by either entering 0, 1 or 2 depending upon how strong you want to create your password for your databases.
Output:

There are three levels of password validation policy:
LOW Length >= 8
MEDIUM Length >= 8, numeric, mixed case, and special characters
STRONG Length >= 8, numeric, mixed case, special characters and dictionary file
Please enter 0 = LOW, 1 = MEDIUM and 2 = STRONG: 2
Next, you will be asked to enter a new password for MySQL root user. Enter a suitable password for your MySQL root. The VALIDATE PASSWORD plugin will give you the estimated strength of your password according to your password validation level. Press Y to continue with the password you provided.
Output:

Please set the password for root here.

New password:

Re-enter new password:

Estimated strength of the password: 100
Do you wish to continue with the password provided?(Press y|Y for Yes, any other key for No) : Y
Press Y for rest of the prompts, they will remove some anonymous users and the test databases, disable remote root login and reload the new settings for the MySQL server. When you are finished, test your database by running:
sudo mysqlThe above command will open the MySQL console, connecting to the MySQL database as the root user. You will see an output such as this:
Output:

Welcome to the MySQL monitor. Commands end with ; or \g.
Your MySQL connection id is 10
Server version: 8.0.20-0ubuntu0.20.04.1 (Ubuntu)

Copyright (c) 2000, 2020, Oracle and/or its affiliates. All rights reserved.

Oracle is a registered trademark of Oracle Corporation and/or its
affiliates. Other names may be trademarks of their respective
owners.

Type 'help;' or '\h' for help. Type '\c' to clear the current input statement.

mysql>
You might have noticed that you didn’t need to enter the password you have set for MySQL root user. That is because the default authentication method for administrative MySQL root user is caching_sha2_authentication instead of the mysql_native_password method which uses a password to log in.
So by default, you can only log in as MySQL root user with sudo enabled users which act as additional security for the MySQL server. But MySQL PHP library doesn’t support caching_sha2_authentication method. Therefore we need to use mysql_native_password method when we create a new user for Laravel as it uses passwords to connect & interact with the database.
Create a New MySQL User & Database
It is always a good practice to create a new user and database specifically for your application instead of using MySQL root user and test databases. So we are going to set up a new MySQL user called laravel_user and a database called laravel. If you have followed the tutorial to this point, you should have the MySQL console open. To create the user called laravel_user run the following query in the MySQL console:
Note: Replace the testpass in the below MySQL query with a strong password.
CREATE USER 'laravel_user'@'%' IDENTIFIED WITH mysql_native_password BY 'testpass';Next, create a database called laravel for our Laravel application by running this query:
CREATE DATABASE laravel;Only the MySQL root user has permissions to the newly created database laravel. Grant all the permissions over the laravel database to the laravel_user by running:
GRANT ALL ON laravel.* TO 'laravel_user'@'%';So, we now have a new MySQL user and a database, exit the MySQL console by running:
EXIT;Test your new MySQL user by logging into the MySQL console with it, to do so run this command in terminal:
mysql -u laravel_user -pNotice the -p flag in the command, it will prompt you for the password you used while creating the laravel_user (testpass in the query). After you have logged in the MySQL console as laravel_user, confirm that the user has access to the laravel database by running:
SHOW DATABASES;Output: +--------------------+ | Database | +--------------------+ | laravel | | information_schema | +--------------------+ 2 rows in set (0.01 sec)
The above output confirms that the MySQL user laravel_user has permissions to the database laravel. Exit the MySQL console using the EXIT; query so we can proceed to create the DemoApp Laravel application.
Installing Laravel
The Laravel framework utilizes Composer to download and manage its dependencies. So, we need to install Composer on our Ubuntu 20.04 machine before we can create a Laravel application.
Install Composer
Composer is a dependency manager tool for PHP, which makes installing and updating the PHP frameworks and libraries so much easier. We are going to look at how to install Composer quickly in this tutorial so we can use it to download and manage the Laravel framework.
You need to install some additional packages that are required by Composer to function such as php-cli to run PHP scripts in the terminal and unzip to help Composer extract the packages. Install them both by running:
sudo apt install php-cli unzipThen to install Composer globally, download the Composer installation script with curl and install it using the following command:
curl -sS https://getcomposer.org/installer | sudo php -- --install-dir=/usr/local/bin --filename=composerFinally, verify that the composer installed correctly by running:
composer ______
/ ____/___ ____ ___ ____ ____ ________ _____
/ / / __ \/ __ `__ \/ __ \/ __ \/ ___/ _ \/ ___/
/ /___/ /_/ / / / / / / /_/ / /_/ (__ ) __/ /
\____/\____/_/ /_/ /_/ .___/\____/____/\___/_/
/_/
Composer version 1.10.8 2020-06-24 21:23:30
Usage:
command [options] [arguments]This output confirms that the Composer is working properly on your Ubuntu 20.04 server, you can start using it to install and manage PHP frameworks and libraries.
Create a Laravel Application
We pretty much have everything required to create a Laravel application on our Ubuntu 20.04 server except for few PHP extensions. Install these missing extensions using the following command:
sudo apt install php-mbstring php-xml php-bcmath php-zip php-jsonNow, we can install Laravel and create a new Laravel application with the help of Composer. First, make sure you are in your user’s home directory:
cd ~Then create a new Laravel project using the Composer’s create-project command:
composer create-project --prefer-dist laravel/laravel LaravelAppThe above command will create a new project called as LaravelApp and it will also install and configure the Laravel Framework for you. You will see an output similar to this:
Output:

Creating a "laravel/laravel" project at "./LaravelApp"
Installing laravel/laravel (v7.12.0)
Installing laravel/laravel (v7.12.0): Downloading (100%)
Created project in /home/ath/LaravelApp
@php -r "file_exists('.env') || copy('.env.example', '.env');"
Loading composer repositories with package information
Updating dependencies (including require-dev)
Package operations: 97 installs, 0 updates, 0 removals
Installing voku/portable-ascii (1.5.2): Downloading (100%)
Installing symfony/polyfill-ctype (v1.17.1): Downloading (100%)
Installing phpoption/phpoption (1.7.4): Downloading (100%)
Installing vlucas/phpdotenv (v4.1.7): Downloading (100%)
Installing symfony/css-selector (v5.1.2): Downloading (100%)
  ....
When the installation is finished, go to the application’s root directory and then run the Laravel’s artisan command to verify that all components are installed properly:
cd LaravelApp/
php artisan
Output:
Laravel Framework 7.18.0
Usage:
command [options] [arguments]
Options:
-h, --help Display this help message
-q, --quiet Do not output any message
-V, --version Display this application version
--ansi Force ANSI output
--no-ansi Disable ANSI output
-n, --no-interaction Do not ask any interactive question
--env[=ENV] The environment the command should run under
-v|vv|vvv, --verbose Increase the verbosity of messages: 1 for normal output, 2 for more verbose output and 3 for debug
....
This output confirms that installation was successful and all the files are in place and Laravel command-line tools are working properly. However, we still need to configure the application to set up the database and a few other settings.
Configure Laravel Application
The Laravel configuration files are located in a directory called config inside the application’s root directory. Additionally, when we installed Laravel through Composer, it created an environment file called ‘.env’ in the application’s root directory. The environment file includes the environment-specific configurations and it takes precedence over the settings in the regular configuration files located inside the config directory.
Note: The environment configuration file contains sensitive information about your server such as database passwords, Laravel application keys etc. Thus it should never be shared publicly.
We will now edit the .env file to change configuration and add the database credentials to it. Open the file using nano editor by running:
nano .envThere are many configuration variables in this .env file. We don’t need to change each one of them, as Composer has configured most settings automatically. So, here is the list of some primary configuration variables that you must know about:
APP_NAME: The application name used for notification and messages, so we are going to set it to ‘LaravelApp’.APP_ENV: This variable is used to indicate the current application environment. It can be set to local, development, testing or production environments. We are going to set it to the development environment for now.APP_KEY: Unique application Key used to create salts and hashes for the web app. It is automatically generated when you install Laravel via Composer, so there is no need to change this.APP_DEBUG: It can be set to either true or false, depending on if you want to display errors on client-side. Set it to false when you move to the production environment.APP_URL: Base URL or IP for the application, change it to your domain name if you have one for your Laravel app or else keep it untouched for now.DB_DATABASE: Name of the database you wish to use with the Laravel application. We are going to use the MySQL database ‘laravel’ we created while configuring MySQL.DB_USERNAME: Username to connect to the database. We are going to use the MySQL user ‘laravel_user’ we created.DB_PASSWORD: The password to connect to the database.
APP_NAME=LaravelAppAPP_ENV=developmentAPP_KEY=base64:Application_unique_keyAPP_DEBUG=true APP_URL=http://domain_or_IPLOG_CHANNEL=stack DB_CONNECTION=mysql DB_HOST=127.0.0.1 DB_PORT=3306 DB_DATABASE=laravel DB_USERNAME=laravel_userDB_PASSWORD=testpass
Make changes to the .env file accordingly and when you are done editing, save and exit the file by using CTRL+X then press Y and hit enter to confirm. Now, all that is left is to configure the Apache server and create a virtual host for our Laravel application.
Setting up Apache Web Server
We have installed Laravel in the local folder of the user’s home directory. While this works perfectly fine for local development, it is recommended practice to have web application directory located in /var/www. The reason why we didn’t install Laravel in /var/www directly is because it is owned by root and Composer should not be used with sudo.
So use the mv command to move the Laravel application folder and its contents to /var/www:
sudo mv ~/Laravel/ /var/wwwThe LaravelApp directory is owned by the user, so you can still edit and make changes to the files without using the sudo command. But the Apache webserver needs access to the cache and storage directories of application as Laravel stores application generated files in it. Change the owner of these folders to the www-data user using the chown command:
sudo chown -R www-data.www-data /var/www/LaravelApp/storage
sudo chown -R www-data.www-data /var/www/LaravelApp/bootstrap/cache
After changing the owner of these directories, enable the Apache’s mod_rewrite as it is required by Laravel to properly transform URLs to be interpreted by its routing function via .htaccess file.
sudo a2enmod rewriteNext, we need to set up a virtual host for the Laravel application. The virtual host configs are located at /etc/apache2/sites-available. We are going to edit the default virtual host file to deploy the Laravel application. Open the default virtual host configuration file using nano editor:
sudo nano /etc/apache2/sites-available/000-default.confChange the document root from /var/www/html to /var/www/LaravelApp/public and add the following snippet below the DocumentRoot line:
<Directory /var/www/LaravelApp>
	AllowOverride All
</Directory>
Your 000-default.conf should look something like this now with few comments.
<VirtualHost *:80>

        ServerAdmin webmaster@localhost
        DocumentRoot /var/www/LaravelApp/public
        <Directory /var/www/LaravelApp>
		AllowOverride All
	</Directory>

        ErrorLog ${APACHE_LOG_DIR}/error.log
        CustomLog ${APACHE_LOG_DIR}/access.log combined

</VirtualHost>
Restart the Apache web server by running the following command:
sudo systemctl restart apache2Now go to your browser and type the IP address of you Ubuntu 20.04 server. You will see the Laravel start page instead of the default Apache welcome page.
Assuming you have followed this guide so far, you should have a working Laravel application with a MySQL database called laravel for it. From this point, you can start developing your Laravel application on your own. To learn more about the Laravel framework and its usage visit the Laravel docs page.