
Apple’s release of the macOS Tahoe 26 public beta gives Mac users a chance to try new features like the Liquid Glass interface and expanded AI tools before the official launch. Installing pre-release software can introduce system instability, so it’s important to prepare your Mac and data carefully to avoid data loss or workflow disruptions.
Preparing Your Mac for macOS 26 Public Beta
Installing any beta operating system carries a risk of bugs, app incompatibilities, and potential data loss. Before proceeding, it’s critical to create a full backup of your Mac using Time Machine or another reliable backup solution. This backup is your recovery path if you need to revert to your previous macOS version, since downgrading from the beta typically requires erasing your disk and restoring from backup.
Apple and experienced users strongly recommend installing beta software on a secondary Mac, a separate partition, or an external drive, rather than your primary work machine. This approach limits the risk to your main system and data. If you have only one Mac, consider creating a new volume or using an external SSD for the beta installation. Make sure you have at least 15GB of free space, although more is preferable for smooth operation.
Main Method: Installing macOS 26 Public Beta via Apple Beta Software Program
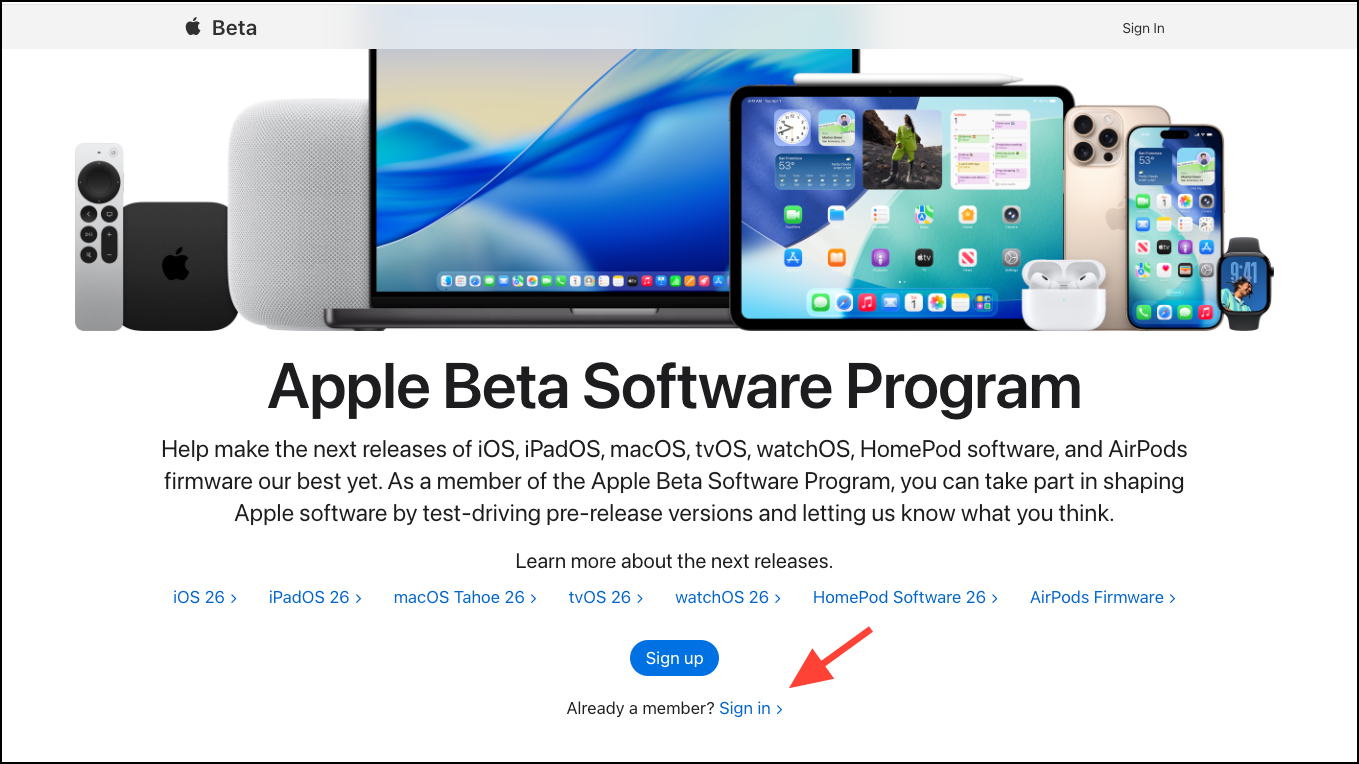
Step 1: Register for the Apple Beta Software Program by visiting Apple’s beta portal. Sign in with your Apple ID and follow the prompts to enroll your account and the Mac you want to use for testing. Registration is open to anyone with a valid Apple ID, and you’ll need to agree to Apple’s terms, which require you to keep non-public beta information confidential.
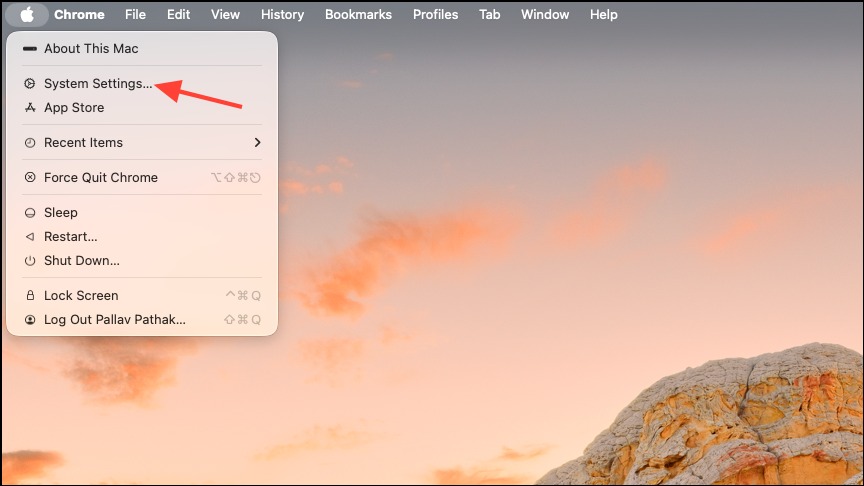
Step 2: After enrolling, open System Settings on your Mac. Click the Apple icon in the top-left corner and select System Settings from the drop-down menu.
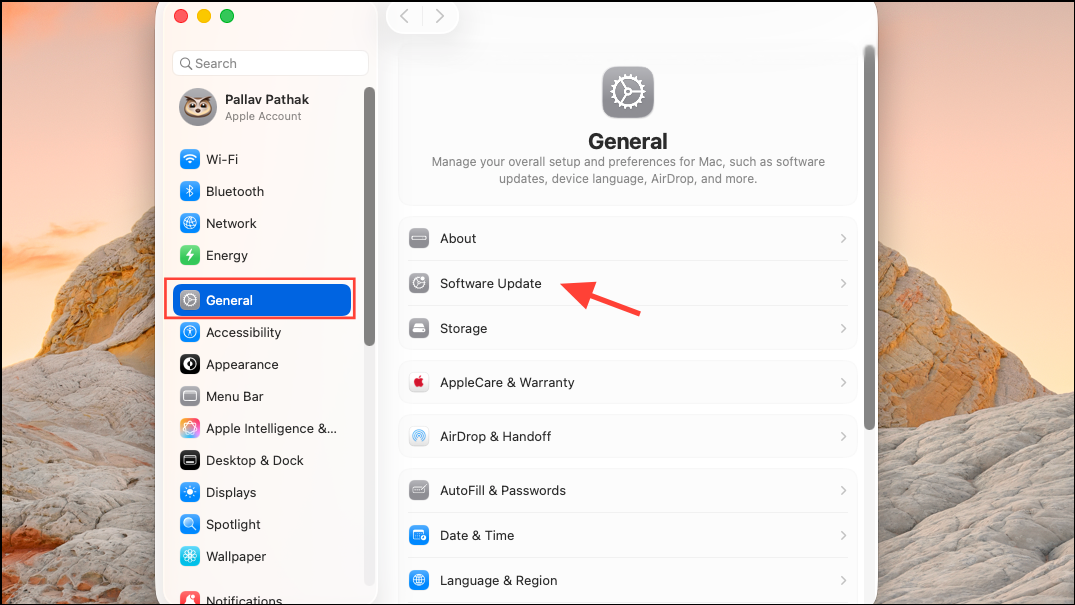
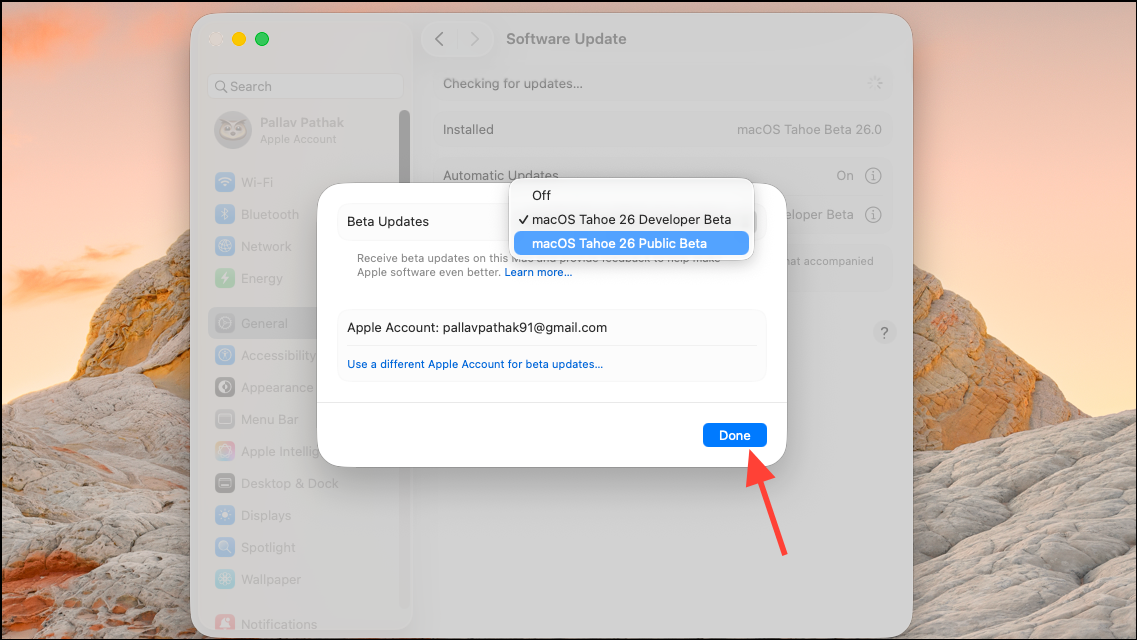
Step 3: In System Settings, navigate to General > Software Update. Here, you’ll see options for Automatic Updates and Beta Updates. Click the i icon next to Beta Updates.
Step 4: In the Beta Updates menu, turn on Beta Updates if they’re not already enabled. From the dropdown, select macOS Tahoe 26 Public Beta. If you don’t see this option, double-check that your Apple ID is properly enrolled in the beta program and that you’re using a compatible Mac model.
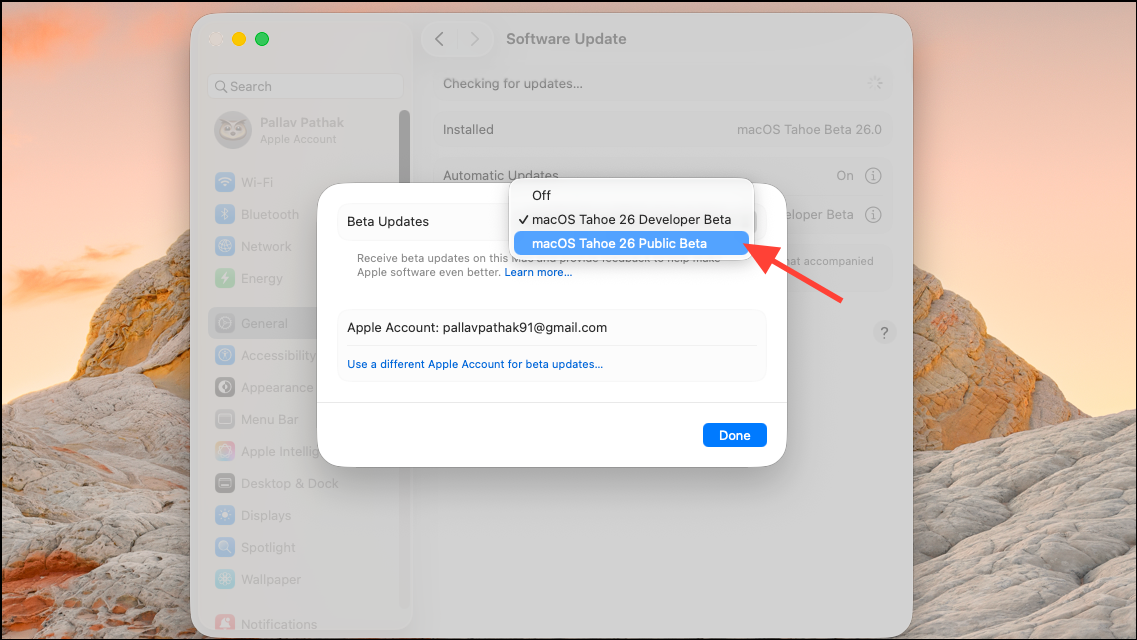
Step 5: Click Done. Your Mac will now check for updates and display the macOS Tahoe 26 Public Beta as an available upgrade. Click Upgrade Now to begin the download and installation process. The Mac will restart after installation, and you’ll be greeted by the new macOS Tahoe setup.
During installation, keep your Mac connected to power and avoid interrupting the process. The time required depends on your internet speed and Mac hardware.
Alternative Methods: Using a Partition, External Drive, or Virtual Machine
For users who want to isolate the beta even further, installing macOS 26 on a separate APFS volume or external SSD is a practical option. This allows you to dual-boot between your stable macOS and the beta, reducing the risk to your main environment. Create a new APFS volume using Disk Utility, then select it as the install destination during the beta installation process.
Running macOS 26 in a virtual machine is another approach, especially for developers or users who want to test features without altering their main system. Tools like VirtualBuddy or UTM support recent versions of macOS and can run the public beta using an official IPSW file. This method offers the most isolation but may have limitations in graphics performance or hardware integration.
Apple’s beta program makes it straightforward to try macOS Tahoe 26, but careful preparation and a robust backup are essential. Testing on a secondary device or volume is the safest way to explore new features while protecting your important data and workflows.