Nginx is an open-source and popular reverse proxy web server available on multiple platforms. The software was developed by Igor Sysoev as a solution to C10K problem and first released in 2004. C10K problem is the problem of handling ten thousand clients concurrently which was quite not easy in the early 2000s.
In this tutorial, we look at how to install and set up Nginx on Ubuntu 20.04 LTS.
Prerequisites
A system with Ubuntu 20.04 installed and a sudo user. Additionally, you need to have no other web server such as Apache running on port 80 or 443.
Installing Nginx
Nginx is available in Ubuntu 20.04 repository and apt package manager can be used to install it. So, to install Nginx open the terminal using ctrl+alt+t and run:
sudo apt update && sudo apt install nginx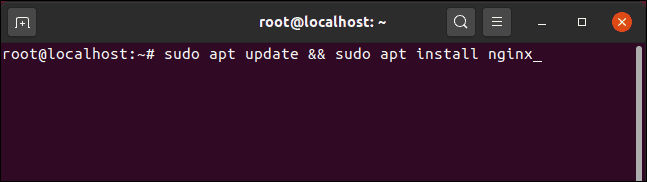
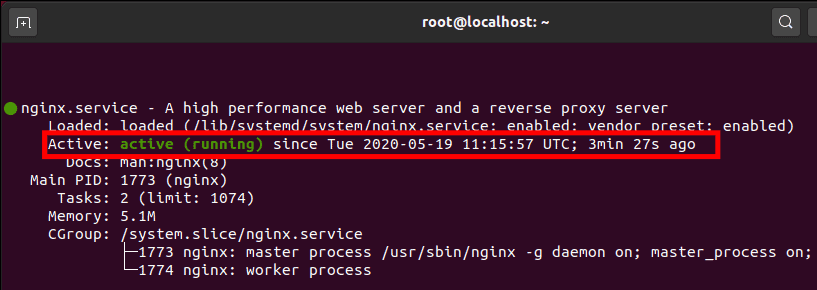
Installation will soon complete and Nginx daemon will start in background automatically. So, to check the status of Nginx, run:
sudo systemctl status nginxAfter running the above command you should get Nginx status as active(running) in green as seen below.
Configuring Ubuntu Firewall (UFW)
By default, the outgoing ports HTTP (80) and HTTPS (443) are closed on Ubuntu 20.04. Additionally, the default firewall daemon ufw is disabled as all the ports are closed.
Thus, to access the Nginx server from other systems, you’ll need to enable the ufw and set it up correctly to allow traffic on port 80 and 443. Before you enable ufw, know that if you are setting up Nginx on a remote server, first update the ufw rules to allow ssh by running:
sudo ufw allow sshThe above command allows the ssh access to the remote server, without allowing ssh you’ll be locked out of the remote server.
After enabling ssh access, you can enable the ufw firewall daemon by running:
sudo ufw enableNow, you need to change the firewall rules to allow HTTP and HTTPS ports so that Nginx can serve web traffic. To change the rules, run:
sudo ufw allow 'Nginx Full'Nginx Full allows both HTTP and HTTPS ports for incoming and outgoing traffic from all IP addresses.
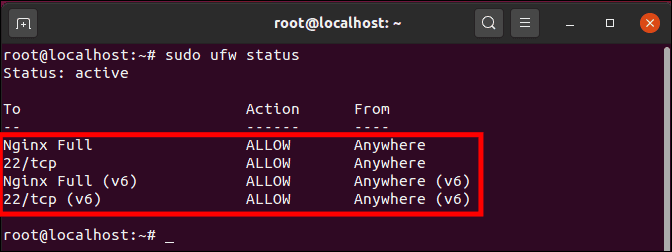
After that, verify if the rules are properly added to ufw firewall by running the command:
sudo ufw statusThe above command will output the rules we added to ufw firewall daemon.
Connecting to Nginx Server
Now that we have installed Nginx and configured ufw to allow incoming HTTP and HTTPS web traffic, you should be able to access Nginx server by using the IP address of the server.
If you don’t know the server’s IP address, use the command below to easily retrieve it.
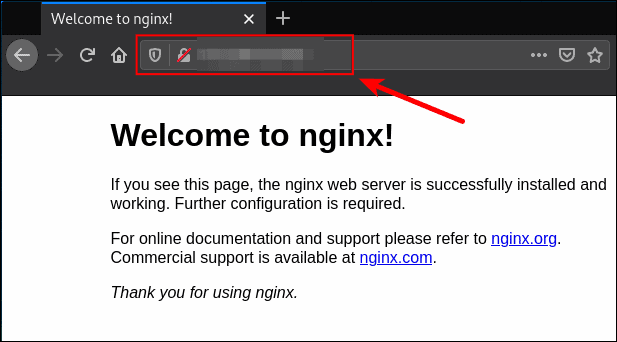
ip addr show eth0 | grep inet | awk '{ print $2; }' | sed 's/\/.*$//'Once you’ve got the IP address, paste it into your browser and hit enter.
http://your-server-ipIf everything was configured correctly, you should be able to see the ‘Welcome to nginx!’ webpage.
Nginx Files and Directories
Now that we have Nginx installed and running on your server. Let us take a look at some of the important Nginx files and directories that you will have to use to configure your website/web app.
Web server Content
You can configure any location you want to be your root directory for your server block. Nginx’s default HTML directly is /var/www/html, it’s where the ‘welcome’ page which we accessed earlier is located.
Other locations that are usually used as root directory for domains include:
/home/<user_name>/<site_name>/var/www/html/<site_name>/opt/<site_name>
Nginx Configuration Files
All the Nginx configuration files are located in /etc/nginx directory. Let’s look at some of the important files we need to set up a basic domain.
/etc/nginx/nginx.conf: This file contains all the configuration needed to run Nginx./etc/nginx/sites-available/: This directory has all the server block configuration of domains, but are currently not enabled/deployed and thus not accessible by clients./etc/nginx/sites-enabled/: This directory holds currently active/enabled domains accessible by clients. To enable a domain we need to link the domain configuration file fromsites-availableto thesites-enableddirectory./etc/nginx/snippets/: In this directory, we can store potentially reusable segments of configuration. It saves a lot of time in the production environment due to the fact that it can make segments/blocks of configuration reusable.
Server Logs
Nginx logs the events/activities and stores them in log files in the /var/log/nginx directory. The Nginx logs activities in these files:
/var/log/nginx/access.log: This file logs the clients who have accessed the Nginx server. Details include the IP address of the client, time and date, browser used to access the server and the OS./var/log/nginx/error.log: This file logs the errors encountered by Nginx server while running.
So, in this section, we have briefly looked at some of important Nginx files and directories that are enough to get started.
Setting up Server Blocks
Now that we have some basic knowledge about Nginx files and server, we are ready to set up our own server block. Server blocks are similar to Apache virtual hosts.
We’ll look at how to create a server block and to demonstrate we’ll use example.com as domain in creation process.
💡 Replace example.com with your domain name.
Before we start configuring Server Blocks, we need to create a directory to serve as the root directory for website content. Let us create /var/www/example.com/html directory for domain using mkdir command.
sudo mkdir -p /var/www/example.com/htmlThe -p option will create all the parent directories needed. That is, it will create example.com a parent directory to html if it doesn’t exist.
Change ownership of the directory with the $USER environment variable:
sudo chown -R $USER:$USER /var/www/example.com/htmlNext, create a simple index.html file that will be accessed when you visit the domain being configured. This is for explanatory purpose only.
nano /var/www/example.com/html/index.htmlPaste the following content in the file we just created on the server.
<html>
    <head>
        <title>Welcome to example.com!</title>
    </head>
    <body>
        <h1>Yo!  The example.com is accessible!</h1>
    </body>
</html>
Press ctrl+o to write and save the index.html file and then, press ctrl+x to exit nano editor.
Now finally we can move onto creating a server block, so that Nginx can serve the index.html when some user goes to example.com. So to create a server block we need to make a configuration file named example.com in sites-available directory. To do so, we use nano and run:
sudo nano /etc/nginx/sites-available/example.comAnd then, either type or copy/paste the following configuration. Then press ctrl+o and enter to write & save. Similarly, press ctrl+x to close the nano editor.
server {
        listen 80;
        listen [::]:80;

        server_name example.com www.example.com;

        root /var/www/example-domain.com/html;
        index index.html;

        location / {
                try_files $uri $uri/ =404;
        }
}
The above configuration is similar to default server block configuration, we have changed root statement to point to our new root directory and changed the server_name to our domain name. While the location{} statement serves as error catch statement if files are not found and displays error 404 to the client.
Next, we can enable our server block so that Nginx will serve example.com webpages. To enable our server block we need to create a symlink of example.com file from sites-available to sites-enabled directory. To do so, run:
sudo ln -s /etc/nginx/sites-available/example.com /etc/nginx/sites-enabledA link will be created in site-enabled directory and now example.com should be enabled. Now we have two server blocks enabled on our Nginx server which will respond to request based on listen and sever_name directives saved in example.com server block configuration.
To check if all configuration files are correct and no syntax error is present, run:
sudo nginx -tNow, finally restart the Nginx to apply the changes by running the following command:
sudo systemctl restart nginxNginx will start serving your server block now, you can go to http://your-domain-name and see your webpage live.
Note: For the above section to work you’ll need to set up your own domain and replace example.com with your own domain name. Also, you’ll have to configure DNS for your domain to point to the IP address of your Nginx server.
To conclude, we have looked at how to install Nginx, configure ufw to allow remote access to Nginx server, connected to Nginx remotely, got familiar with some basic Nginx files and directories and learned how to set up a server block.
To know and learn more about Nginx, you may want to see Nginx wiki.