Notes on the iPhone come very handily whenever you need to jot something down quickly. From shopping lists, gift ideas, diary entries to sensitive financial information, we all use Notes for a gamut of things.
But storing compromising information in Notes is a scary thought for a lot of us. We don’t want anyone with access to our phones (even friends and family) to read our most personal thoughts, and we definitely don’t want anyone to be able to access our passwords and other financial information we have stored in there. Well, it is a good thing then that Apple introduced the ability to Lock Notes on iPhone.
You can lock the notes in the Notes app with a password, or with Face ID & Touch ID on supported iPhone models.
Setting Up the Notes Password
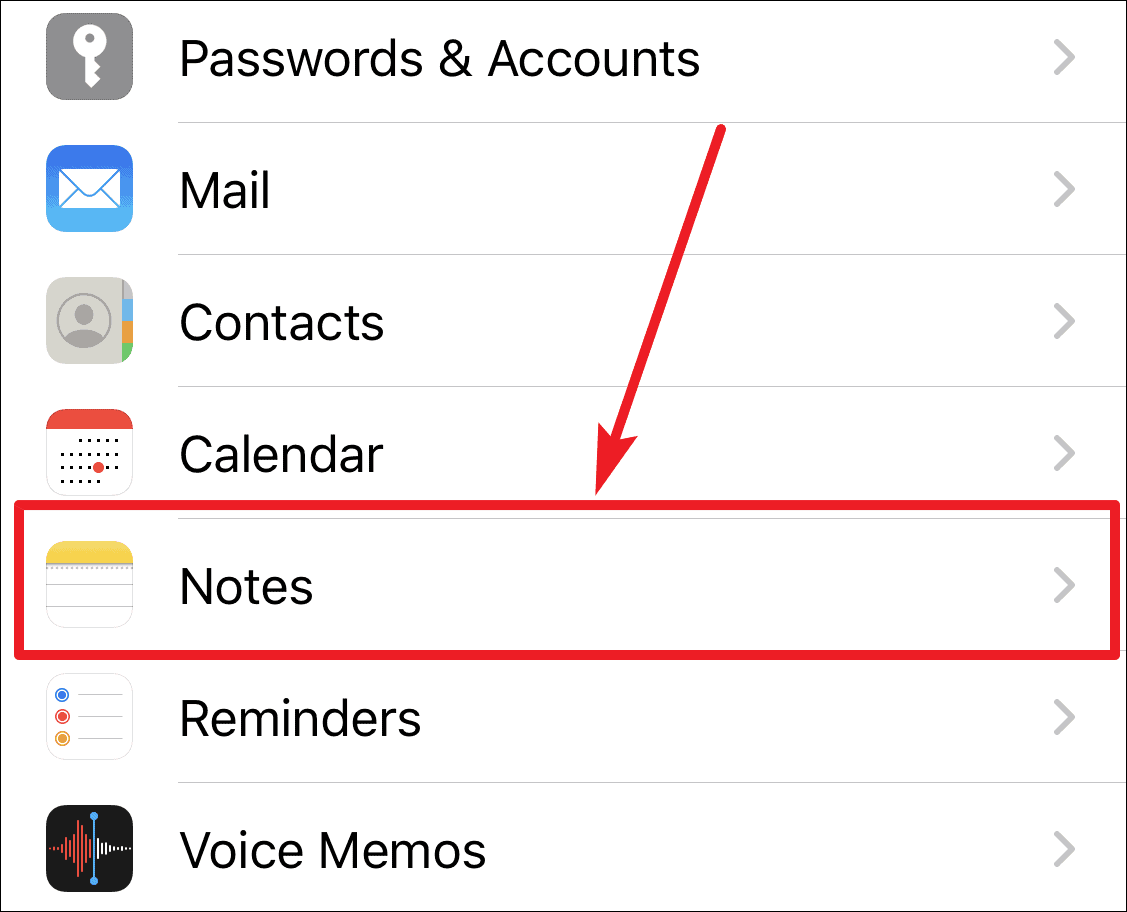
First of all, you will have to create a password for your Notes. The Notes app uses a single password for all your notes and across all your devices. Open your iPhone ‘Settings’ and scroll down a bit. Then, go to ‘Notes.’
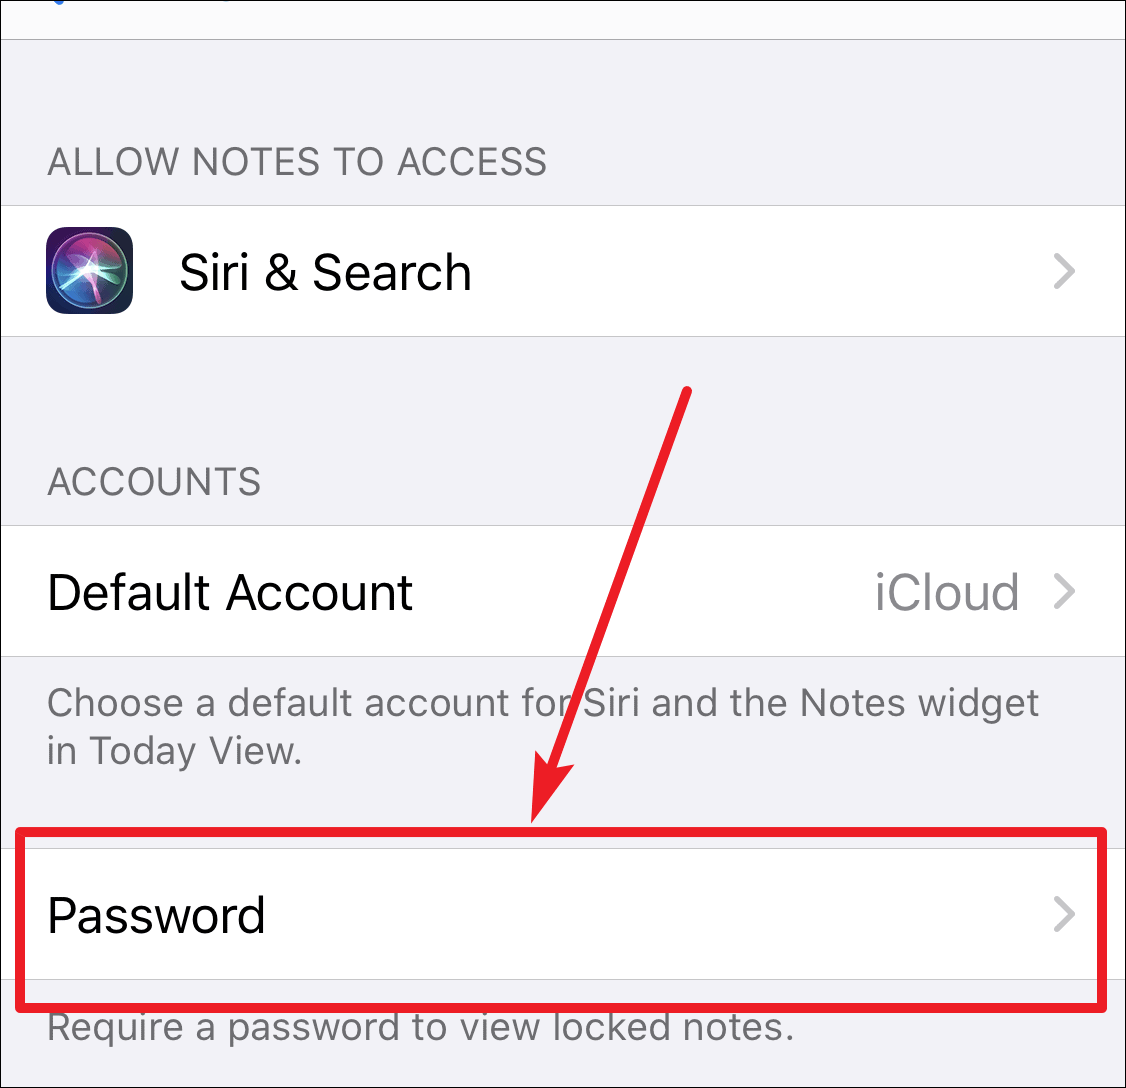
In Notes, choose ‘Password.’
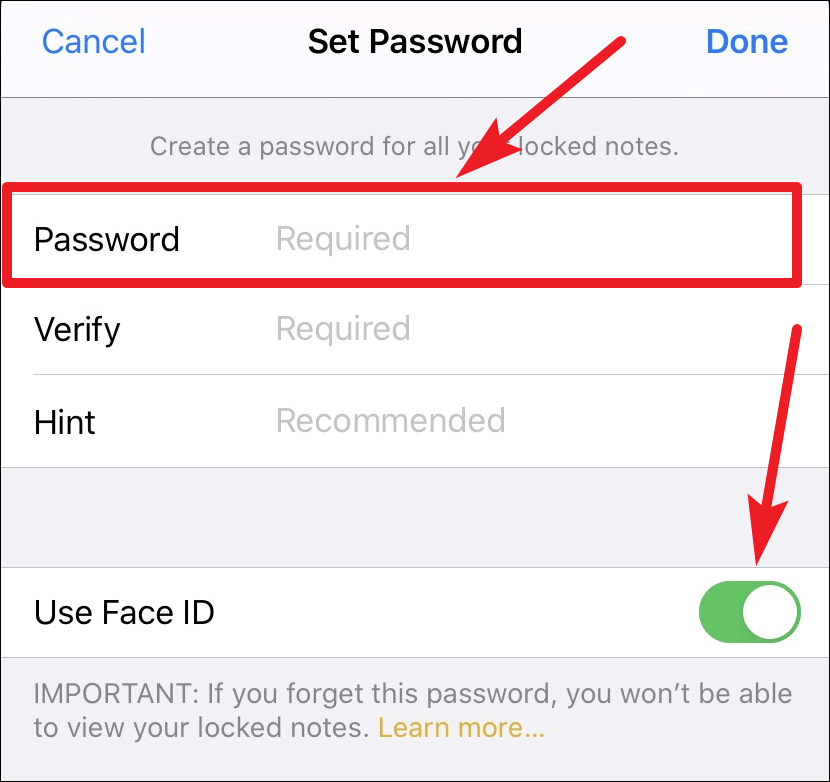
Finally, set a password you’d like to use for locking your notes. You could also enter a hint to help you remember the password in case you forget it.
Also, to make it easier to unlock notes, you can enable ‘Face ID’ or ‘Touch ID’ as well while setting a password on the ‘Set Password’ screen. Enabling this option also assures that you can still access your notes even if you forget and reset your old password.
💡 We advise you to create a helpful hint to remember your password. If you forget your password, you can reset it but all the previous notes locked with the old password will become inaccessible (especially if you don’t have Touch ID or Face ID enabled). The new password will only apply to the notes locked using the new password, and even Apple can’t help you access the notes secured with the old password.
How to Lock a Note
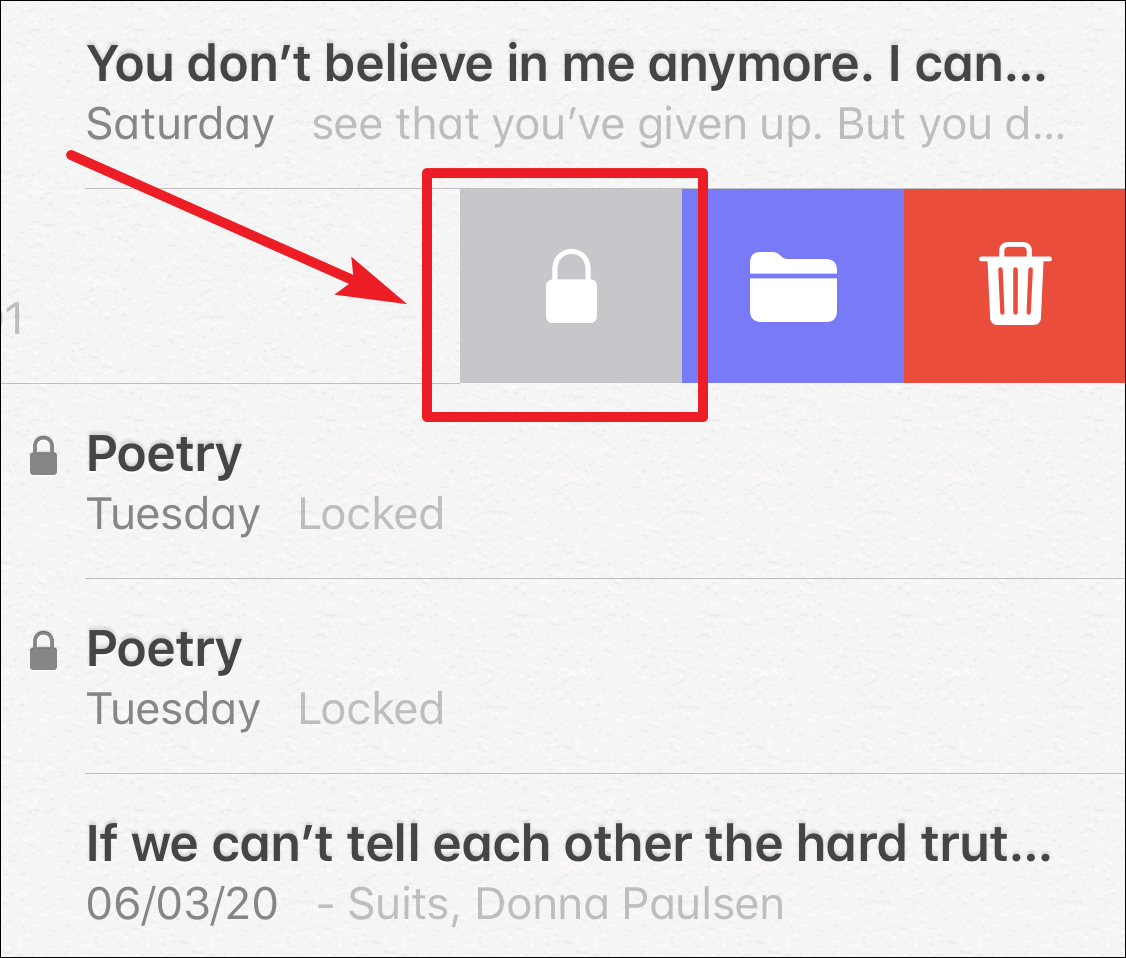
In the iCloud Notes list, swipe left on the note that you want to lock and then tap the Lock icon.
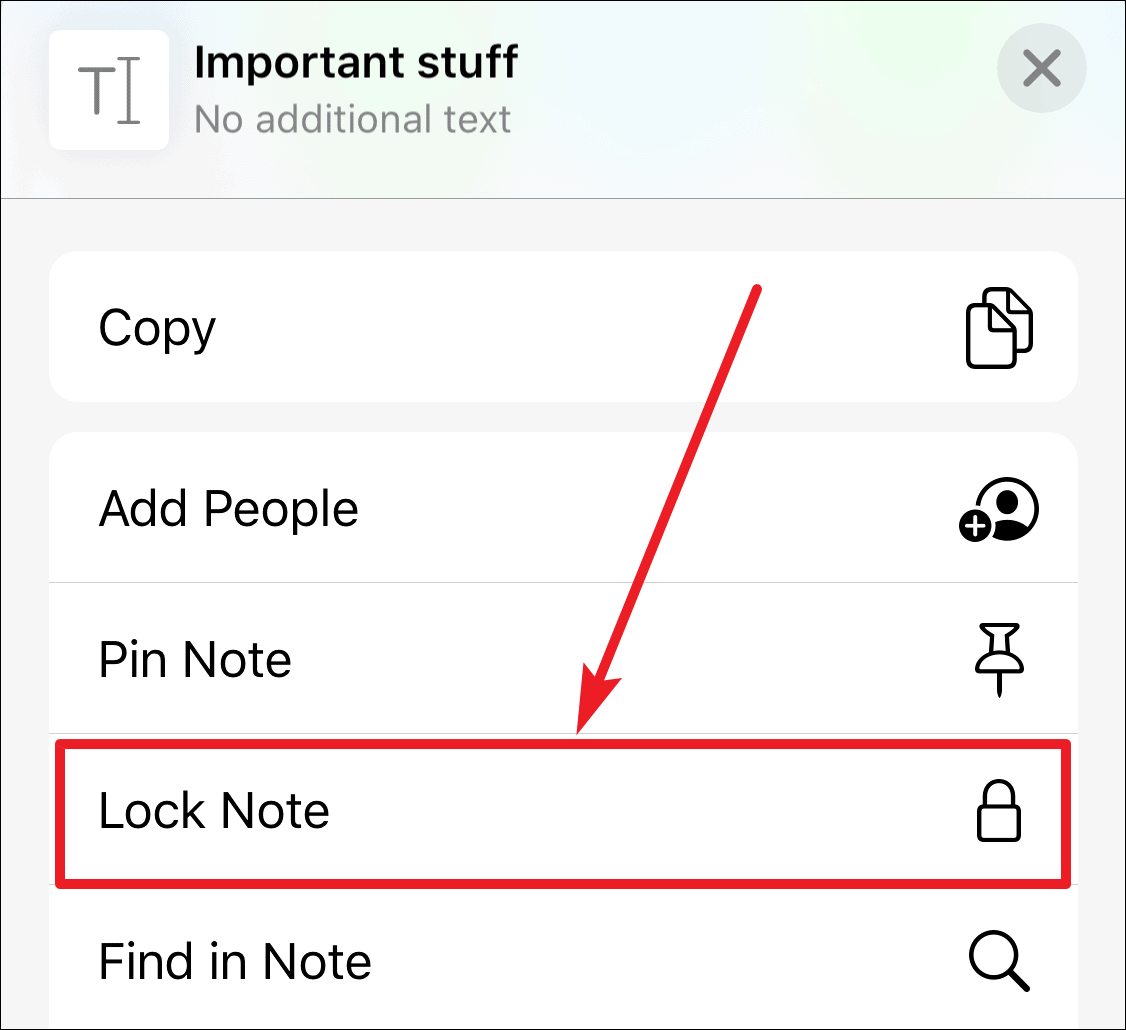
You can also lock a note from within an open note. In an open note, tap the ‘Share’ button on the top-right corner.

A pop-up menu will appear. Slightly scroll down and you will find the option to ‘Lock Note’. Tap on it to lock the note.
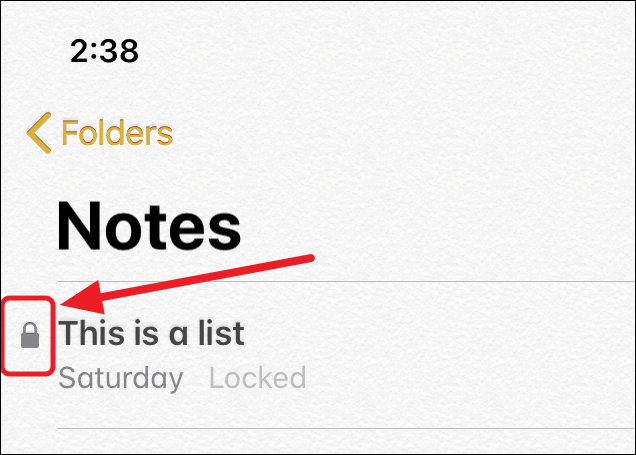
All locked notes will have a lock icon beside them in the notes list and only the heading will be visible.
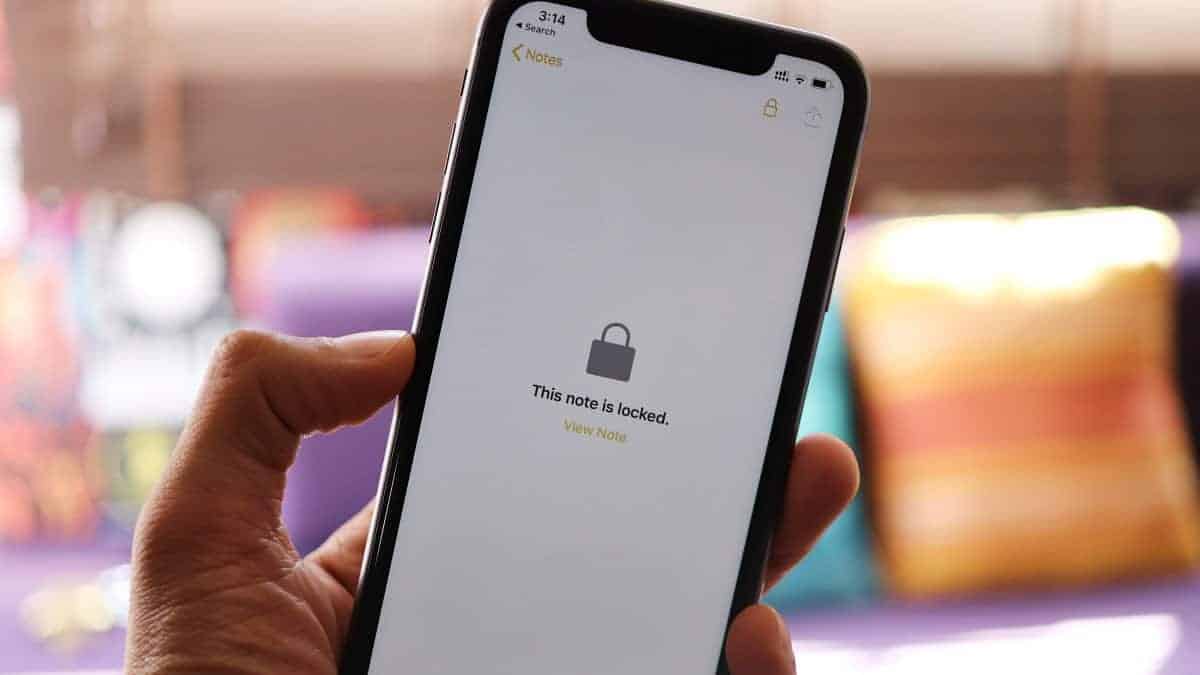
To view a locked note, tap on it from the Notes list. It’ll show a ‘This note is locked’ message. Tap ‘View Note’ right below it.
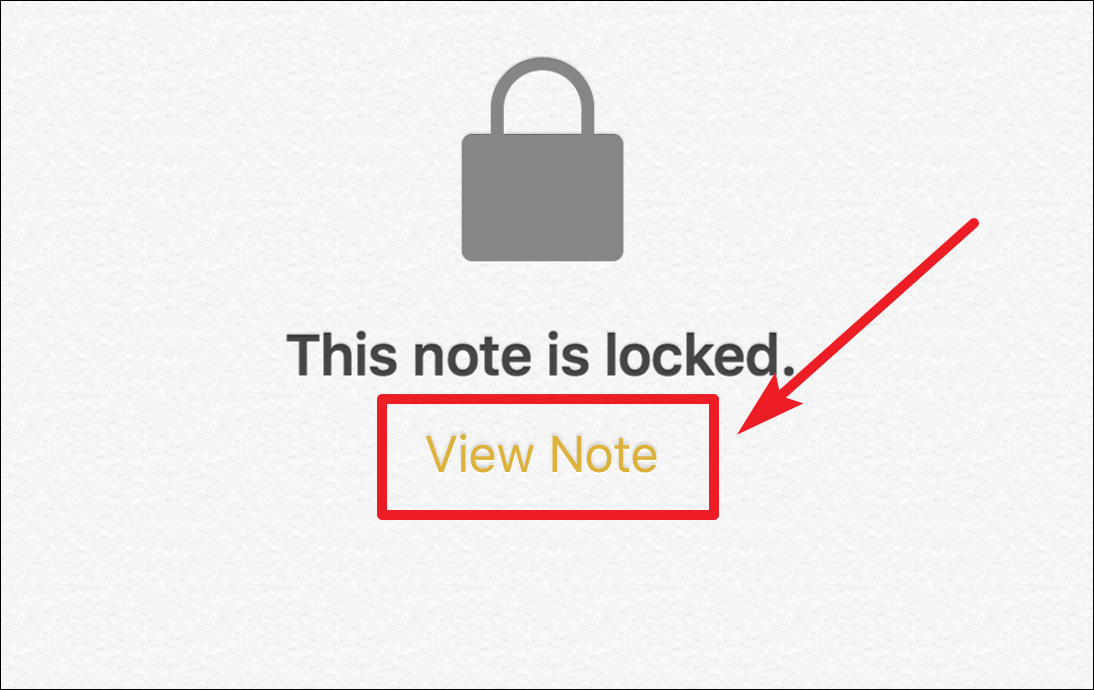
If you enabled Face ID or Touch ID, you’ll be prompted to unlock the note using those methods. If not, then enter the password you set for notes in the iPhone settings.
💡 Once you unlock a note, all locked notes in your iPhone will remain unlocked for several minutes so you can easily go back and forth between them.
Which type of Notes can be locked?
You can only lock the notes in the iCloud account in the Notes app. That is if you use more than one account in Notes, say your iCloud and Google account, then you cannot lock the notes created in the Google account.
Also, the notes that have PDFs, audio, video, Keynote, Pages, Numbers documents attached, or notes that have collaborators cannot be locked even in the iCloud account.
Conclusion
Storing your personal information in Notes has never been more secure in Apple than it is now. With locked notes, you never have to fear about your data being vulnerable to prying eyes. Locking and viewing locked notes in the Notes app is also very easy and user-friendly, so start locking your notes and never worry about an invasion of privacy ever again!


