Designing a videogame is a highly complex process requiring good programming knowledge and skill, which is why major videogame publishers usually have multiple studios working on such projects. However, now Microsoft's new MakeCode Arcade aims to make it easy for everyone to create video games. So, even if you do not have a programming background and lack the necessary skills and knowledge, you can still create games using it. It's especially perfect if you're trying to get your kid interested in coding.
What is Microsoft MakeCode Arcade?
Microsoft MakeCode Arcade is a free and open-source web-based game development platform that lets you design and share retro arcade games online. Built on top of the Programming eXperience Toolkit or PXT, it has been developed to help beginners understand the fundamentals of programming and game development interactively. MakeCode Arcade provides a block-based game development environment and allows users to create MakeCode programs like games in Blocks, Static Python, or Static TypeScript.
It is designed to help users learn how to code while moving from block-based coding to languages like Python and JavaScript. The platform website has several tutorials and examples along with in-depth documentation to help users become familiar with it. It also features tools like map and sprite editors, music tools, etc. Once you've created a game using the platform, you can not only share it with others, including the MakeCode community but even download it to hand-held devices.
Understanding and using the platform
If you want to save your projects while using MakeCode Arcade, you will need to sign in to the platform but you can also start making games without logging in. It is a good idea to first take a look at the tutorials available on the platform for different projects like JavaScript games, Block games, Community Games, and more. Each tutorial will teach you how to make a game in a step-by-step manner.
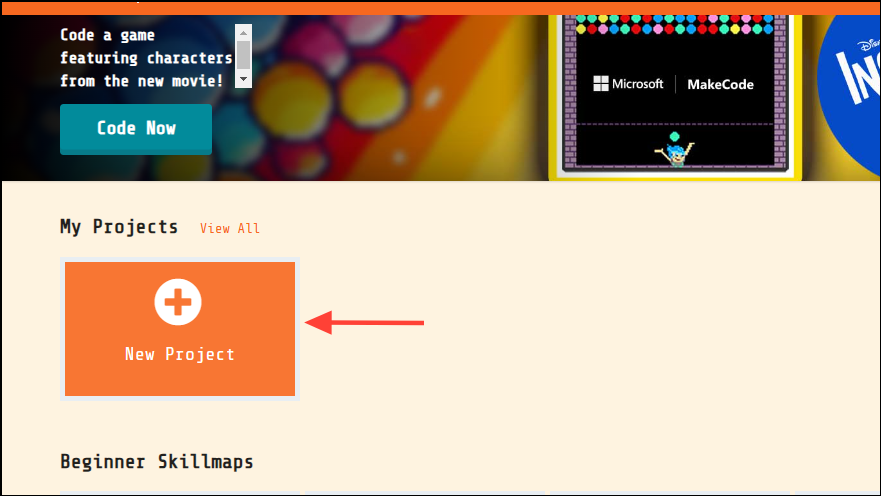
- Once on the website, click on the orange 'New Project' button.
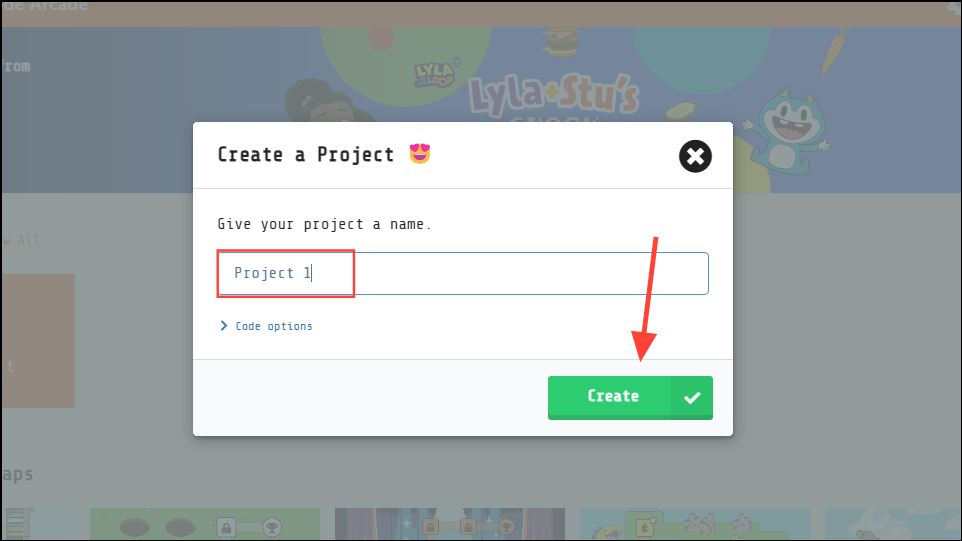
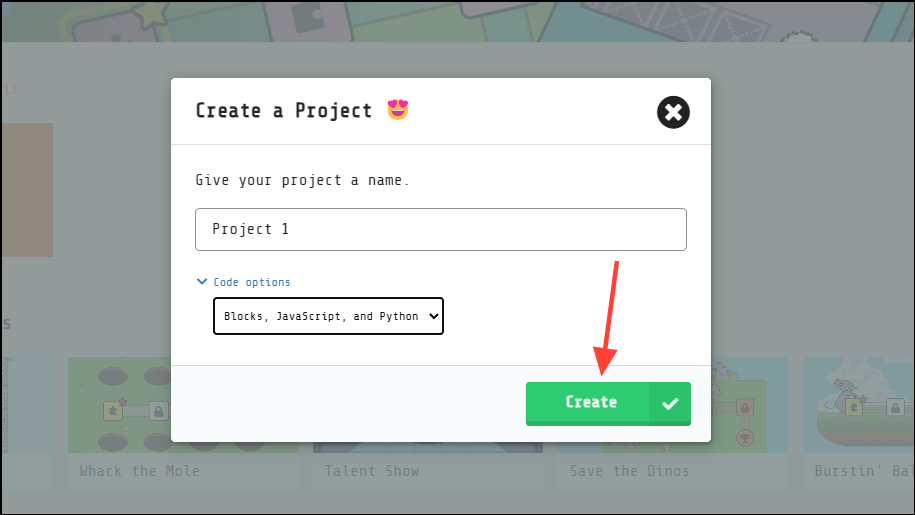
- Enter a name for your project in the 'Create a Project' pop-up and click on the 'Create' button.
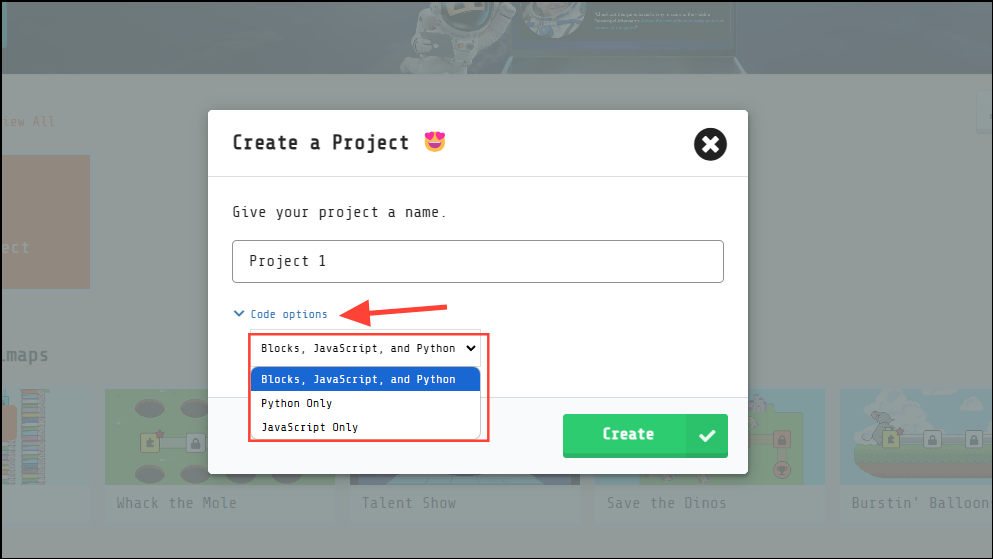
- To choose which type of game you want to create, click on 'Code options' and then on the dropdown. You can select from 'Blocks, JavaScript, and Python', 'Python Only', or 'JavaScript Only'.
- Click on the 'Create' button to go to the main project window.
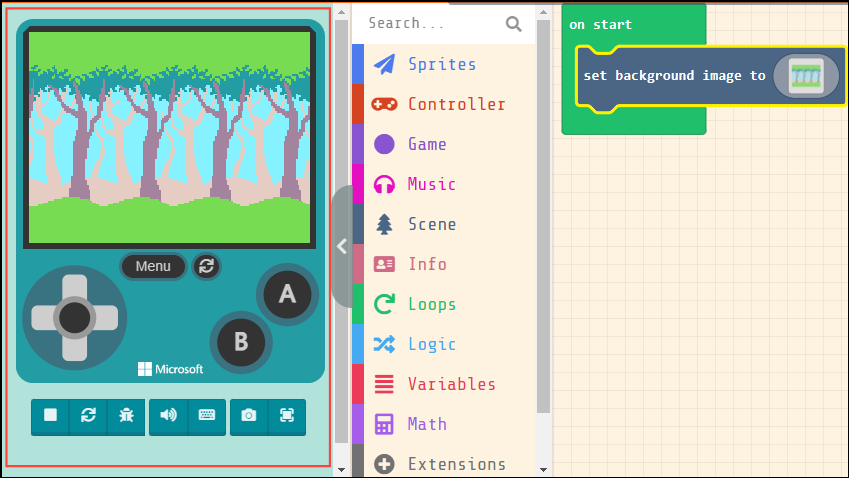
- The main window has three sections from left to right – the 'Preview Area' which shows your progress in real-time, the 'Toolbar' which contains the elements and code blocks you will need to make your game, and the 'Work Space' on the right.
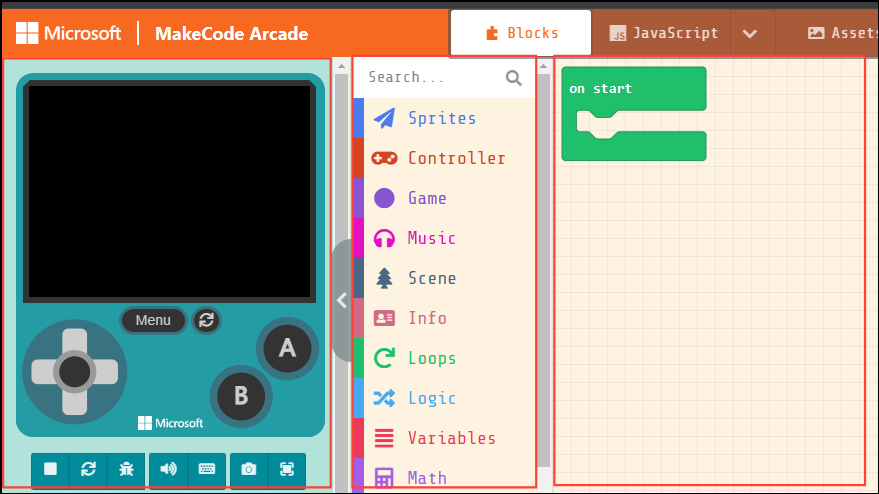
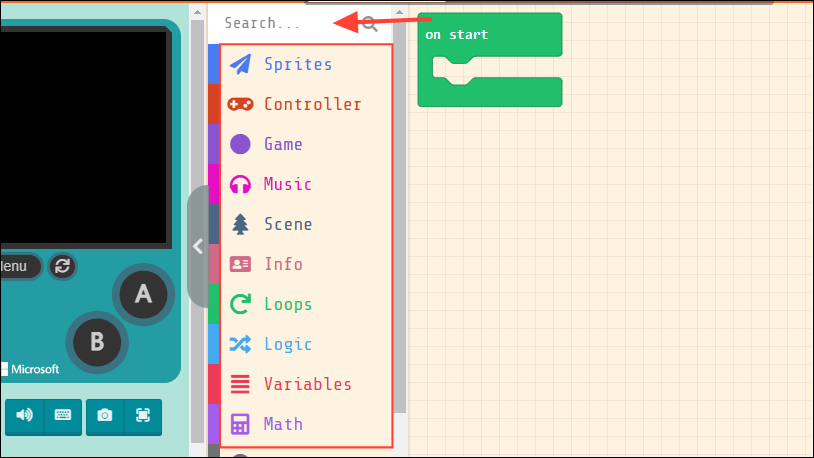
- The Toolbar in the middle contains the blocks in the various color-coded drawers you will need to make your game. You can also search for specific blocks using the Search box at the top. These elements can include sprites, controllers, music, etc.
- To make a game, you will need to drag blocks from this toolbar to the Work Space on the right. When you do so, a preview of the game will appear on the left.
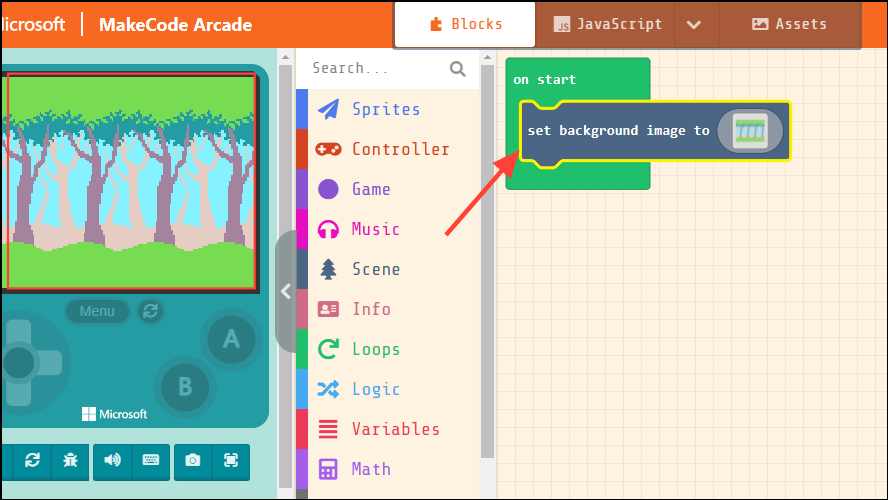
- While making your game, you will be able to test the preview on the left using your keyboard. The preview screen is 160x120 and has a 2D engine capable of showing 16 colors at a time. In addition, it has eight buttons and a retro sound system.
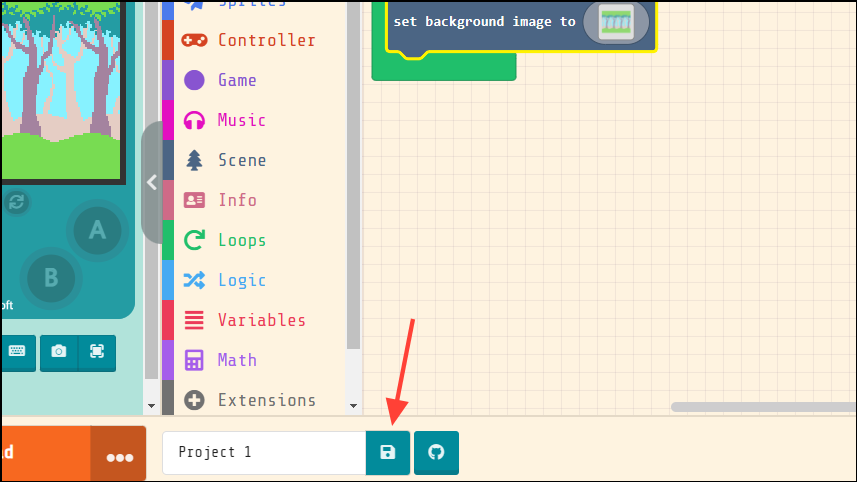
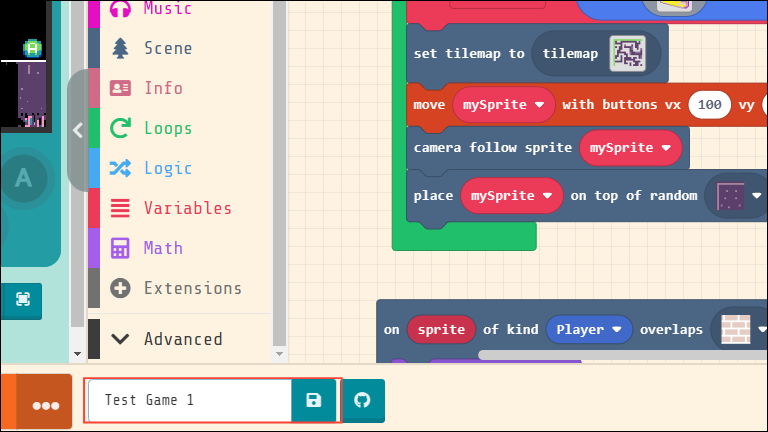
- You can save your game by clicking on the 'Save' icon at the bottom and even save it as a GitHub repository if you've connected MakeCode Arcade with your GitHub account.
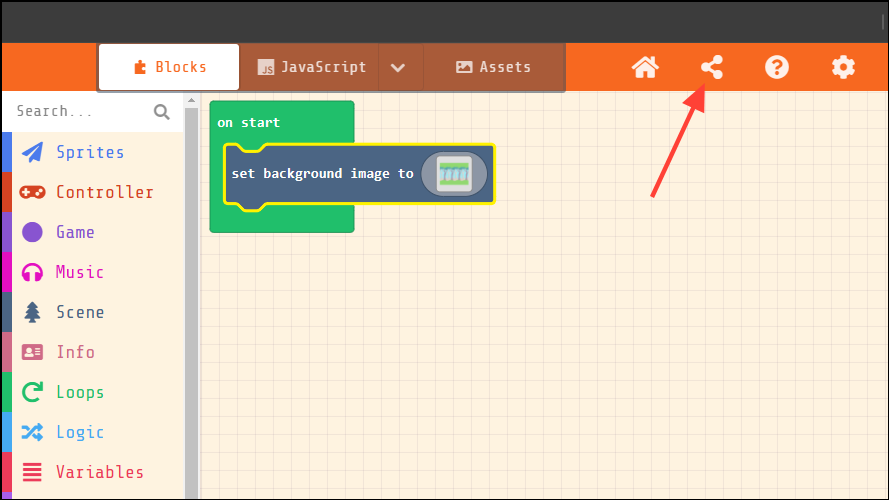
- Once you've created your game, you can share it with others using the 'Share' button at the top.
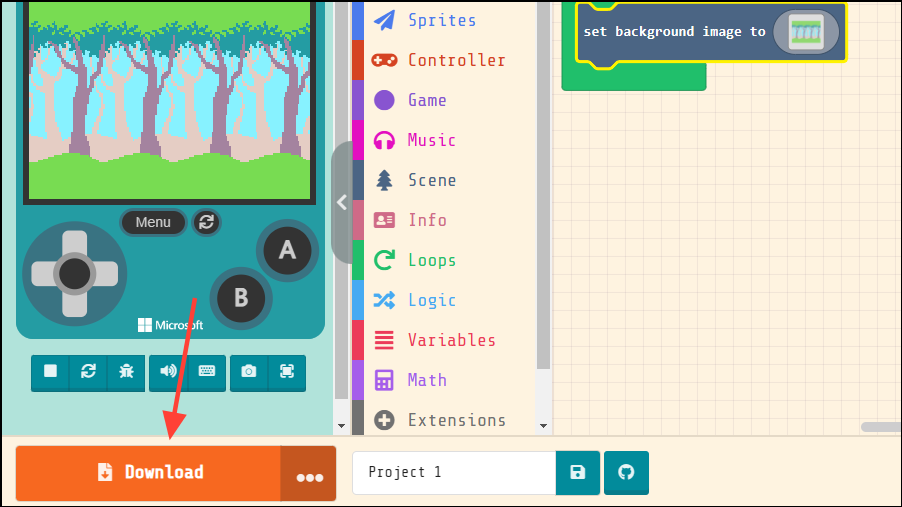
- Lastly, you can download your game by clicking on the 'Download' button on the bottom left.
Creating a block game in MakeCode Arcade
Now that you are familiar with the interface of the MakeCode Arcade platform, you can start making your own game. While there are different types of games you can build, including JavaScript and Python games, block games are one of the easiest ones and a good option for beginners. The games you design on the platform can run on any web browser, including those on your smartphone.
Step 1: Adding a character sprite block
To start creating a block game, follow the steps mentioned above and create a new project.
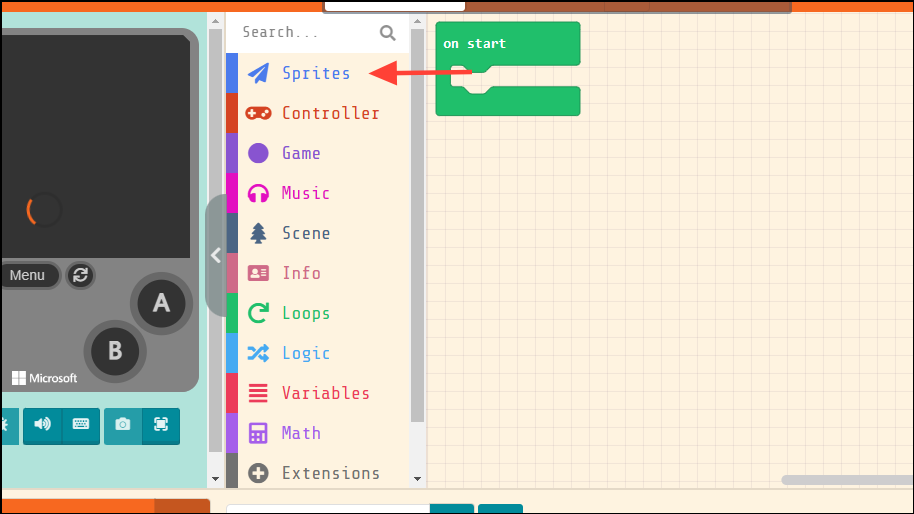
- Once your project is created, click on 'Sprites'.
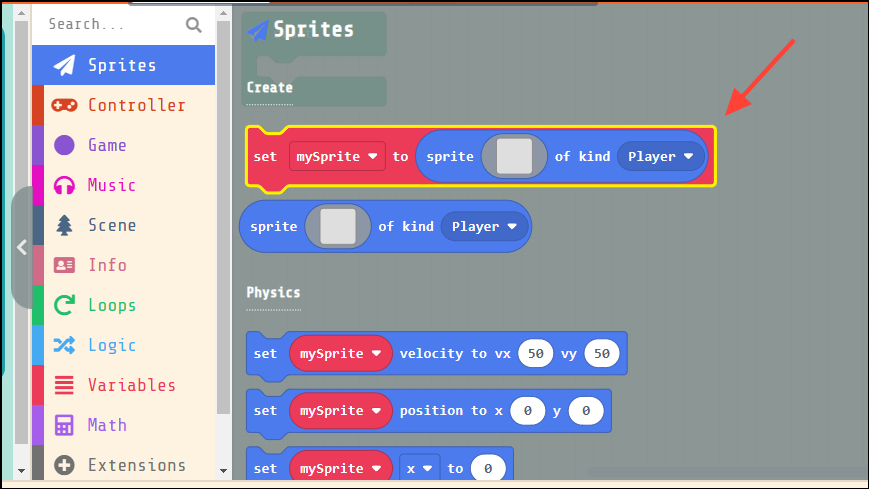
- Then click on a 'mySprite' block from the available options to select it. Once you select it, the block will be added to your project.
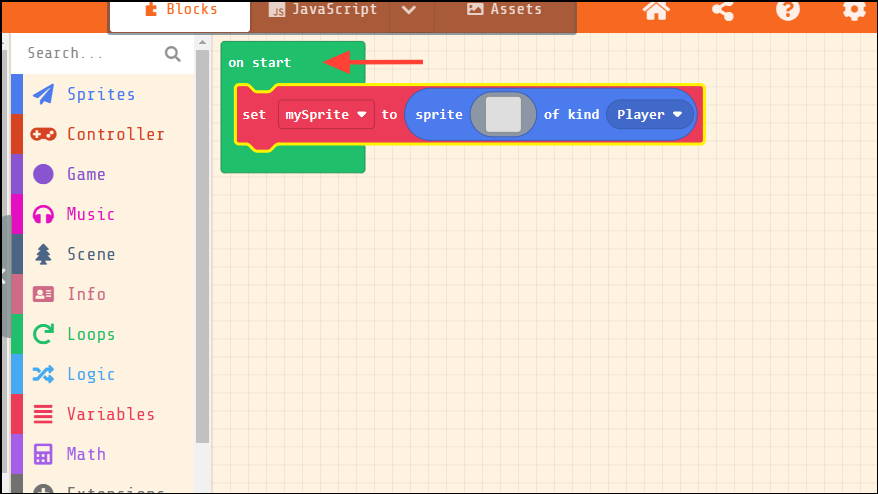
- Drag the mySprite block onto the 'Start' block in your project.
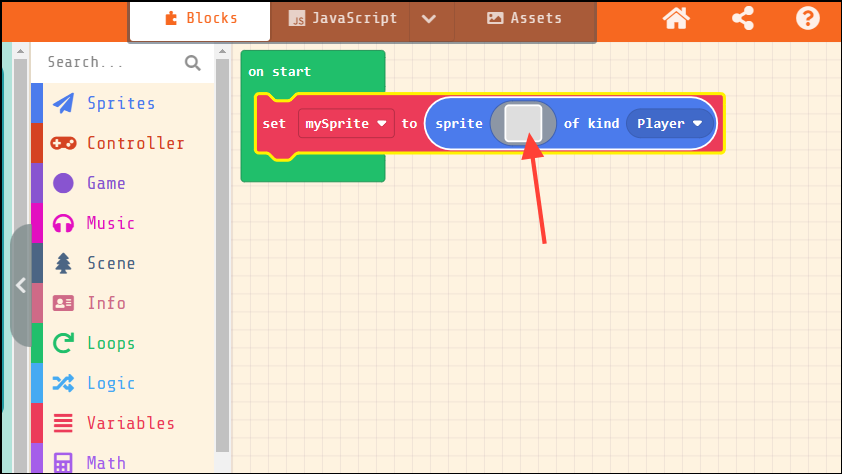
- Then click on the blank box on the mySprite block to add your character design or select one from the gallery.
- This will open the editor. If you want, you can add your own design or else click on 'Gallery' at the top.
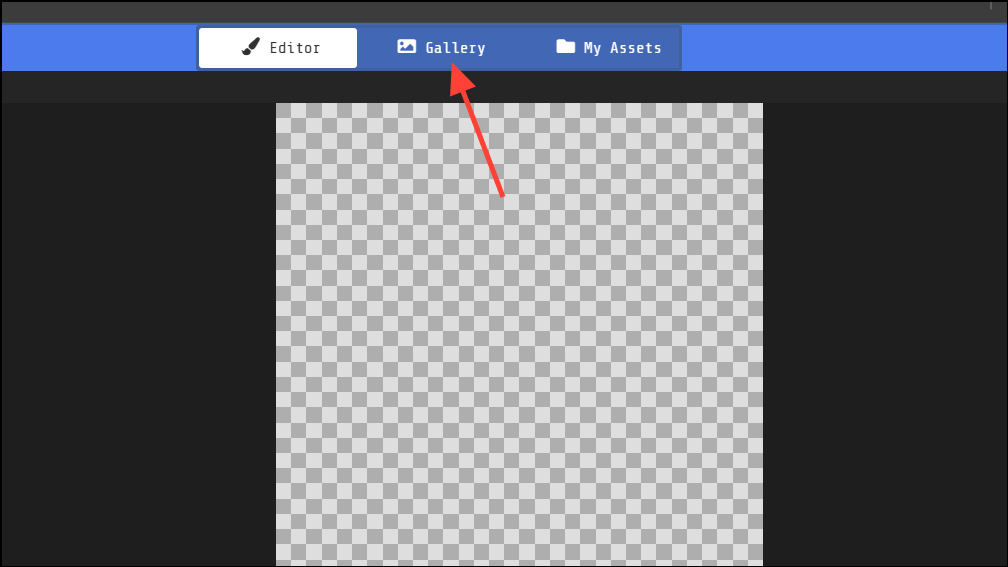
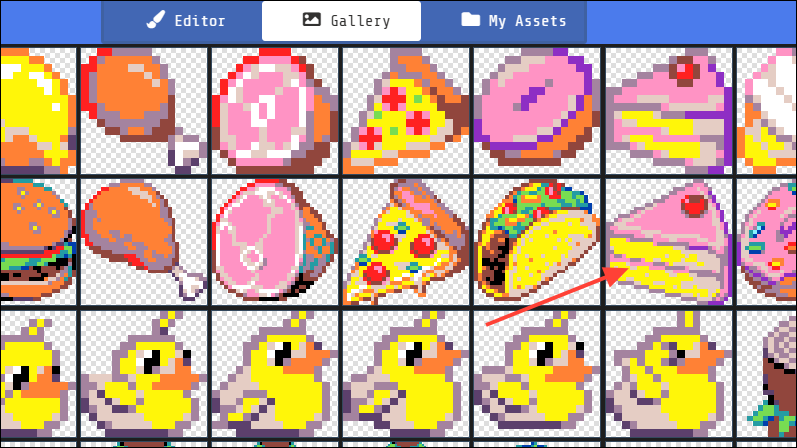
- Click on any character in the Gallery to select it and add it to your project.
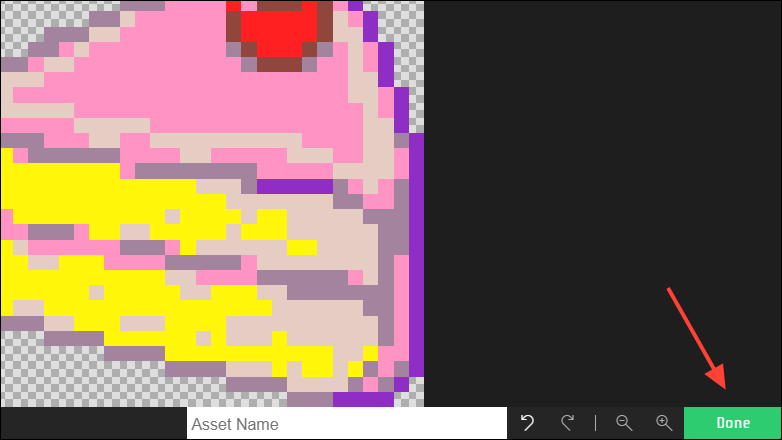
- Once you've added a design, click on the 'Done' button on the bottom right.
Step 2: Add a background block
- Now click on 'Scene' to add a background to your project.
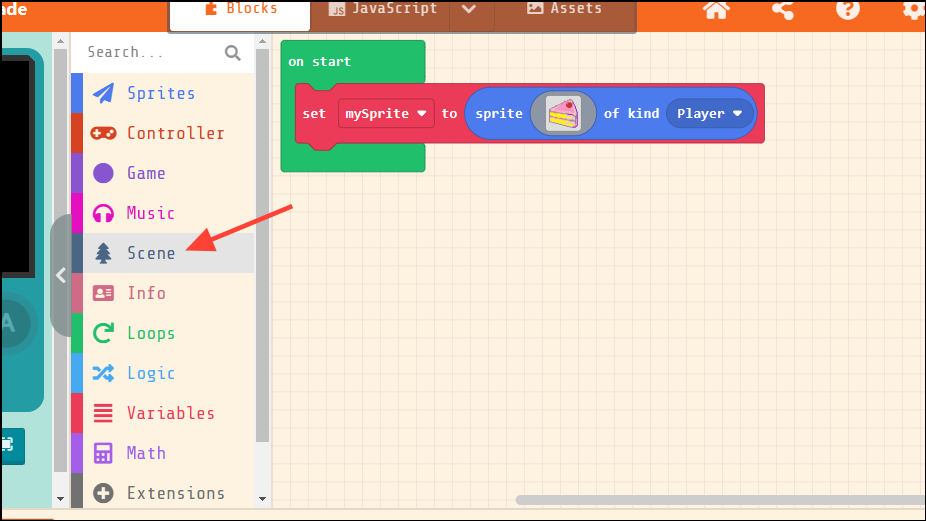
- Click on 'Set tilemap to tilemap' to select it.
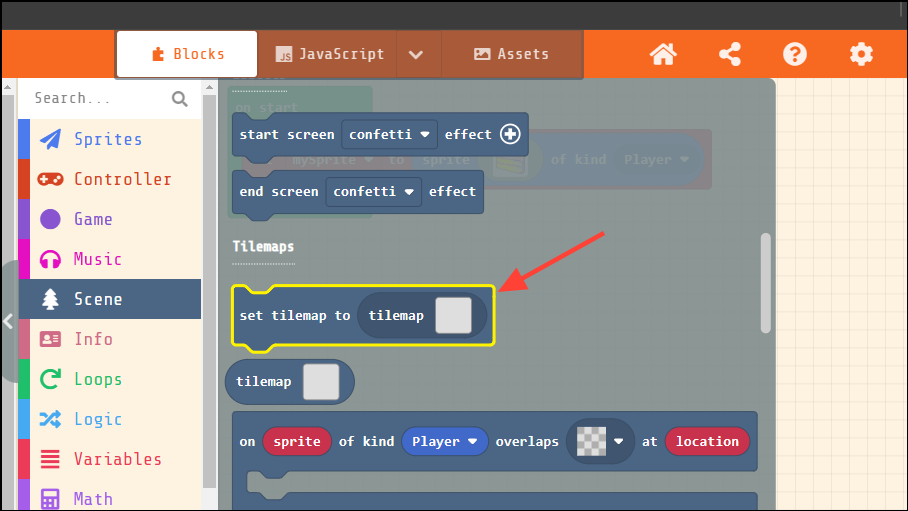
- Then drag it to the Start block and place it below the character sprite.
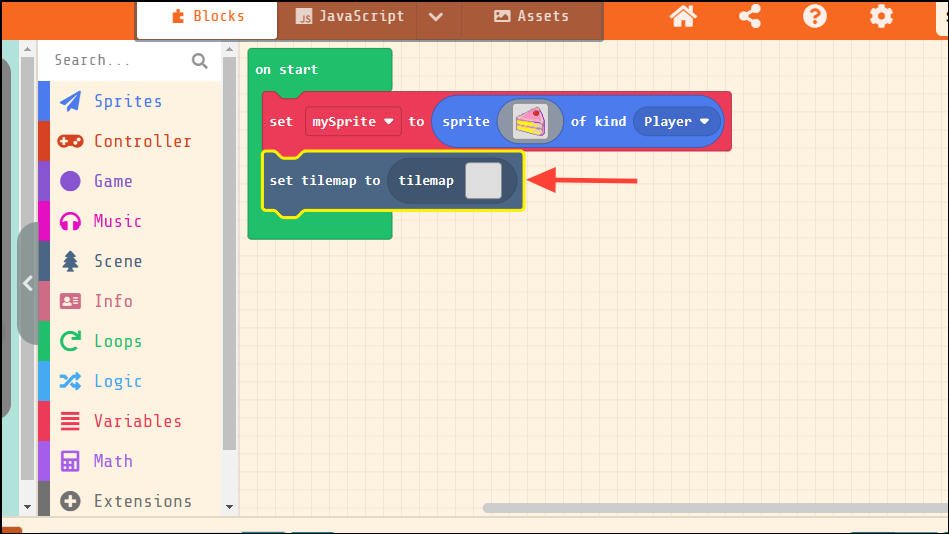
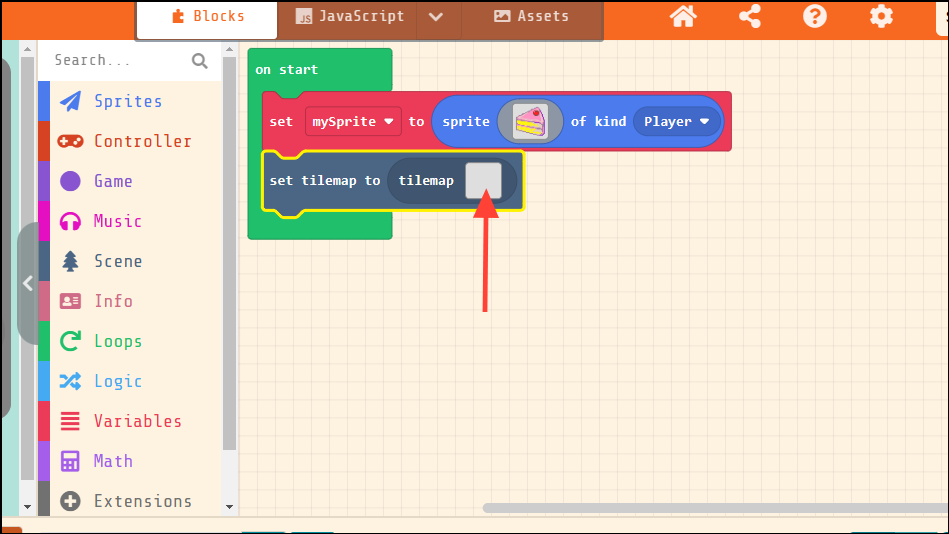
- Once it is in position, click on the blank box in the tilemap block.
Step 3: Create your tile map
Clicking on the blank box in the tilemap block will once again open the editor. Now you can create your tile map.
- You can select from different types of tiles by clicking on the dropdown menu on the left. Use the Forest tile for the floors and the Dungeon tile for the walls. The brick tile in the 'Miscellaneous' section will make players lose the game while the crowd tile will make them win.
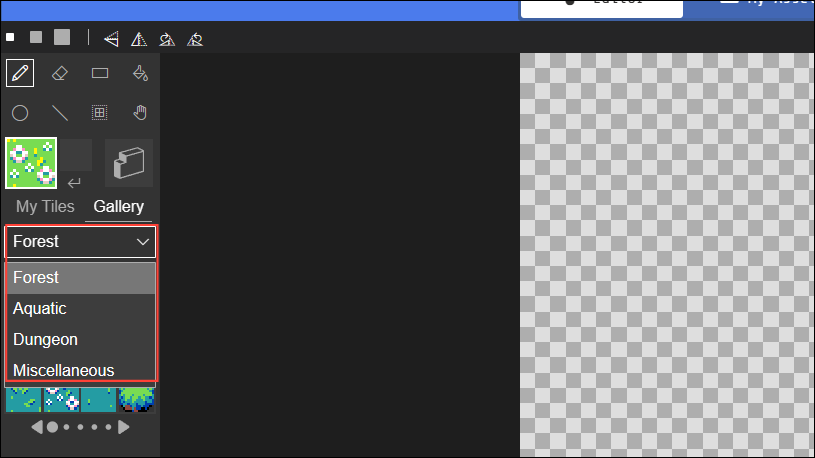
- Select the Dungeon tile from the dropdown and click on the 'Draw walls' button, which will turn red.
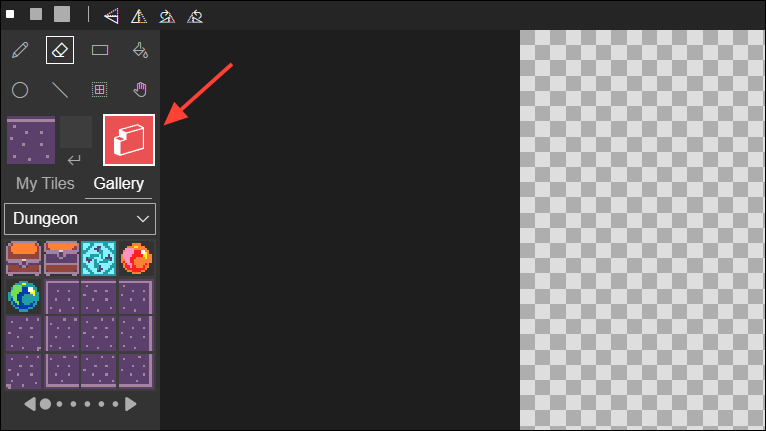
- Move your cursor to the map on the right and you will see the tiles becoming transparent red. Start clicking on the areas where you want to place the walls on your map.
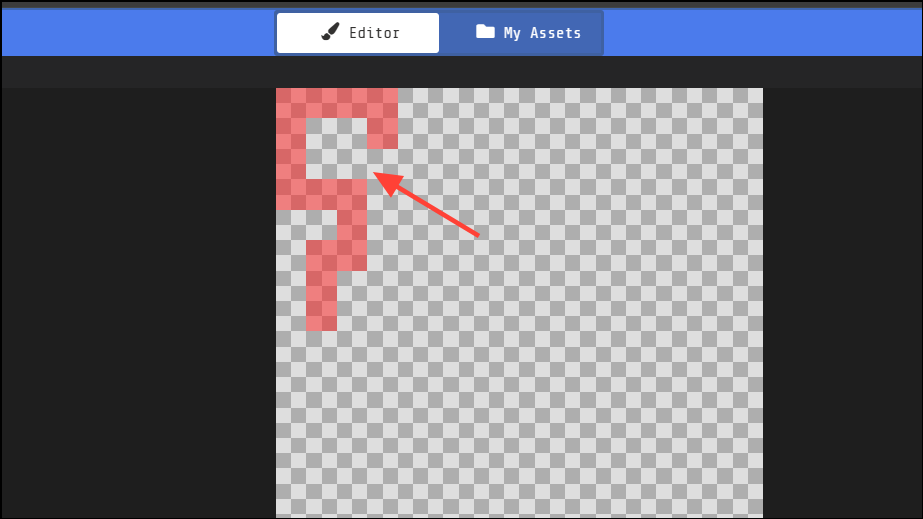
- Once you've placed the walls on your map, place the forest tile for the floor in the same manner. Then add the brick and crowd tiles that will determine whether the players lose or win. If you want, you can use other tiles as well.
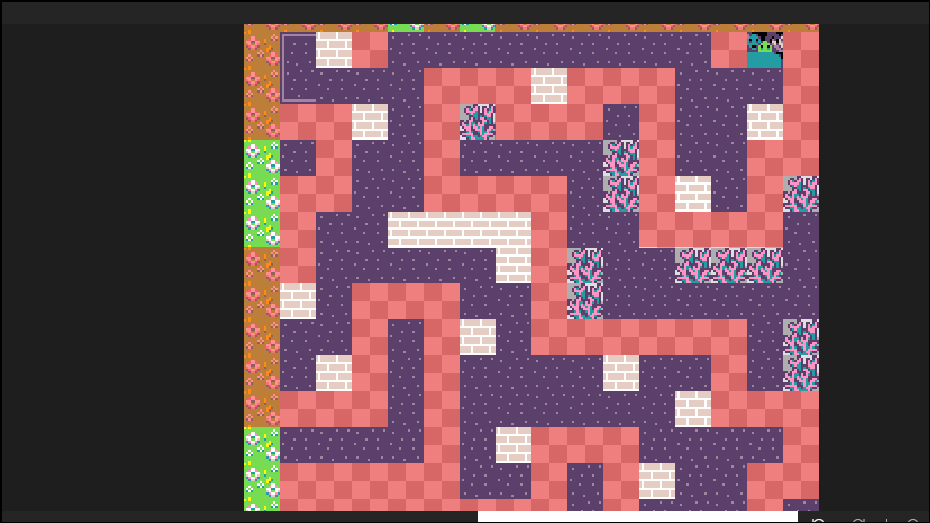
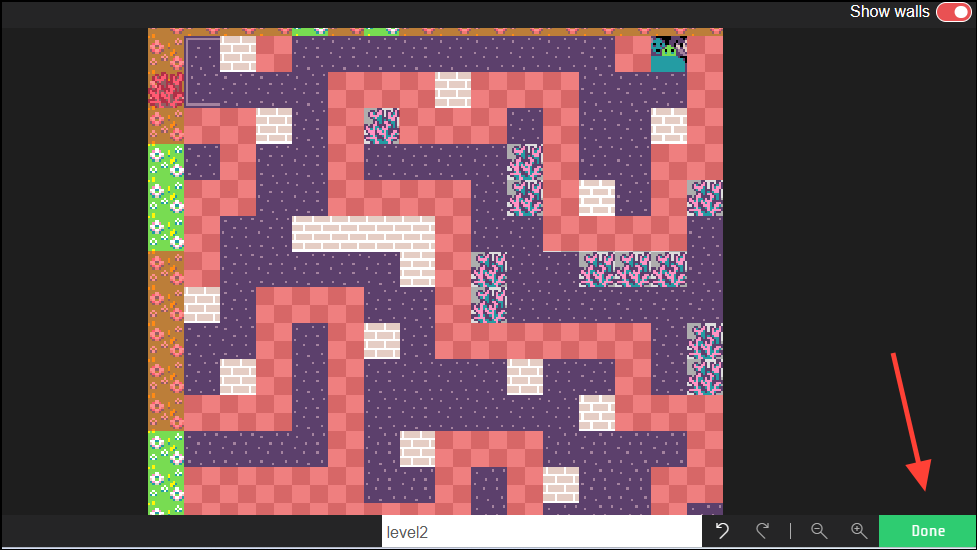
- Once you've finished creating your map, click on the 'Done' button on the bottom right.
Step 4: Control your player
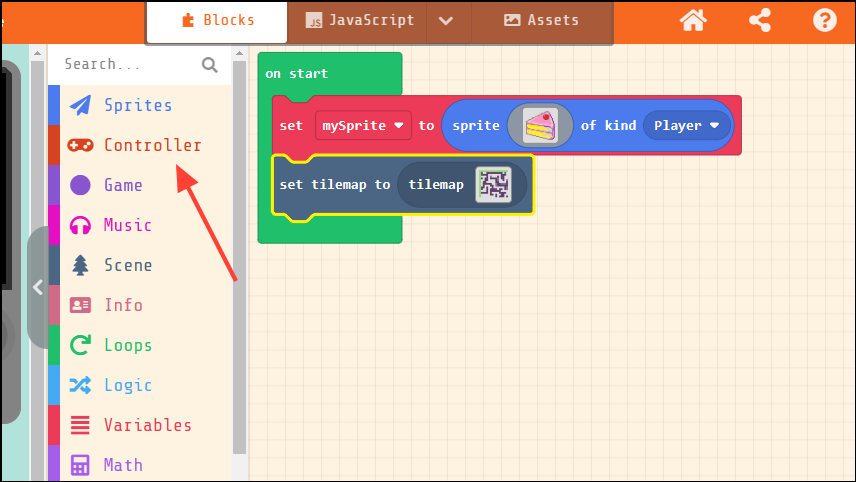
- Click on the 'Controller' option in the MakeCode Arcade dashboard.
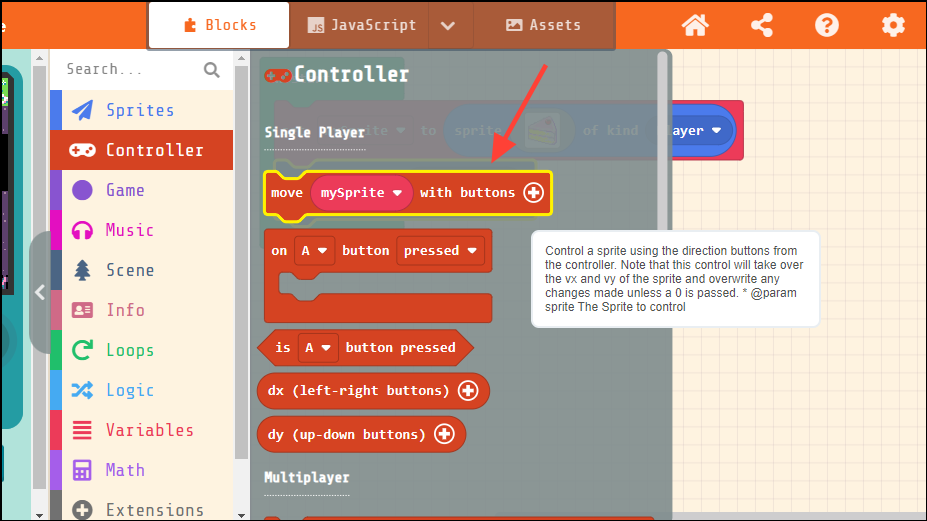
- Click on the 'Move mySprite with buttons' block to select it.
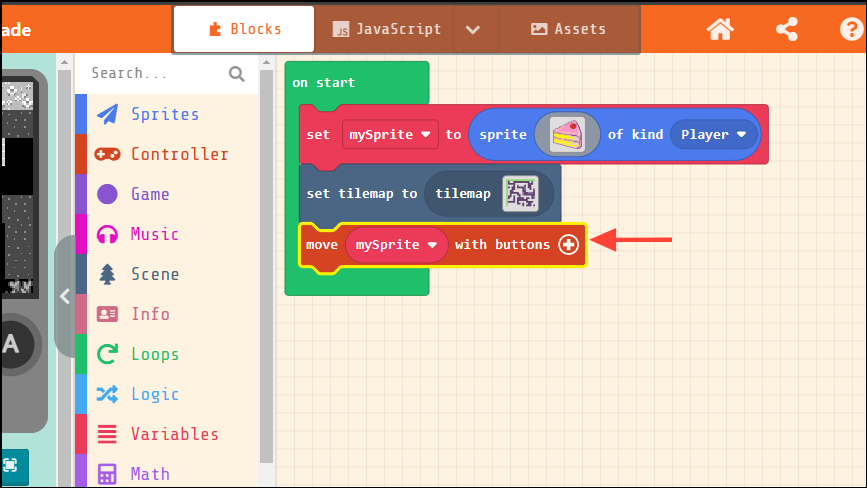
- Add it to the 'on Start' block by dragging it and then click on the '+' button.
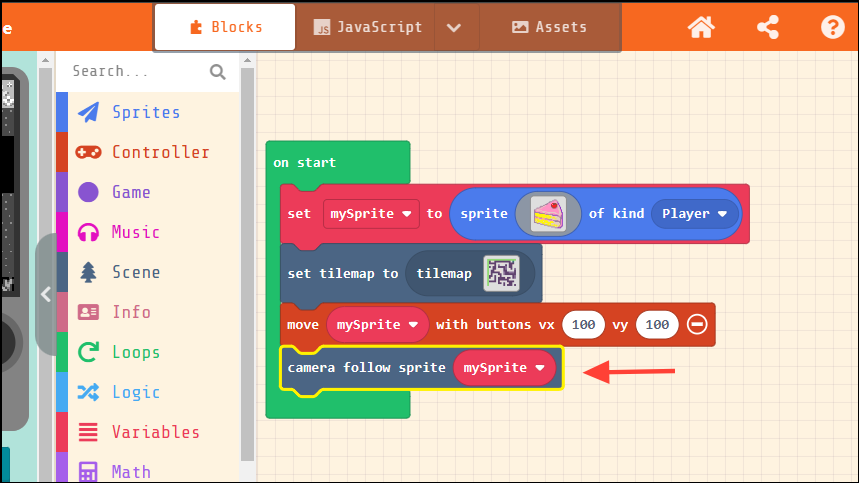
- Click on the 'Scene' option again and then click on the 'Camera follow sprite mysprite' block.
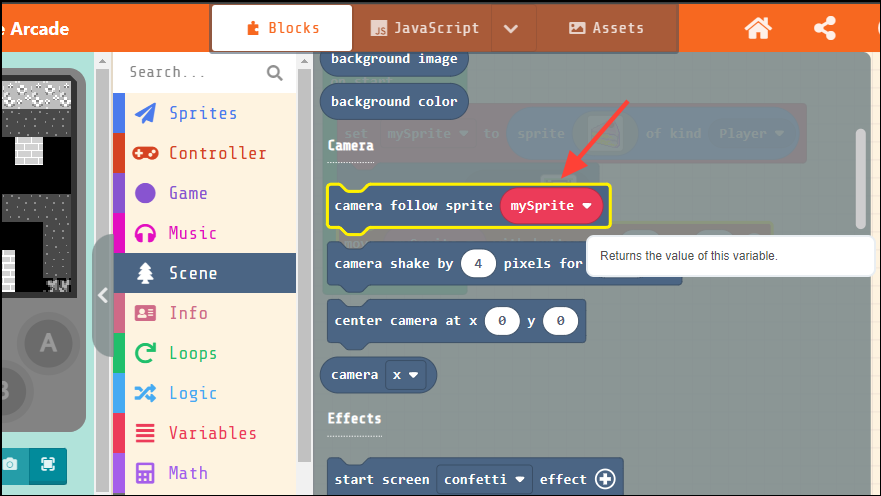
- Drag and add this to the ' On Start' block.
Step 5: Create your win and lose conditions
- Click on 'Scene' again and click on the 'on sprite kind of player overlaps (there is a blank square) at location' block to add it.
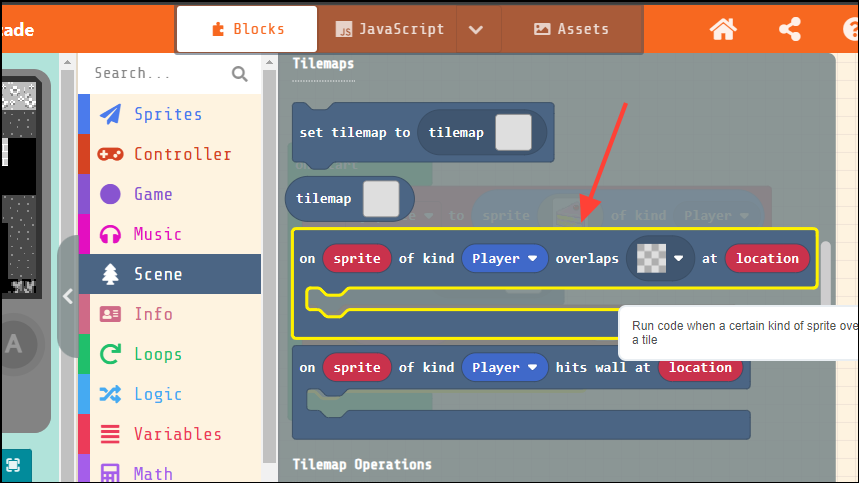
- You will need to add this block twice to your project. Then click on the white block on one of these blocks.
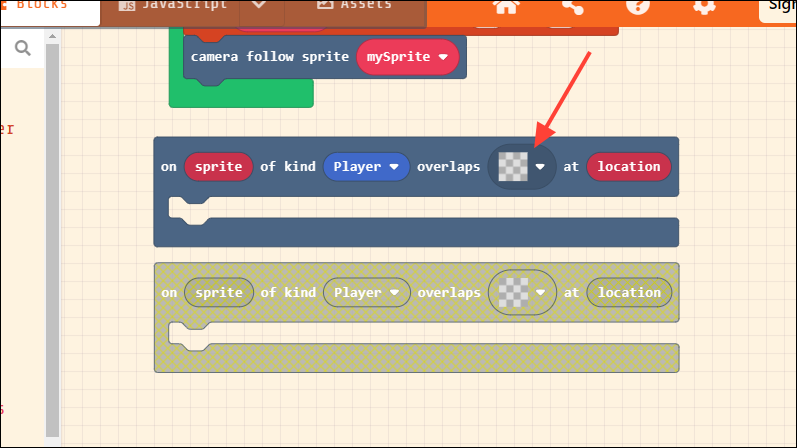
- Select the wall tile. Then click on the white block on the second 'a sprite kind of player overlaps (there is a blank square) at location' block and select the crowd tile.
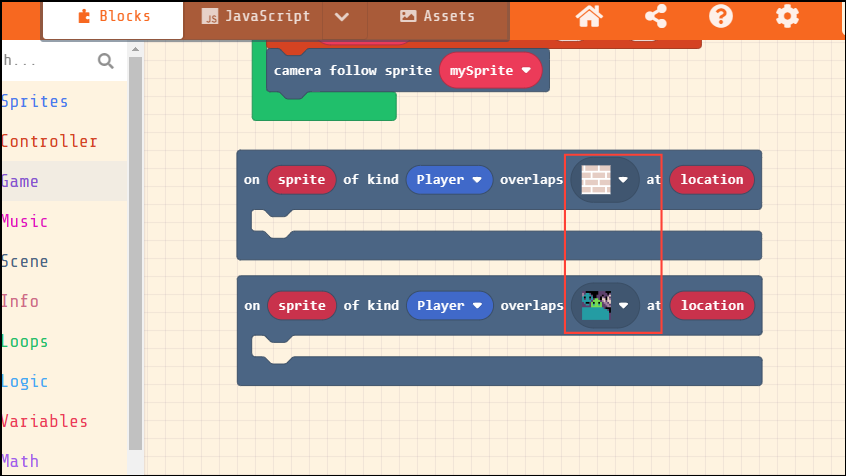
- Now click on 'Game'.
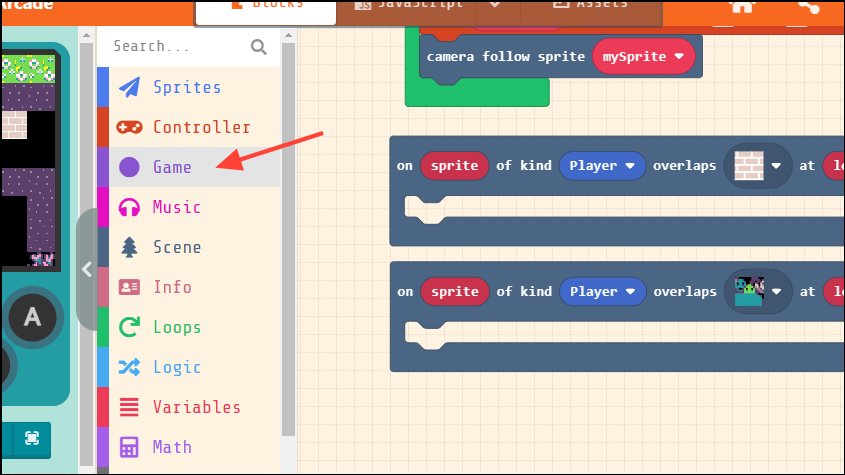
- Click on the 'Game over' block and add it to the block with the brick tile.
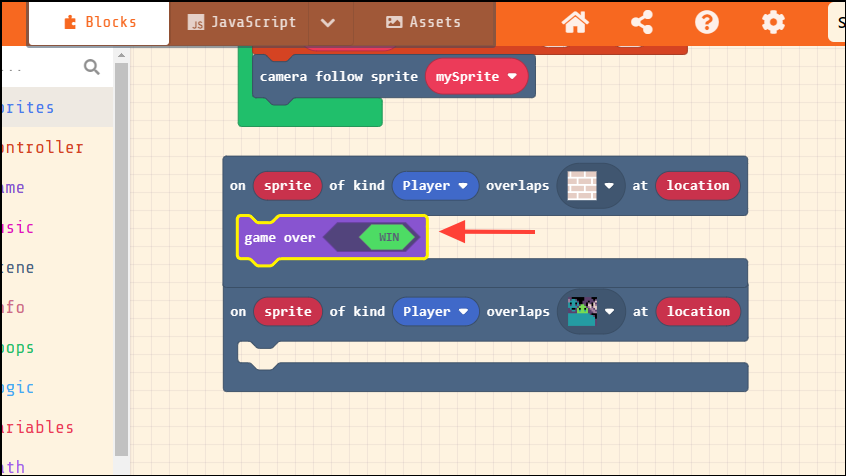
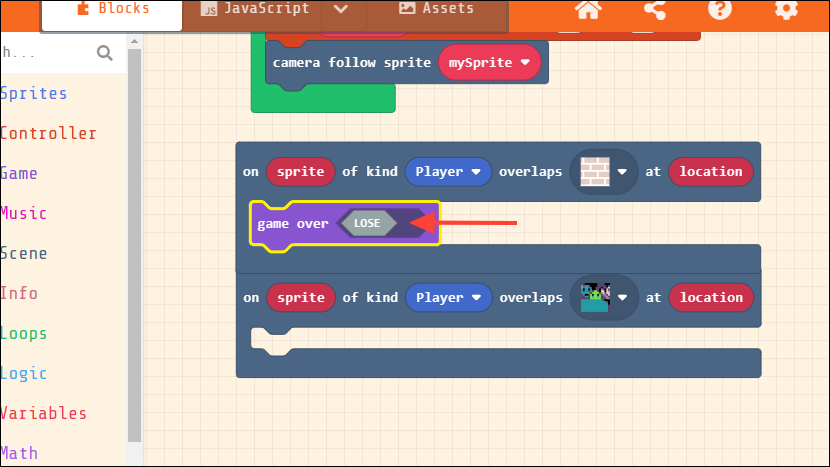
- Click on the 'Win' button in the block you just added and switch it to 'lose'.
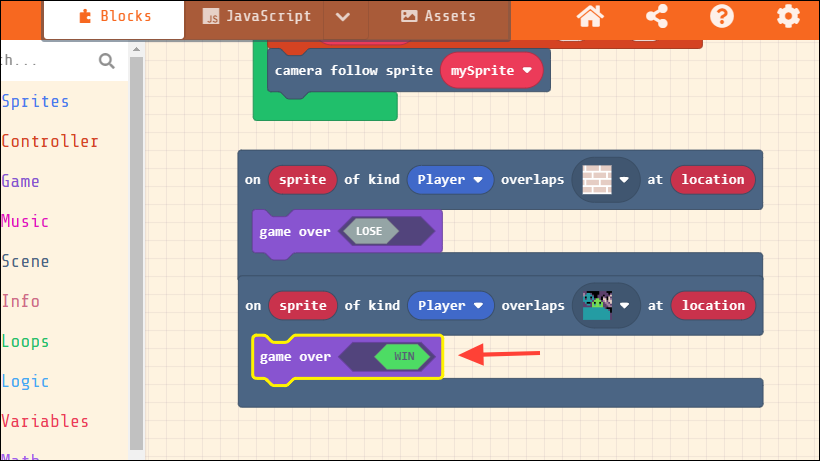
- Add another 'Game over' block to the block with the crowd tile.
Step 6: Finalization
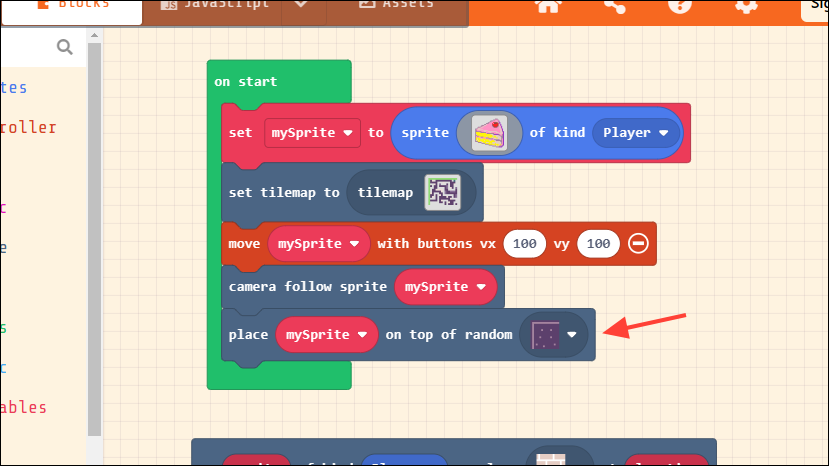
- Click on 'Scene' again and click on the 'place mysprite on top of random' block to select it and add it to the 'On Start' block.
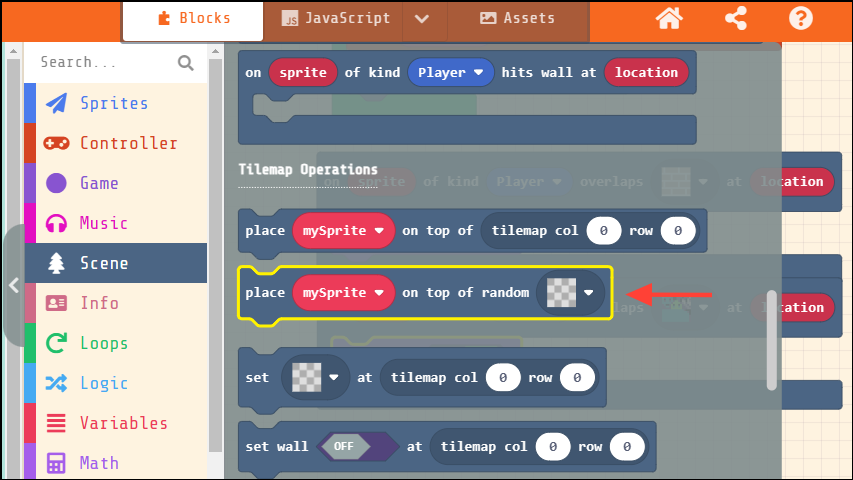
- Click on the blank square in the block and select the forest tile without grass.
- Finally, add a name for your game and click on the 'Save' icon at the bottom to save it.
Things to know
- It is a good idea to have an idea of what kind of game you are planning to create beforehand. This will help you when placing tiles and adding blocks to your project.
- Once you save your game, a PNG image of the game will be saved to your computer. You can simply open the MakeCode Arcade and upload that image to load your game.
- The platform has many other options, such as extensions, variables, loops, etc., which you can experiment with to make your game more interesting.
- Signing in to your Microsoft account on the platform will help you keep track of your projects more easily and allow faster access to them.

