Default Windows settings often direct new documents, pictures, and desktop files to OneDrive, which can quickly fill up your cloud storage and create confusion about where your files are actually stored. When your OneDrive quota is full, saving new files becomes unreliable and you may lose access to important data. Shifting file saving back to your local hard drive restores direct control, eliminates sync errors, and keeps your files private.
Method 1: Change Default Save Locations in Windows Settings
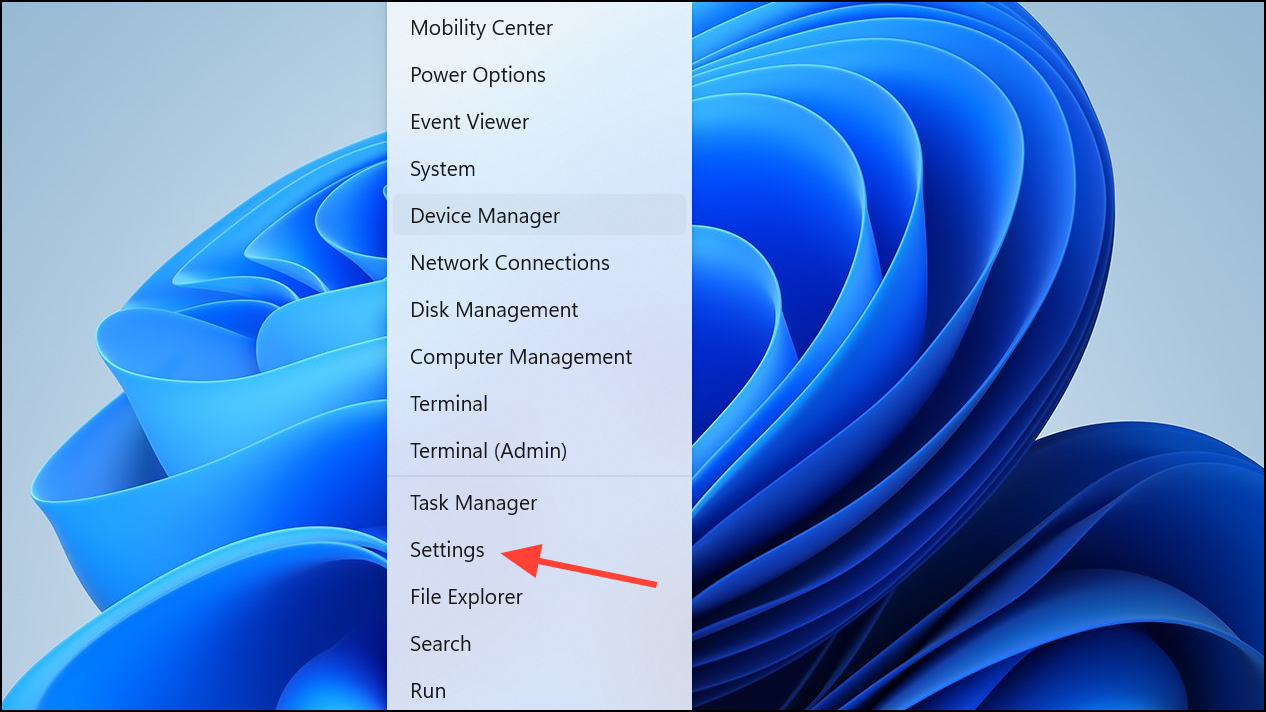
Step 1: Right-click the Start button in the lower-left corner of your screen and select Settings. This opens the Windows Settings menu.
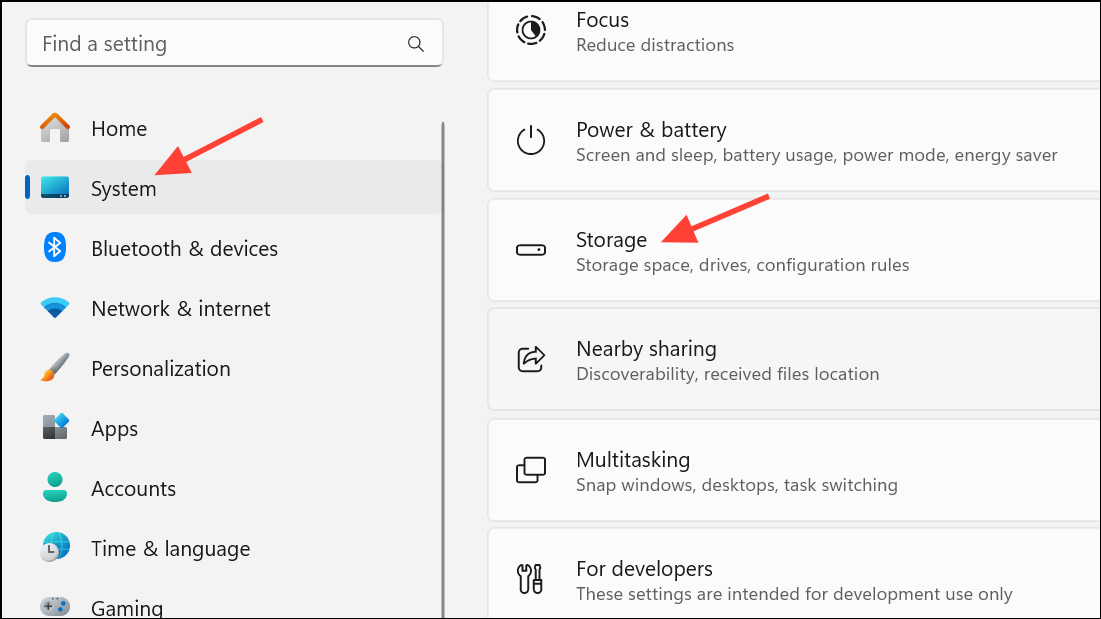
Step 2: Click on System, then select Storage from the left-hand menu. This section manages how and where your files are stored.
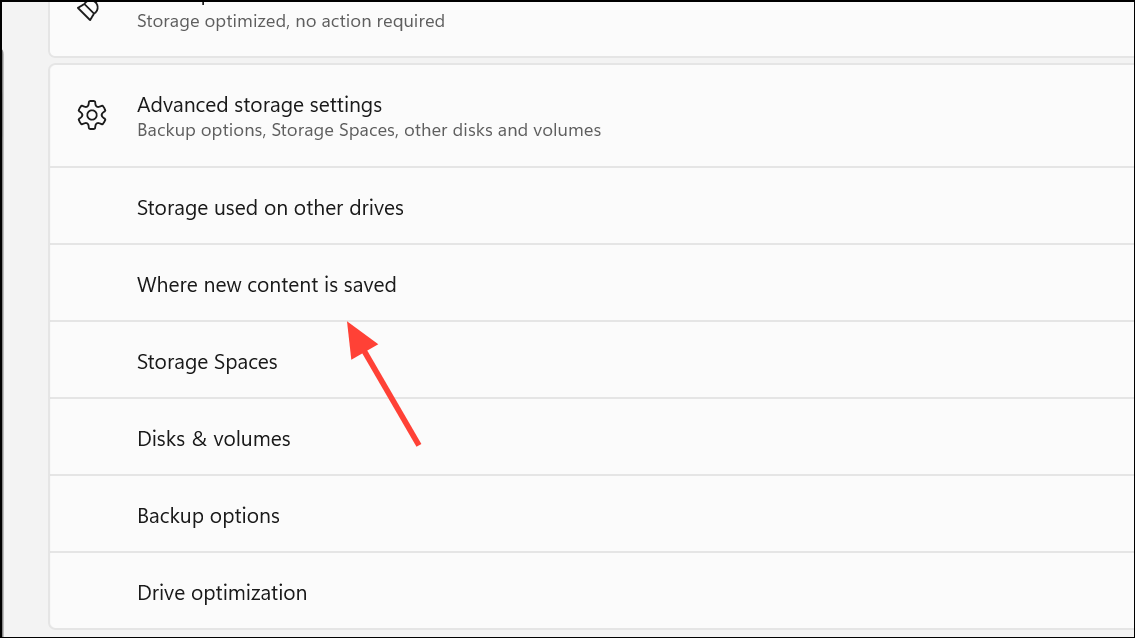
Step 3: Scroll down and expand the Advanced storage settings. Select Where new content is saved. Here, you can adjust the default location for new documents, music, pictures, and videos.
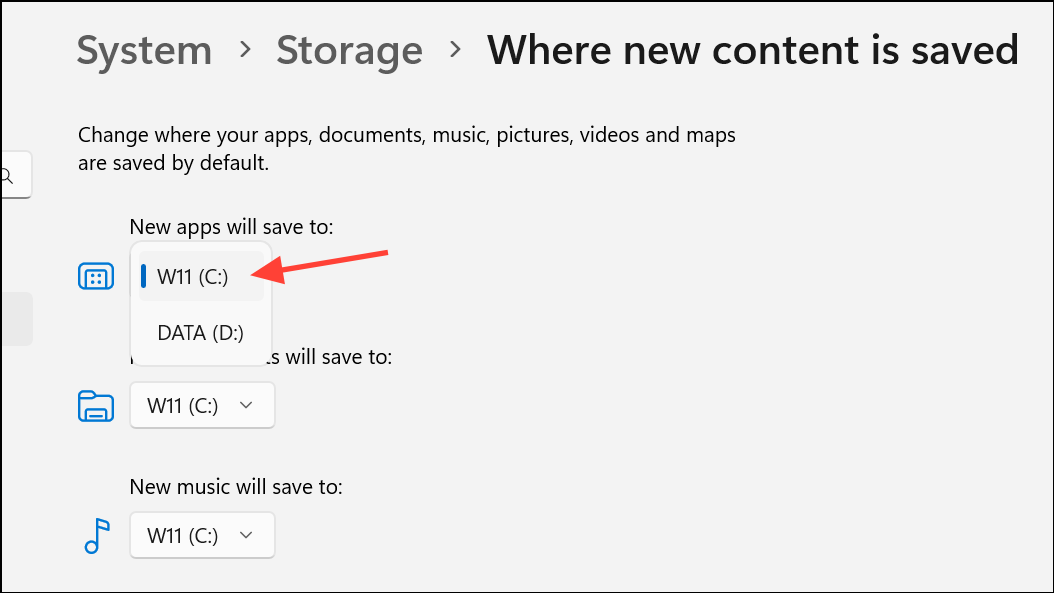
Step 4: For each file category (e.g., Documents, Pictures, Videos), use the dropdown menu to select your C: drive (Local Disk) instead of OneDrive. This ensures new files are stored directly on your PC, not in the cloud.
Step 5: Close the Settings window. All new files in the selected categories will now save locally by default.
Method 2: Stop OneDrive Folder Backup and Restore Local Folders
OneDrive Backup can redirect special folders like Desktop, Documents, and Pictures to the cloud. Disabling this backup returns these folders to your PC. Be careful: disabling backup can remove local copies of files, so make a backup before proceeding.
Step 1: Copy all important files from your Desktop, Documents, and Pictures folders to a temporary folder outside of any OneDrive-related directory or to an external drive. This protects your files from accidental deletion during the process.
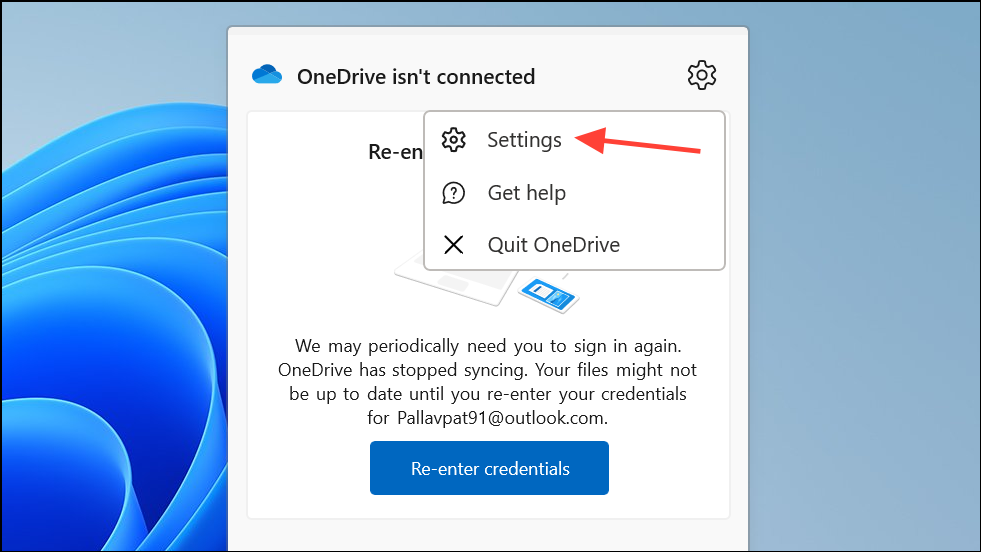
Step 2: Click the OneDrive cloud icon in your system tray (bottom right of the screen), then click the gear icon to access Settings.
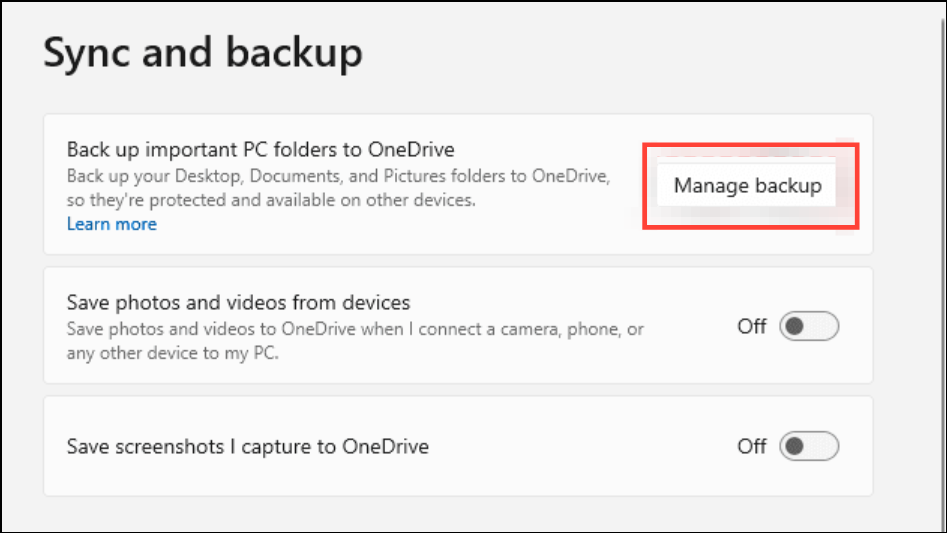
Step 3: Go to the Sync and Backup tab, then click Manage Backup. In the dialog, deselect folders you no longer want to sync with OneDrive, such as Desktop, Documents, and Pictures.
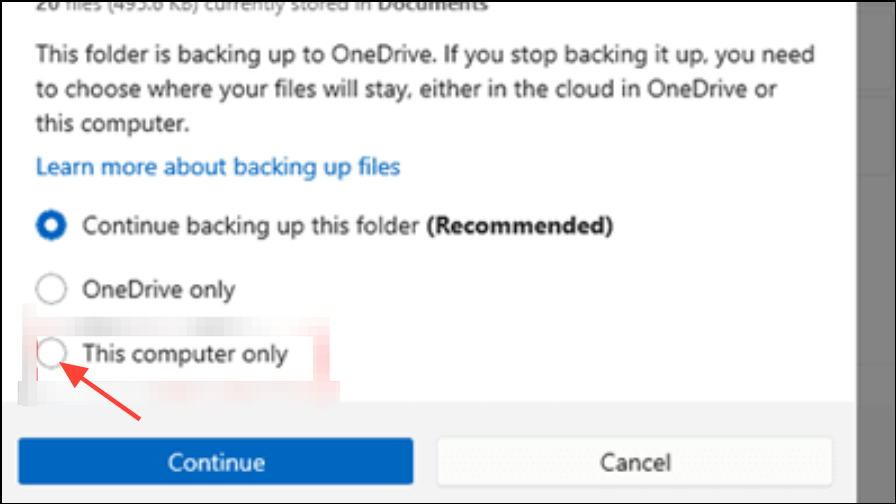
Step 4: When prompted, confirm your choice. If the system asks where to keep your files, choose This computer only to move the files back to your local folders. If this option doesn't appear, you may need to move the files manually from the OneDrive folder to your desired local folder.
Step 5: Return your files from the temporary folder or external drive to the restored local Desktop, Documents, or Pictures folders.
Method 3: Remap Special Folders to Local Paths
Sometimes, even after disabling OneDrive, folders like Desktop or Documents still point to the OneDrive directory. You can manually point them back to your PC’s user folder.
Step 1: Open File Explorer and navigate to C:\Users\YourUsername.
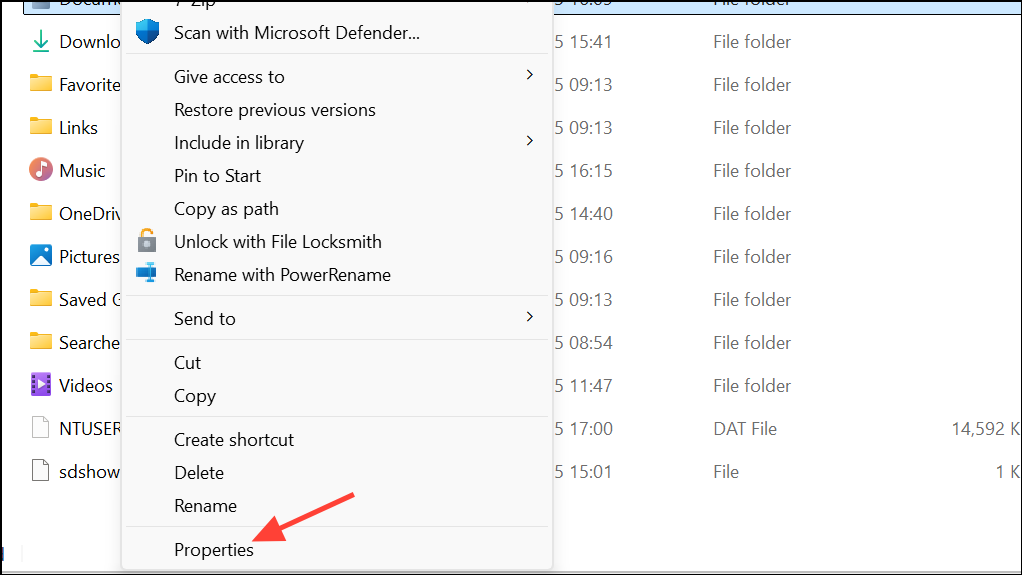
Step 2: Right-click on a folder such as Desktop or Documents, then select Properties.
Step 3: Click the Location tab. If the path includes \OneDrive\, edit the path to remove \OneDrive\ so it reads C:\Users\YourUsername\Desktop (or the appropriate folder).
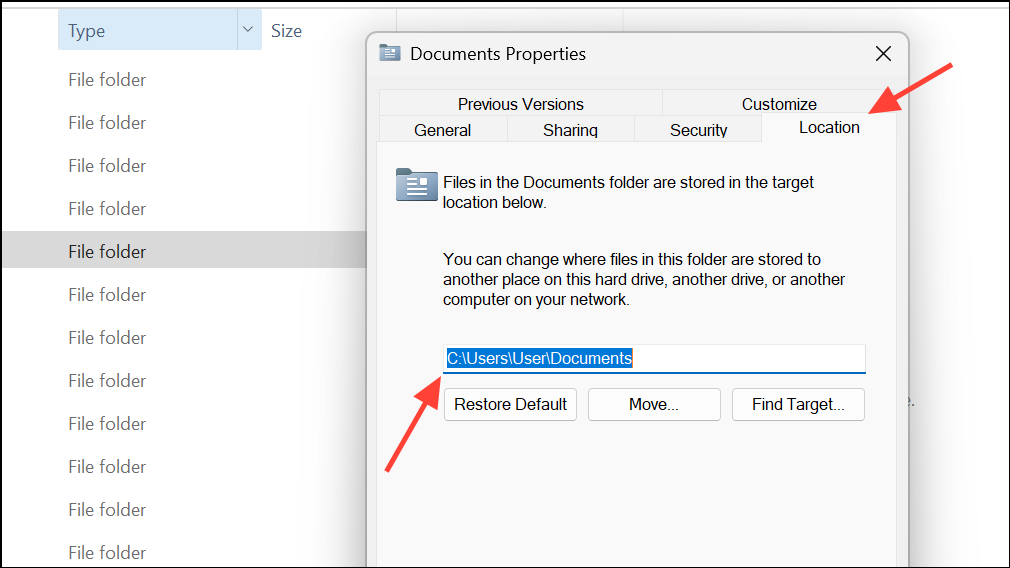
Step 4: Click Apply. When prompted, approve moving files to the new location. This step ensures your files are stored directly in your user folder rather than in OneDrive’s directory.
Step 5: Repeat for other folders (Documents, Pictures, etc.) as needed.
Method 4: Set Office Apps to Save Locally by Default
Microsoft Office apps like Word and Excel may still default to saving files in OneDrive. Adjusting the settings in each app ensures new documents save to your PC instead.
Step 1: Open an Office application, such as Word.
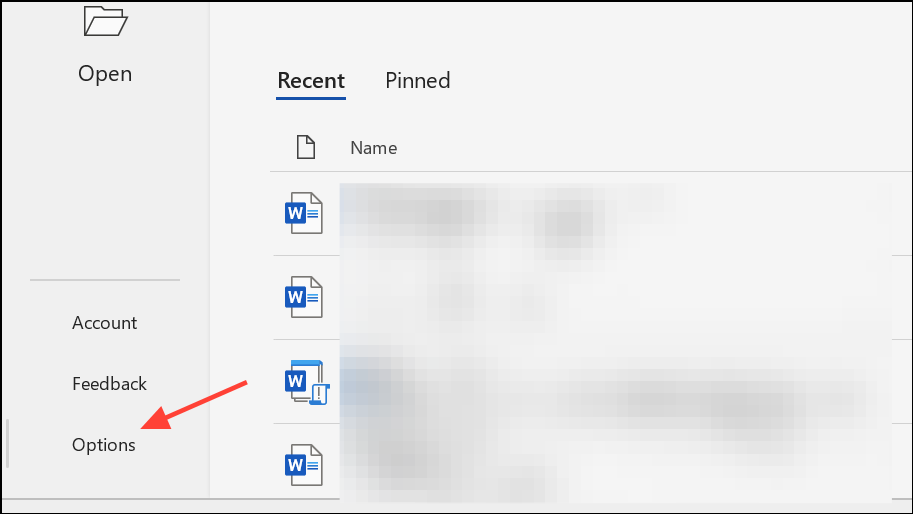
Step 2: Click on File in the top menu, then select Options at the bottom left.
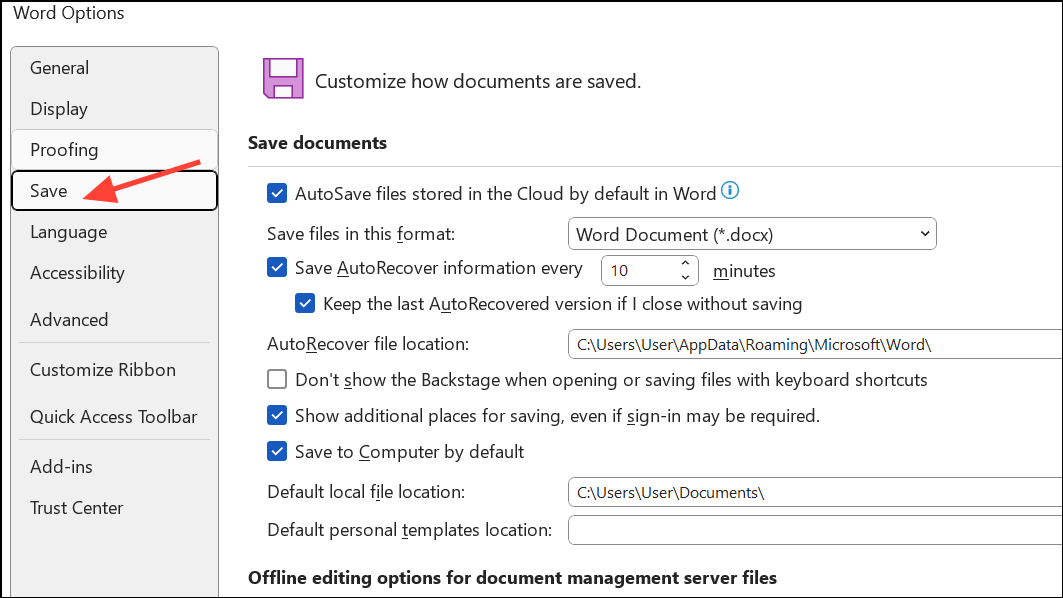
Step 3: In the Options window, select Save from the left sidebar.
Step 4: Check the box labeled Save to Computer by default. Uncheck AutoSave OneDrive and SharePoint Online files by default if visible. Set your preferred local folder as the Default local file location.
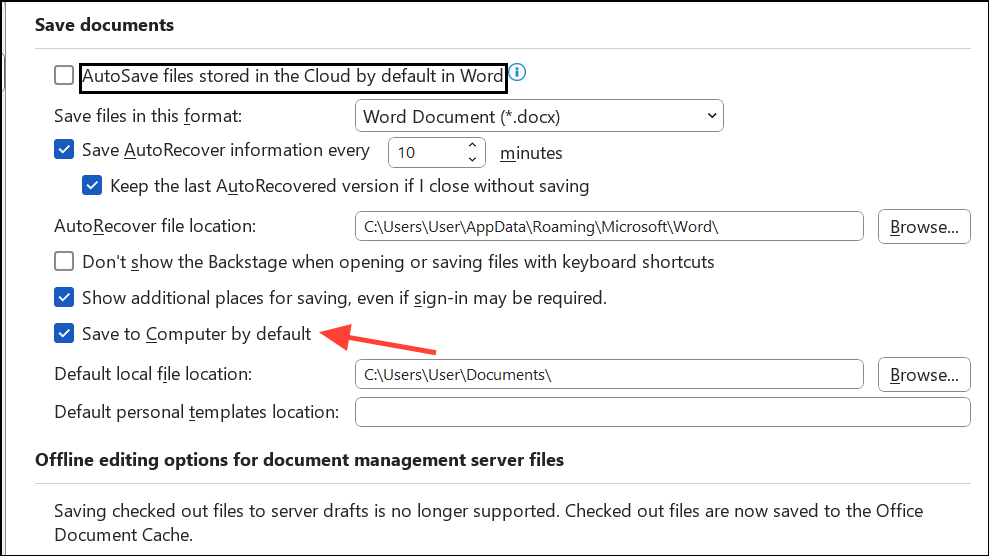
Step 5: Click OK and restart the Office app for changes to take effect. Repeat for other Office programs as needed.
Method 5: Turn Off OneDrive Files On-Demand
OneDrive’s Files On-Demand feature keeps files in the cloud and only downloads them when needed. Disabling this ensures all OneDrive files are stored locally, but does not stop future files from being saved to OneDrive. This method is best if you want existing files available offline but still use OneDrive for backup.
Step 1: Click the OneDrive icon in your system tray, then click the gear icon and select Settings.

Step 2: Go to the Sync and backup tab, open Advanced settings, and toggle off Files On-Demand. Alternatively, select Download all files to make every file always available offline.
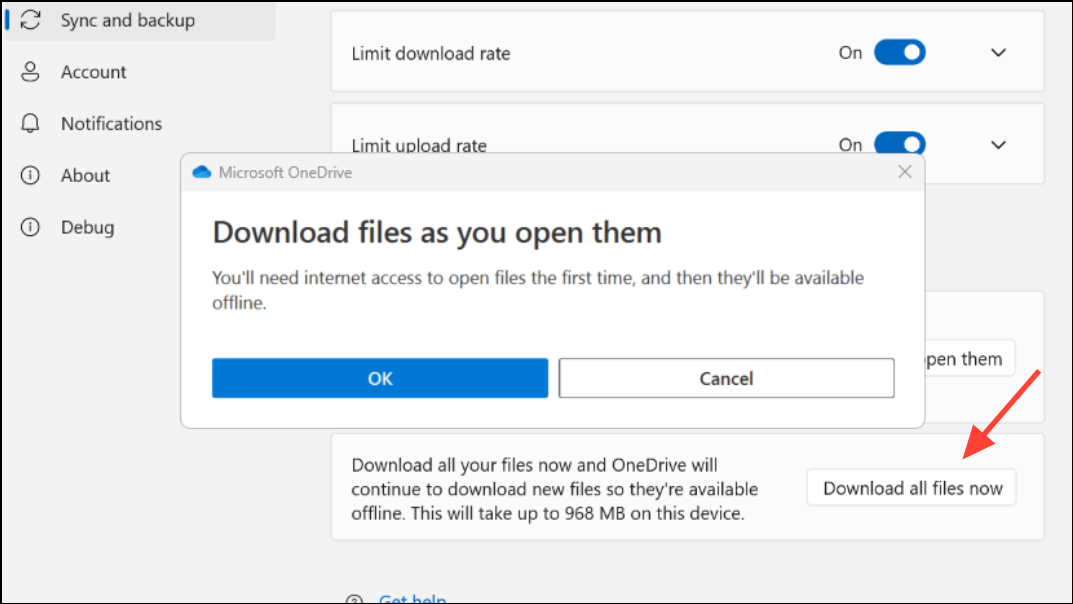
Step 3: Wait for OneDrive to finish downloading your files. They will now be accessible even without an internet connection.
Additional Tips and Cautions
When moving files or changing folder locations, always back up important data to an external drive or a safe local folder outside OneDrive. Disabling OneDrive Backup or unlinking folders can sometimes remove local copies, so verify your files are secure before making changes. If you plan to reset or set up a new PC, pay attention during Windows setup to avoid enabling OneDrive folder backup unintentionally. You can also uninstall OneDrive entirely if you prefer not to use it at all.
Switching Windows to save documents locally instead of in OneDrive puts you back in charge of your files and eliminates cloud storage headaches. Just remember to back up your data before making changes, and enjoy a simpler, more predictable file-saving experience.

