Handling multiple Google Chrome windows can be challenging, especially when each window serves a different purpose. Whether you're separating work tasks from personal browsing or organizing research topics, keeping track of numerous windows can become cumbersome.
With Chrome version 90 and above, you have the option to name your windows, making it significantly easier to manage and locate them.
Naming a Chrome Window
First, ensure that your Chrome browser is updated to the latest version. Here's how you can check and update Chrome:
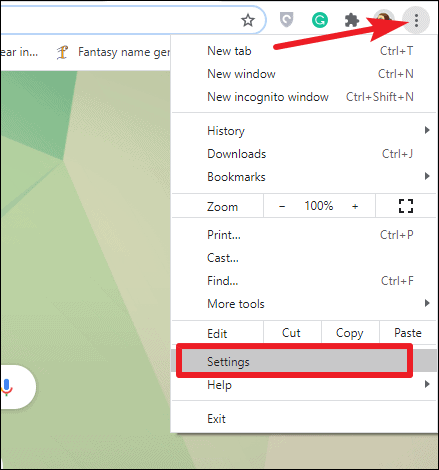
Step 1: Click on the three-dot menu icon in the top-right corner of the browser and select Settings from the dropdown menu.
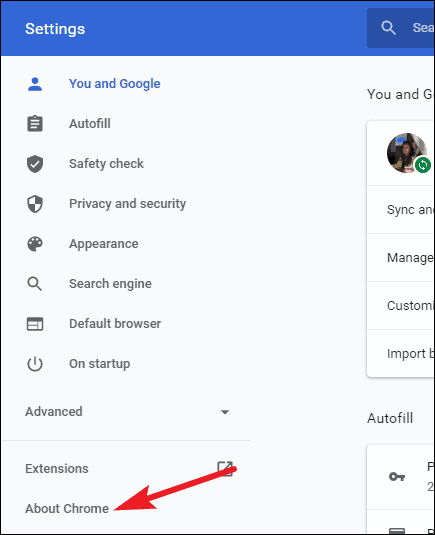
Step 2: In the left sidebar of the Settings page, click on About Chrome.
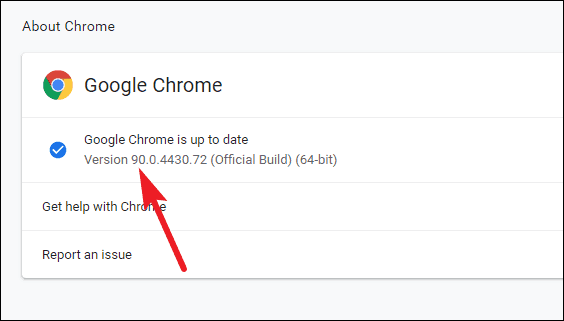
Chrome will display the current version you're running. If it's not version 90 or higher, it will automatically start updating. Once the update is complete, click on Relaunch to restart the browser with the latest version.
After updating, you can proceed to name your Chrome windows:
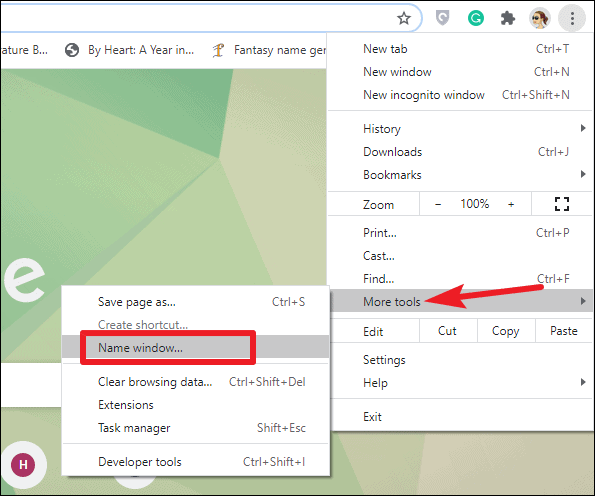
Step 3: Click the three-dot menu icon again, hover over More Tools, and select Name window from the submenu.
Alternative: You can also right-click on the title bar at the top of the Chrome window and choose Name window from the context menu.
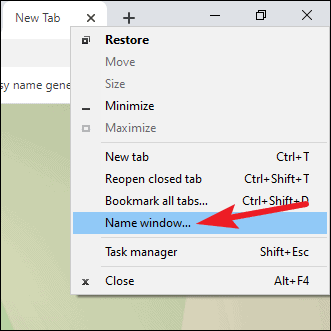
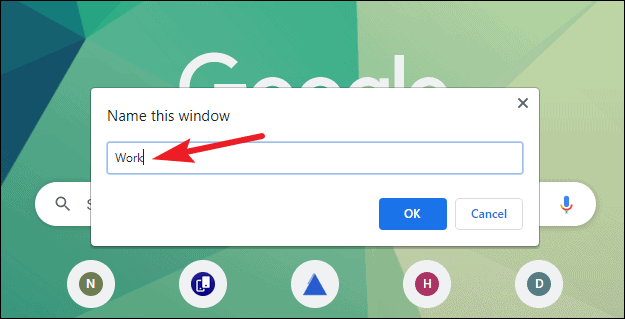
Step 4: In the Name window dialog that appears, type your desired window name and click OK.
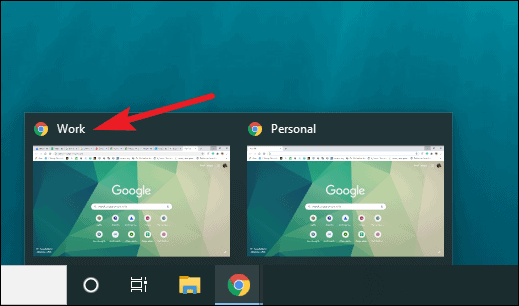
Now, when you hover over the Chrome icon in your taskbar, the custom window name will be displayed, helping you quickly identify the window you need.
Chrome will retain these window names even after you've closed and reopened the browser, as long as your settings allow for the restoration of previously open windows.
Naming your Chrome windows can greatly enhance your browsing efficiency, allowing you to manage multiple tasks without confusion.

