If you've adjusted your Windows 11 display settings and now things don't look quite right, you might want to reset them to their default state. Restoring the original settings can help fix issues like incorrect colors, unreadable fonts, or improper resolution. Here are several methods to reset your display settings and get your screen back to normal.
Reset Windows themes
Changing your Windows theme can alter various display settings, including backgrounds, colors, and sounds. Resetting the theme to the default can help restore these settings.
Step 1: Open the Settings app by clicking on the Start menu and selecting the gear icon, or by pressing Win + I. Click on the 'Personalization' section on the left sidebar.
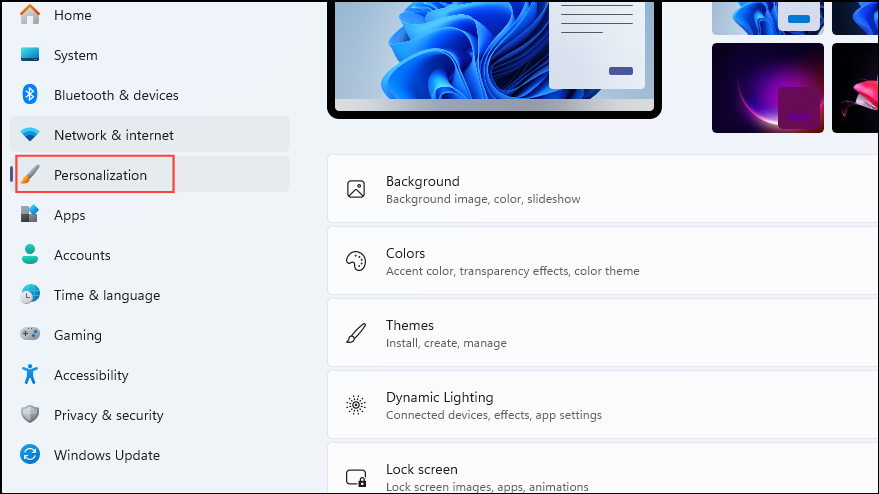
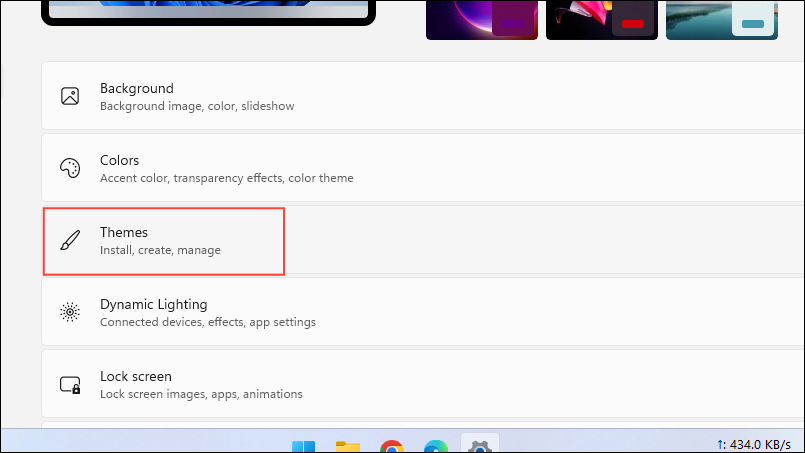
Step 2: In the Personalization settings, select the 'Themes' option.
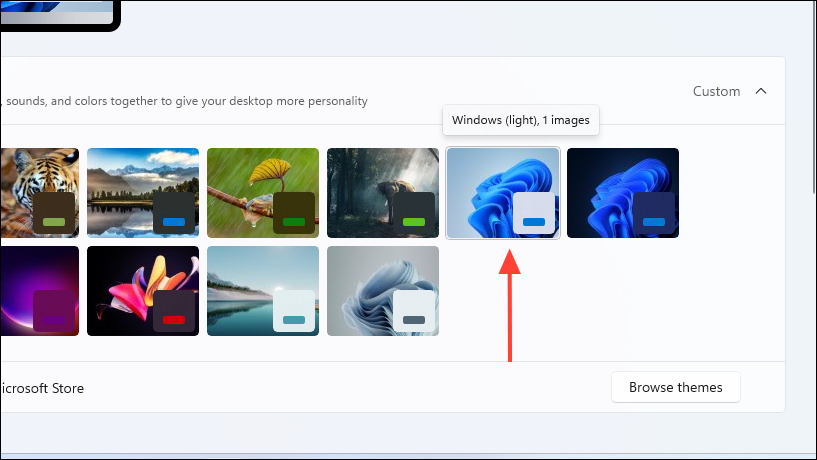
Step 3: Under 'Current Theme', you'll see a list of available themes. Click on the 'Windows (Light)' theme to reset your theme to the default.
Reset the display resolution
If your screen elements appear too large or too small, resetting the display resolution to the recommended setting can help.
Step 1: Open the Settings app and select 'System' from the left sidebar.
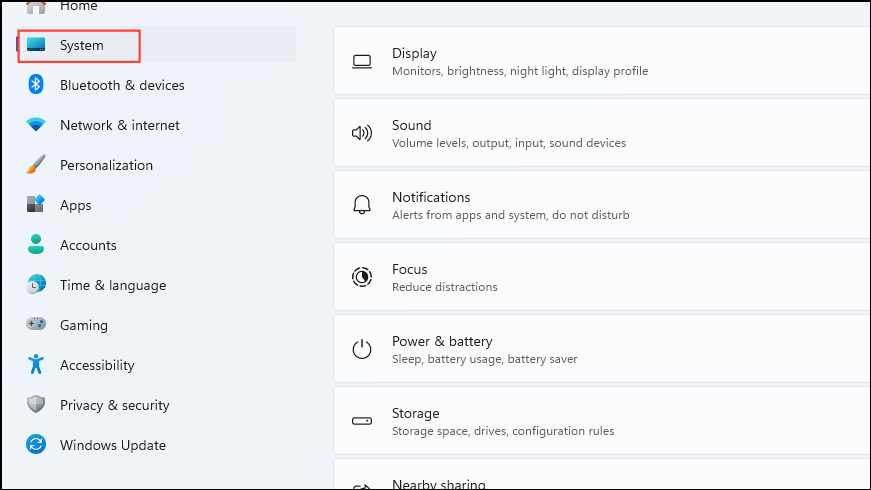
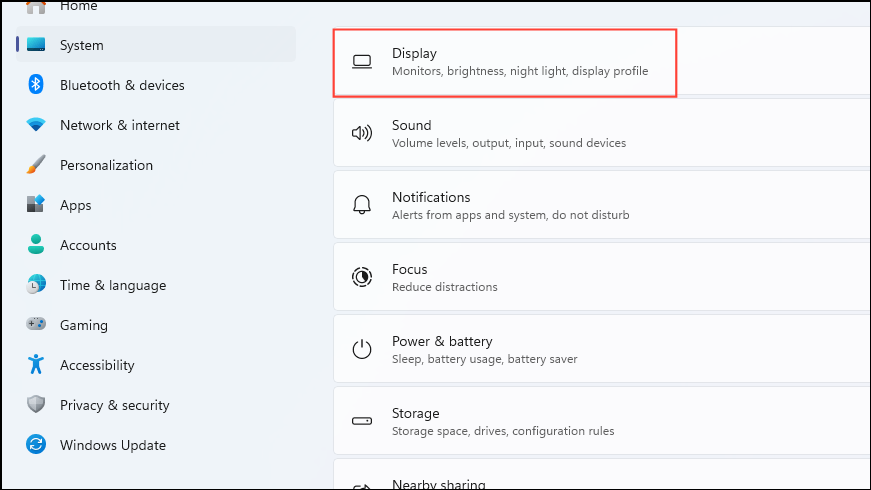
Step 2: Click on the 'Display' option on the right to access display settings.
Step 3: Scroll down to the 'Scale and layout' section. Next to 'Display resolution', click the dropdown menu and select the resolution labeled as 'Recommended'.
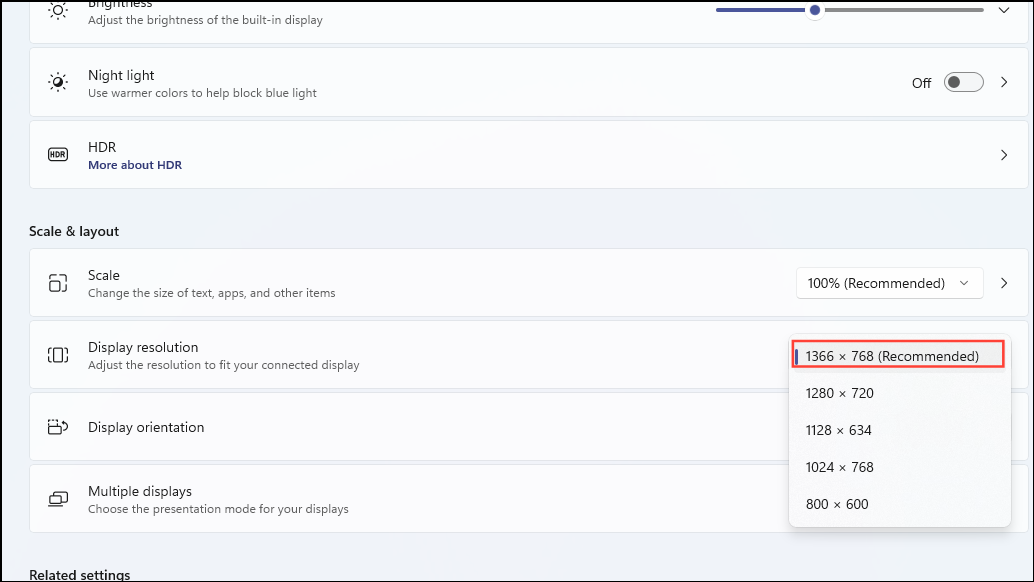
Your display should now revert to the optimal resolution for your screen.
Note: If the resolution doesn't change, you can restart your graphics driver by pressing Win + Ctrl + Shift + B. Your screen will flicker briefly. Then, try changing the resolution again.
Reset the scaling settings
If items on your screen still appear too large or small after adjusting the resolution, resetting the scaling settings can help.
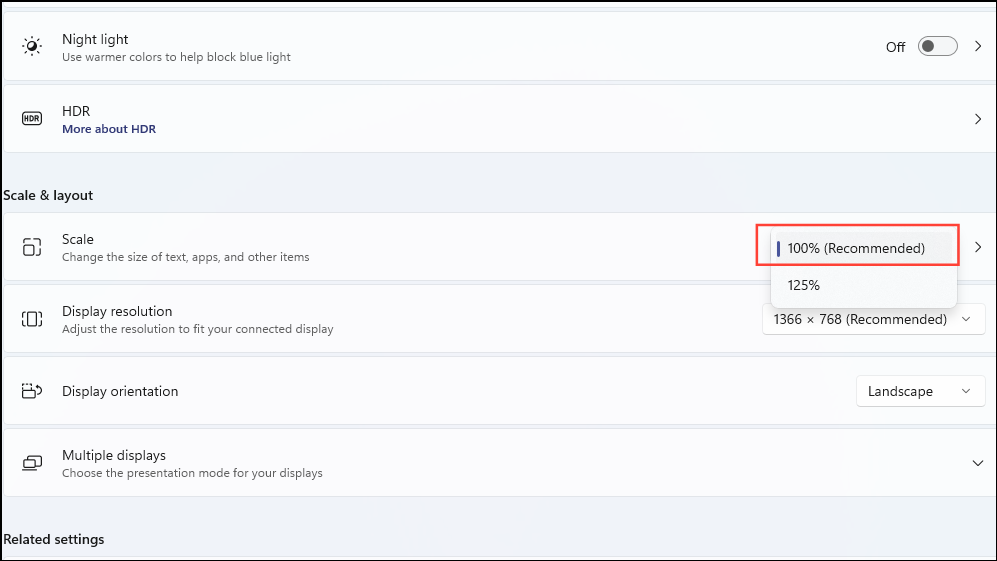
Step 1: In the Display settings, stay in the 'Scale and layout' section.
Step 2: Next to 'Scale', click the dropdown menu and select the recommended percentage (usually 100% or 125%).
Reset HDR calibration
If you have an HDR-compatible monitor and have calibrated it without the desired results, resetting the calibration can help.
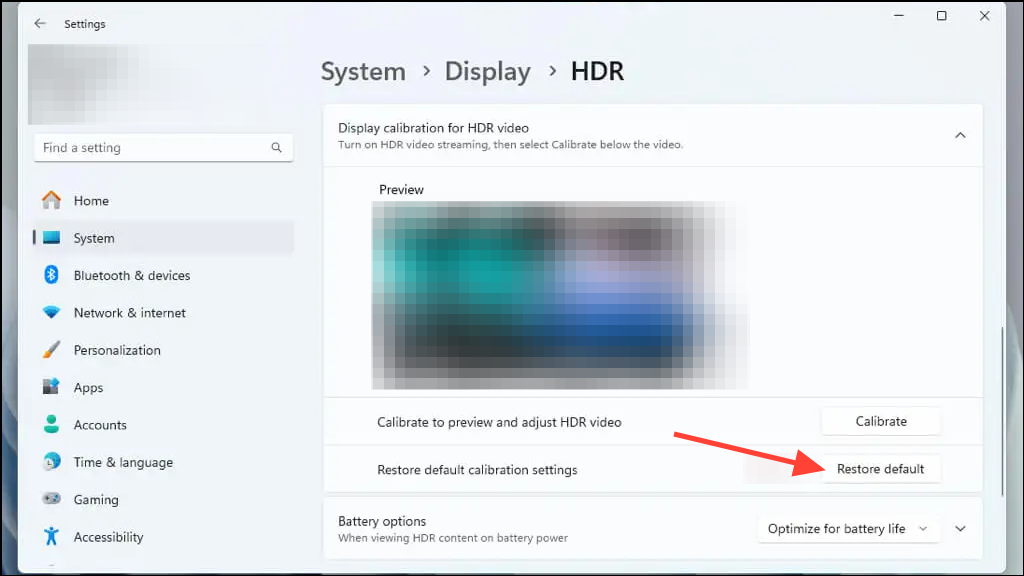
Step 1: In the Display settings, click on the 'HDR' option under 'Brightness & color'.
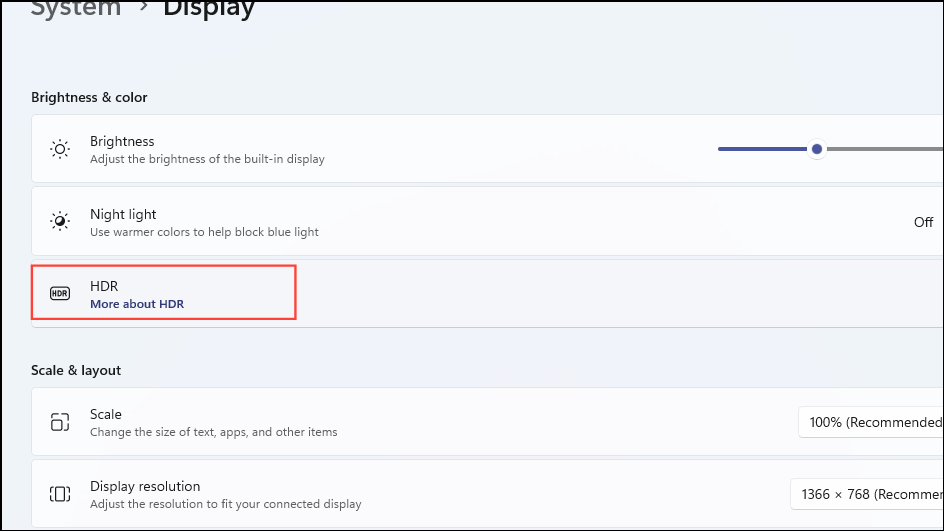
Step 2: Click on 'Calibrate your display for HDR video' to expand the options, then click on the 'Reset calibration' button.
Reset Night light settings
Night light reduces blue light to ease eye strain, but if it's too strong or weak, you can reset its settings.
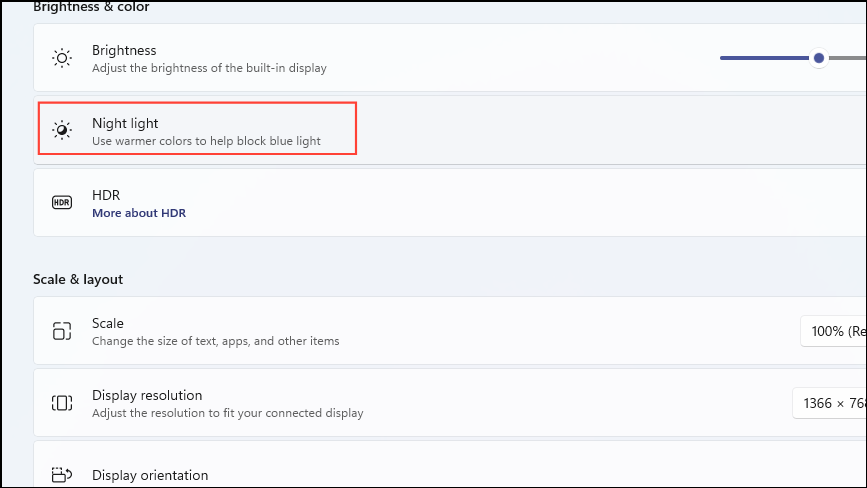
Step 1: In the Display settings, click on the 'Night light' option under 'Brightness & color'.
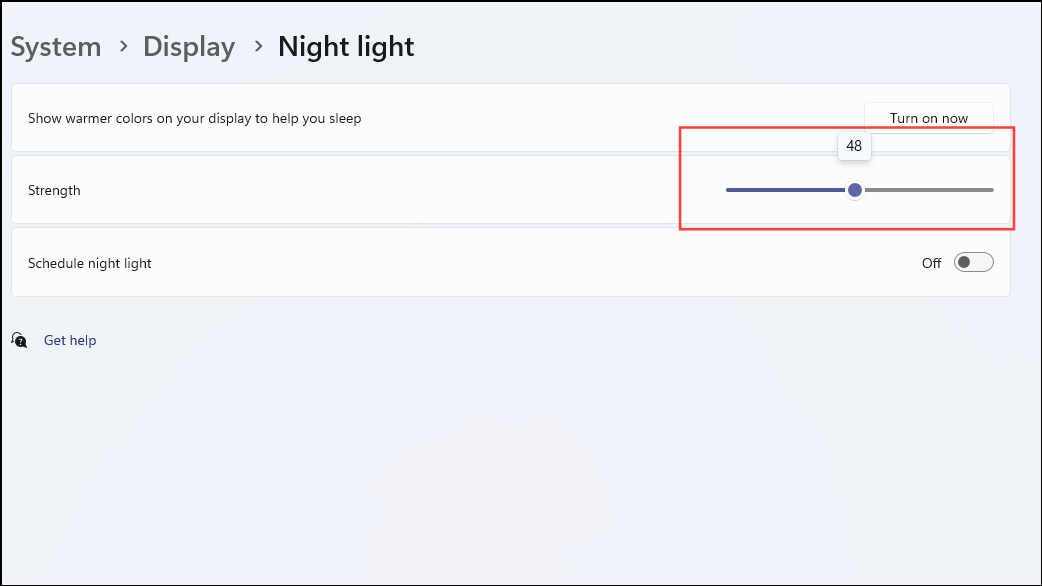
Step 2: Adjust the 'Strength' slider to the middle value (around 50%) to reset it to a balanced level.
Reset the OS colors
Customizing colors can sometimes make the interface hard to read. Resetting to default colors can resolve this.
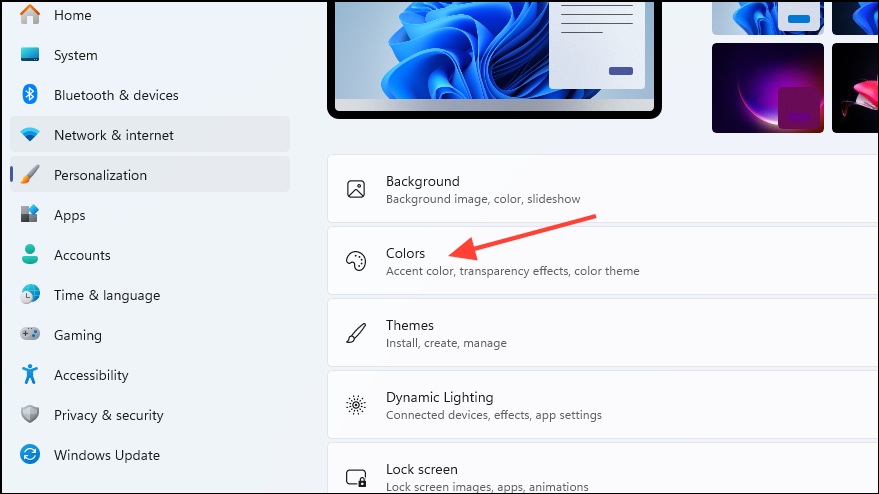
Step 1: Open the Settings app and select 'Personalization' from the left sidebar.

Step 2: Click on 'Colors'.
Step 3: Under 'Choose your color', select 'Light' from the dropdown menu.
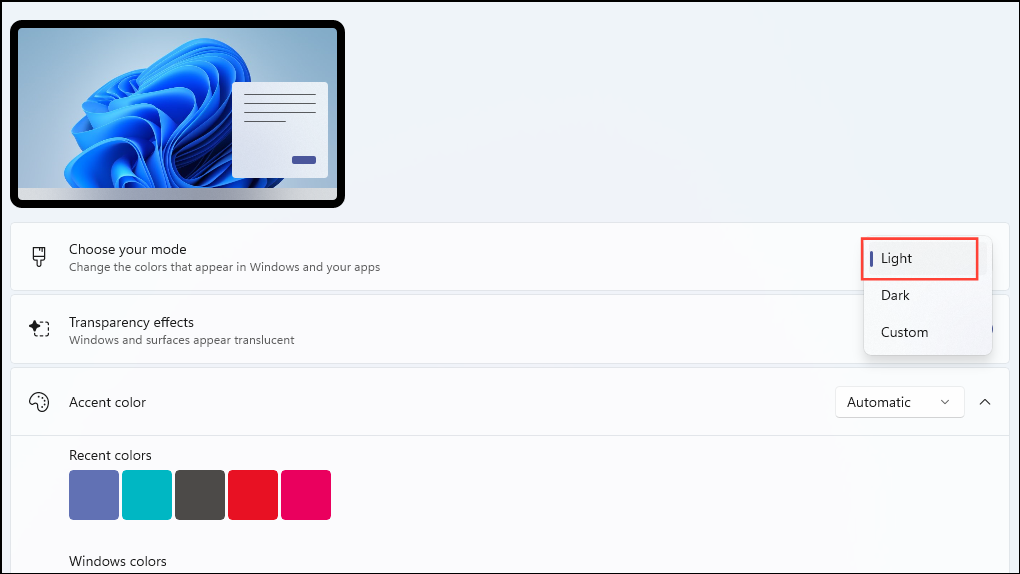
Step 4: Ensure 'Transparency effects' are turned on, and set 'Accent color' to 'Manual'.
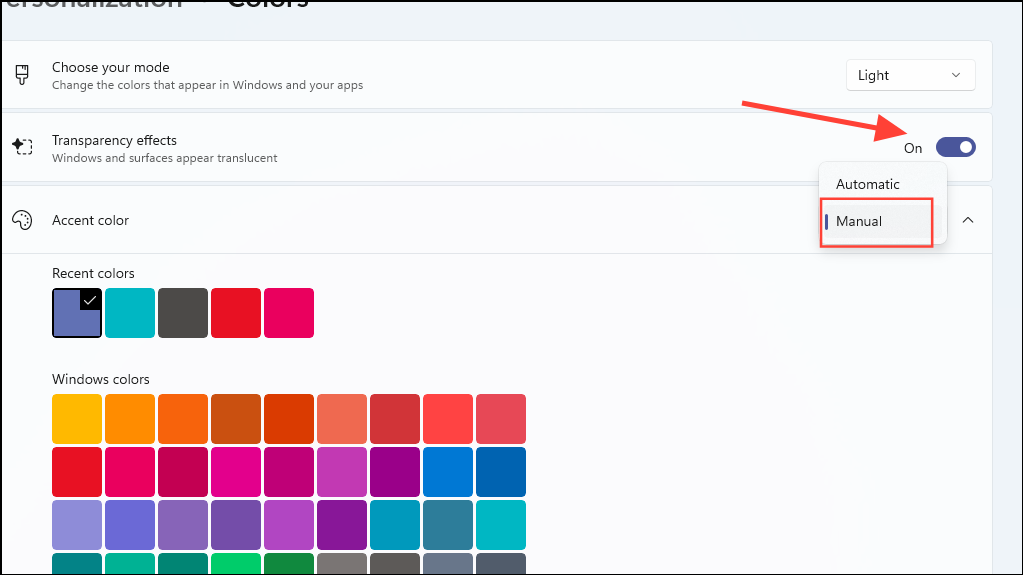
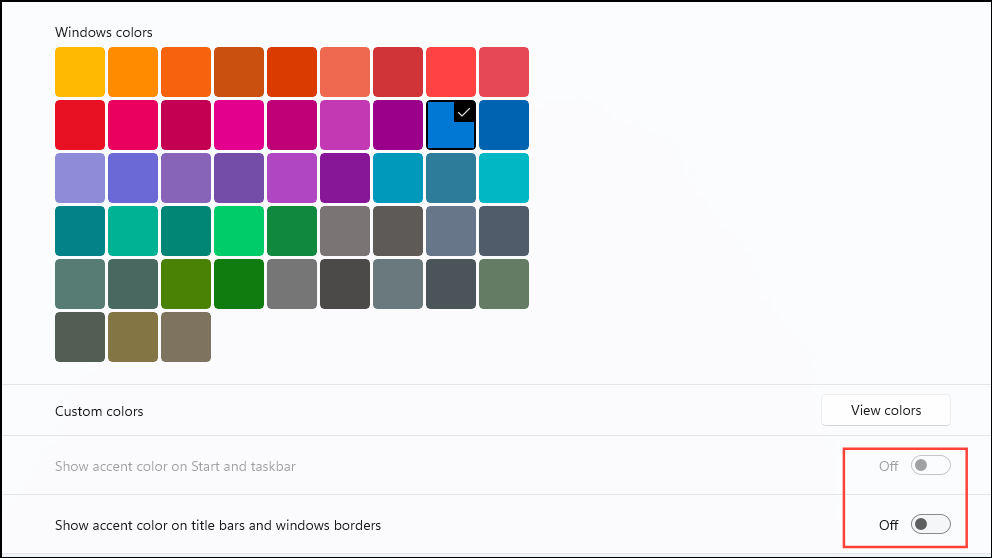
Step 5: Under 'Accent color', select 'Blue' from the Windows colors. Disable 'Show accent color on Start and taskbar' and 'Show accent color on title bars and windows borders' by toggling them off.
Reset the display orientation
If your screen is rotated incorrectly, resetting the display orientation can fix it.
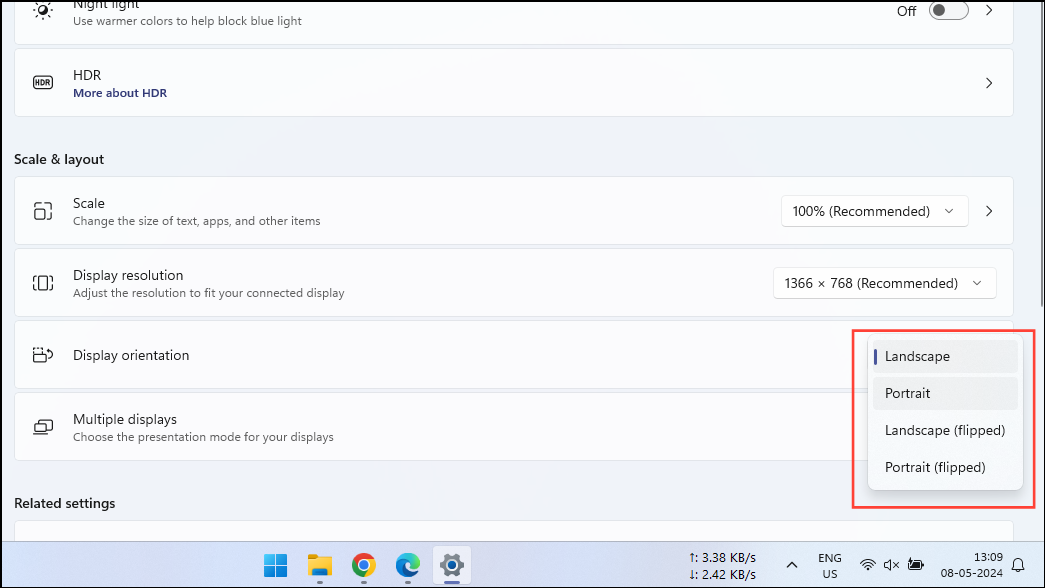
Step 1: In the Display settings, scroll to 'Scale and layout'.
Step 2: Next to 'Display orientation', select 'Landscape' from the dropdown menu.
Turn off color filters
If colors appear distorted, disabling color filters can help restore the original display colors.
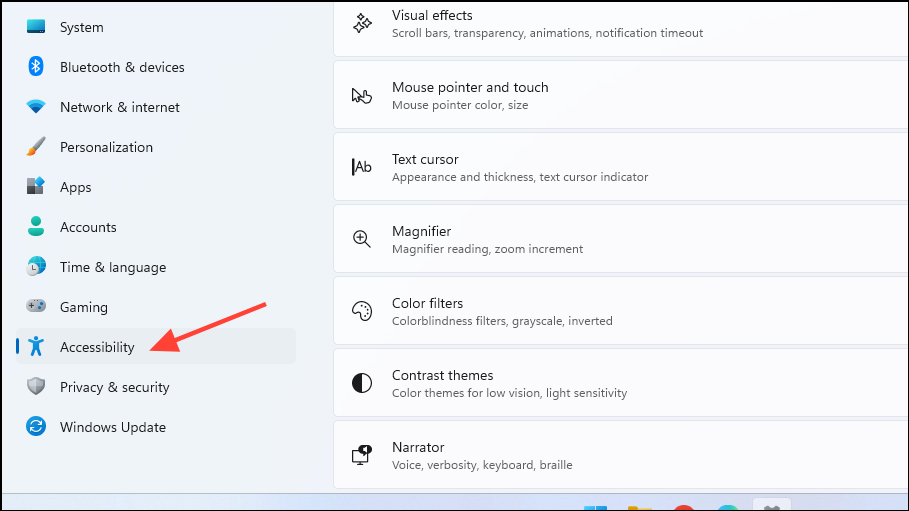
Step 1: In the Settings app, select 'Accessibility' from the left sidebar.
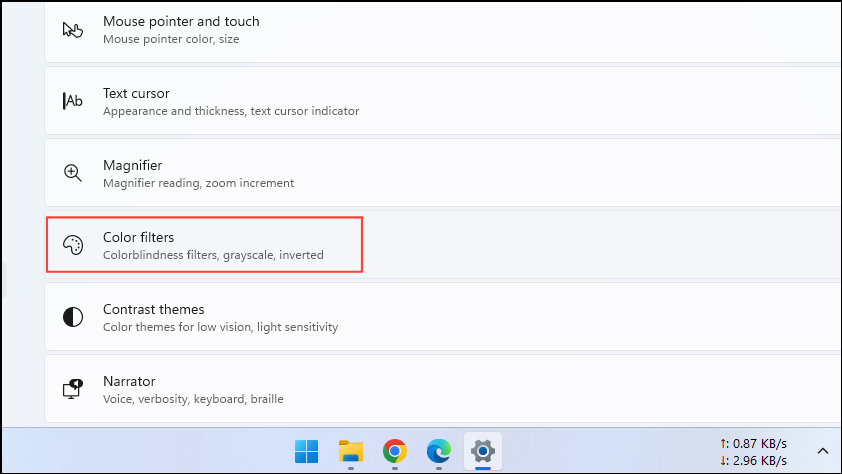
Step 2: Click on 'Color filters'.
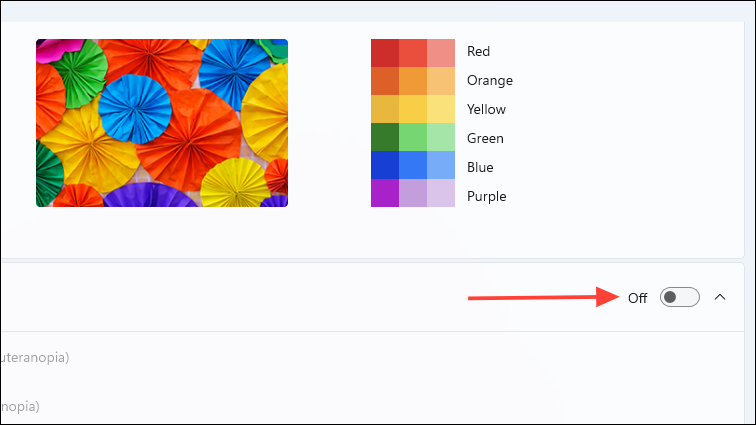
Step 3: Toggle off the switch next to 'Color filters' to disable them.
Turn off contrast themes
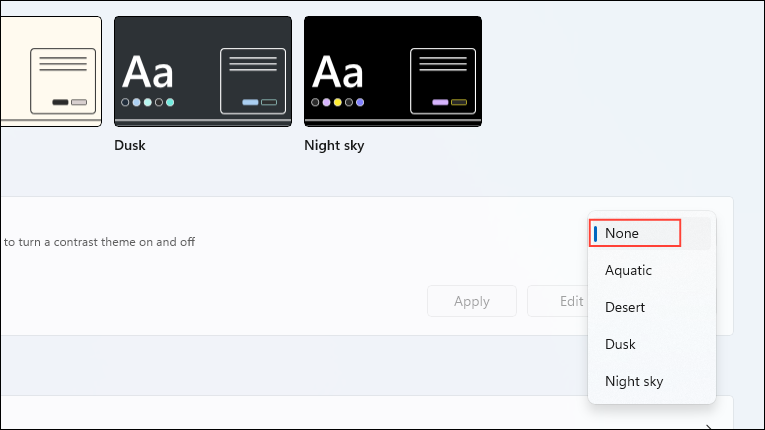
Contrast themes change the color scheme to make text and icons more readable. Turning them off can revert to the default look.
Step 1: In the 'Accessibility' settings, select 'Contrast themes'.
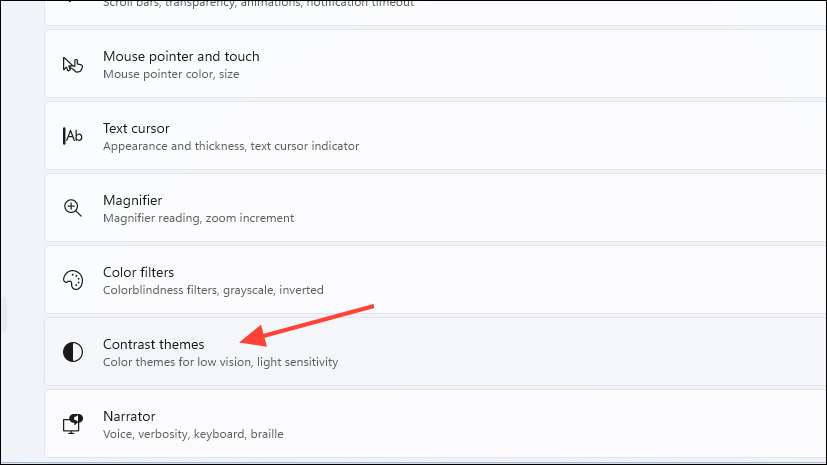
Step 2: In the 'Contrast themes' section, choose 'None' from the dropdown menu and click 'Apply'.
Reset visual effects
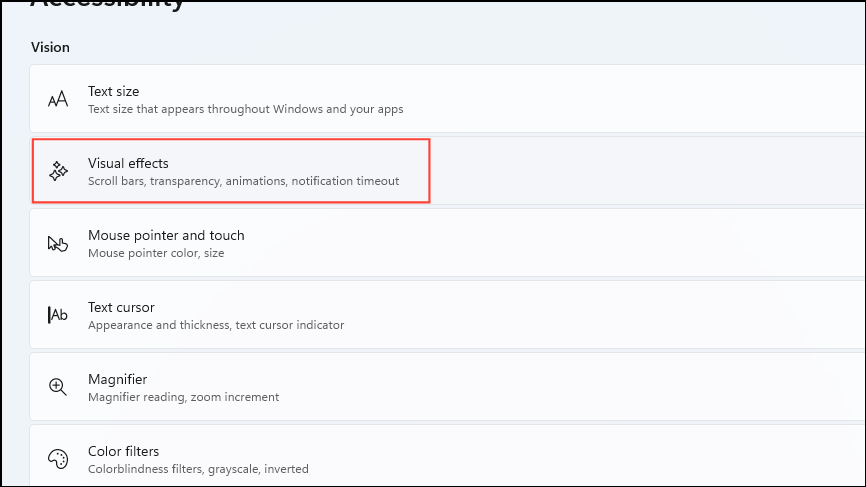
Visual effects like animations enhance the user experience. If disabled, you can re-enable them.
Step 1: In 'Accessibility' settings, click on 'Visual effects'.
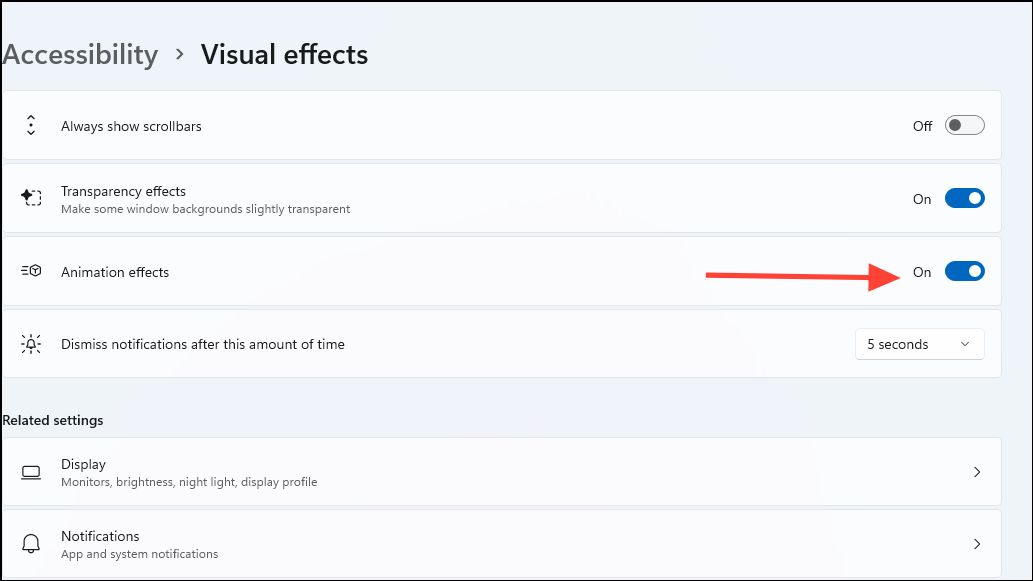
Step 2: Toggle on the switch next to 'Animation effects'.
Reset the mouse pointer
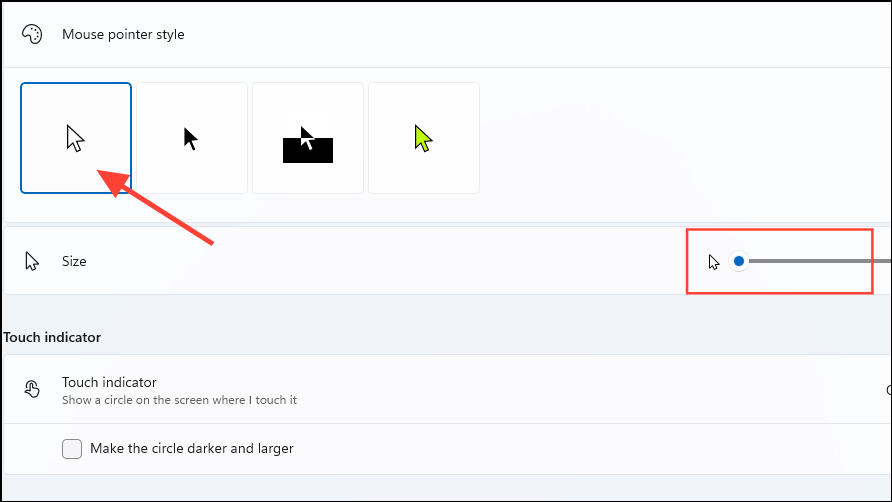
If your mouse pointer size or color has changed, you can reset it to default settings.
Step 1: In 'Accessibility' settings, select 'Mouse pointer and touch'.
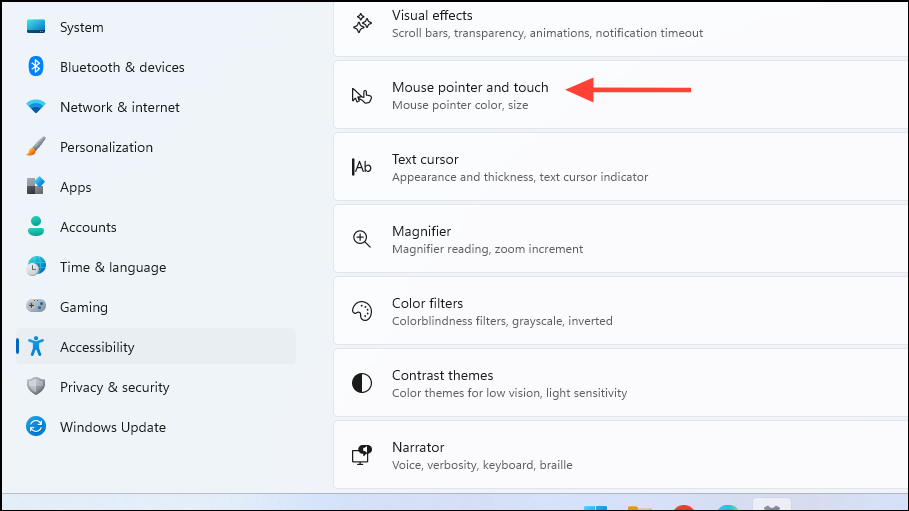
Step 2: Choose the first pointer option (white with black border) and adjust the size slider to the default position.
Restore default color display settings
If color profiles have caused display issues, resetting the color management can help.
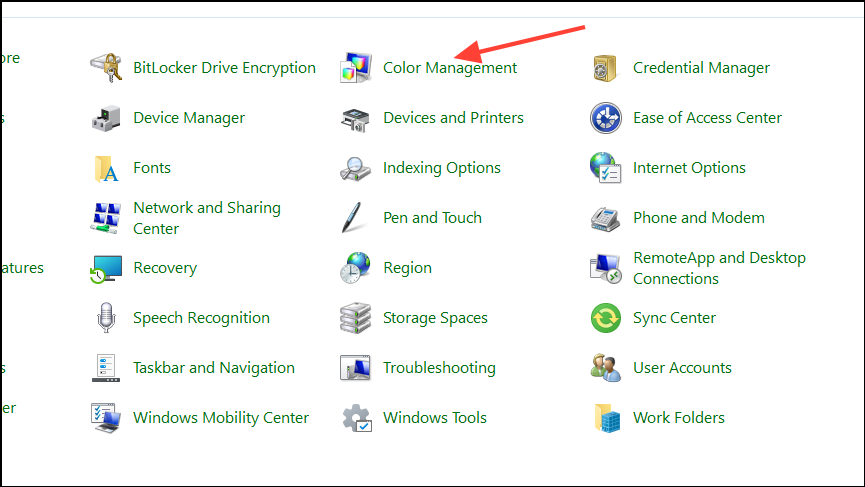
Step 1: Open Control Panel and search for 'Color Management'. Click on it to open.
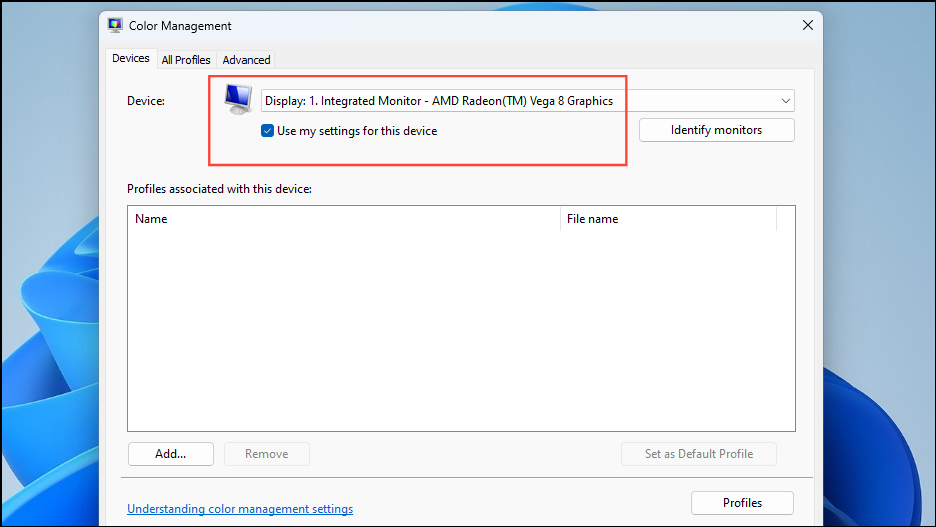
Step 2: In the 'Devices' tab, select your monitor and check 'Use my settings for this device'.
Step 3: Go to the 'Advanced' tab and click on 'Change system defaults...'.
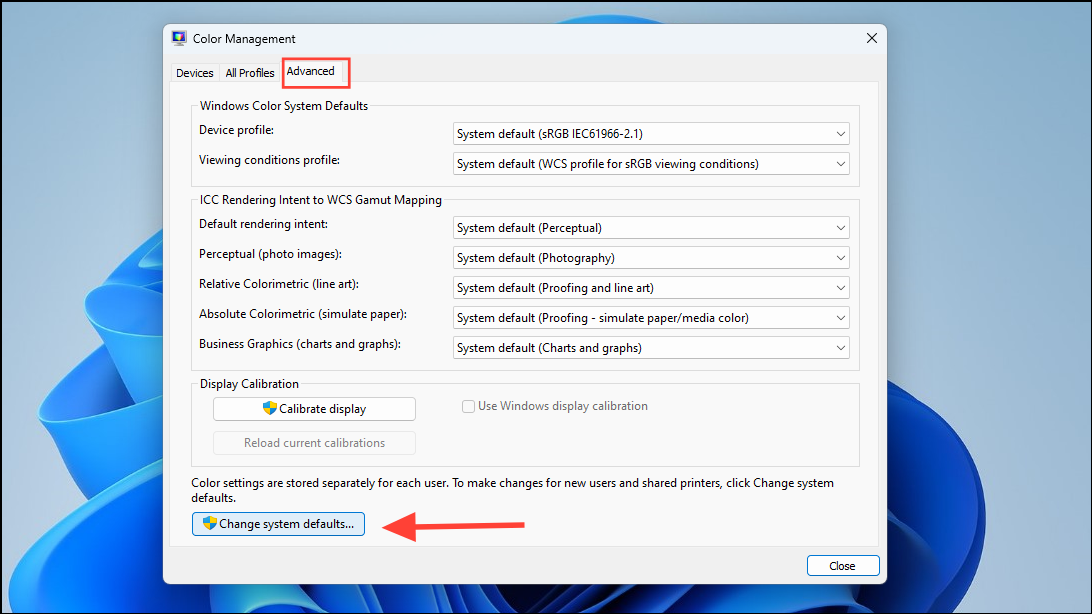
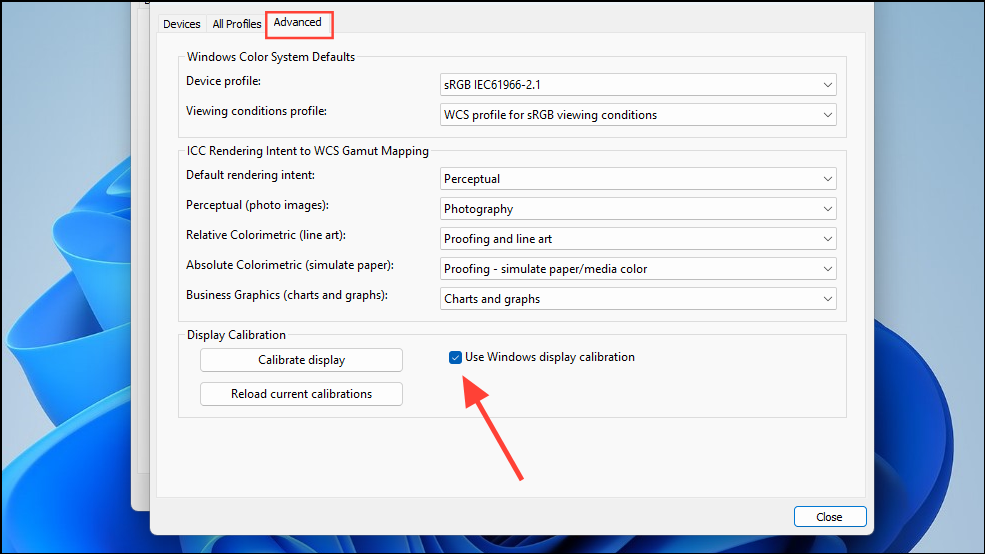
Step 4: In the new window, under the 'Advanced' tab, check 'Use Windows display calibration' and click 'Close'.
Reset the text color
If you've changed the text color using the Registry Editor, you can reset it back to default.
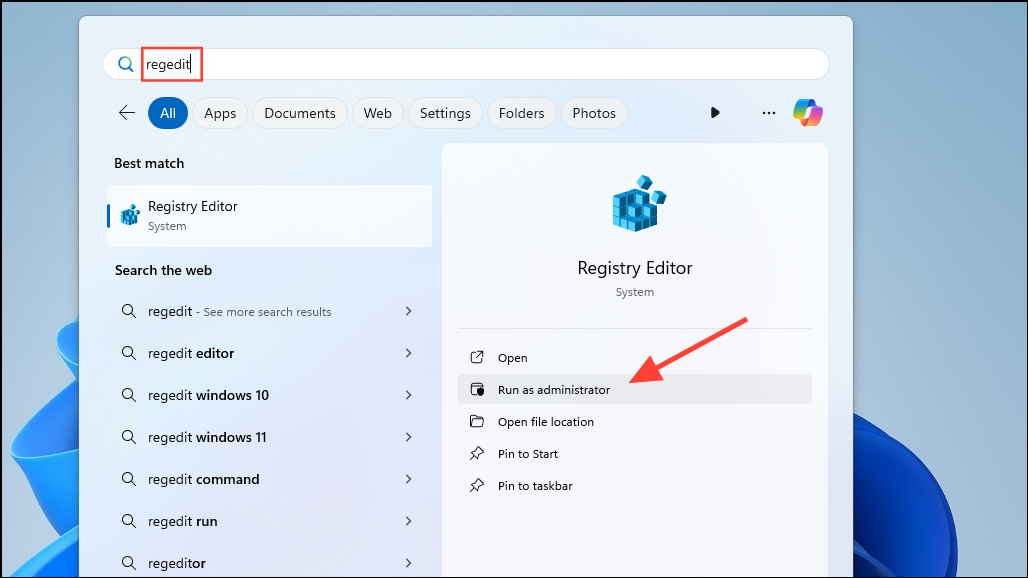
Step 1: Press Win + R, type regedit, and press Enter. Run the Registry Editor as administrator.
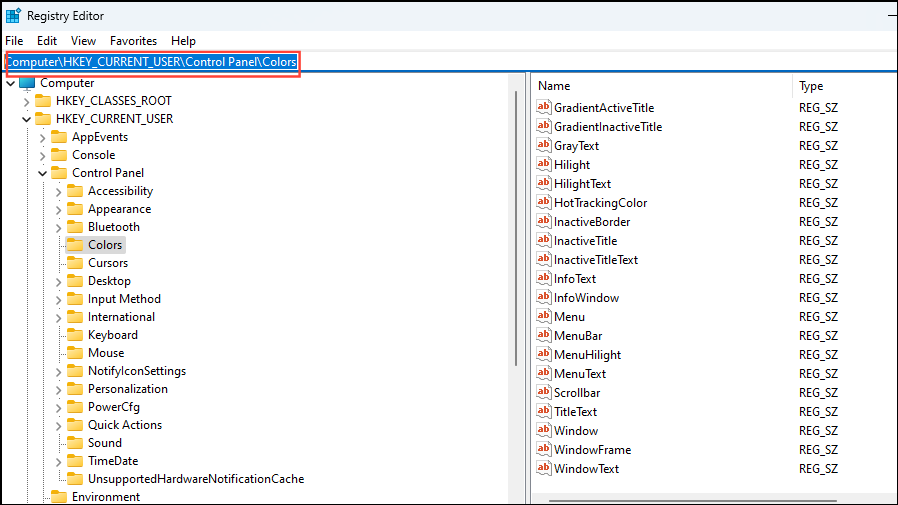
Step 2: Navigate to HKEY_CURRENT_USER\Control Panel\Colors.
Step 3: Find 'WindowText' in the list, double-click on it, change its value to 0 0 0, and click 'OK'.
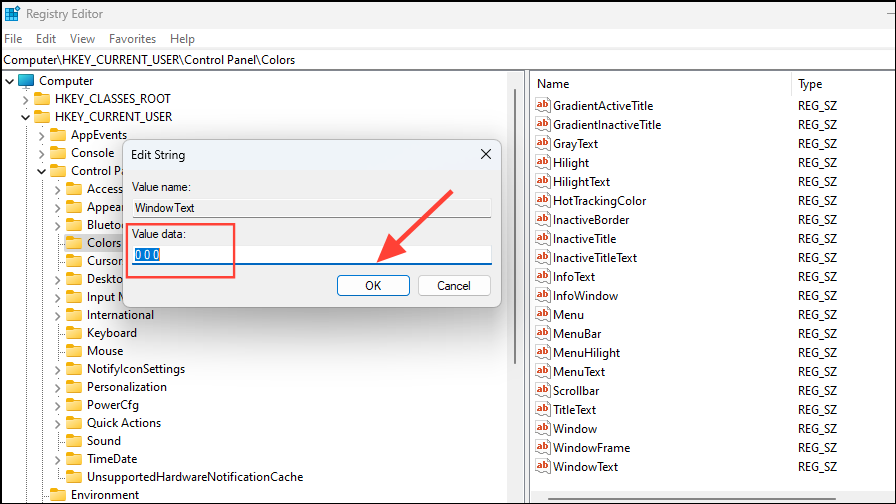
Note: To revert this change, set the 'WindowText' value back to 255 255 255 in the Registry Editor.
Restore the default text size
If the text size is too large or small, you can reset it to the default size.
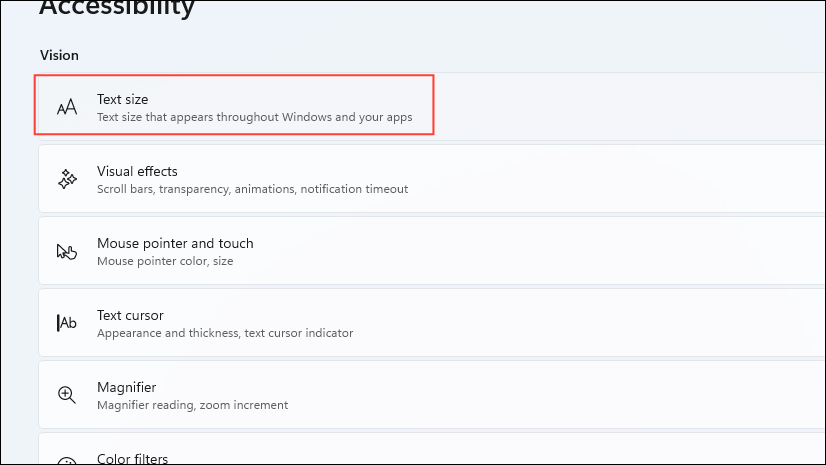
Step 1: In 'Accessibility' settings, click on 'Text size'.
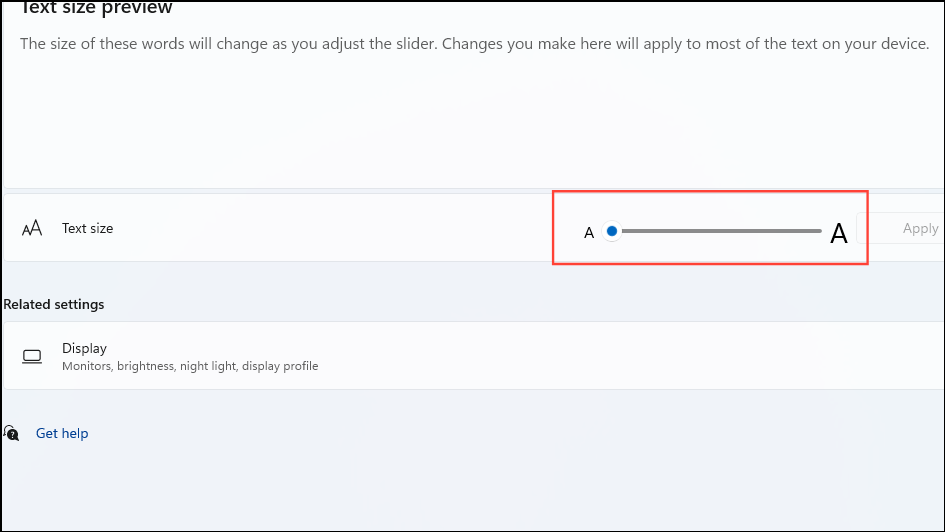
Step 2: Move the slider to the far left to set the text size to 100% (default). Then click 'Apply'.
Restore default icons
If you've customized desktop icons and want to revert to default, you can reset them.
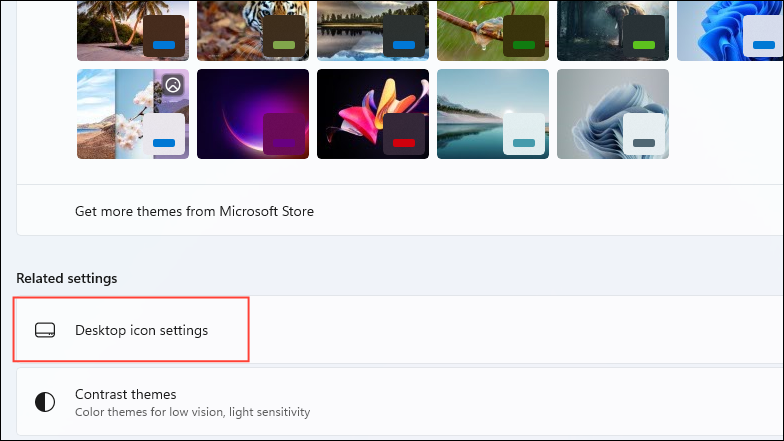
Step 1: In 'Personalization' settings, go to 'Themes' and scroll down to 'Related settings'. Click on 'Desktop icon settings'.
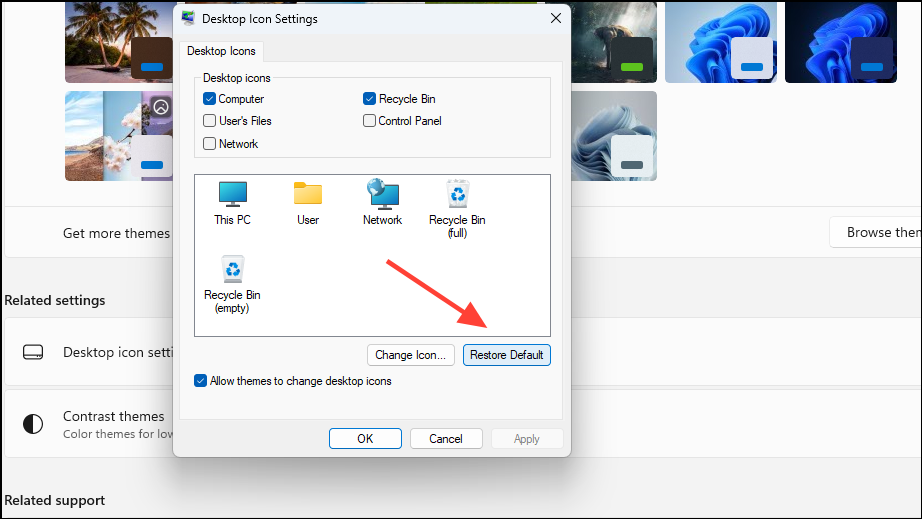
Step 2: In the 'Desktop Icon Settings' window, select the icons you want to restore and click 'Restore Default'. Then, click 'OK'.
By following these steps, you can reset various display settings in Windows 11 to their default values, helping to resolve display issues and restore your screen to its original appearance. Remember, you can adjust these settings again later if needed.


