
Graphics issues like sudden black screens, frozen visuals, or unexpected crashes often indicate problems with your graphics card drivers in Windows 11. Resetting your graphics card drivers can quickly resolve these issues and restore normal functionality to your system.
Reset Graphics Card Drivers Using Keyboard Shortcut
Step 1: The fastest method to reset your graphics driver is through a simple keyboard shortcut. Press Windows + Ctrl + Shift + B simultaneously. Your screen will briefly flicker or go black momentarily. This indicates Windows is resetting your graphics driver.
Step 2: Once the screen returns, check if your graphics issue is resolved. This shortcut restarts the graphics driver without affecting open applications or unsaved data, making it a safe first step for troubleshooting.
Reinstall Graphics Drivers via Device Manager
If the keyboard shortcut doesn't resolve your issue, reinstalling your graphics driver through Device Manager can fix deeper driver-related problems.
Step 1: Press Windows + X, then select Device Manager from the menu.
Step 2: In Device Manager, expand the Display adapters category. Right-click your graphics adapter (e.g., Intel UHD Graphics, AMD Radeon, or NVIDIA GeForce) and select Uninstall device. Confirm the action if prompted.
Step 3: Restart your computer. Upon reboot, Windows 11 will automatically detect and reinstall the appropriate graphics driver. This fresh installation often resolves persistent graphical issues.
Perform a Clean Graphics Driver Reinstallation
If standard reinstallation doesn't resolve the issue, performing a clean reinstall ensures all previous driver files and settings are entirely removed before installing fresh drivers.
Step 1: Open Windows Search, type Add or remove programs, and select the matching result.
Step 2: Scroll through the installed apps to locate your graphics drivers (NVIDIA, AMD, or Intel). Click the three-dot menu next to the graphics driver and select Uninstall. Also, uninstall related applications like NVIDIA Control Panel or AMD Radeon Adrenaline software if present.
Step 3 (Optional but recommended): To thoroughly remove all driver remnants, you can use a third-party tool called Display Driver Uninstaller (DDU). Follow the instructions provided on the official DDU site to completely clean your system of old graphics drivers.
Step 4: Restart your PC once the uninstallation process is complete.
Step 5: Visit your graphics card manufacturer's website to download the latest drivers:
Step 6: Run the downloaded installer file and follow the on-screen prompts to install the latest graphics driver. After installation, restart your PC once again to apply changes fully.
Reset Graphics Settings to Defaults (Optional)
If graphics issues started after you customized graphics settings, resetting these settings to defaults can resolve conflicts or performance problems.
NVIDIA Users: Right-click your desktop and select NVIDIA Control Panel. Under Manage 3D Settings, click Restore Defaults at the bottom. Restart your computer to apply the changes.
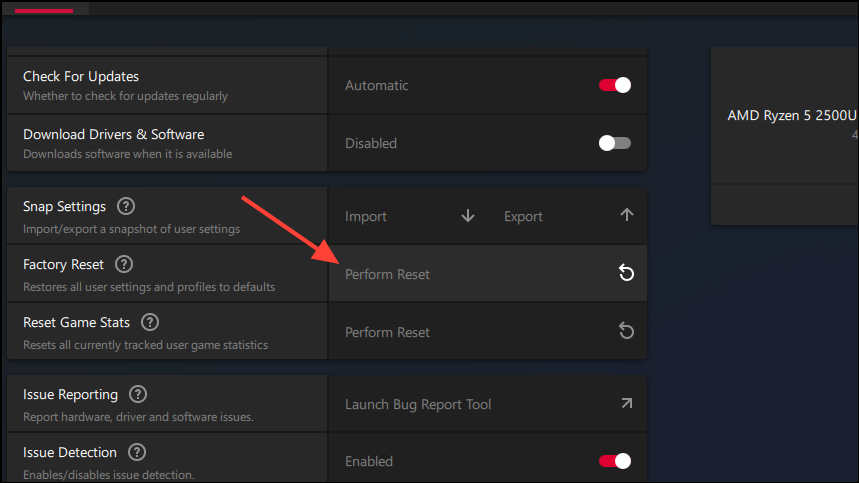
AMD Users: Right-click your desktop and open AMD Radeon Settings. Navigate to the Preferences tab and select Restore Factory Defaults or Perform Reset. Restart your PC afterward.
Intel Users: Right-click your desktop and select Intel Graphics Settings. Click the Restore Defaults option, confirm the action, and restart your system.
After following these steps, your graphics issues in Windows 11 should be resolved, allowing you to enjoy a smooth visual experience again.