Experiencing issues with your Windows 11 PC can be frustrating, especially when you want to resolve them without losing important data and applications. Fortunately, there are ways to reset or reinstall Windows 11 while keeping your personal files intact. This guide will walk you through the most effective methods to refresh your system without sacrificing your data.
Reinstalling Windows 11 Without Losing Apps and Data
If you want to reinstall Windows 11 without losing your apps, settings, and personal files, you can perform an in-place upgrade (also known as a repair upgrade). This method reinstalls the operating system and repairs any issues without deleting any of your data or applications.
Download the Windows 11 ISO File or Create a Bootable USB Drive
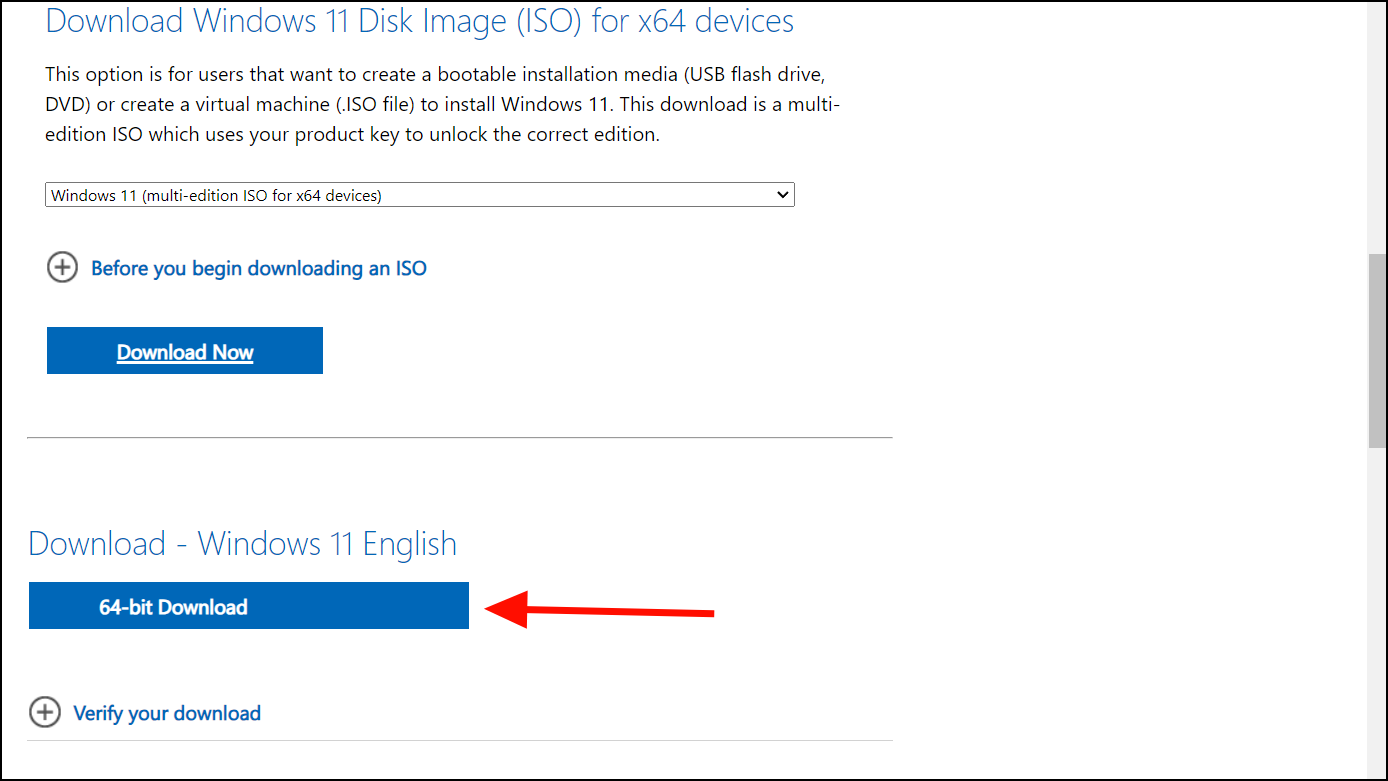
Step 1: Visit the official Windows 11 download page. Scroll down to the 'Download Windows 11 Disk Image (ISO) for x64 devices' section and select 'Windows 11 (multi-edition ISO for x64 devices)' from the dropdown menu.
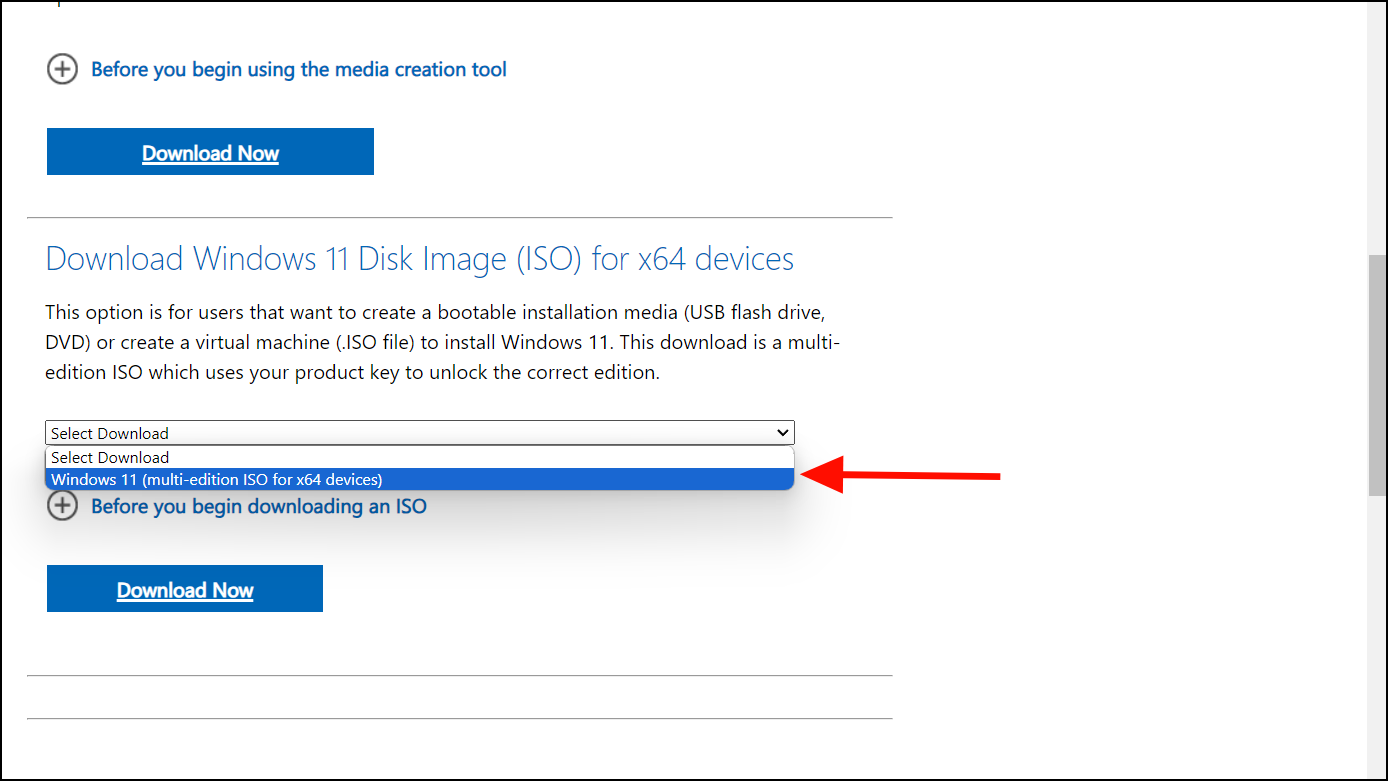
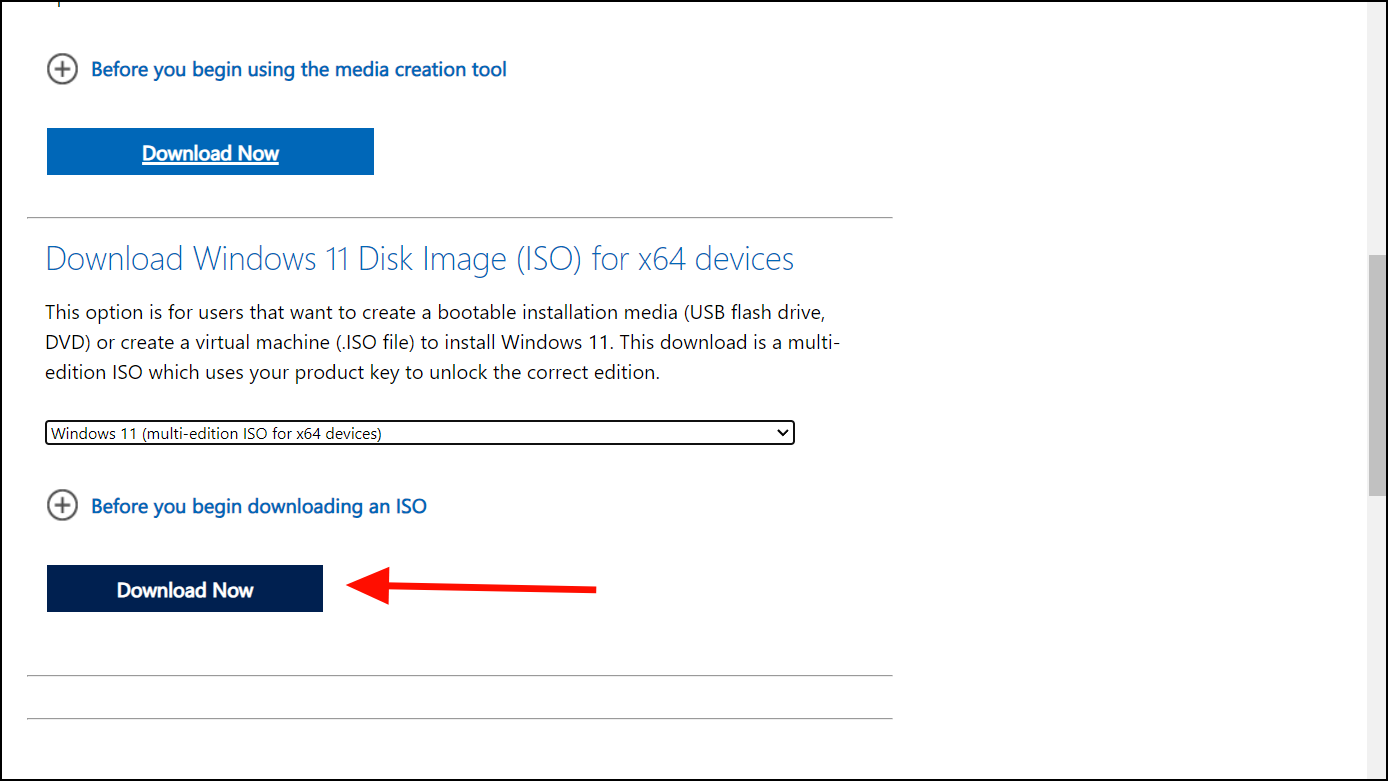
Step 2: Click the 'Download' button to proceed.
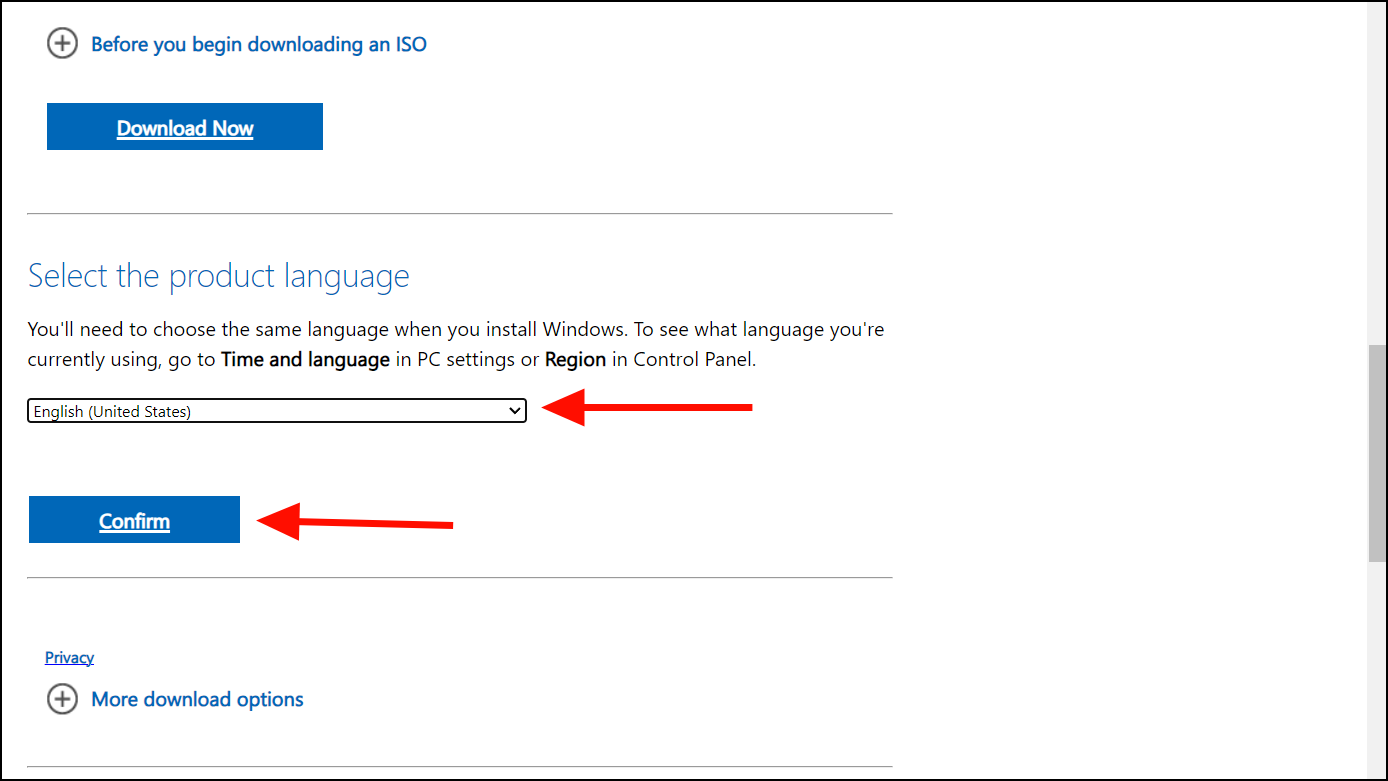
Step 3: Choose your preferred language for the operating system and click on 'Confirm'.
Step 4: Click the '64-bit Download' button to start downloading the ISO file. If you encounter issues downloading the ISO directly, you can use the 'Media Creation Tool' available on the same page to download the ISO or create a bootable USB drive.
Step 5: Wait for the download to complete. Once done, you can proceed to mount the ISO file on your PC.
Mount and Perform an In-Place Upgrade
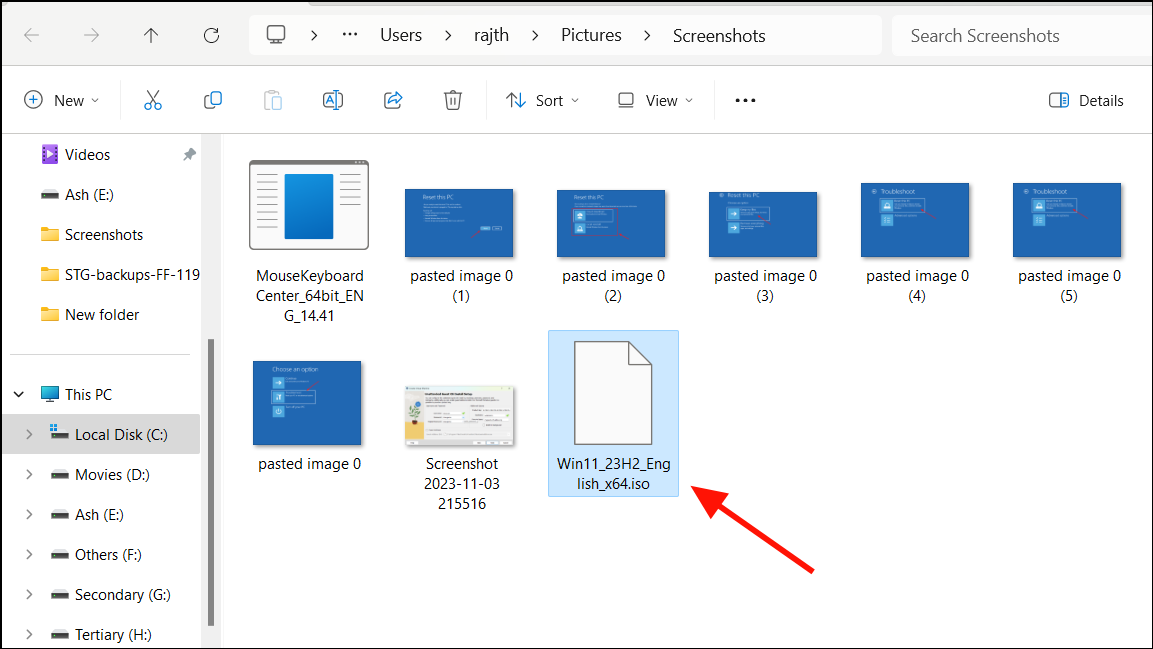
Step 1: Locate the downloaded ISO file (e.g., Win11_23H2_English_x64.iso) on your computer. Right-click on the file and select 'Mount' or simply double-click it.
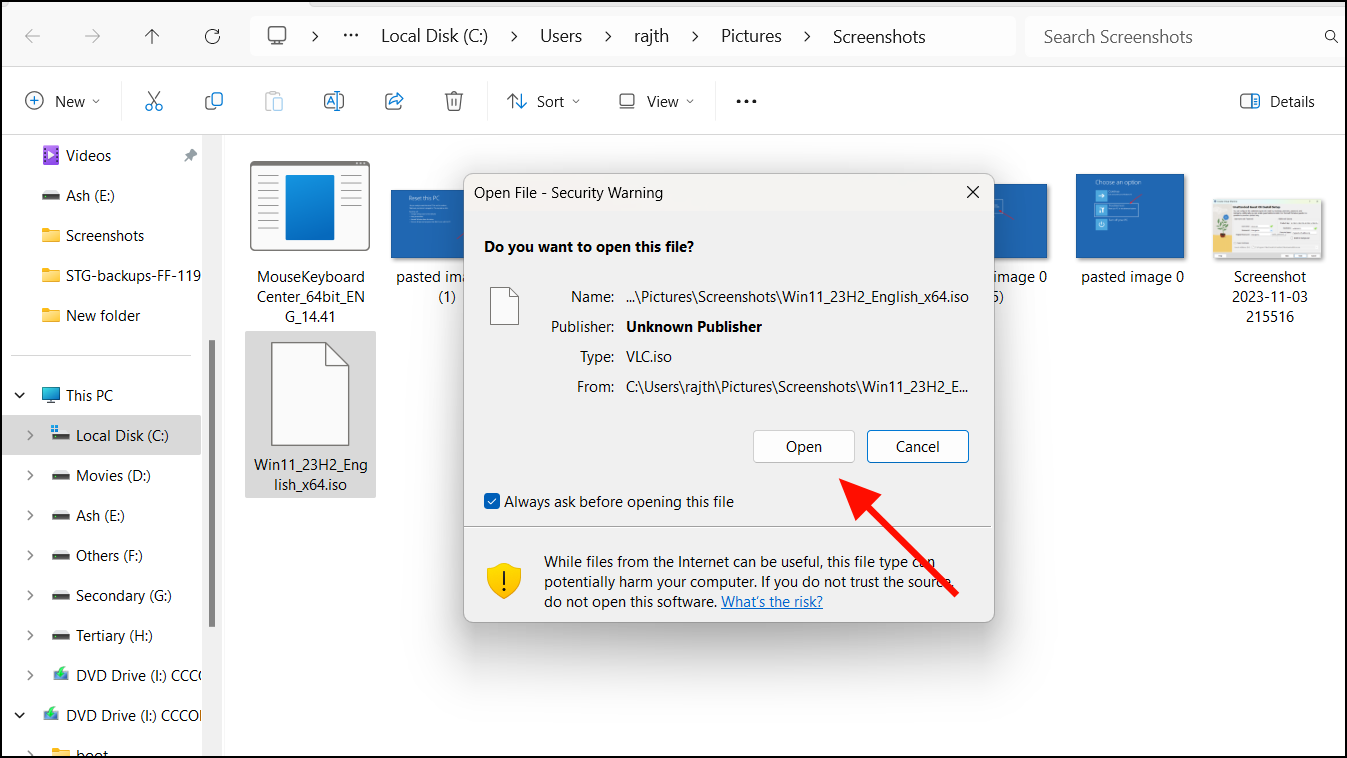
Step 2: If prompted with an 'Open File – Security Warning', click 'Open'.
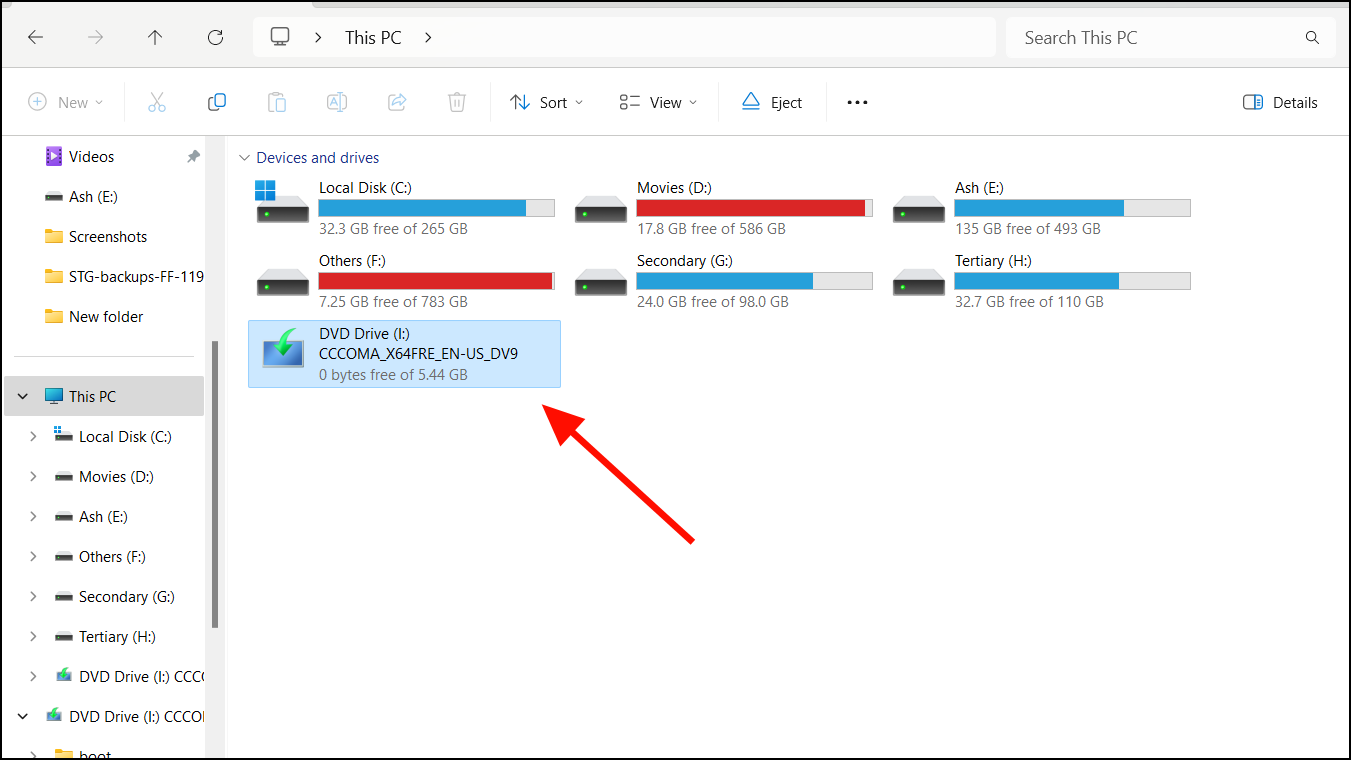
Step 3: Open 'File Explorer' and go to the mounted virtual drive that represents the ISO file.
Step 4: Double-click on the 'setup.exe' file to initiate the Windows 11 setup process. If a 'User Account Control' prompt appears, click 'Yes'. The setup may take a few moments to load.
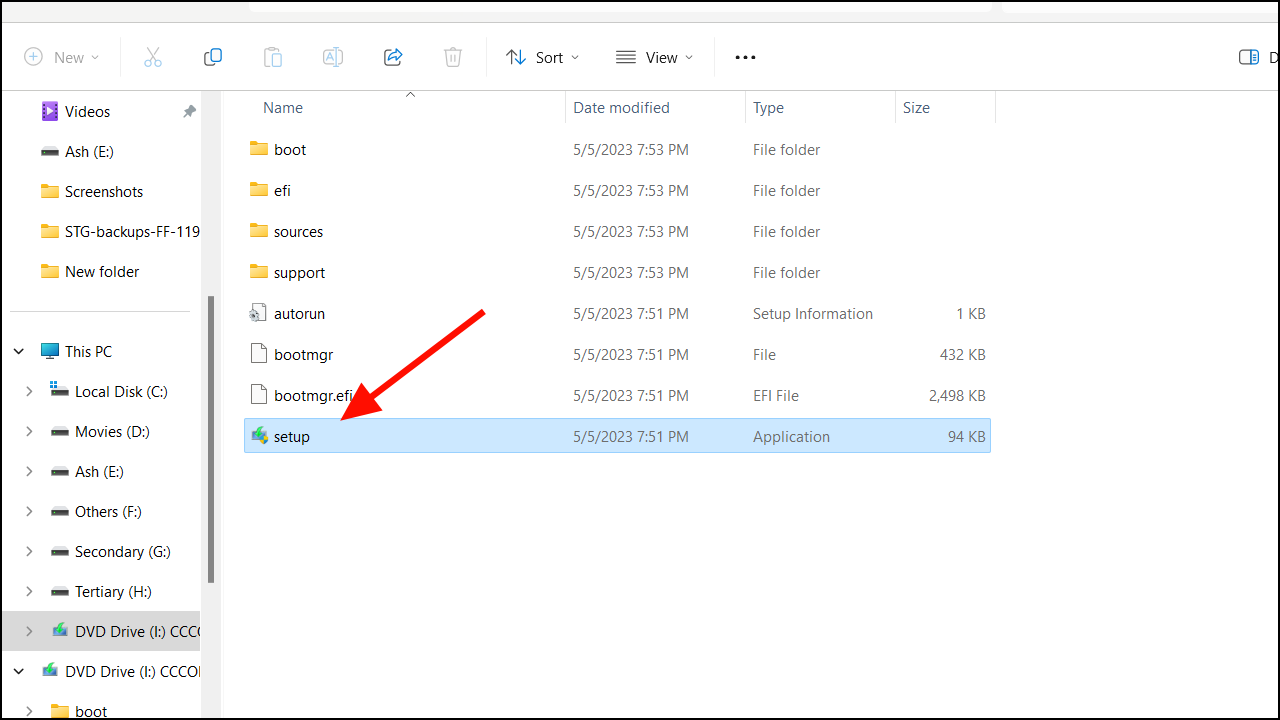
Step 5: In the Windows 11 Setup window, click on 'Change how Setup downloads updates'.
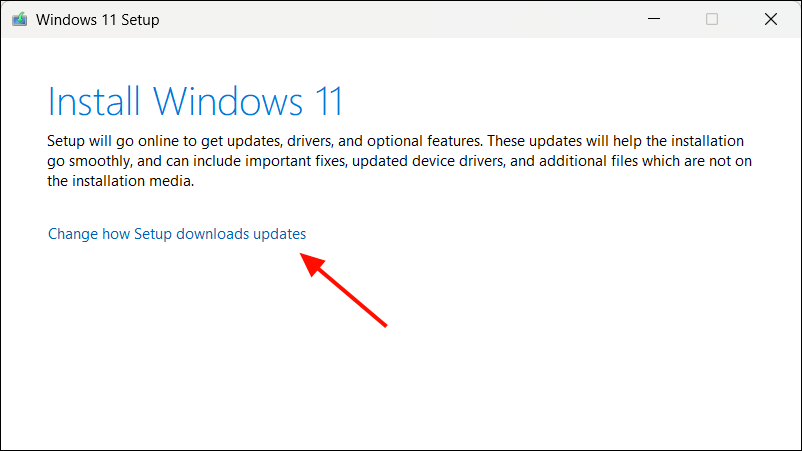
Step 6: Choose whether to download updates during the installation. You can select 'Not right now' to skip downloading updates at this stage. Uncheck 'I want to help make the installation better' if you prefer, then click 'Next'.
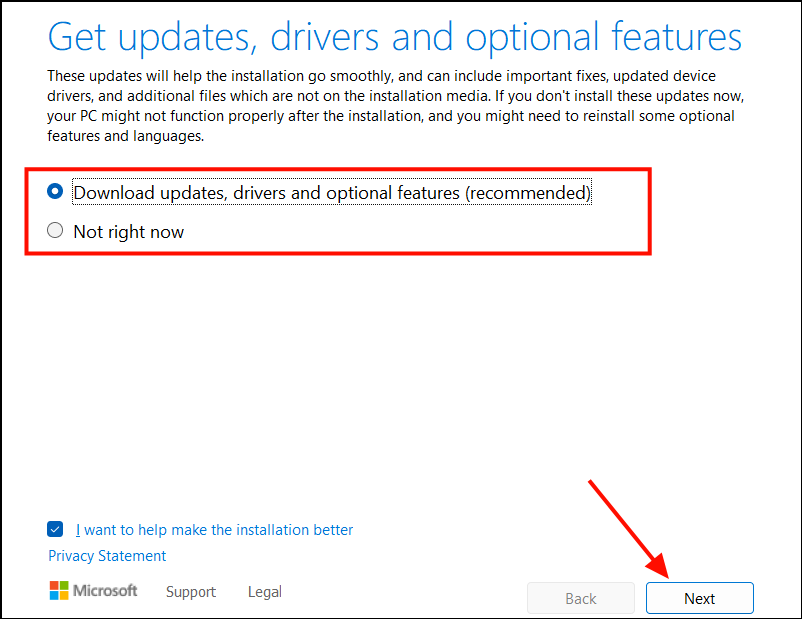
Step 7: Read and accept the licensing terms by clicking 'Accept'.
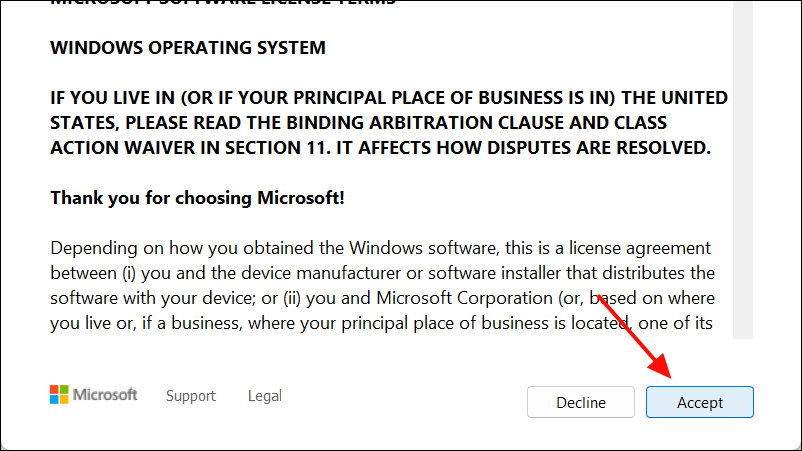
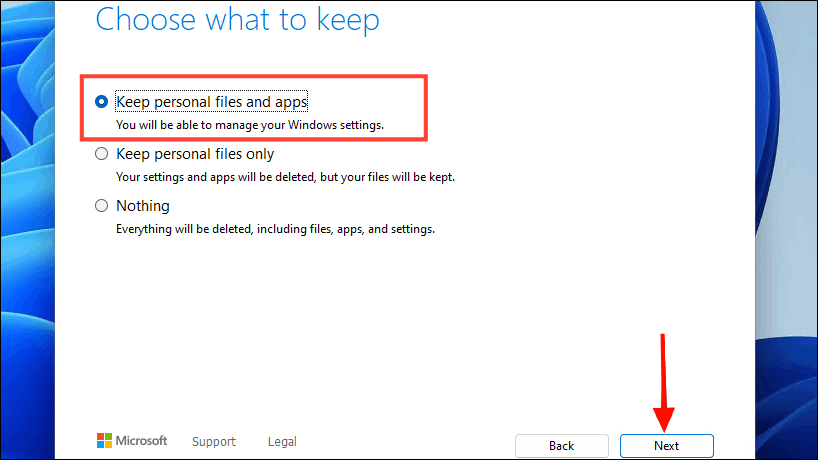
Step 8: On the 'Choose what to keep' screen, ensure that 'Keep personal files and apps' is selected. This option will preserve your applications, settings, and personal files. Click 'Next' to continue.
Step 9: The setup will check if your system is ready for the installation. Wait for the verification to complete.
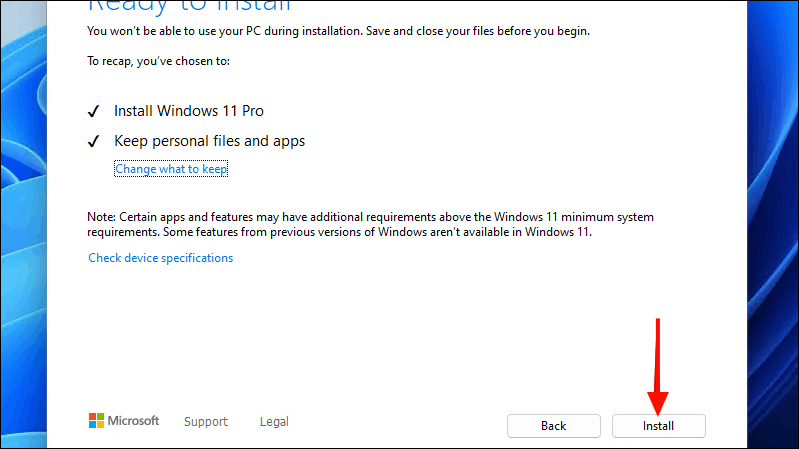
Step 10: Click 'Install' to begin reinstalling Windows 11. Your PC will restart several times during the installation process.
Once the installation is complete, your Windows 11 will be refreshed without losing any apps, settings, or personal files.
Reset Windows 11 from Settings Without Losing Data
If you're experiencing persistent issues, resetting Windows 11 from the Settings app can resolve many problems. This method reinstalls the operating system while giving you the option to keep your personal files.
Step 1: Open the Windows Settings app by pressing Windows + I on your keyboard.
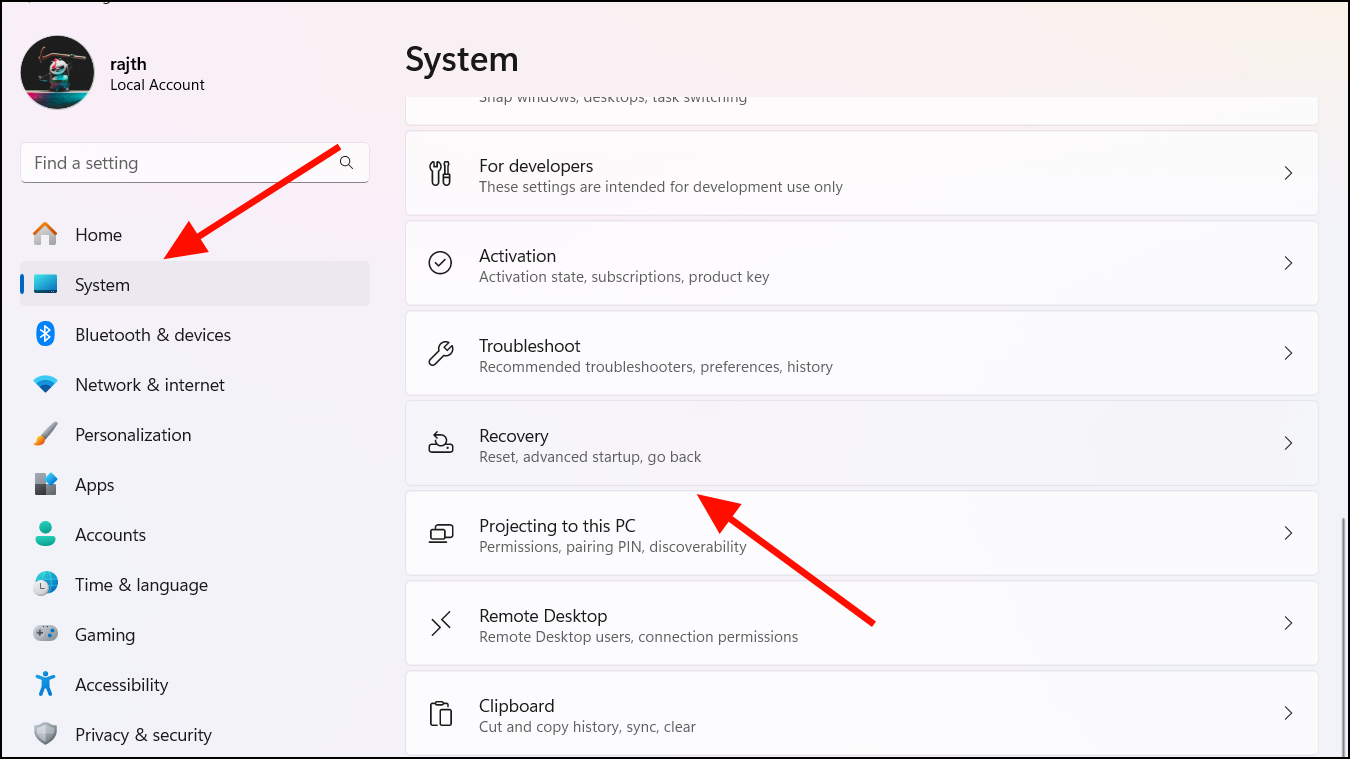
Step 2: In the Settings window, click on the 'System' tab in the left pane. Scroll down on the right pane and select 'Recovery'.
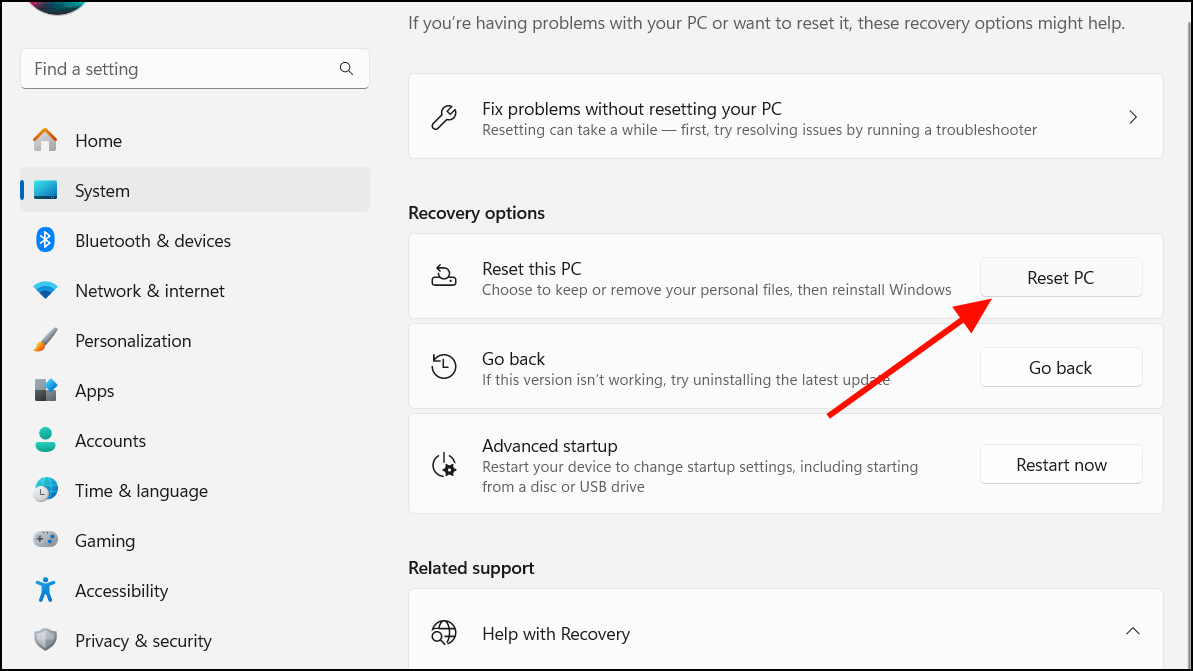
Step 3: Under 'Recovery options', click the 'Reset PC' button next to 'Reset this PC'.
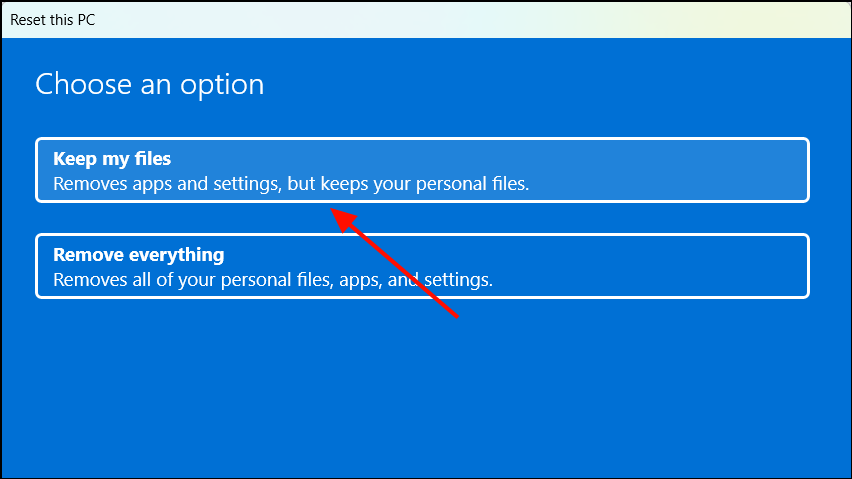
Step 4: In the 'Reset this PC' window, select 'Keep my files'. This option will remove apps and settings but keep your personal files.
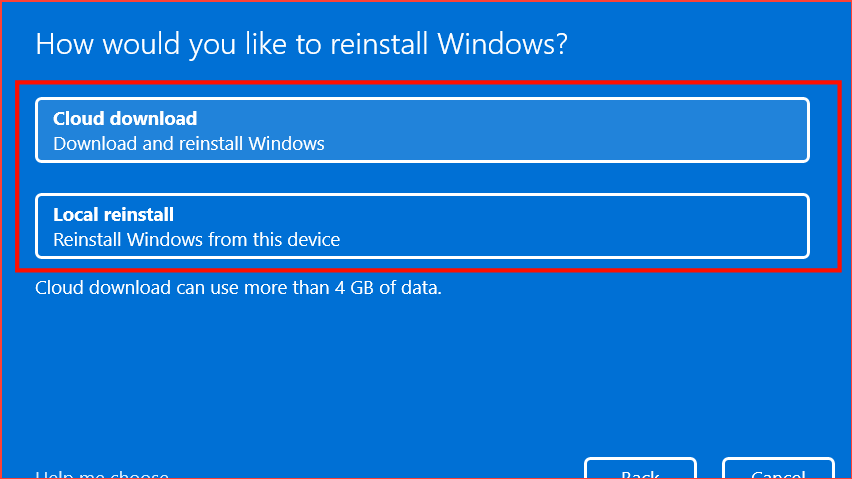
Step 5: Choose the reinstallation method:
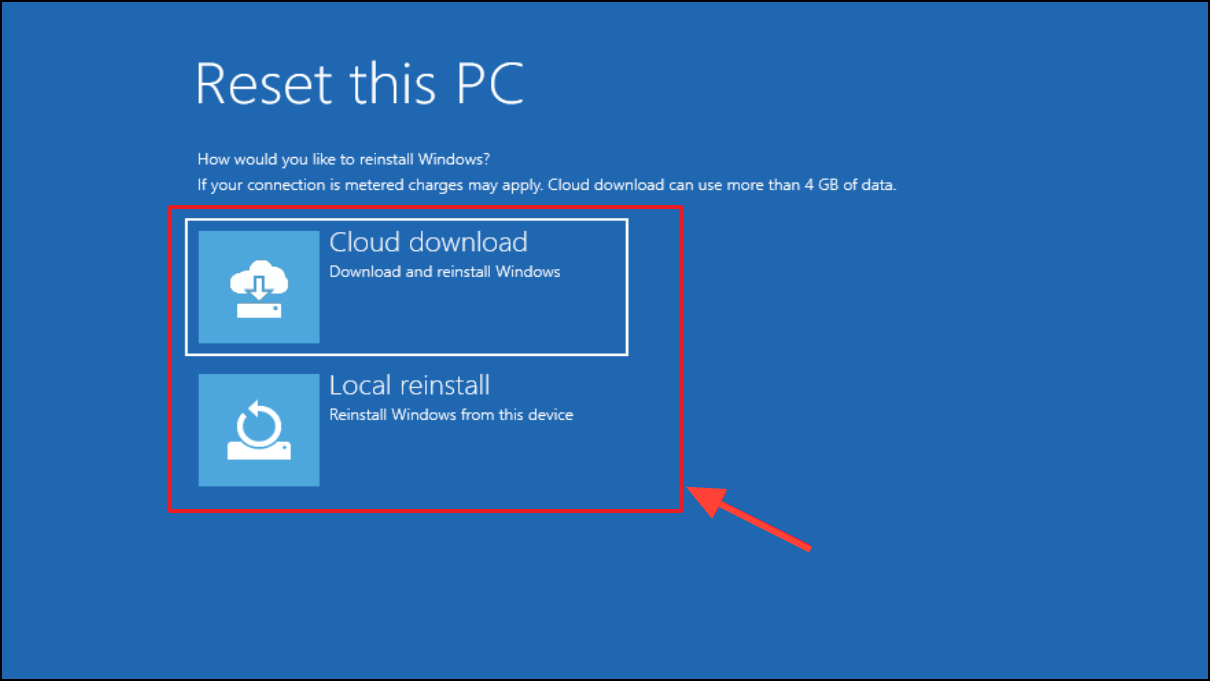
- Cloud download: Downloads the latest version of Windows 11 from Microsoft's servers (requires internet and about 5 GB of data).
- Local reinstall: Reinstalls Windows from a local backup on your PC. This is faster but may not fix issues caused by corrupted system files.
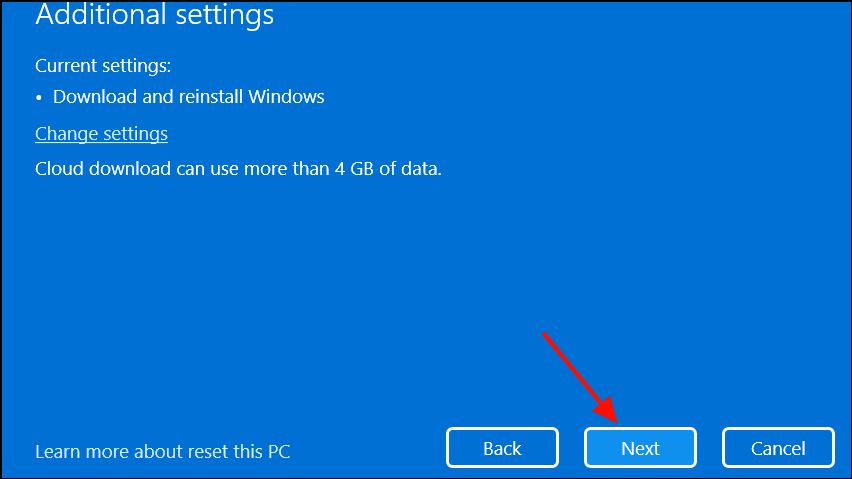
Step 6: On the 'Additional settings' page, review your choices and click 'Next' to proceed.
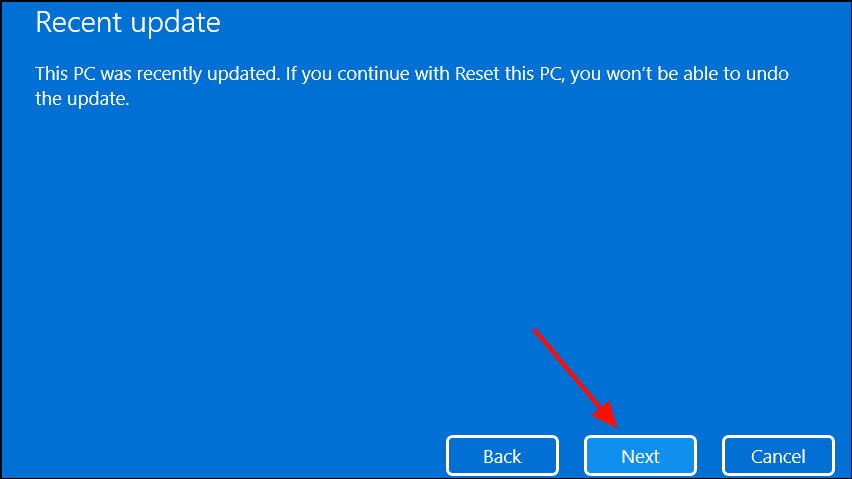
Step 7: If you recently updated your PC, you may see a warning that resetting will remove the latest updates. Click 'Next' to continue.
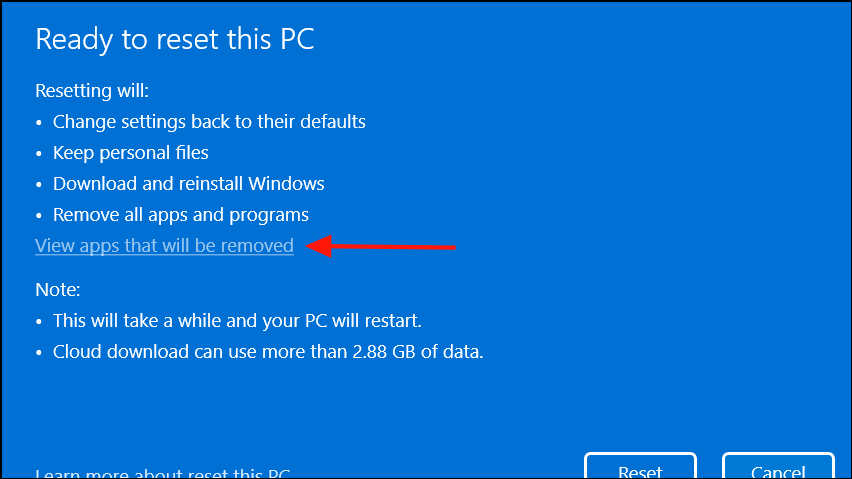
Step 8: To see which apps will be removed, click 'View apps that will be removed'. Take note of any important applications you may need to reinstall later.
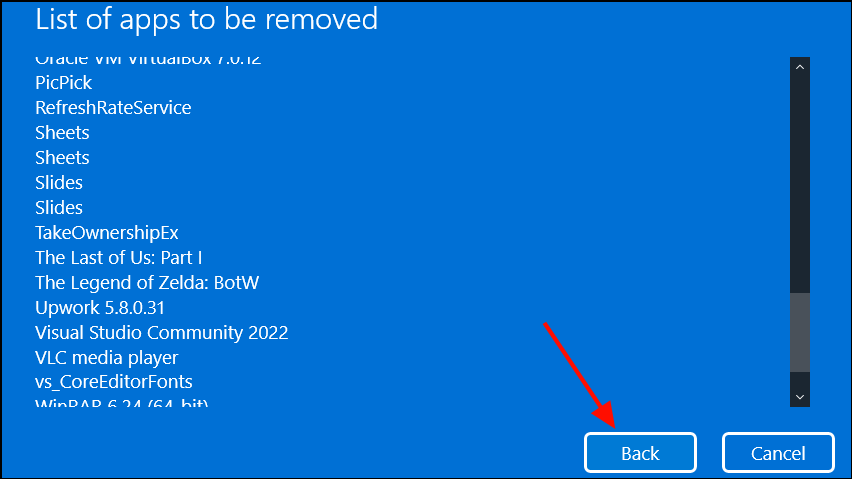
Step 9: After reviewing, click 'Back' to return to the previous screen.
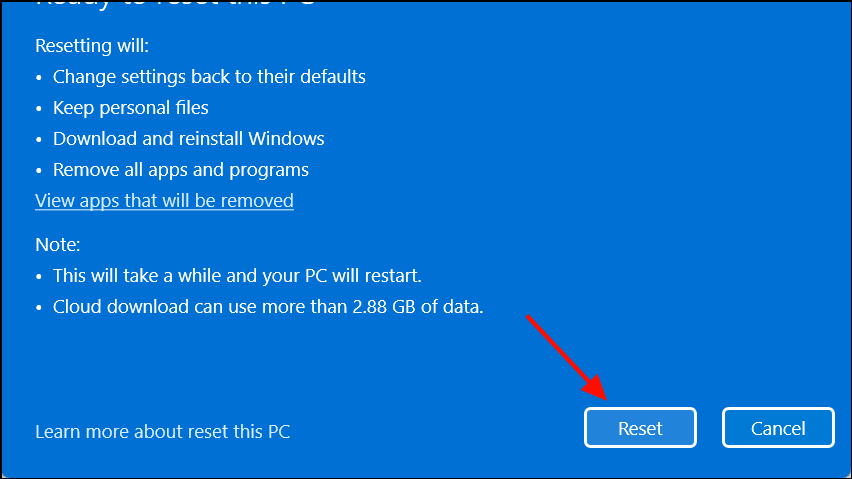
Step 10: Click 'Reset' to start the reset process. Your computer will restart and may take some time to complete the reset.
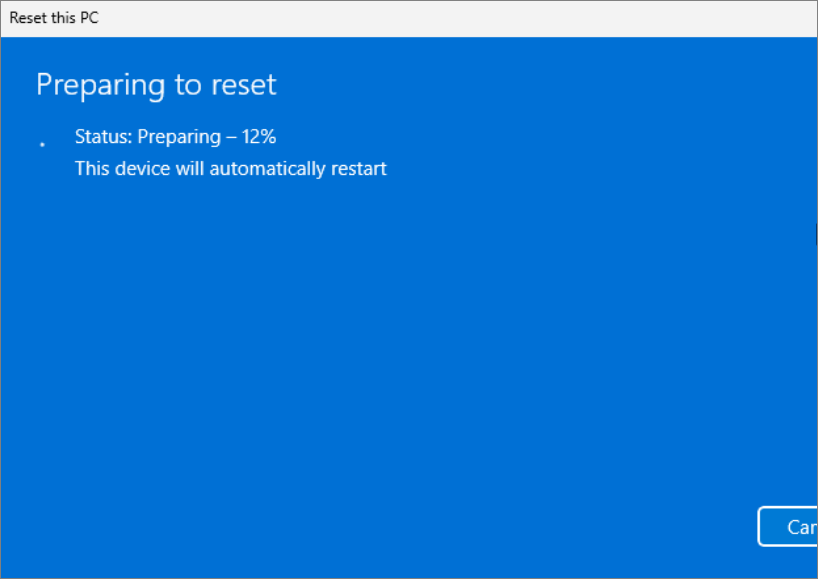
Step 11: After the reset is complete, your PC will reboot, and Windows 11 will be reinstalled. Your personal files will remain, but you'll need to reinstall any removed apps.
Reset Windows 11 via Recovery Mode Without Losing Data
If you're unable to access the Settings app or sign in to your account, you can reset your PC using the Windows Recovery Environment (WinRE). This method allows you to reset Windows 11 without booting into the operating system.
Step 1: On the sign-in screen, click the power icon at the bottom right corner. Press and hold the Shift key, then click 'Restart'.
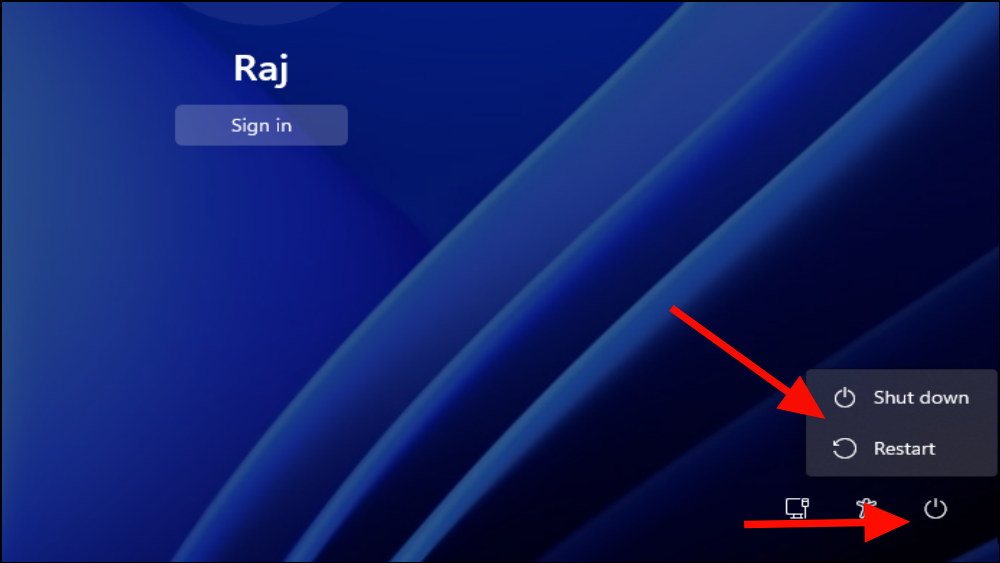
Step 2: Click 'Restart anyway' if prompted. Your PC will restart and boot into the WinRE.
Step 3: In the Recovery Environment, select 'Troubleshoot'.
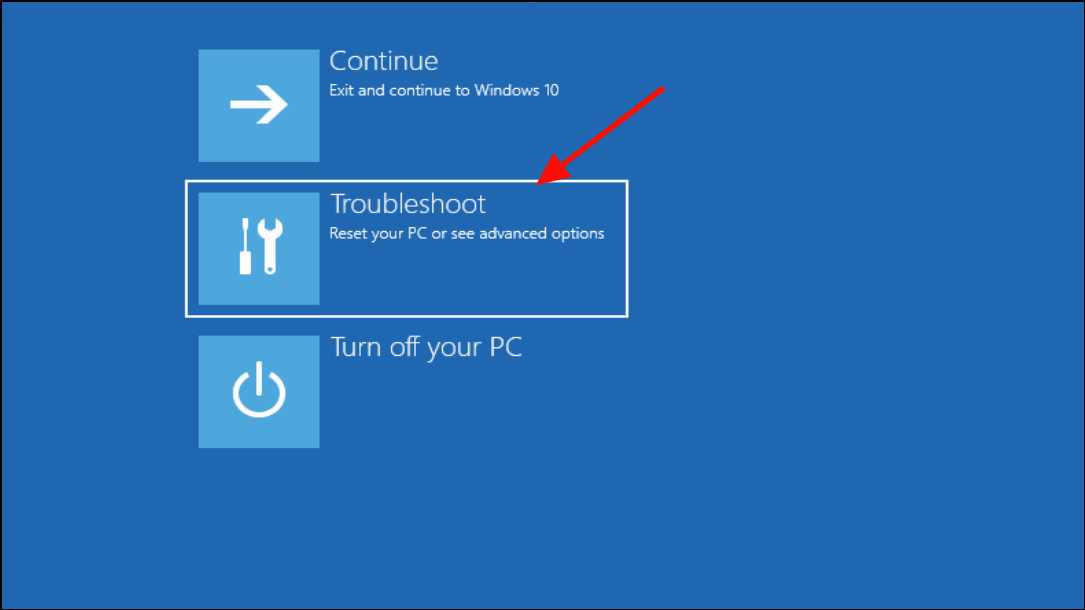
Step 4: Choose 'Reset this PC' from the Troubleshoot menu.
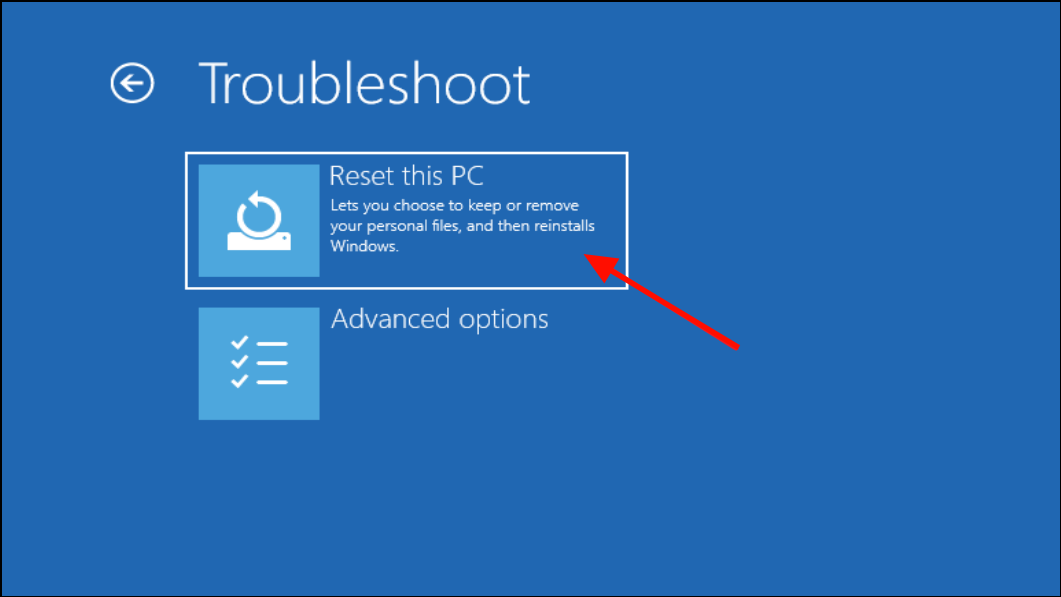
Step 5: Select 'Keep my files' to retain your personal data while resetting Windows.
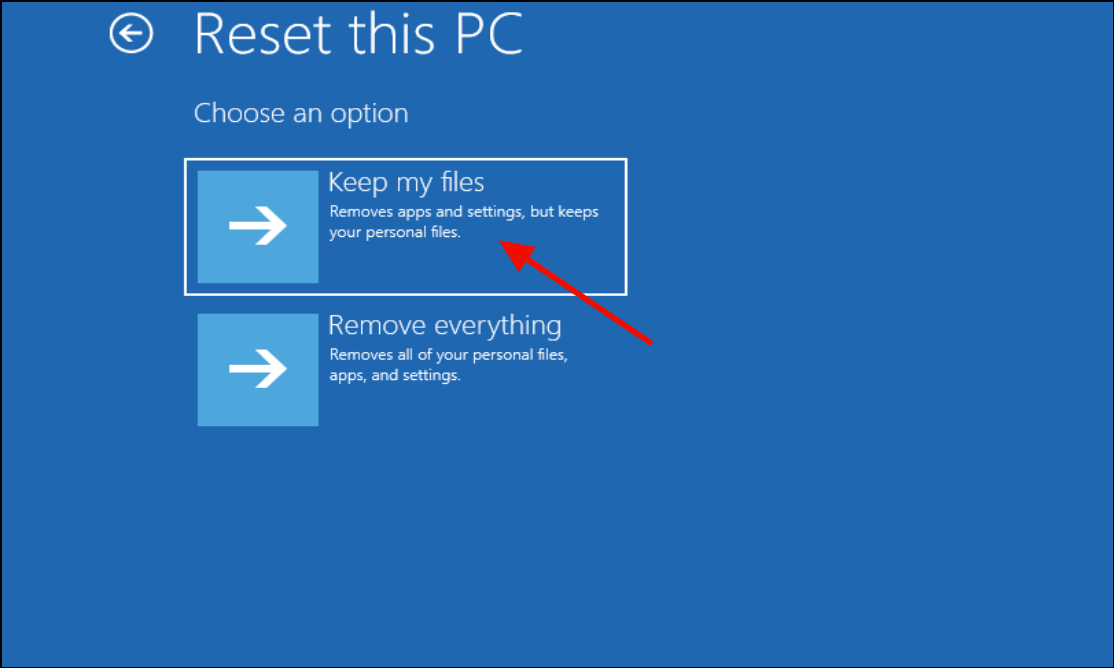
Step 6: Choose your preferred installation method: 'Cloud download' or 'Local reinstall'.
Step 7: Click 'Reset' to begin the reset process. Your PC will restart and start resetting Windows 11.
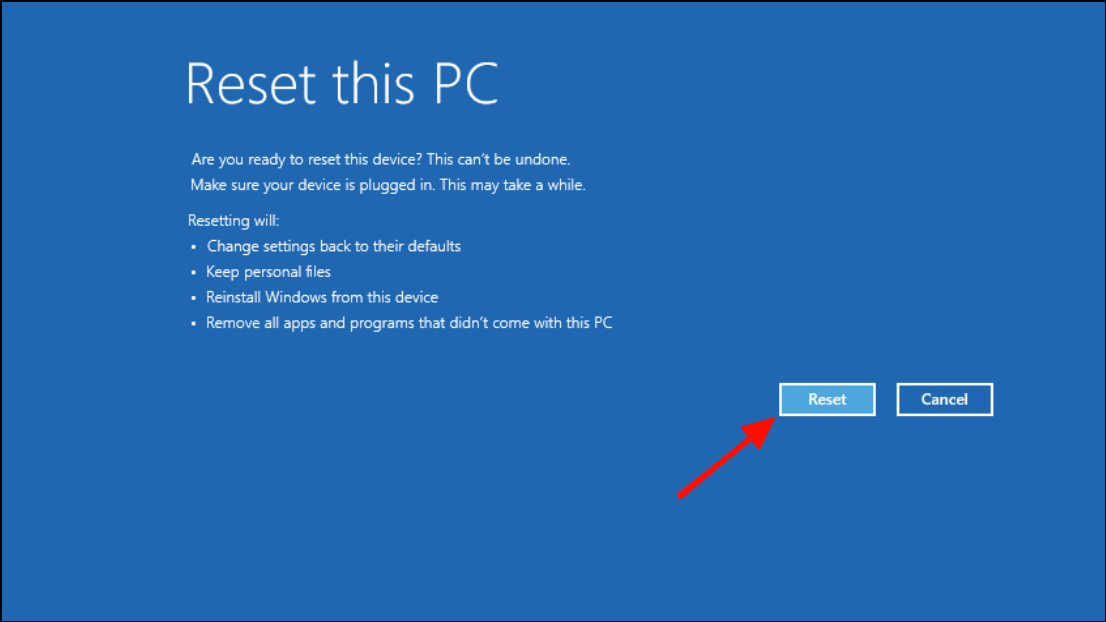
Once the reset is complete, your computer will restart with a fresh installation of Windows 11, keeping your personal files intact.
These methods should help you resolve system issues on your Windows 11 PC without losing important data. Choose the method that best suits your situation to get your computer running smoothly again.

