
Keeping Windows 11 updated is essential for system security and performance. However, sometimes updates may not install correctly or might introduce new issues. Reviewing your update history can help identify problematic updates and assist in troubleshooting.
This guide outlines several methods to view your Windows 11 update history using the Settings app, Command Prompt, PowerShell, and Registry Editor.
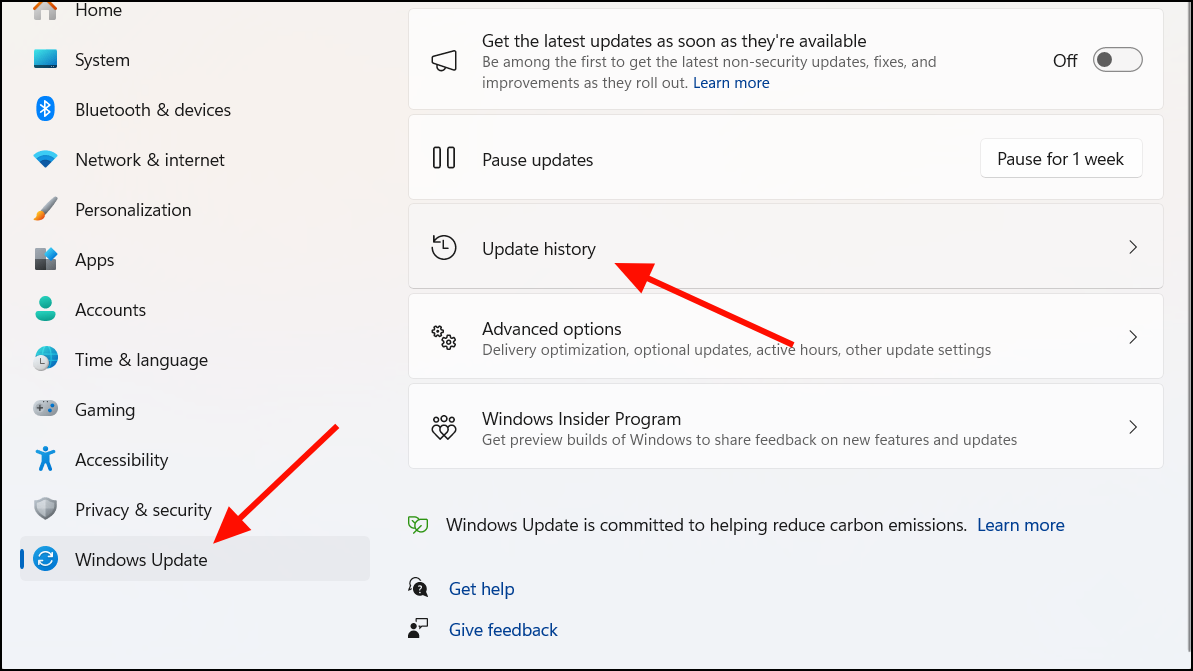
View Update History Through Settings
The Settings app provides an easy way to check your update history, displaying all installed updates and any that failed to install. Follow these steps to access it:
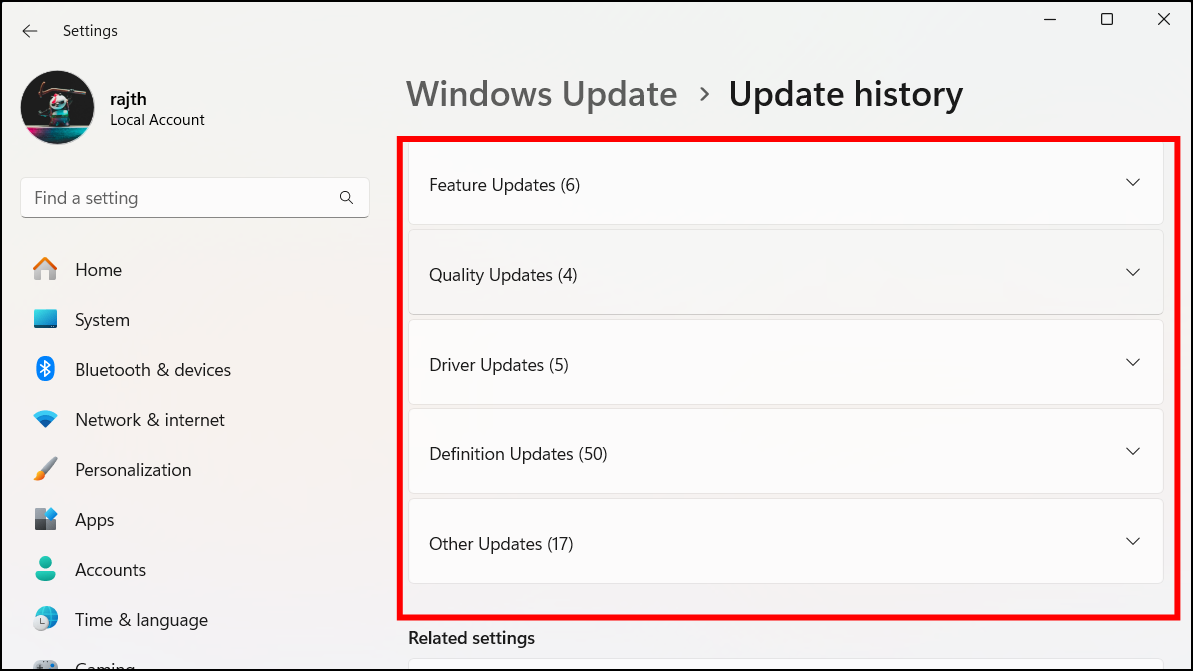
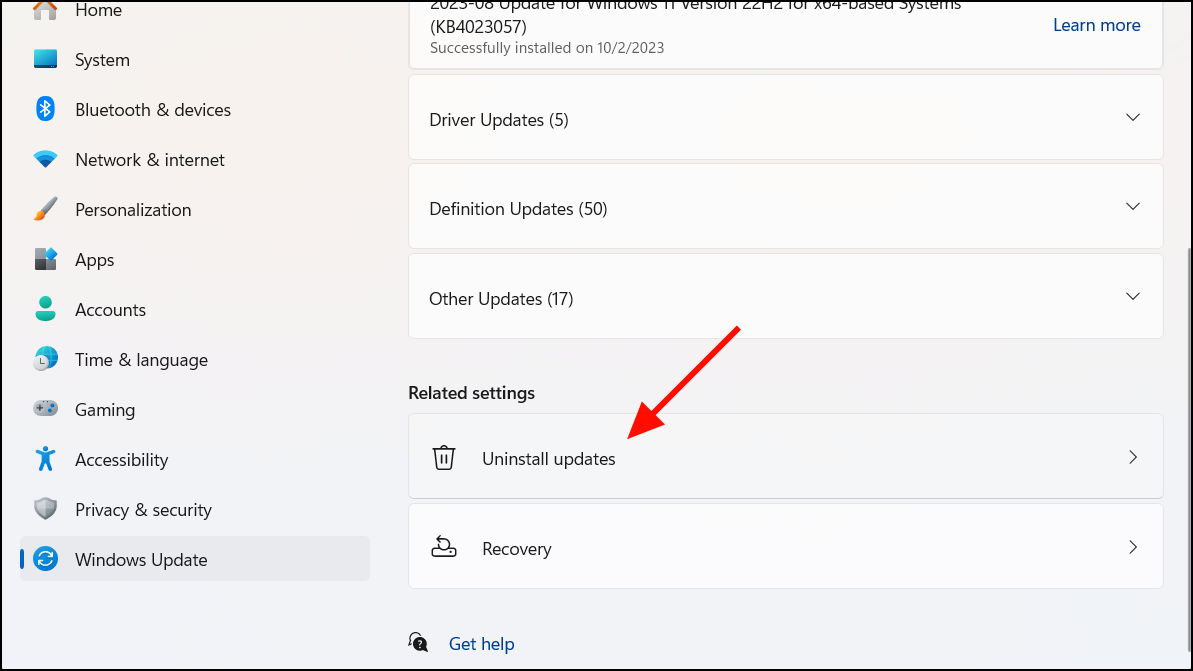
The types of updates you might see include:
- Security updates: Fix vulnerabilities to protect your computer from threats.
- Quality updates: Address bugs and enhance system performance and reliability.
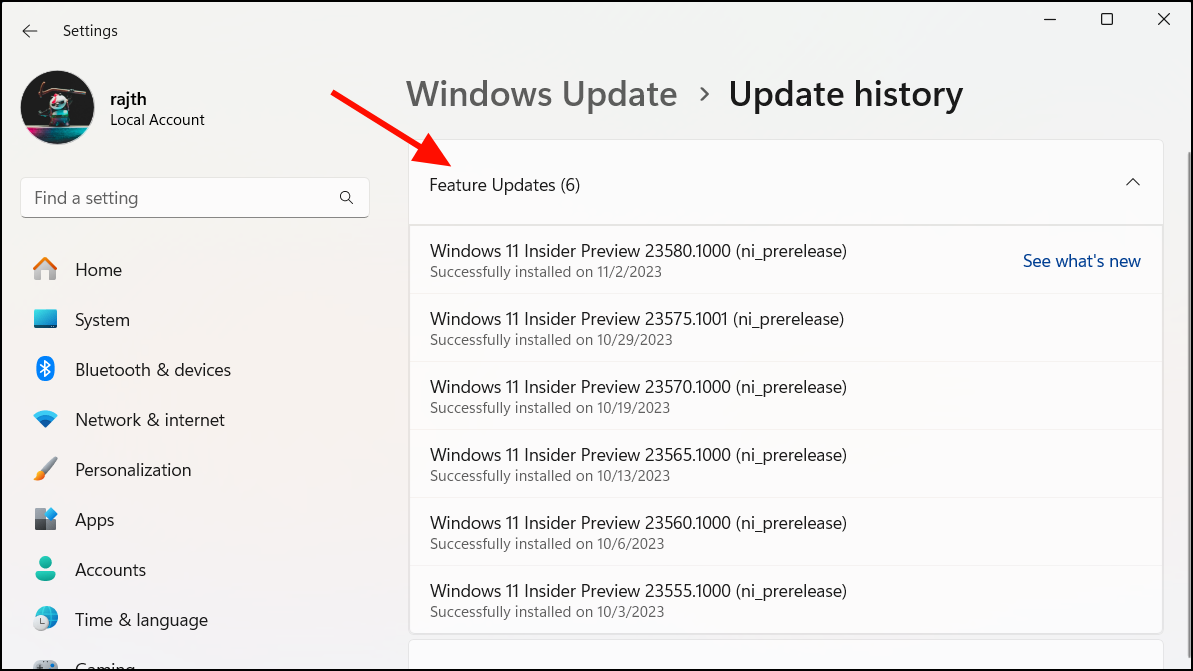
- Feature updates: Introduce new features and significant improvements to Windows.
- Driver updates: Update hardware drivers to improve device functionality.
- Definition updates: Provide the latest security intelligence updates for Windows Security.
- Other updates: Include updates for other Microsoft software like Microsoft Edge or Paint.
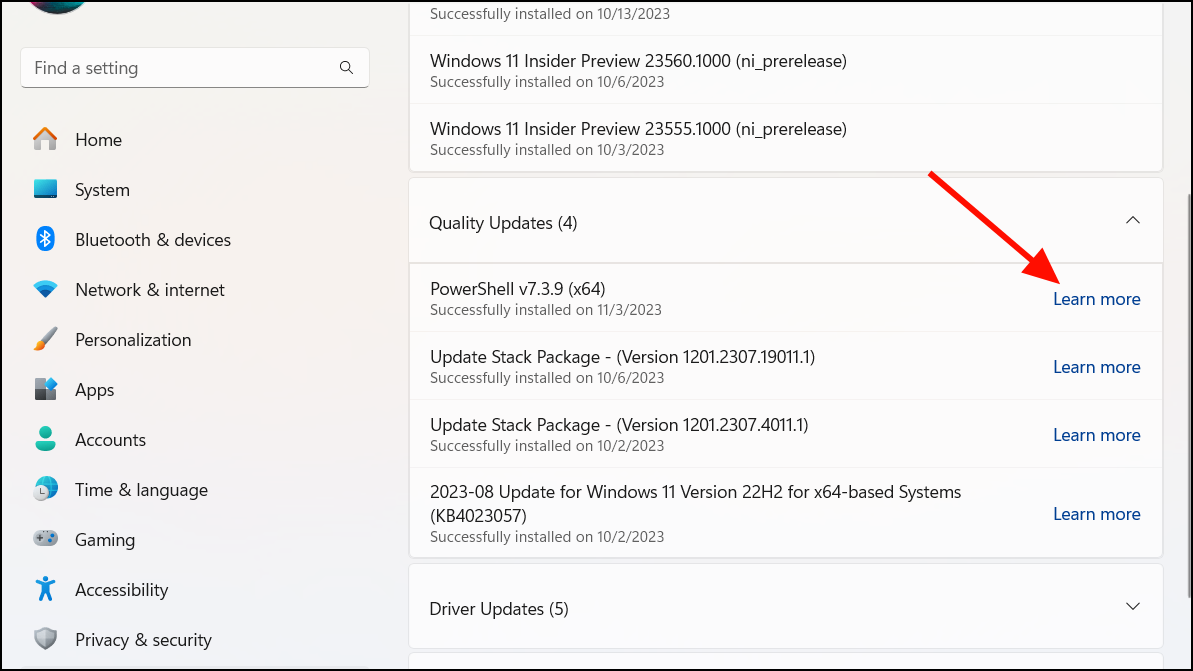
For more details about a specific update, click the ‘Learn more’ link to visit the Microsoft knowledge base page.
If an update is causing issues, you can uninstall it:
View Update History Using Command Prompt
You can also use the Command Prompt to view and manage your update history:
wmic qfe list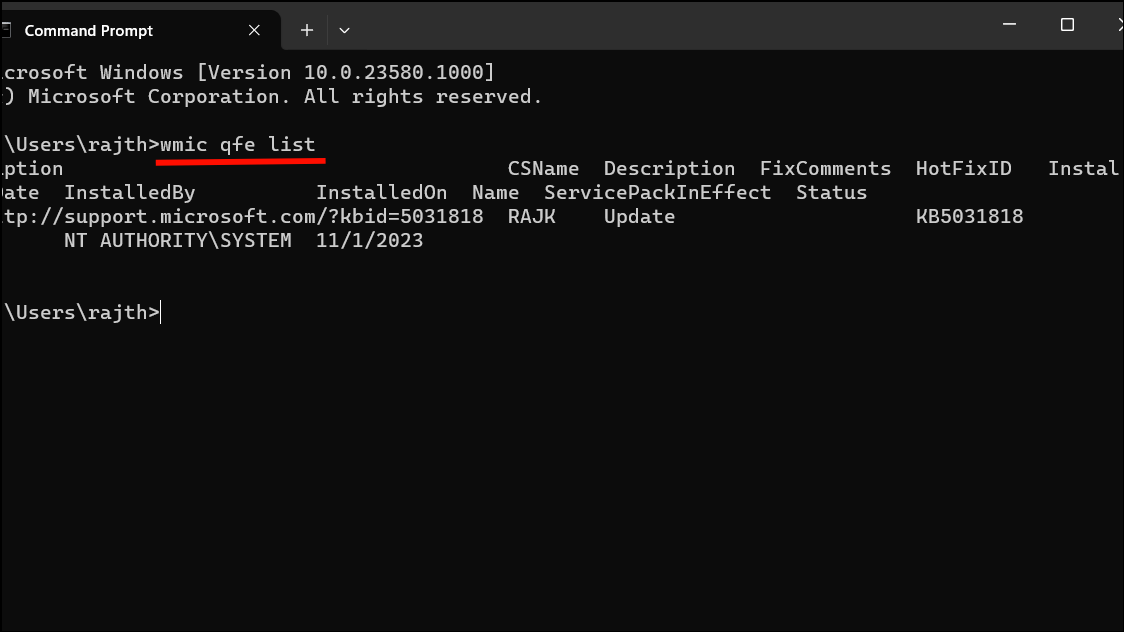
This command shows details like the update description, hotfix ID, and installation date.
To export the updates list to an HTML file, use:
wmic qfe list full /format:table > C:\WindowsUpdatesReport.htmlThe report will be saved as an HTML file at the specified location.
To uninstall an update via Command Prompt:
Type wusa /uninstall /kb:<KB number> /quiet and press Enter, replacing <KB number> with the update’s knowledge base number. For example:
wusa /uninstall /kb:5031818 /quietView Update History Using PowerShell
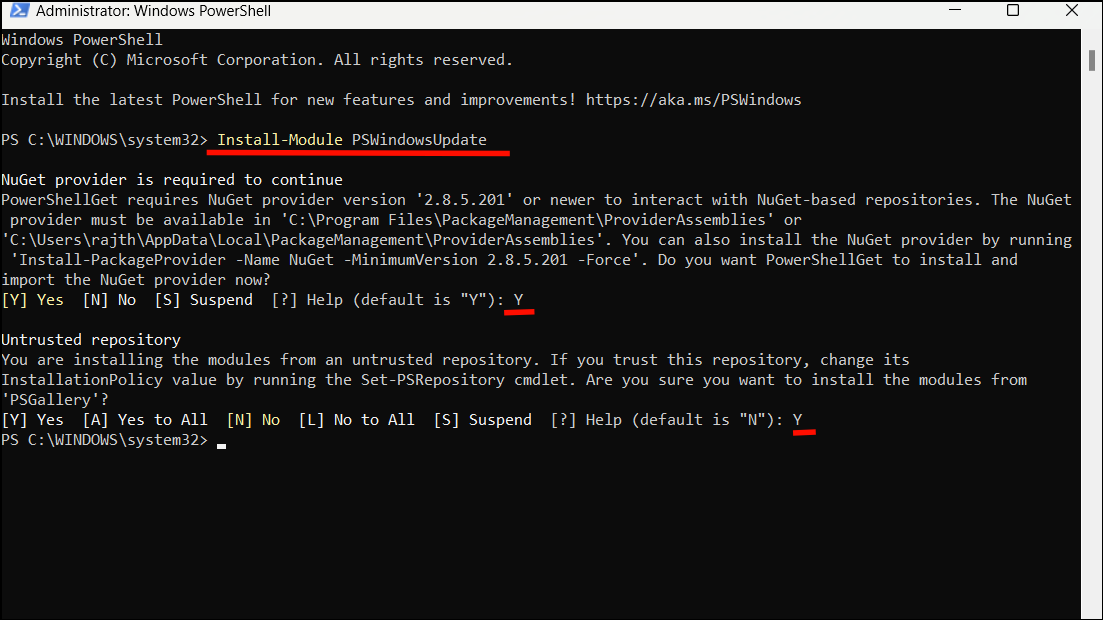
PowerShell provides another method for accessing your update history:
Install-Module PSWindowsUpdateIf prompted about the NuGet provider, type Y to confirm. If you receive a message about an untrusted repository, type A to proceed.
Set-ExecutionPolicy Bypass, pressing Enter, and then typing A to confirm.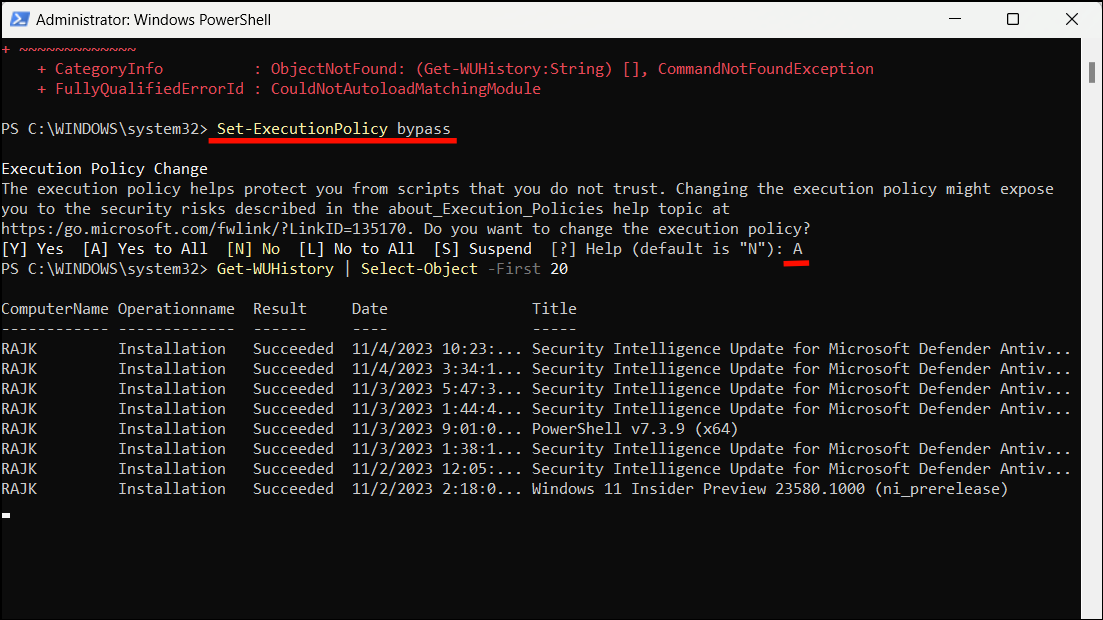
Get-WUHistory | Select-Object -First 20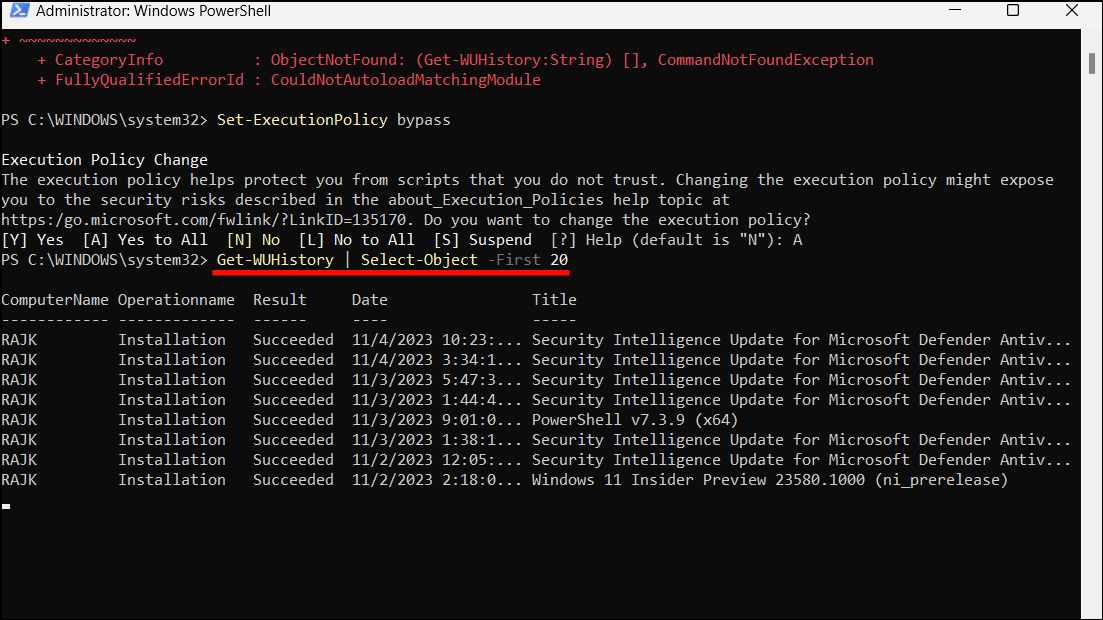
View Feature Update History in Registry Editor
To check feature updates using the Registry Editor:
HKEY_LOCAL_MACHINE\SYSTEM\Setup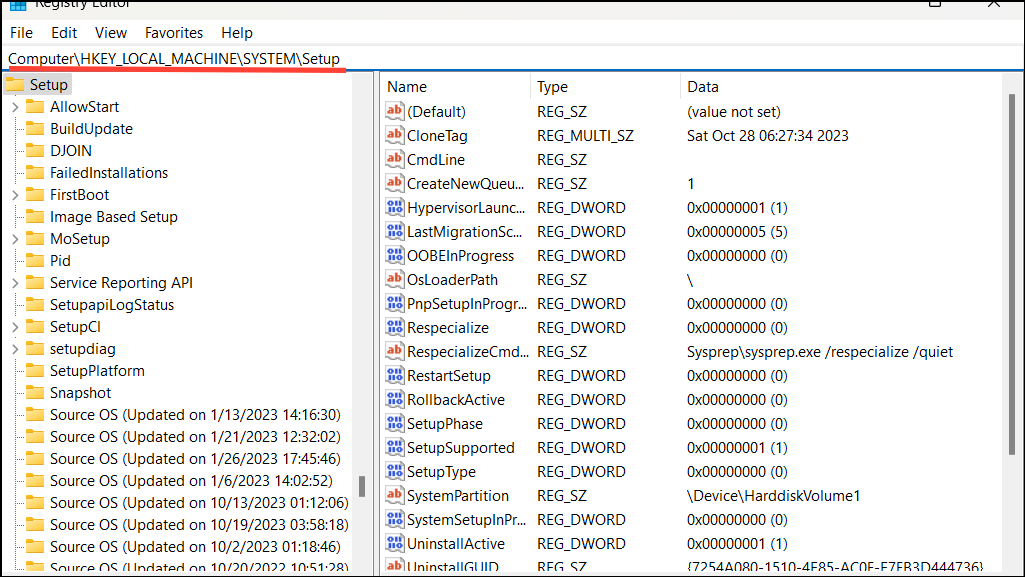
Setup key, you’ll find subkeys named Source OS (Updated on ...), each representing a feature update. Select a subkey to view its details in the right pane.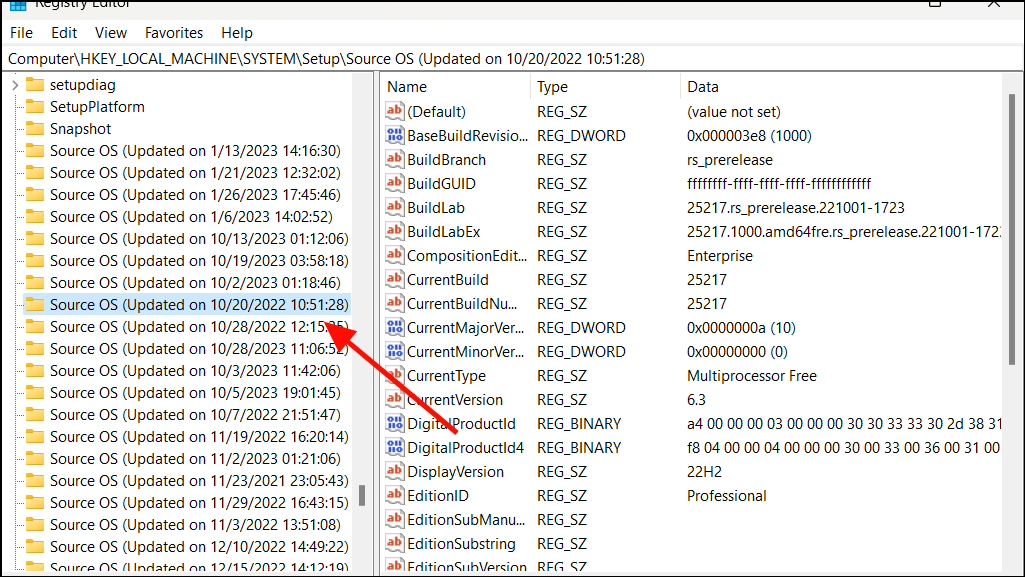
Regularly reviewing your Windows 11 update history helps you stay informed about the updates installed on your system. Whether using the intuitive Settings app or command-line tools, accessing this information enables you to troubleshoot issues and ensure your PC remains secure and up-to-date.