iOS 18 seems to be the update that's finally delivering the features users have been requesting for a long time. iOS 18 comes with features like Home Screen and Control Center customization, the ability to lock and hide apps, and the option to schedule messages. That's right, you can now schedule an iMessage on your iPhone. So you don't have to worry about forgetting to send important messages anymore, at least those you have to send within the next two weeks.
Scheduling a message in iOS 18 is quite easy. Just follow these steps.
- Open the Messages app on your iPhone.
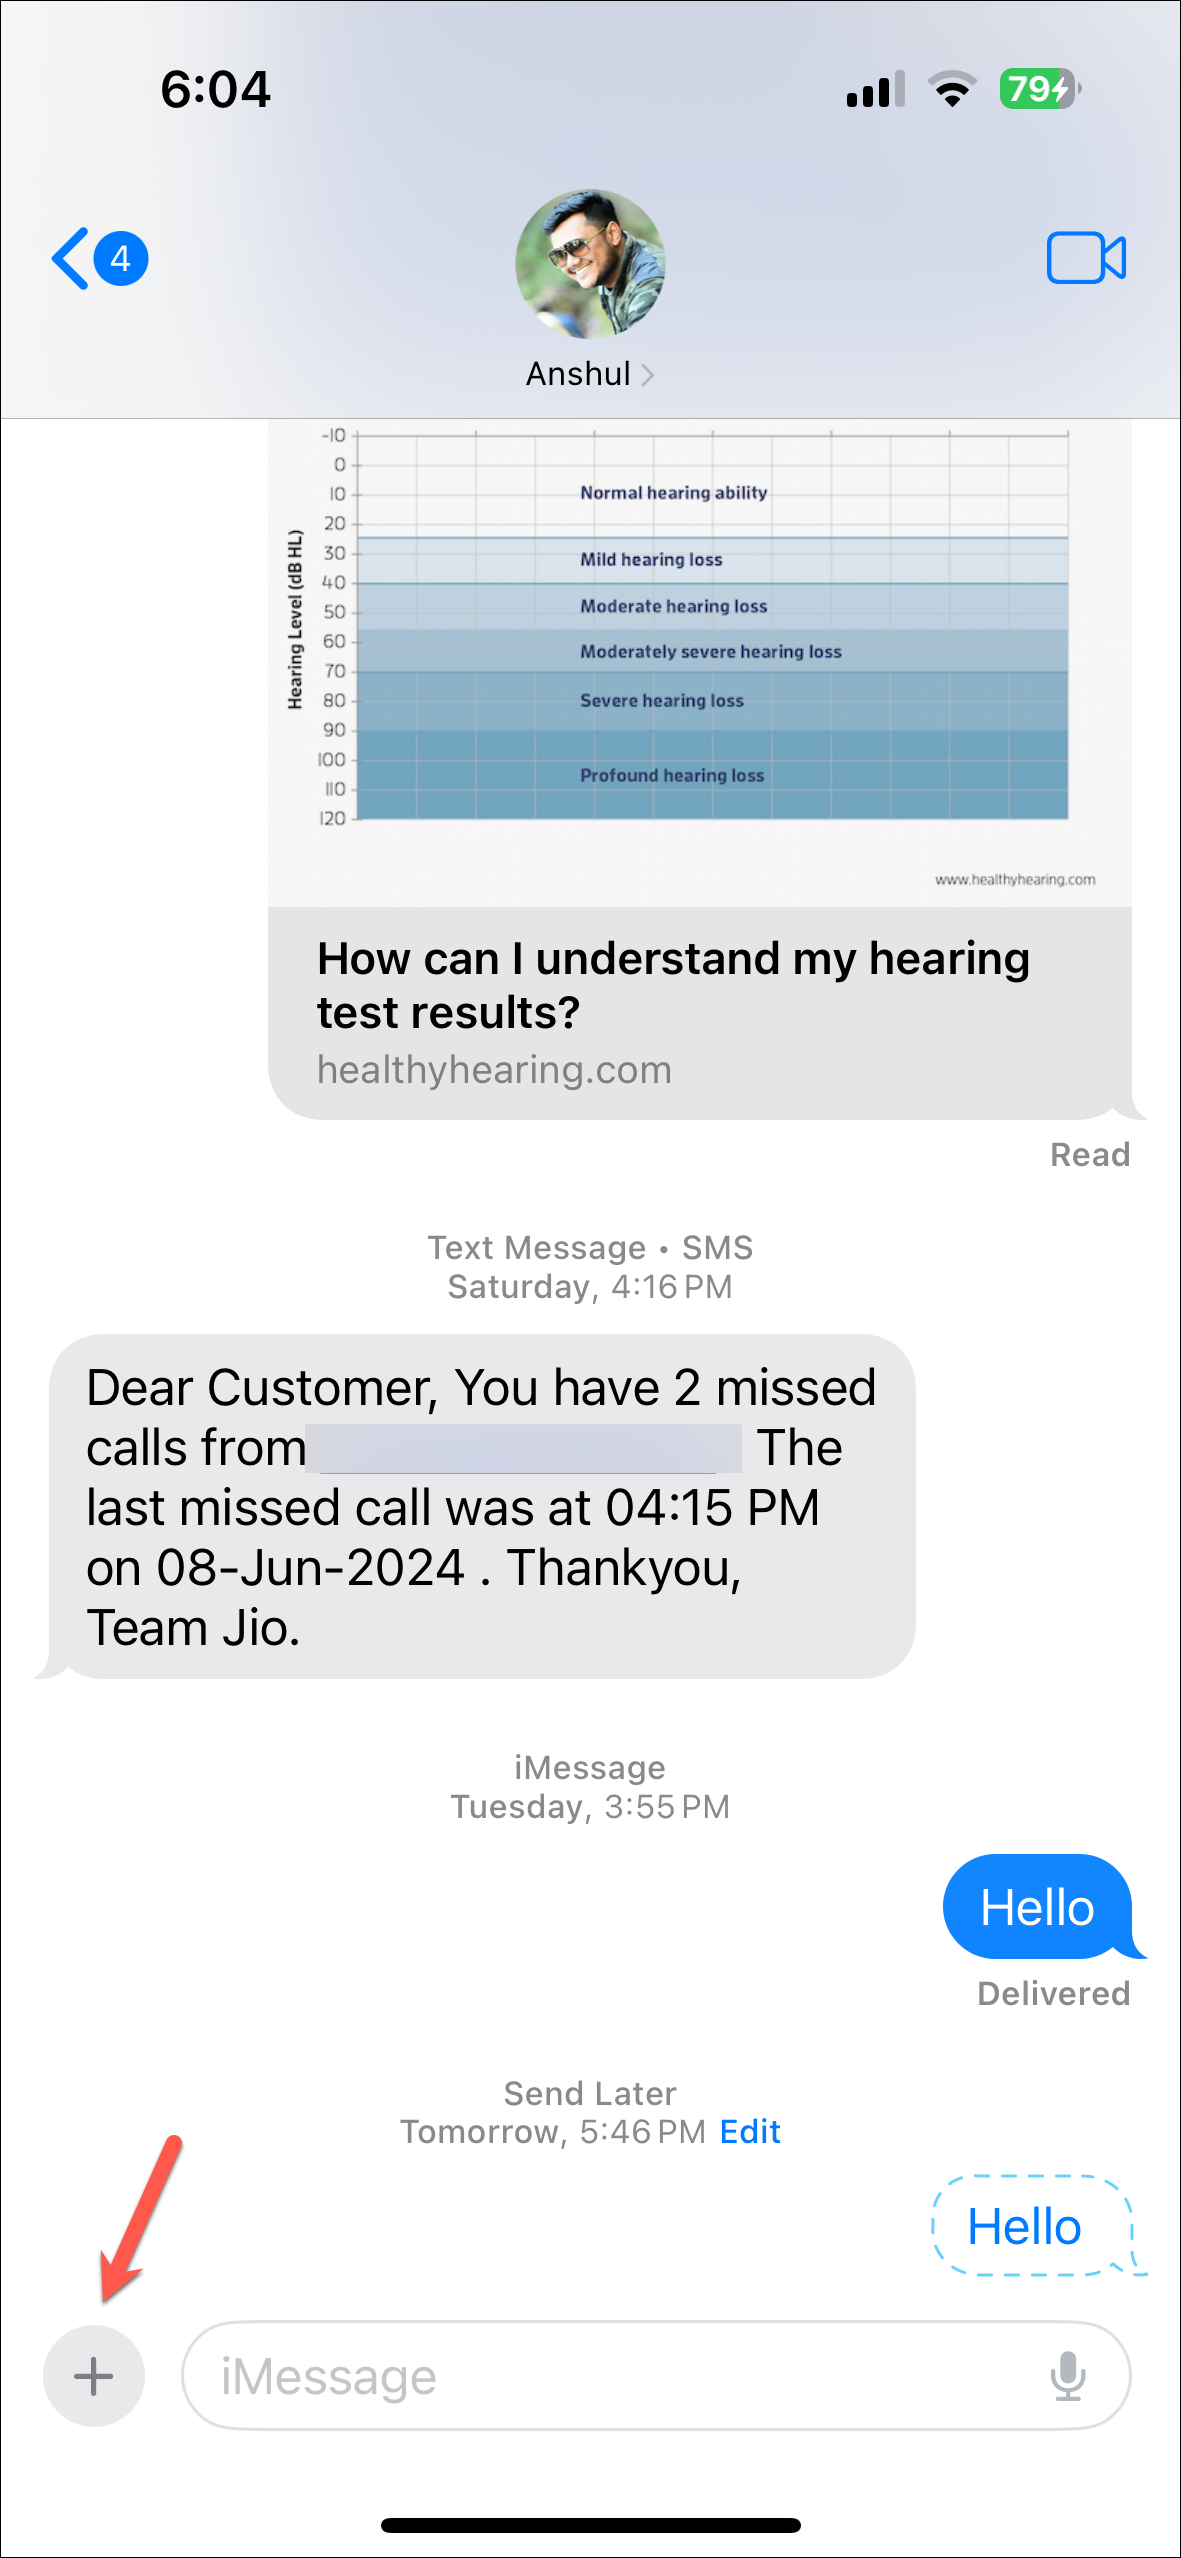
- Then, navigate to the chat where you want to schedule the message. It can be an iMessage chat with a person or a group chat. You cannot schedule messages in SMS chats, though.
- Tap on the '+' icon in the bottom-left corner.
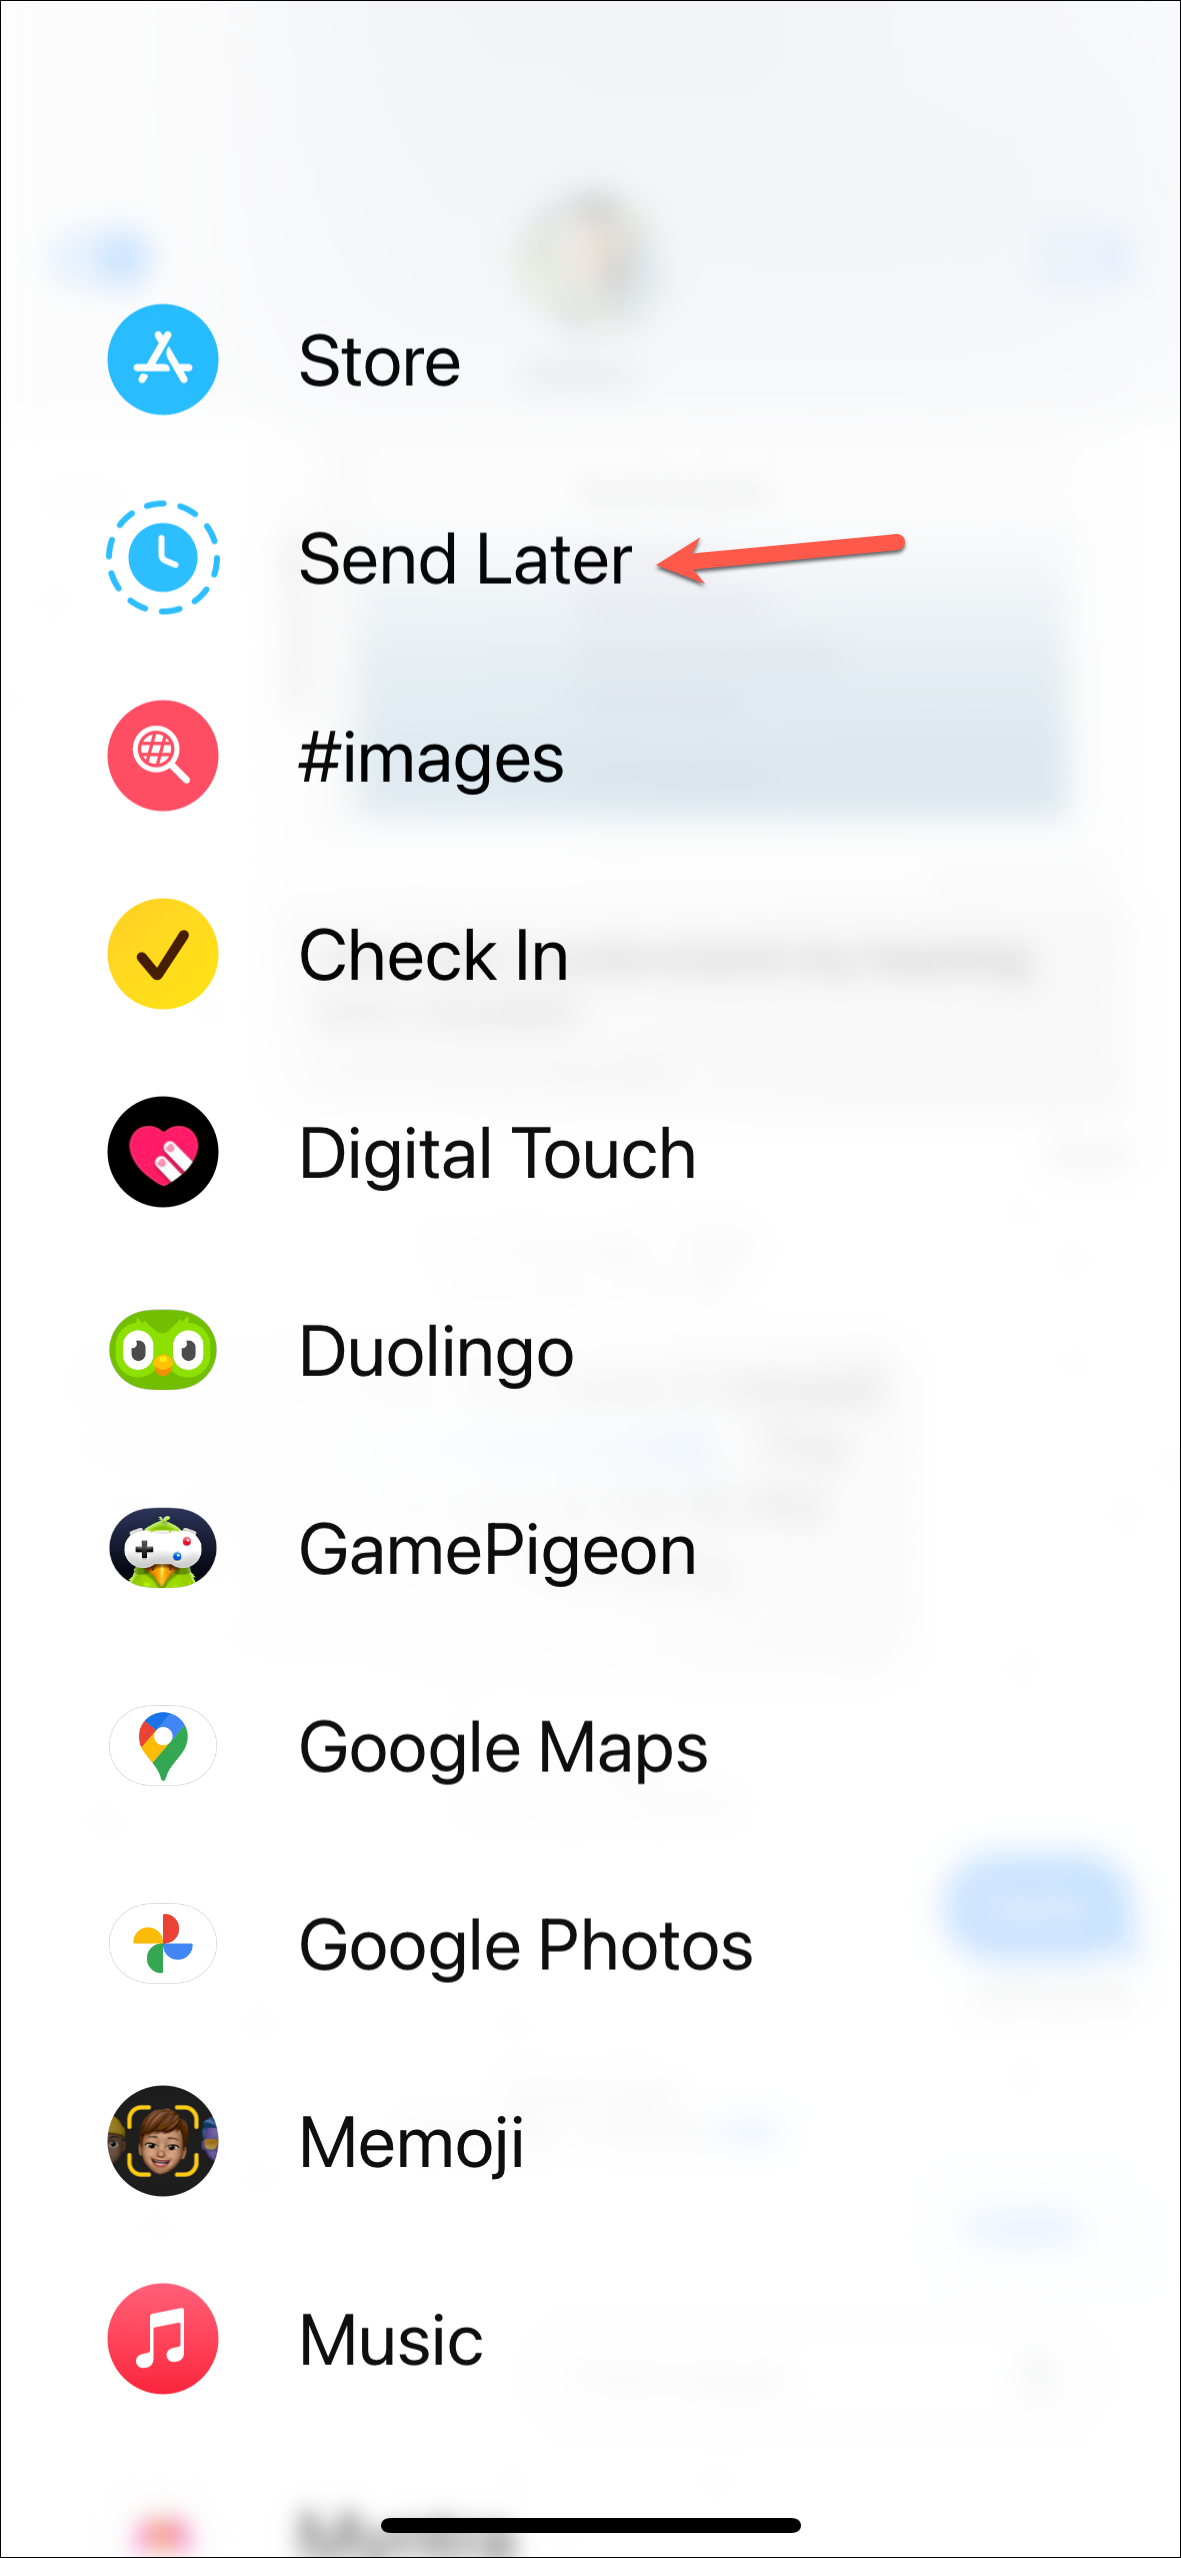
- From the app drawer, either tap on 'More' or swipe up to reveal more options.
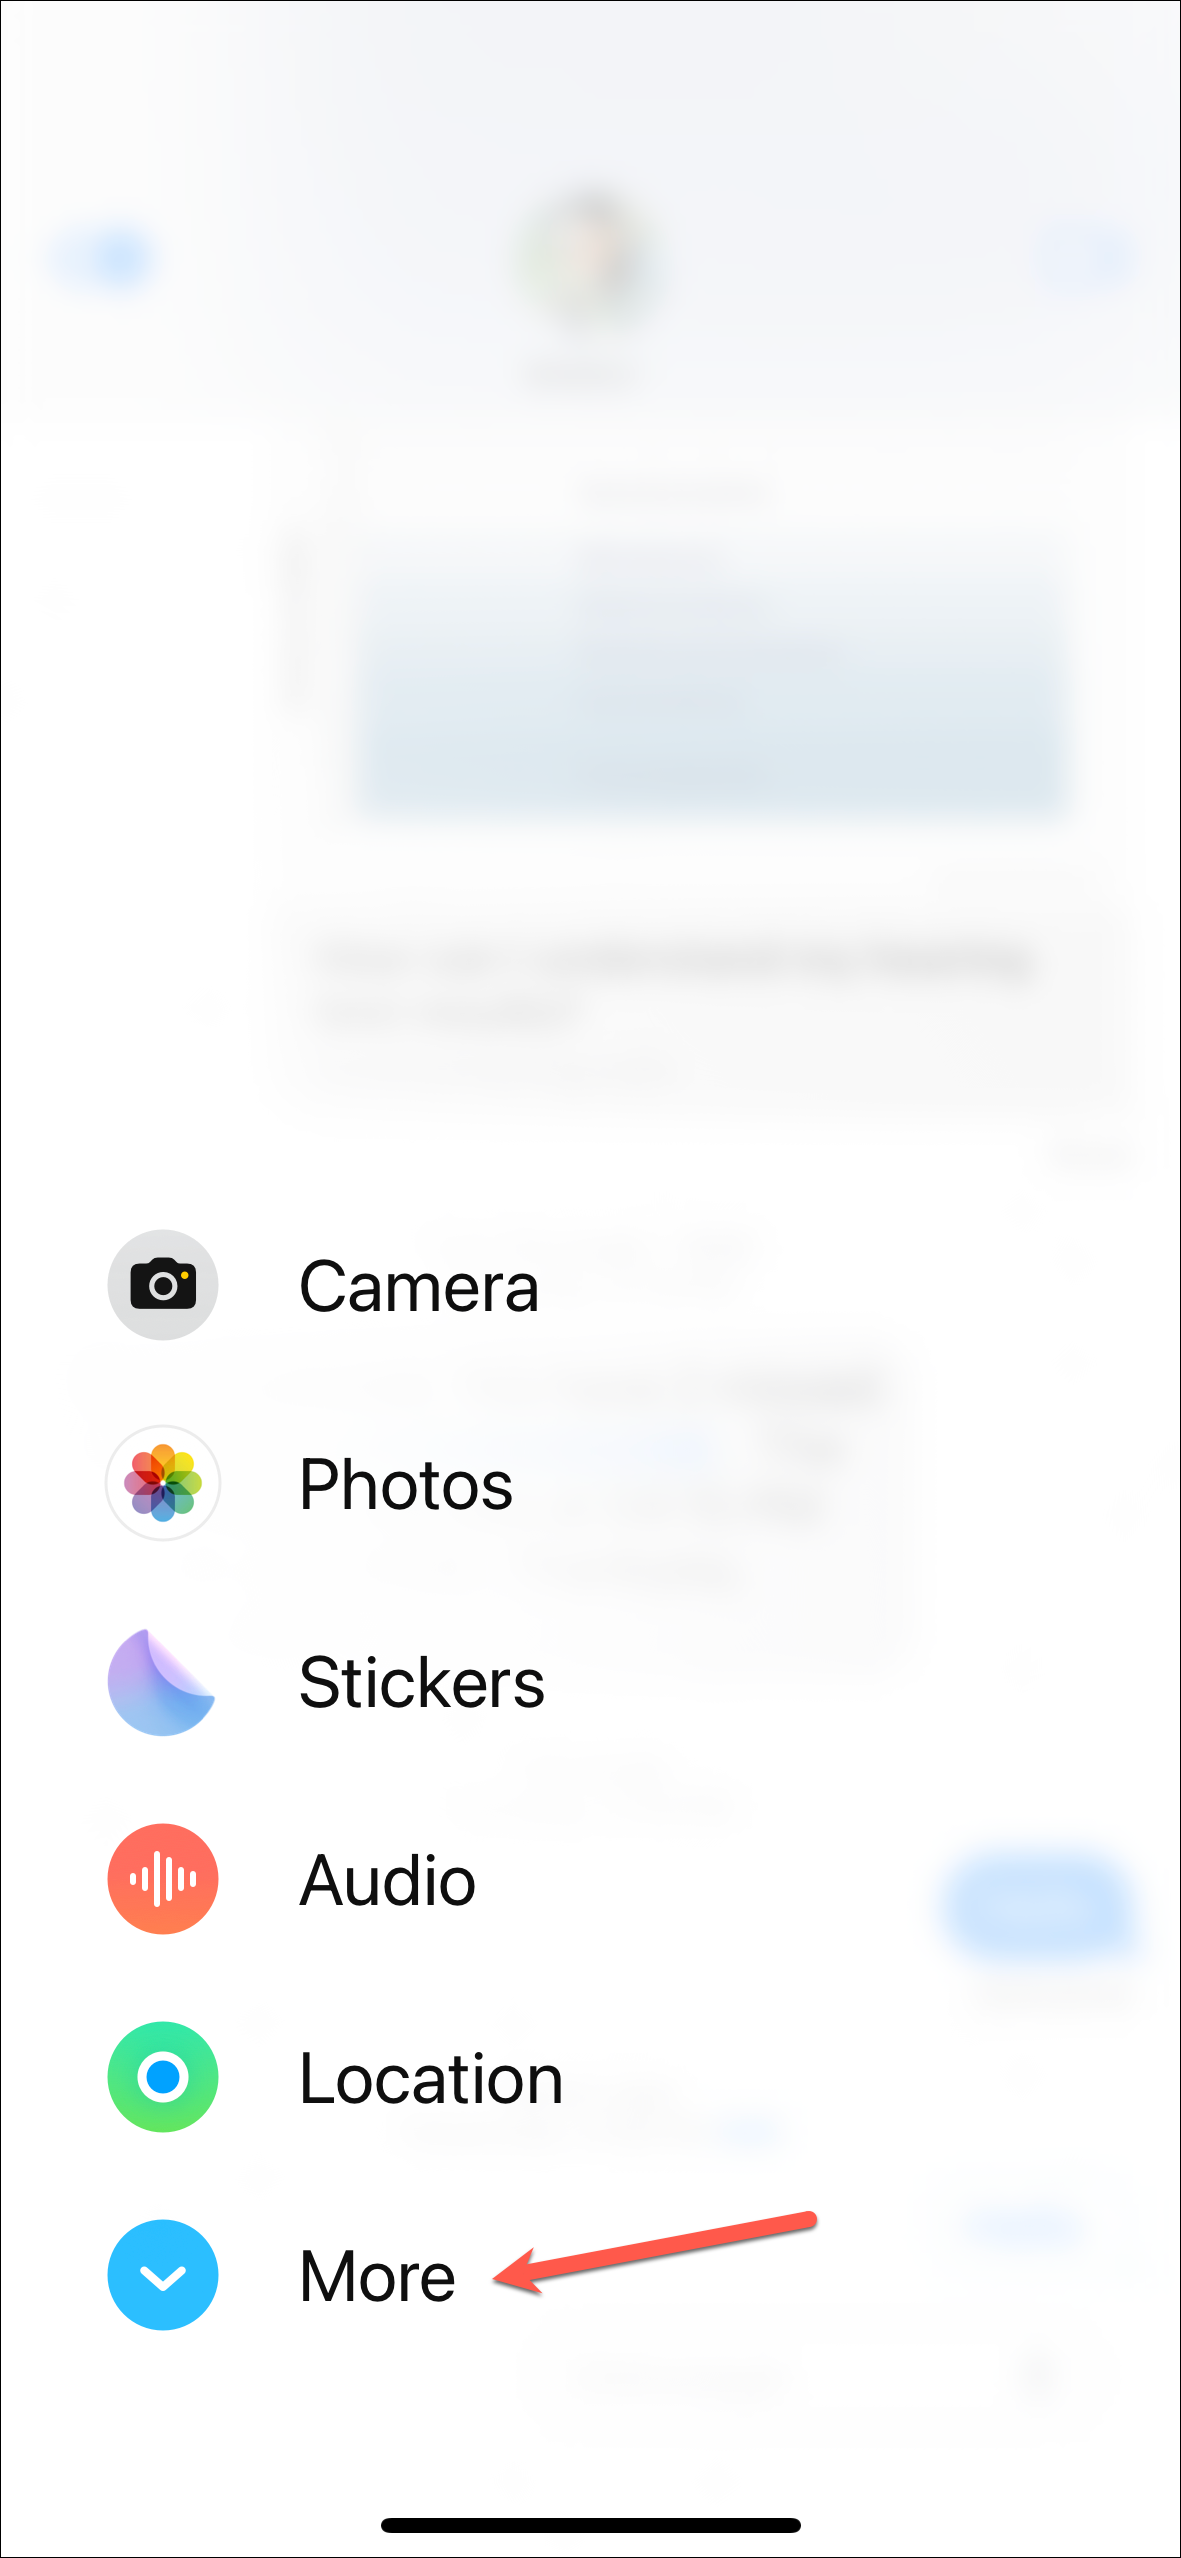
- Select 'Send Later' from the options on your screen.
- The selector for date and time will appear. Select the date and time on which you want to send the message. You can schedule a message to be sent anytime within the next two weeks but not later than that.
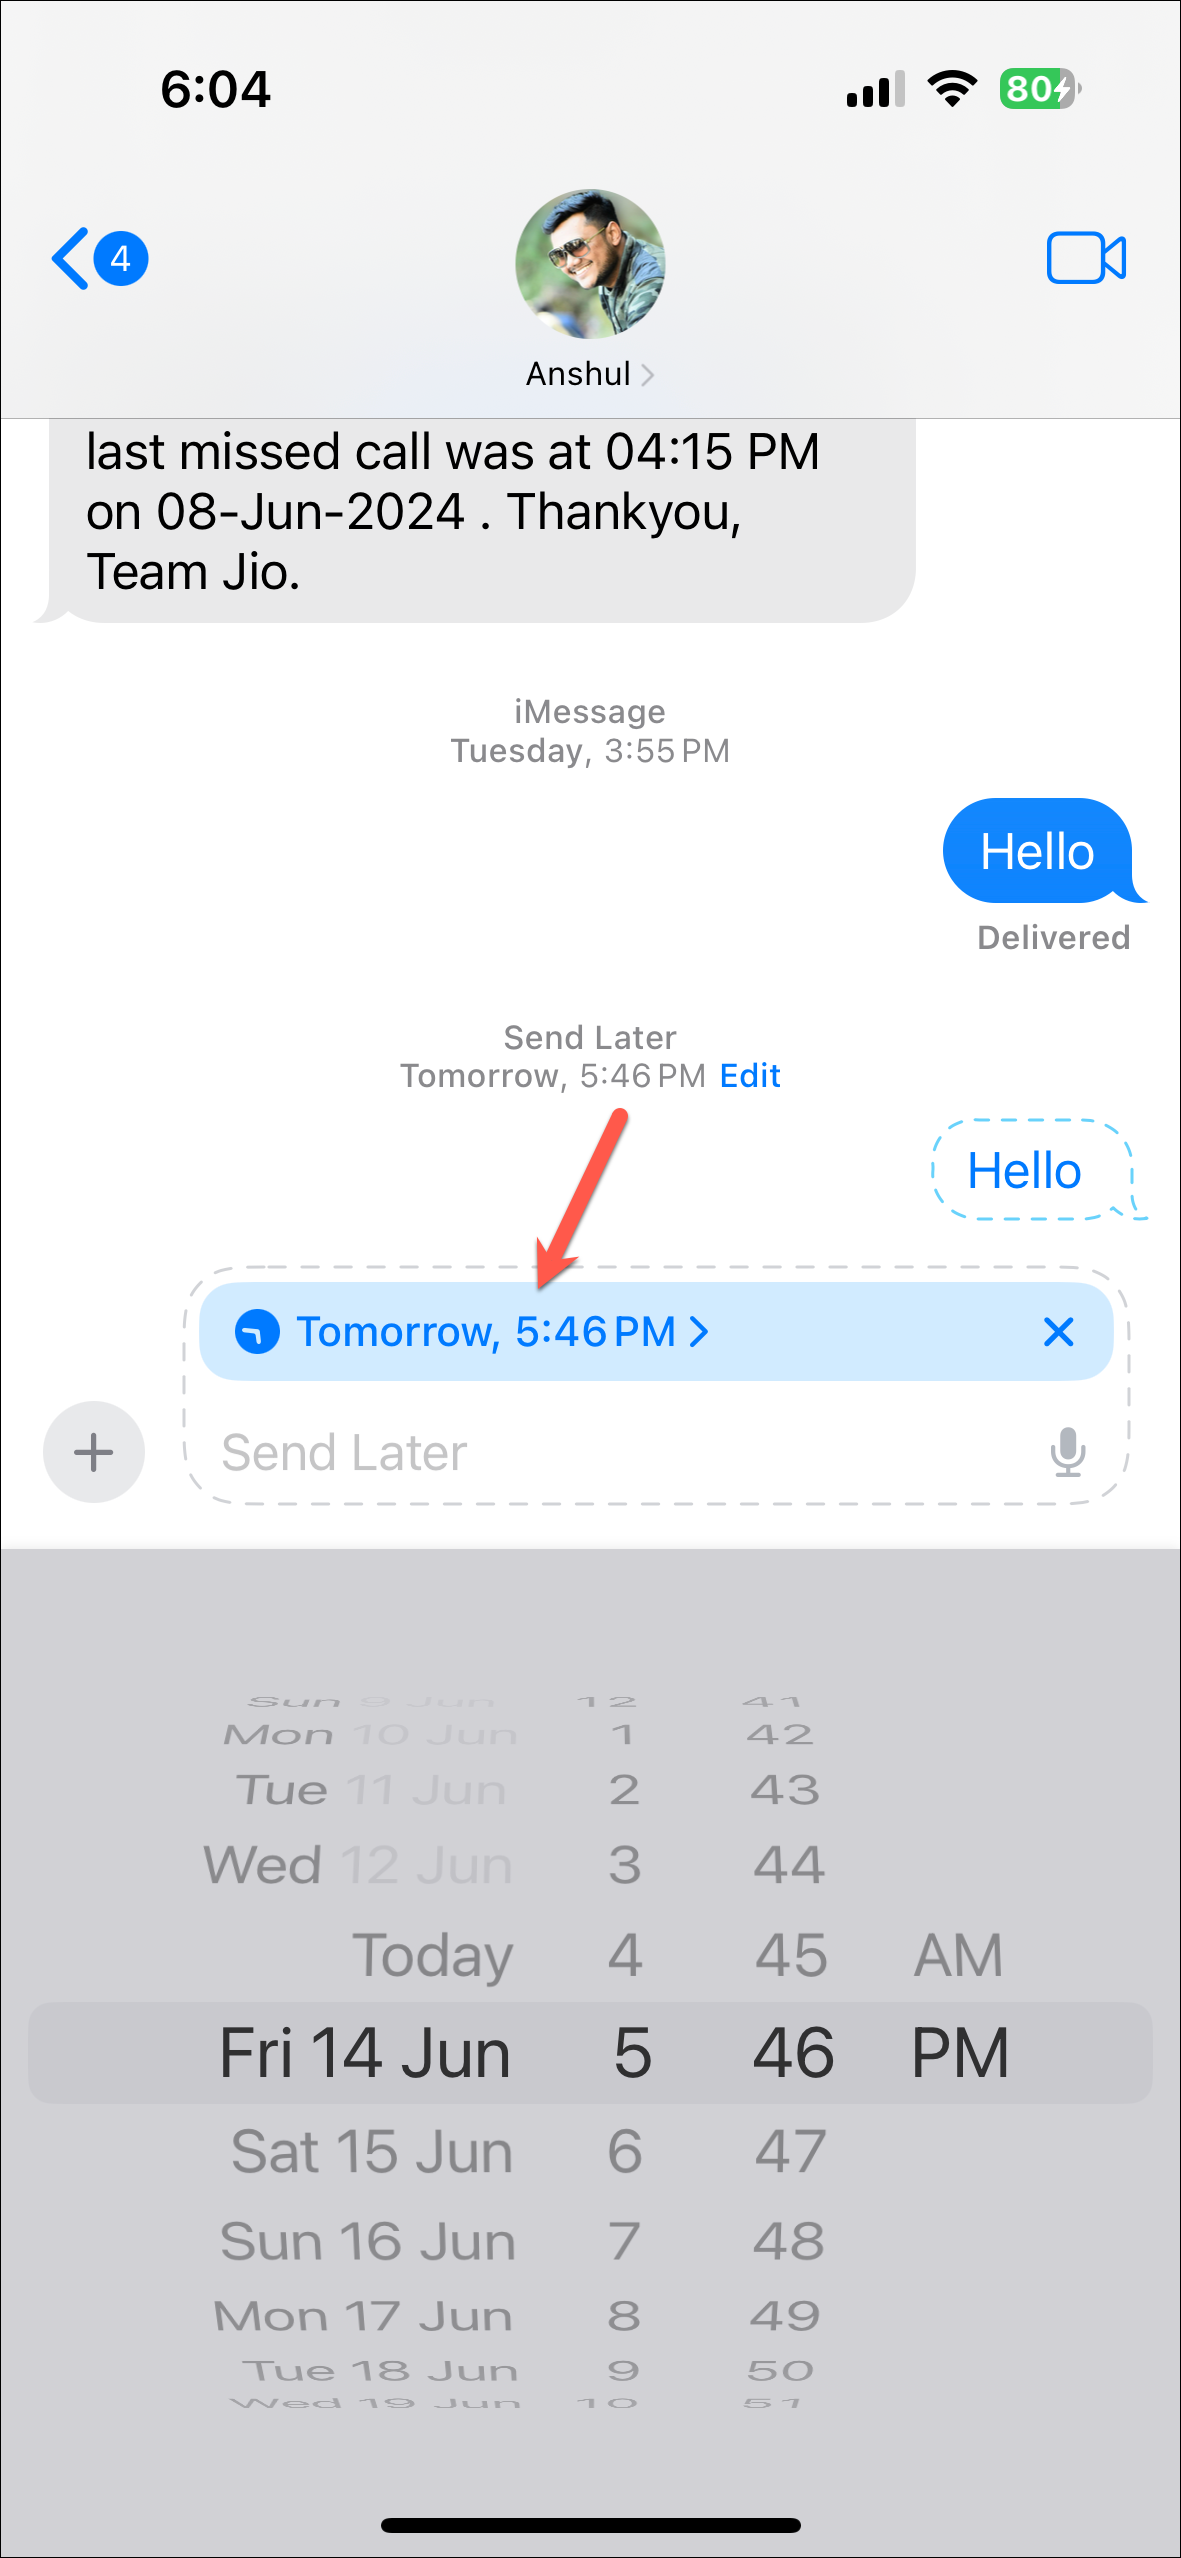
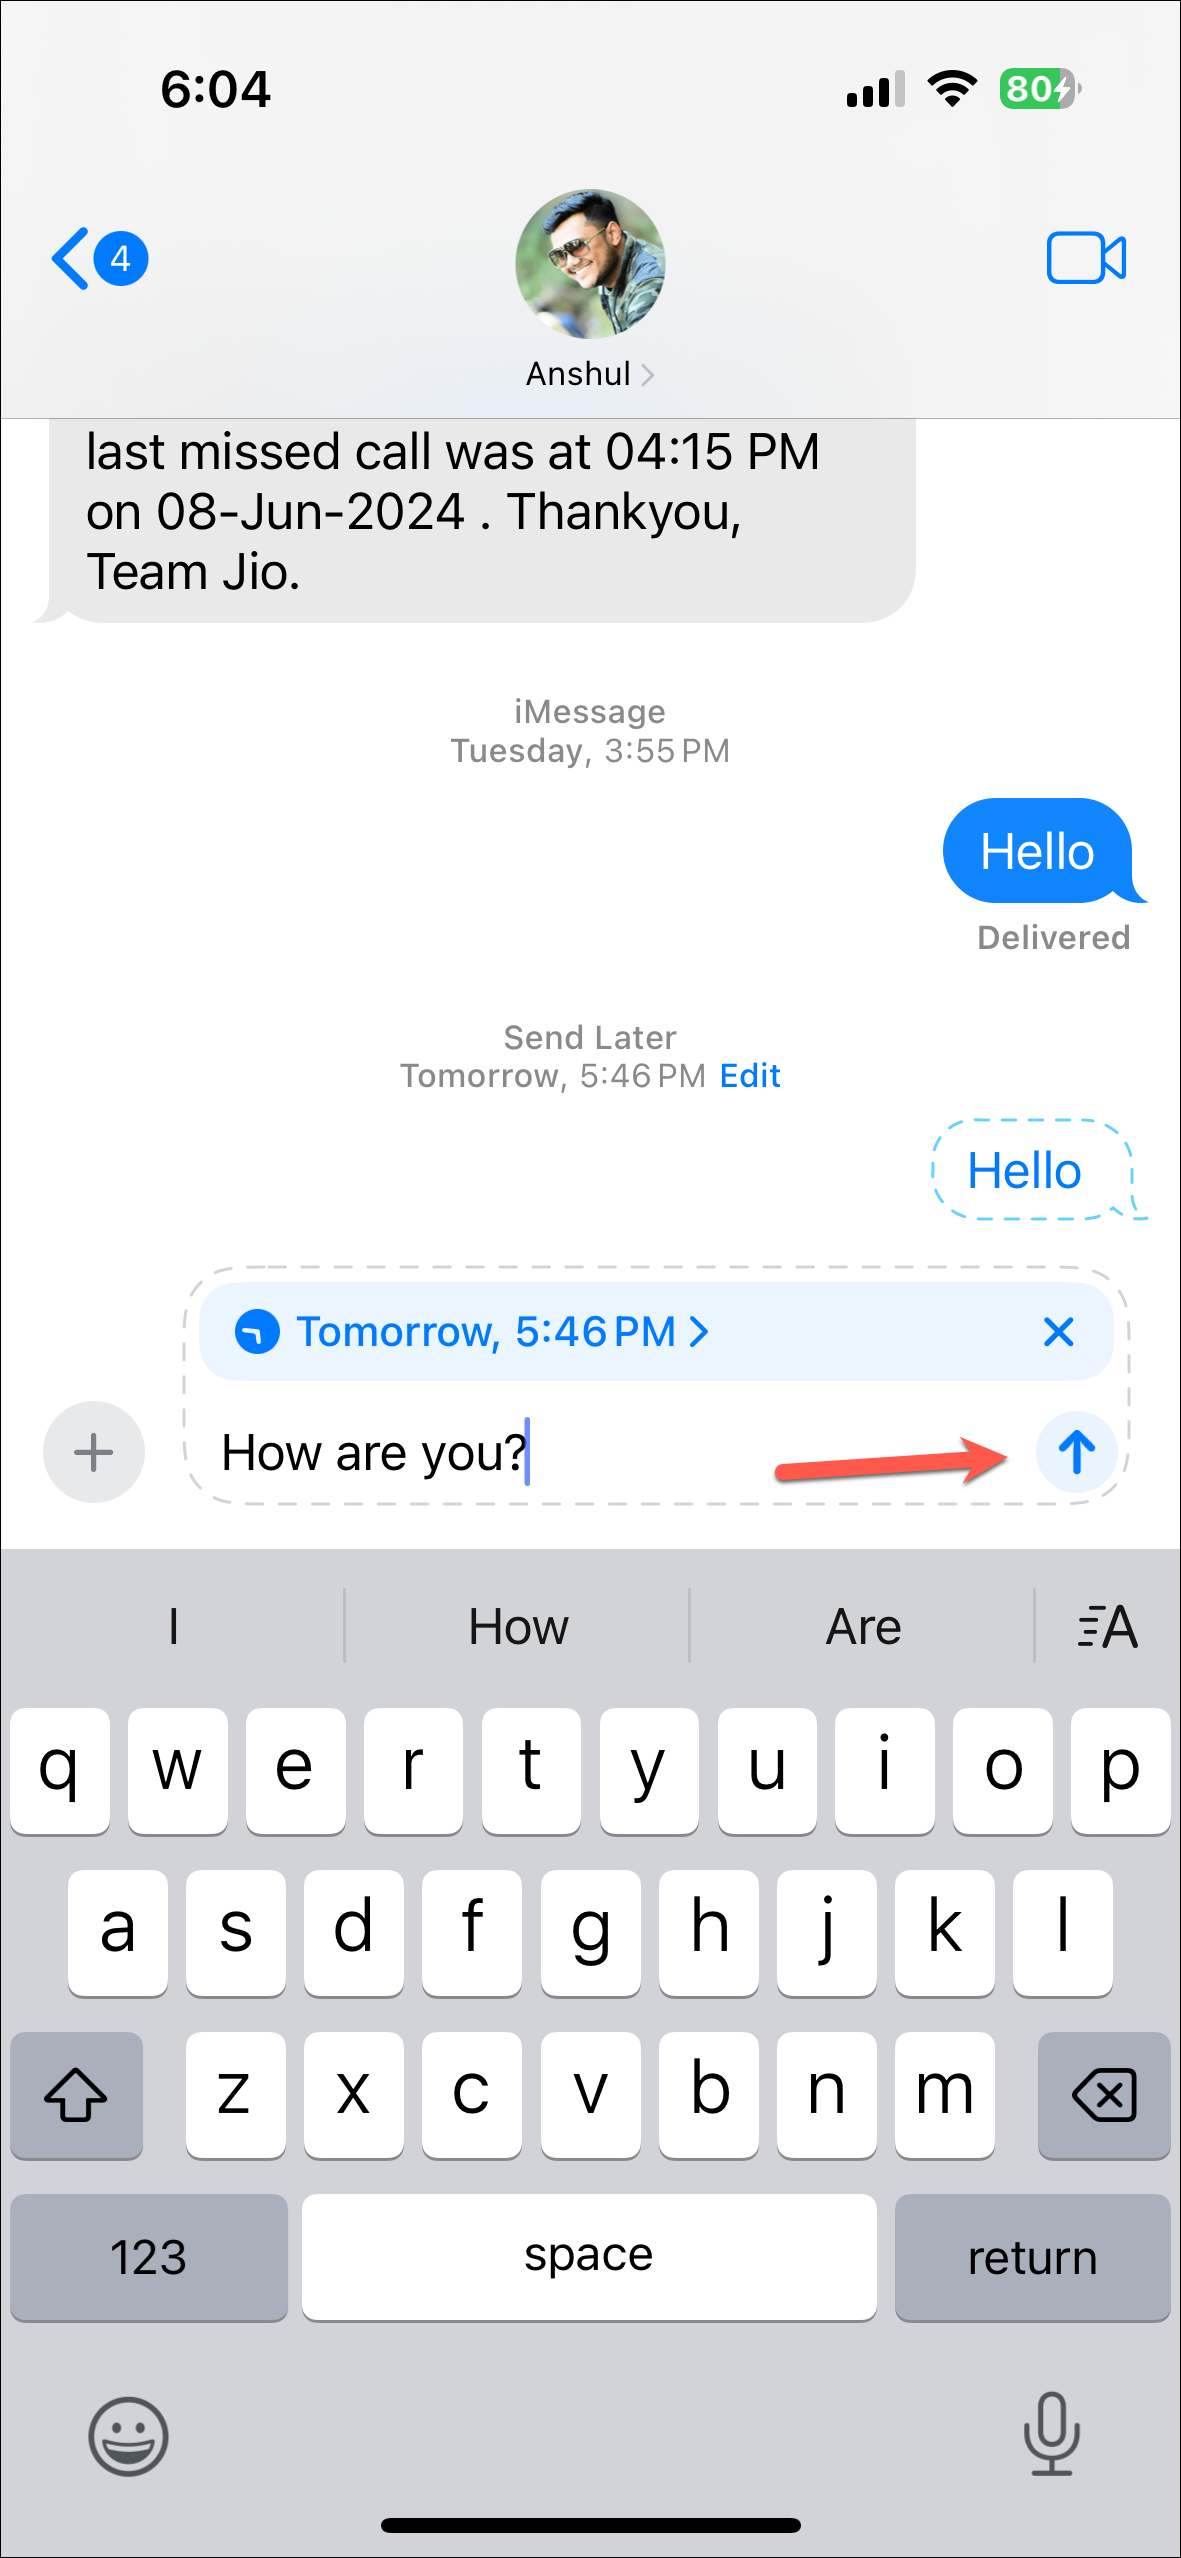
- Once the date and time are selected, compose your message however you want (you can add screen effects, new in-line message effects, photos, etc.) and tap on the 'Send' button.
- The message will be scheduled for the selected date and time and you'll be able to see it in the chat. You can also edit it; tap on the 'Edit' option.
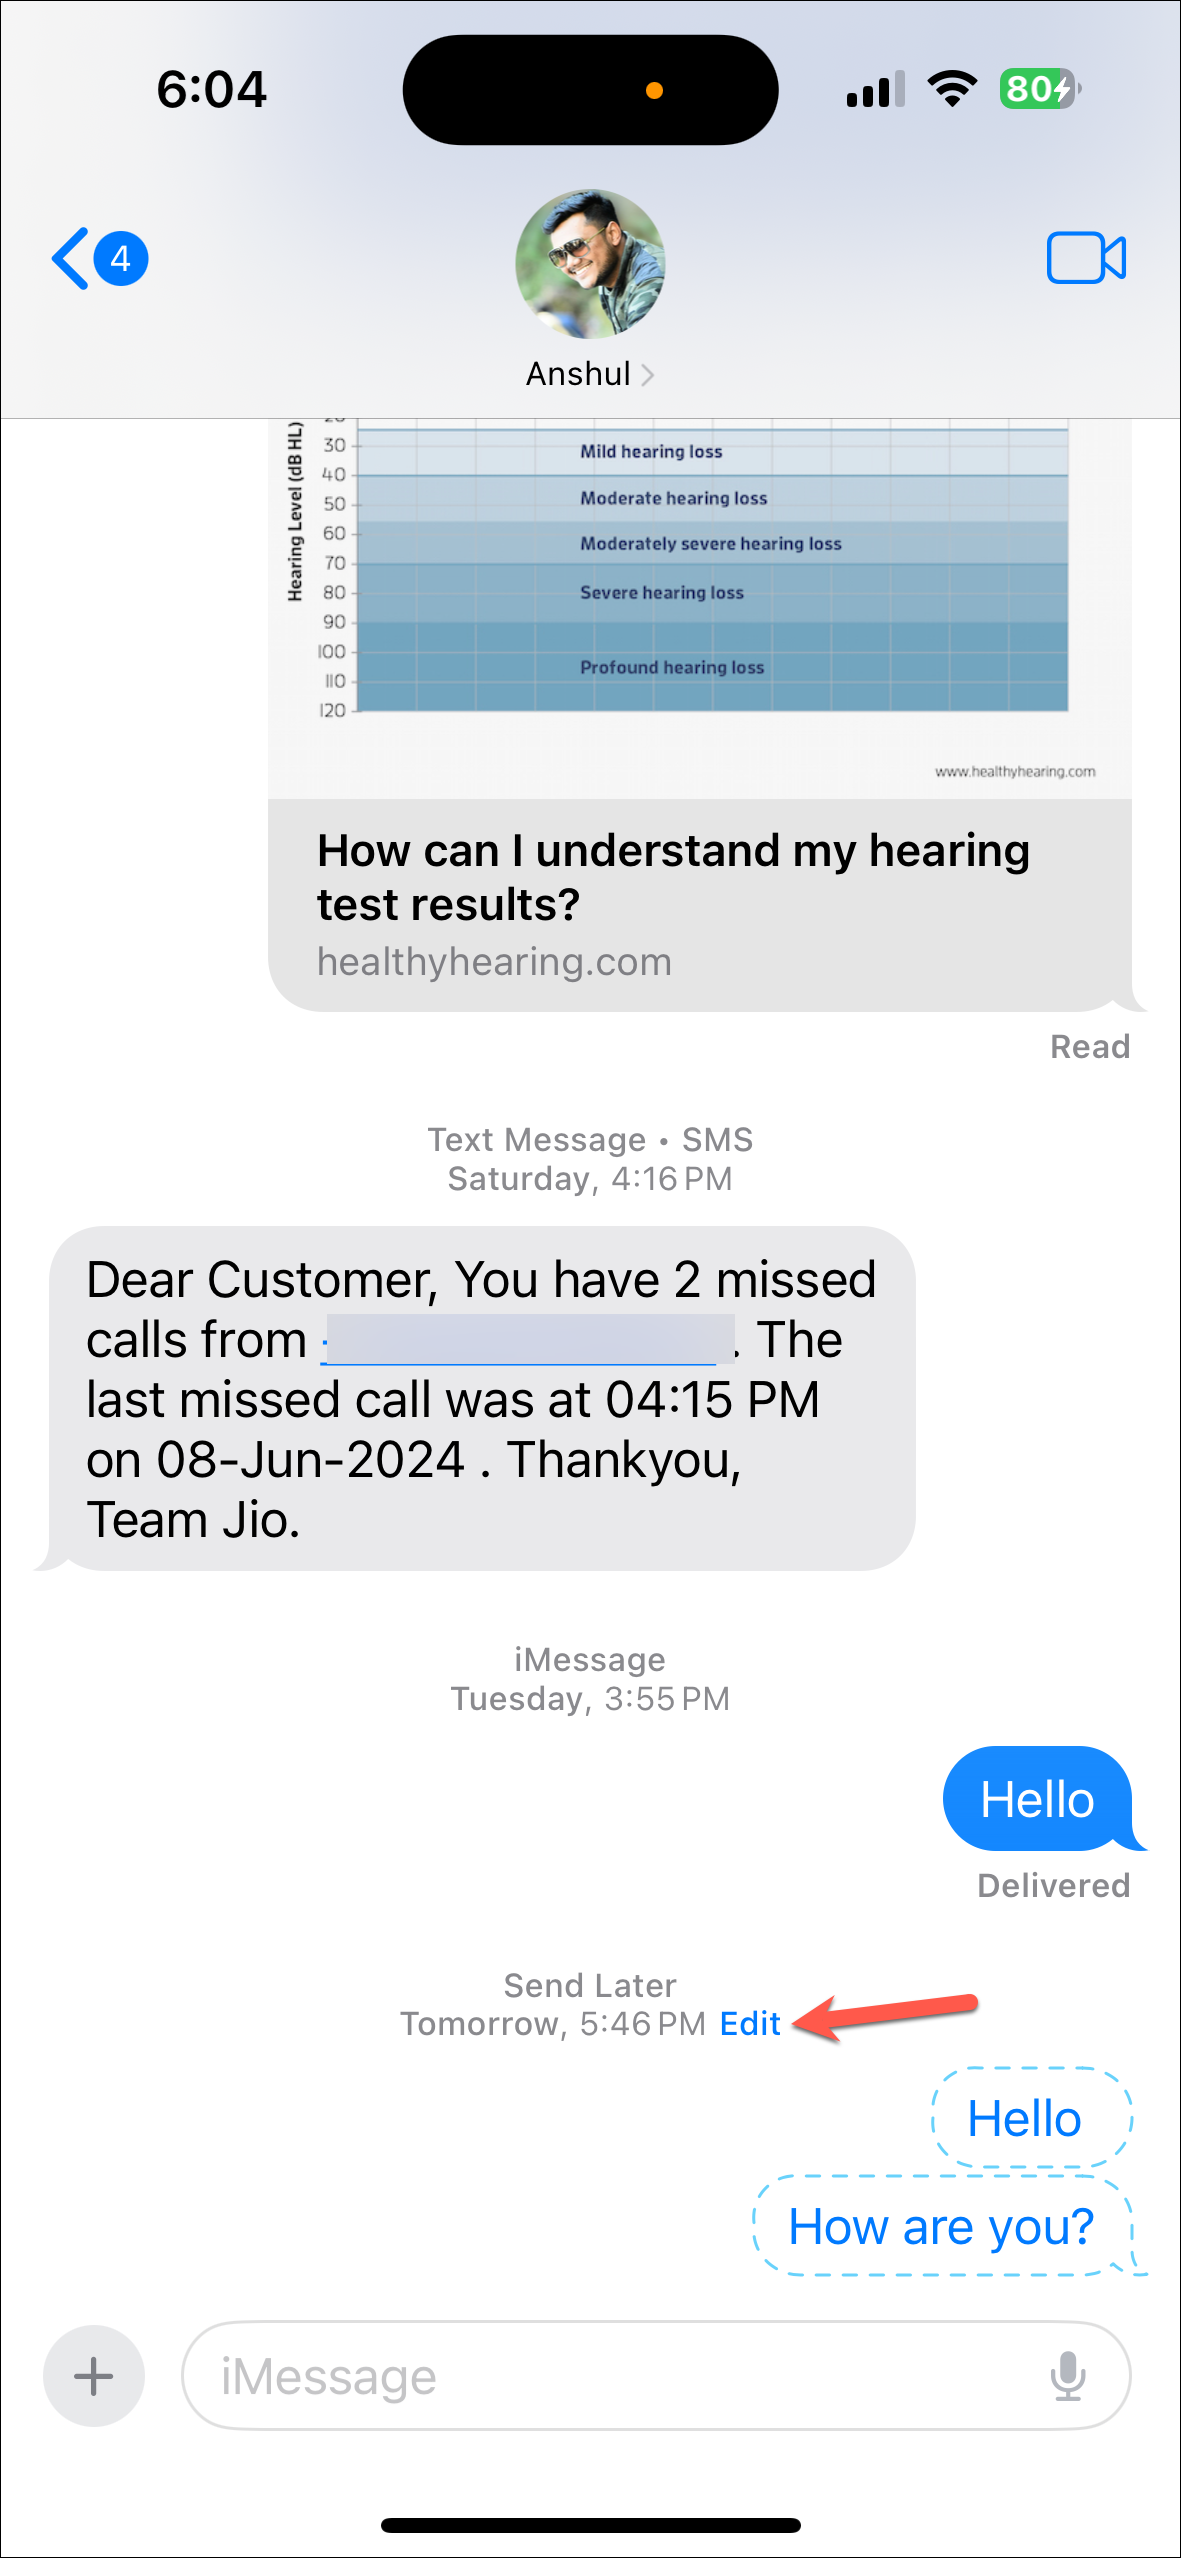
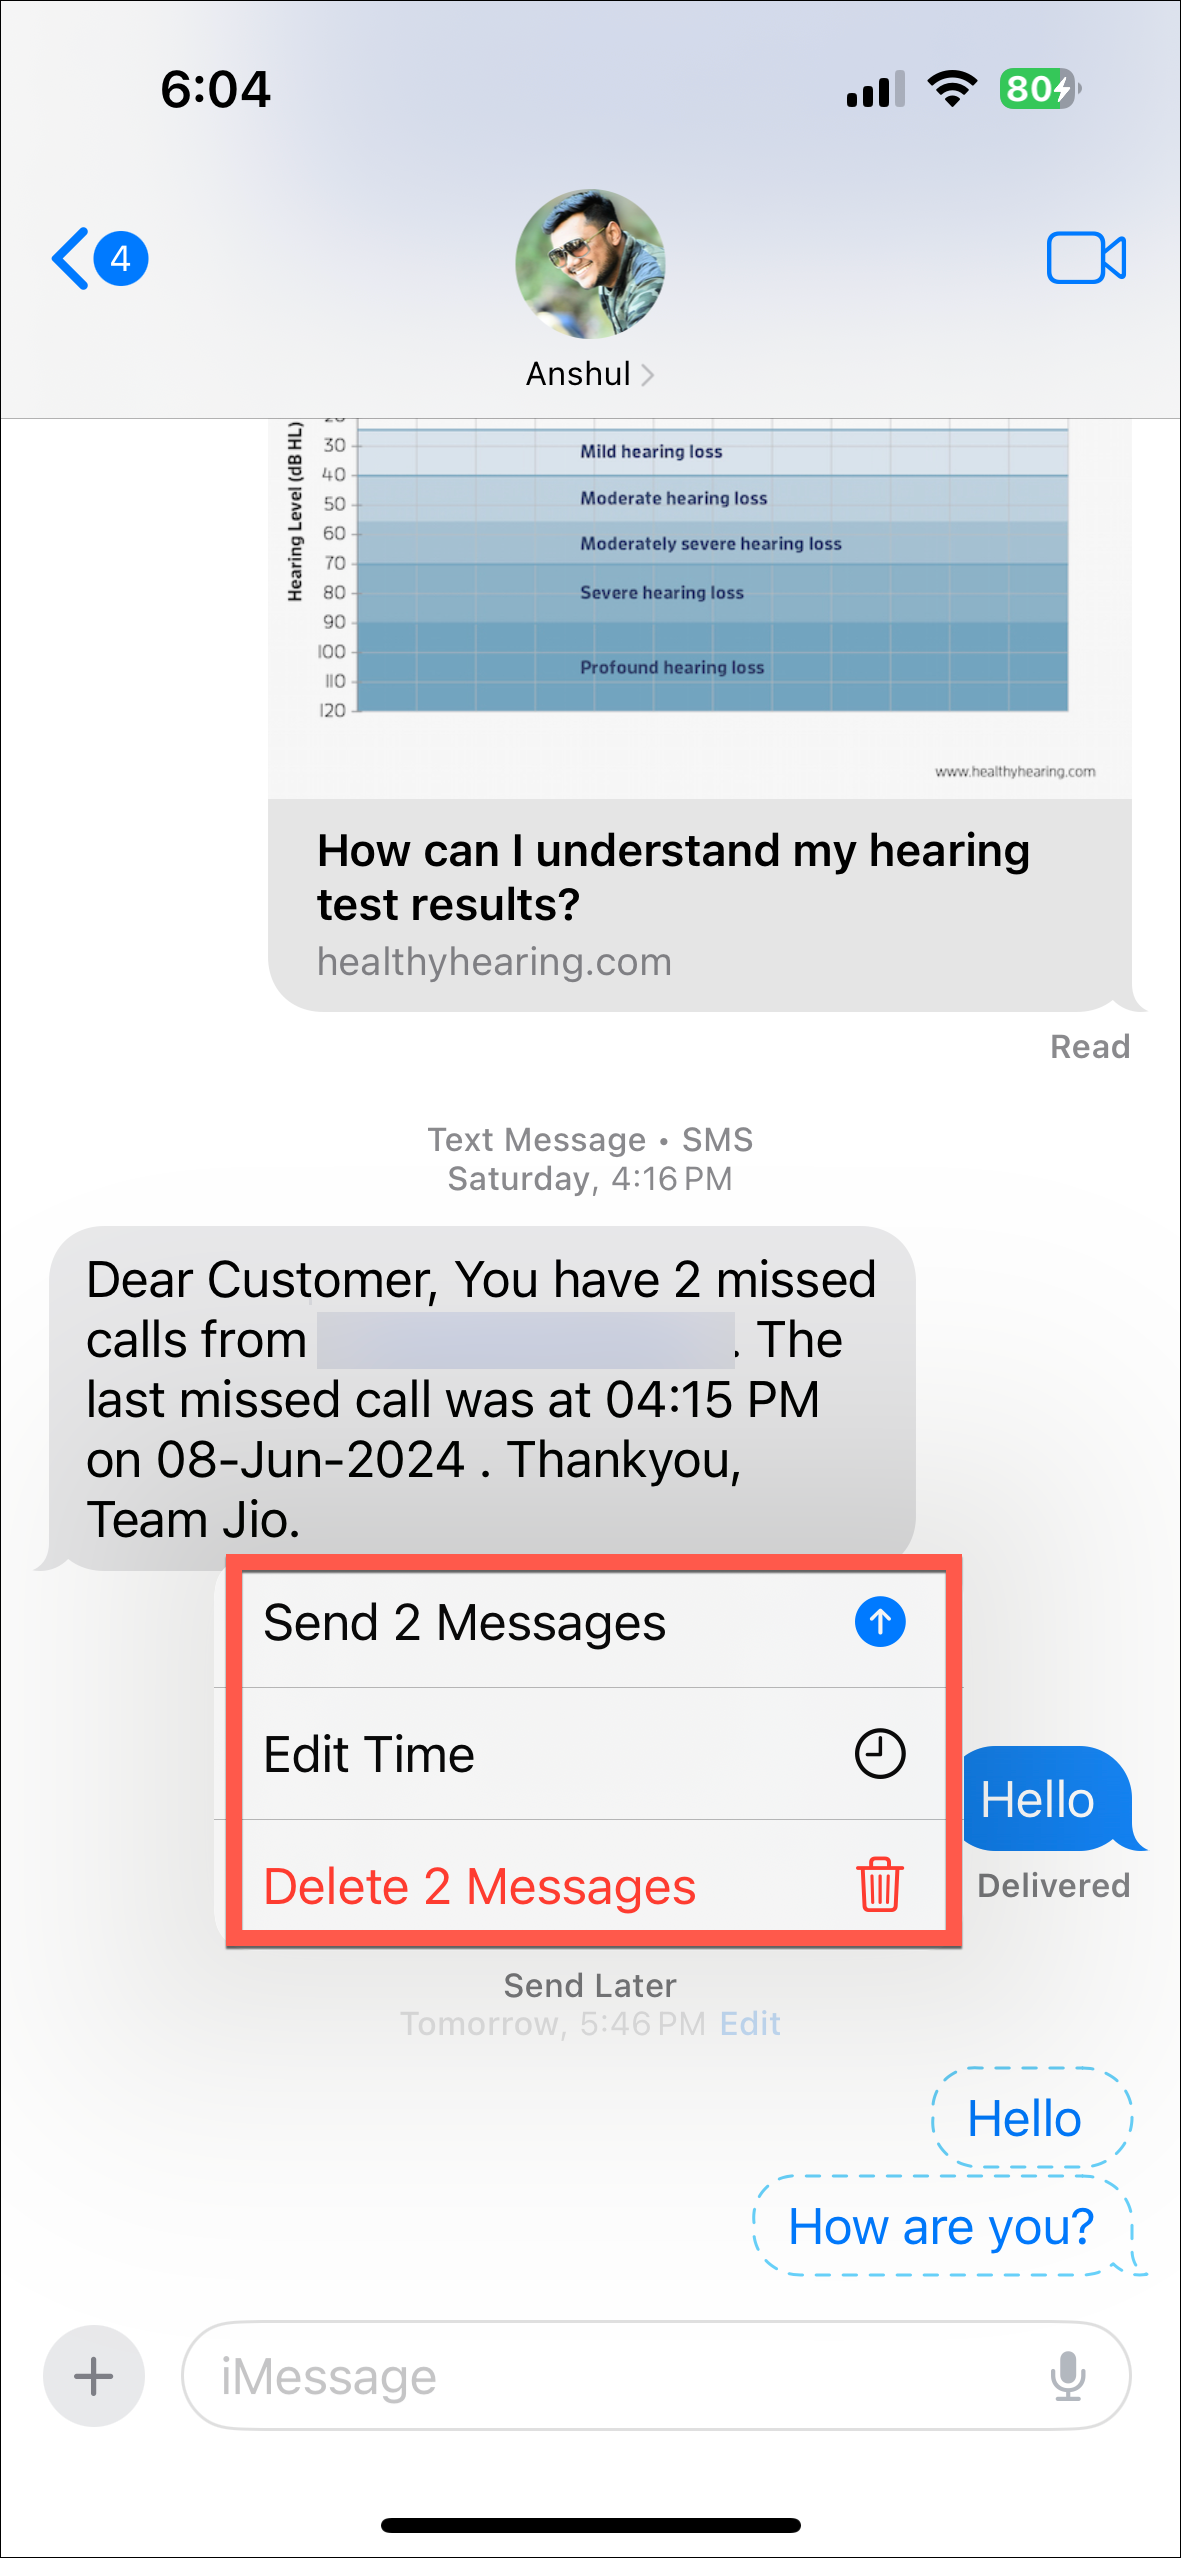
- Options for sending the message right now, editing the time, or deleting the message will appear. Select what you want. Otherwise, the message will be sent at the original scheduled time.
There you go. It's easy to schedule a message for up to 2 weeks in advance with the latest iOS 18 update. Now, you can take things off your plate when you're too busy by scheduling messages in advance.

