
It’s impossible to keep kids away from devices these days. But whether they’re borrowing your phone, using a family iPad, or have access to their own device, the perils of letting them have unrestricted access are too many. After all, the internet might be a reservoir of good things, but there’s no shortage of inappropriate content either.
But when using an iPhone or iPad, you can put these worries to rest. Apple lets you set Parental Controls on these devices. There are a lot of parental controls to choose from so you can customize them the way it suits you and your child the best. And with these restrictions in place, you never have to worry even a pinch about your kids seeing or hearing something they aren’t supposed to. Your device will do all the worrying in your stead.
Setting Up Parental Controls
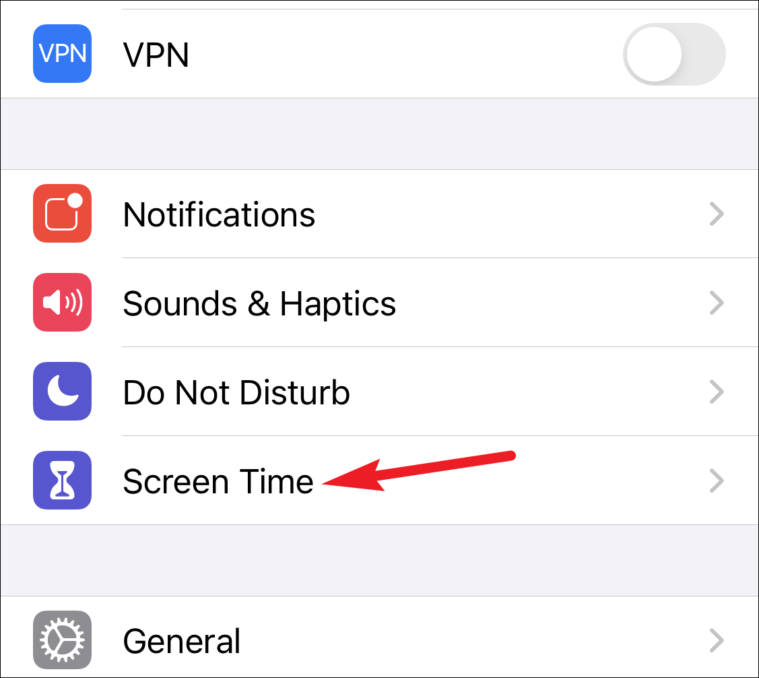
Whether you want to set up parental controls on your own device or your kid’s device, Apple has provisions for both. Open your iPhone or iPad Settings and go to ‘Screen Time’.
When configuring Screen Time for the first time, Apple asks if it’s your device or your child’s. If it’s your child’s phone, select that, and you can set a ‘Parent Passcode’ for the device. Your child won’t be able to change Screen Time settings without this passcode. Otherwise, select ‘This is my iPhone’ and proceed.

The only difference between both is that applying a passcode is a choice if it’s your phone but obligatory otherwise. Configuring all the other settings for parental restrictions would be the same. If Screen Time is already set up on your device, it would skip these steps.
Tap ‘Use Screen Time Passcode’ to create a passcode on your device so no one else can change the Screen Time settings you’ll configure in the next steps. Screen Time passcode is also required to extend time limits for apps when they expire. Create a different passcode than the one you use to lock your device.
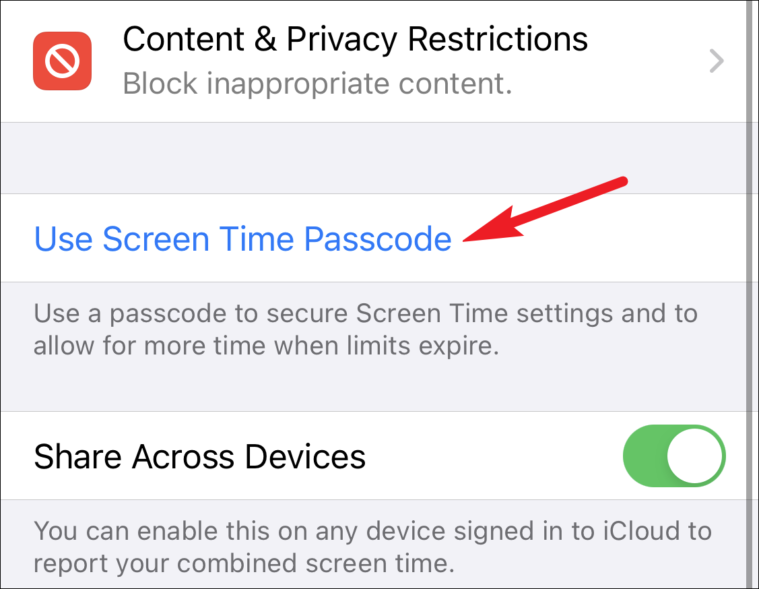
After setting up a passcode, you might be asked to enter your Apple ID & Password. Enter it. You can use these to reset Screen Time Passcode in case you forget it.
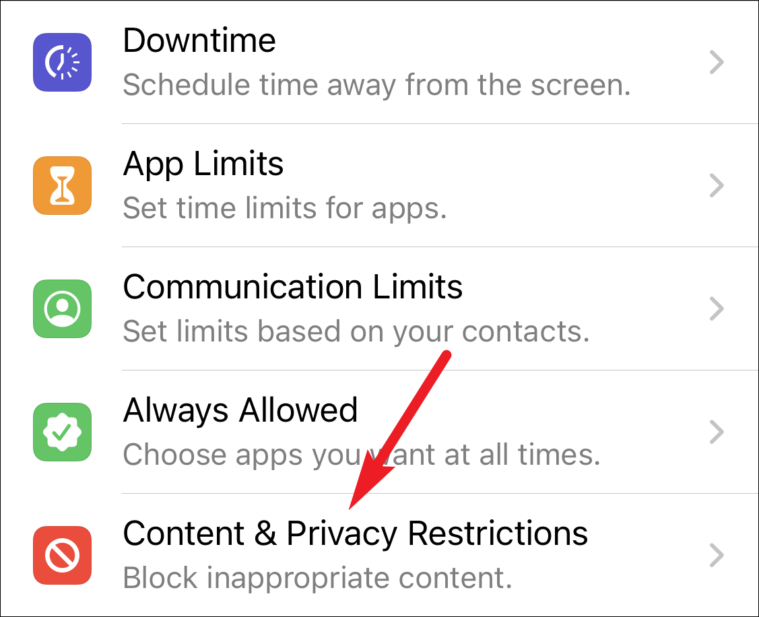
Now, tap on ‘Content & Privacy Restrictions’.
Turn on the toggle for it.
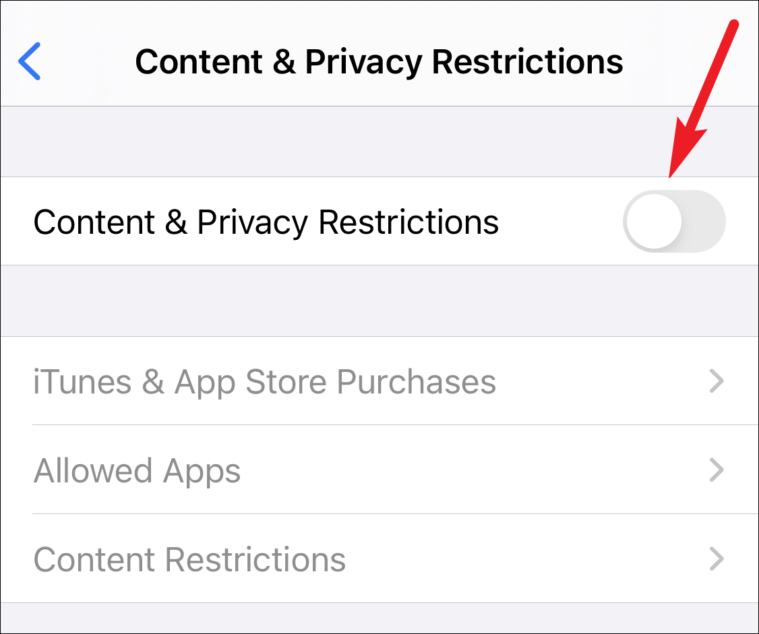
Now, you’ll see a lot of options in Content & Privacy Restrictions that you can configure. There’s no need to get overwhelmed. When it comes to setting up parental controls, you only need to tinker a few.
Choose which Apps to Allow
With Parental restrictions on iPhone and iPad, you can choose which built-in apps and features you want to allow. Disallowing an app won’t delete it from your device but only hide it until you choose to allow it again.
From the Content & Privacy Restrictions screen, tap on ‘Allowed Apps’.
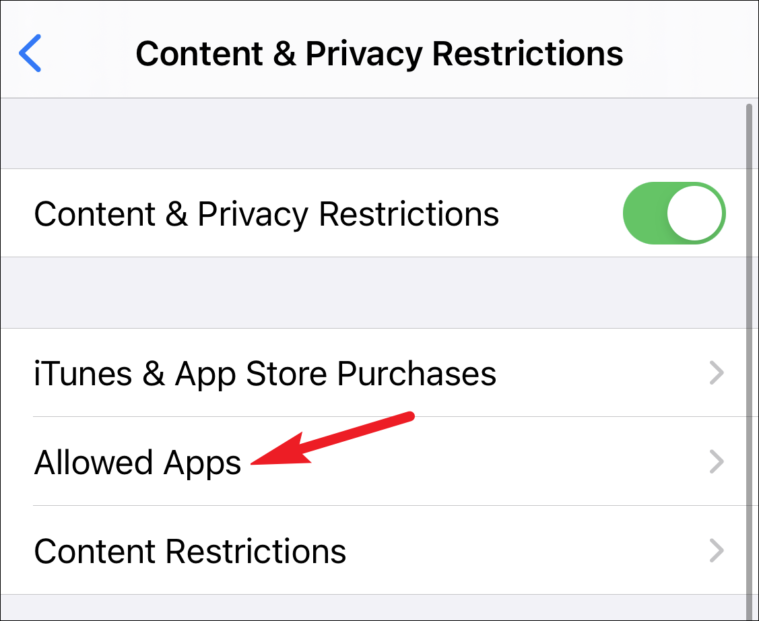
The list of built-in apps and features that you can restrict access to will appear. Turn off the toggle for the app(s) you wish to.

The app will be hidden completely from your device, not just the Home Screen. Even Spotlight search won’t show it until you allow it again.
Prevent Explicit Content & Decide Content Ratings
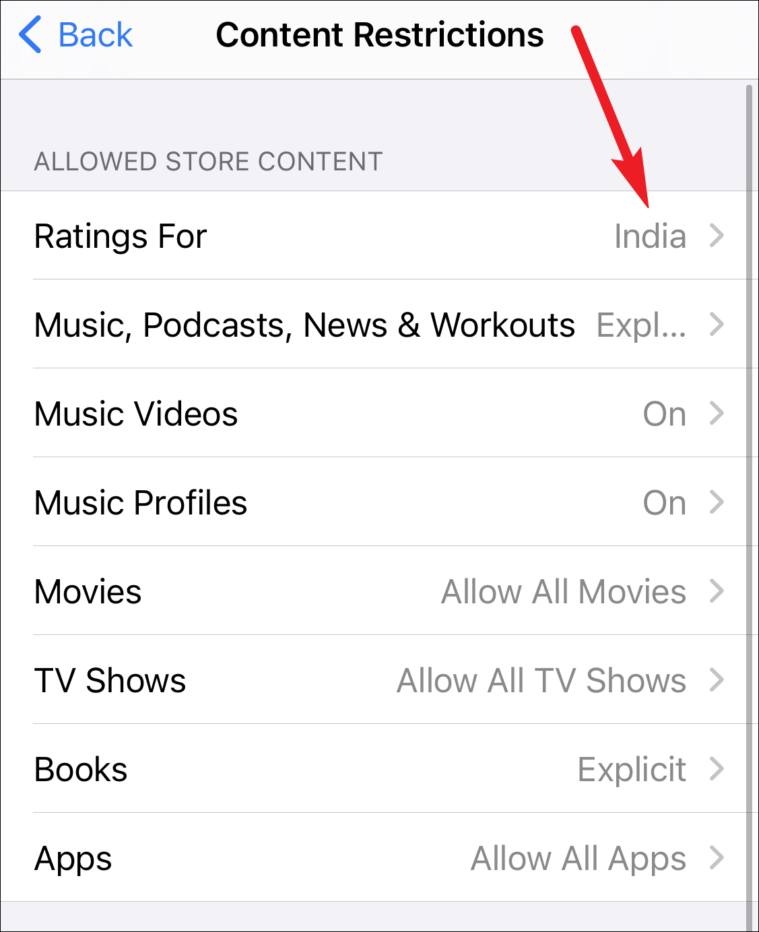
You can prevent explicit content or entirely prevent some content like Music Videos from viewing. Go to Content & Privacy Restrictions from Screen Time and tap on ‘Content Restrictions’.

Here, you can choose the content you want to allow from the iTunes store and the ratings too. Ratings for different titles are applied according to the region selected. You can change the preferred region and select the country you want to apply the ratings for to all content in the store. Other types of content you can choose ratings for involves Music, Podcasts, Music Videos, Music Profiles, Movies, TV Shows, Movies, Books, and Apps. Select each option and then select the preferred setting for each.
Restrict Web Content
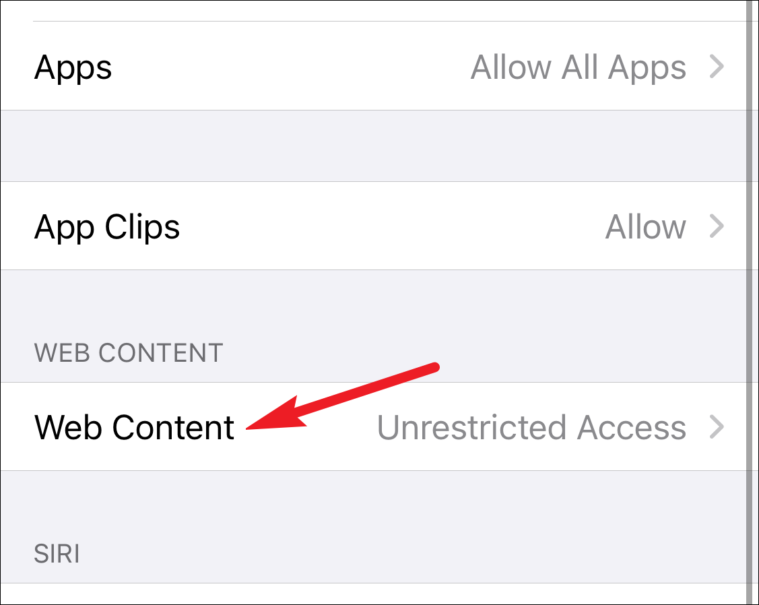
iOS and iPadOS can automatically filter and restrict adult content in Safari and other apps when the setting is on. You can also restrict web content to such an extent where only the sites you want to allow will be available.
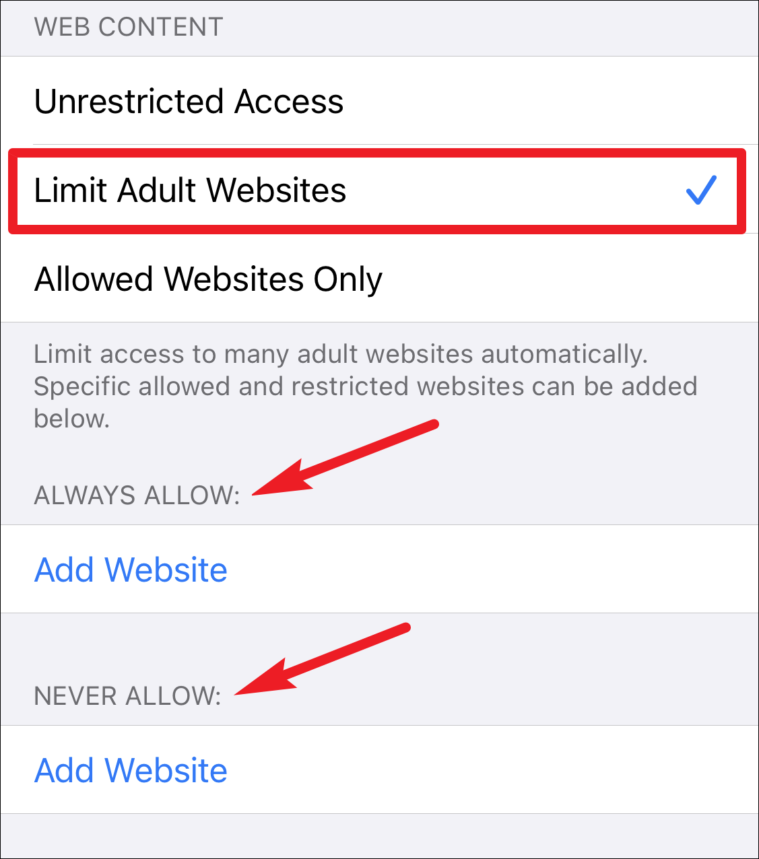
From the Content Restrictions screen, scroll down and tap ‘Web Content’.
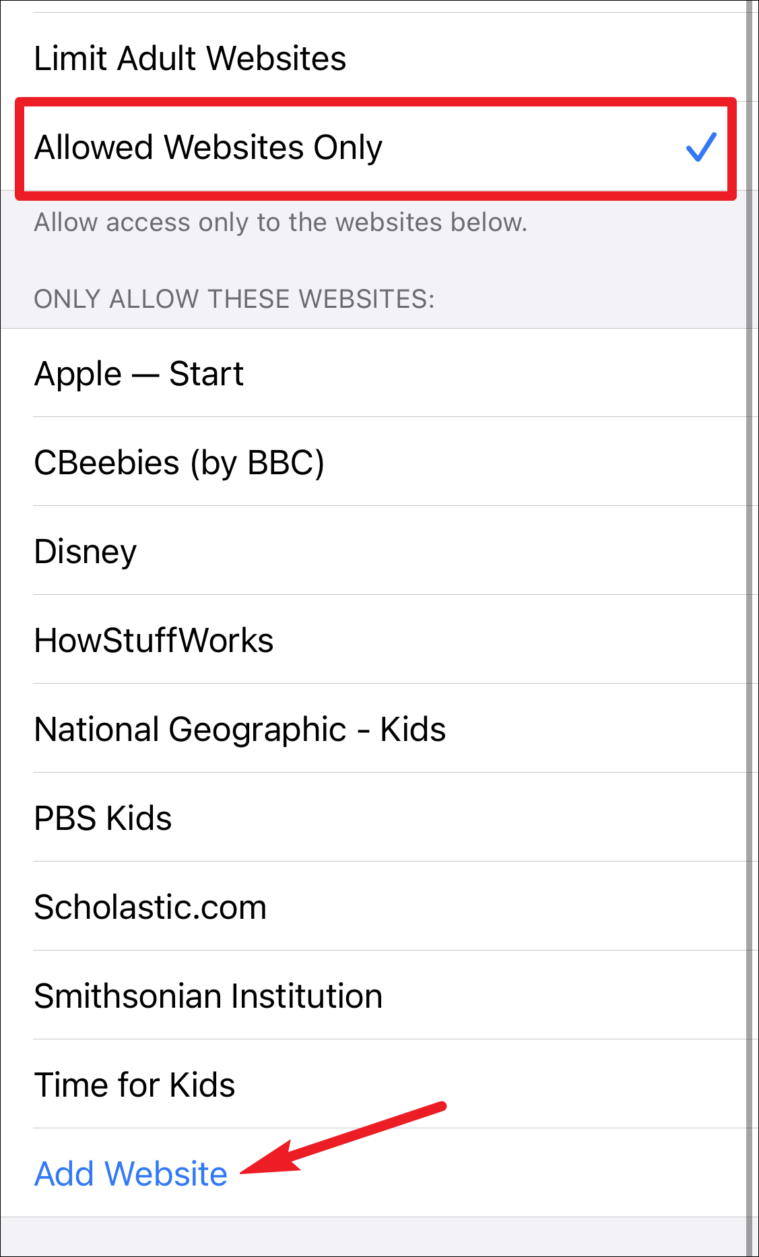
The options for restricting Web Content will appear. by default, ‘Unrestricted Access’ will be chosen. You can either choose to ‘Limit Adult Websites’ or select ‘Allowed Websites Only’.
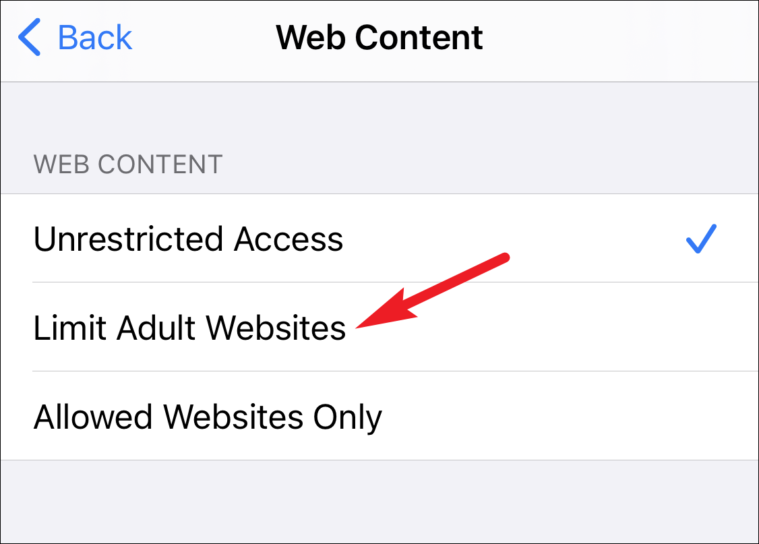
With the first option, your device will automatically limit access to many adult websites. But you can add additional websites you want to restrict or allow under ‘Always Allow’ and ‘Never Allow’ options.
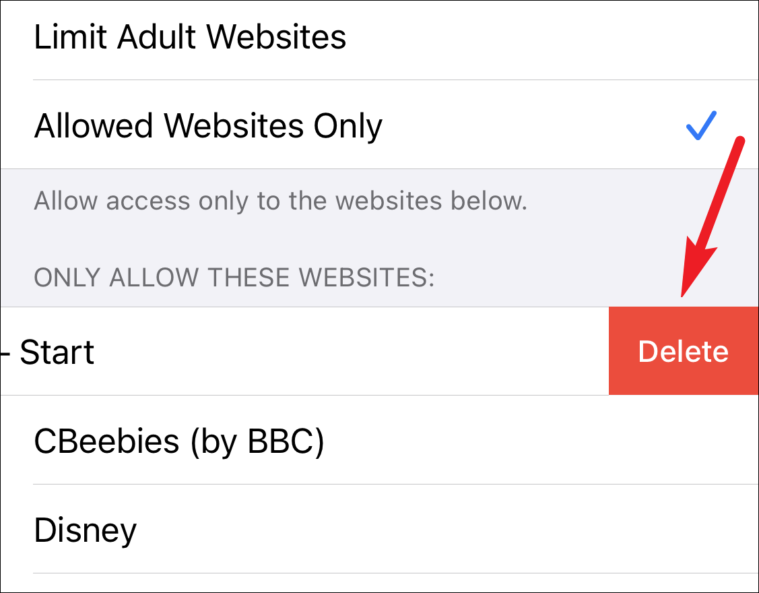
With the ‘Allowed Websites Only’ option, there is a pre-approved list of websites from which you can add or delete websites. This option is great when you’re letting very young children use the device. Tap ‘Add Website’ to add a site to the list.
To remove a site, swipe left on the site and then tap the ‘Delete’ button.
Restrict Game Center
Entertainment and gaming are a huge part of what children use the devices for. You can also restrict Game Center features like private messaging, playing games with strangers, etc., on both your iPhone and iPad. Open the Content Restrictions screen and scroll down to the very bottom. There, you’ll find the options for restricting access to the Game Center.
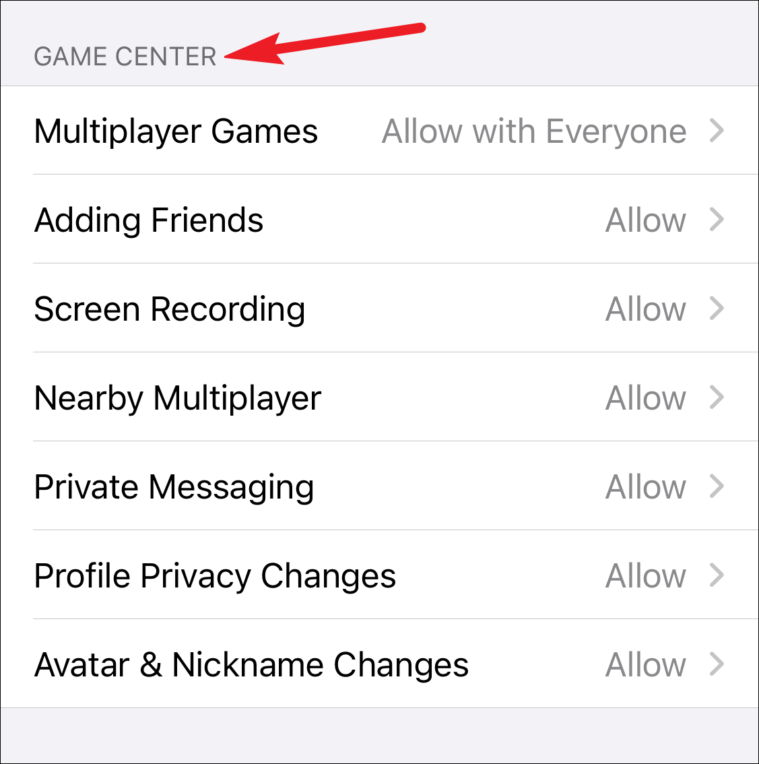
You can allow kids to have Multiplayer Games with only friends, everyone, or no one at all. Other features you can restrict involve Adding Friends, Screen Recording, Nearby Multiplayer, Private Messaging, Profile Privacy Changes, and Avatar & Nickname Changes. Each setting can either be allowed or disallowed. Tap on the feature you want to restrict and select the preferred option for it.
Content & Privacy Restrictions also contain other settings you can tweak that are not related to controlling the content your kids see. One such useful setting for the times when kids are using the device has to be the option to completely disable iTunes and App Store purchases.
With these various parental controls in place, you can be completely carefree about kids using the devices.


