
In Short.
To set up Personal Voice in iOS 17 on iPhone, head to 'Settings', then 'Accessibility'. Find 'Personal Voice' under the 'Speech' section and follow prompts to record your voice. Your iPhone will process the recordings when idle. When your Personal Voice is ready, you'll receive a notification.
When it comes to trailblazing in Accessibility features, Apple undoubtedly takes the crown. Their commitment to making devices accessible is unparalleled – no other brand comes close. And with iOS 17, they're continuing to enrich this legacy, adding more impressive innovations to their accessibility toolkit. The introduction of iOS 17 has brought a plethora of new features to Apple's iPhone lineup, one of which is the Personal Voice feature.
In the vast spectrum of Apple's accessibility features, Personal Voice shines as a new tool designed for those who need their voice to talk for them. It's not just for the tech geeks; it's a godsend for people dealing with speech-related challenges due to conditions like ALS and others. It's all about preserving your unique voice and making communication easier and more personal.
How does the Personal Voice feature Work?
Personal Voice requires you to record some audio clips. It then leverages on-device machine learning to analyze said audio clips and creates a personalized voice model that accurately replicates your voice. If you've ever wished that your device could talk just like you, iOS 17 has granted that wish.
It is especially beneficial for users who are at risk of losing their voice. Conditions like Amyotrophic Lateral Sclerosis (ALS) or similar ailments that can impact speaking ability put you at risk of speech loss. But Personal Voice can help preserve your voice so you can communicate more effortlessly.
And since it uses on-device machine learning, your data stays secure.
You can even use it in FaceTime calls, phone calls, and assistive communication apps with the Live Speech option, which will use type-to-speak to communicate in your own voice once it is set up.
Setting Up Personal Voice in iOS 17
Before you start, you should keep some things in mind. The process requires you to record approximately 15 minutes of your voice, but Apple warns that it could take up to an hour to complete it. However, it's no reason to get disheartened. You don't have to complete the recording in one session. Instead, you can record your voice in smaller sections and return any time to add more.
Now, to get started, open the 'Settings' app on your iPhone running iOS 17.
Then, tap the 'Accessibility' tile.
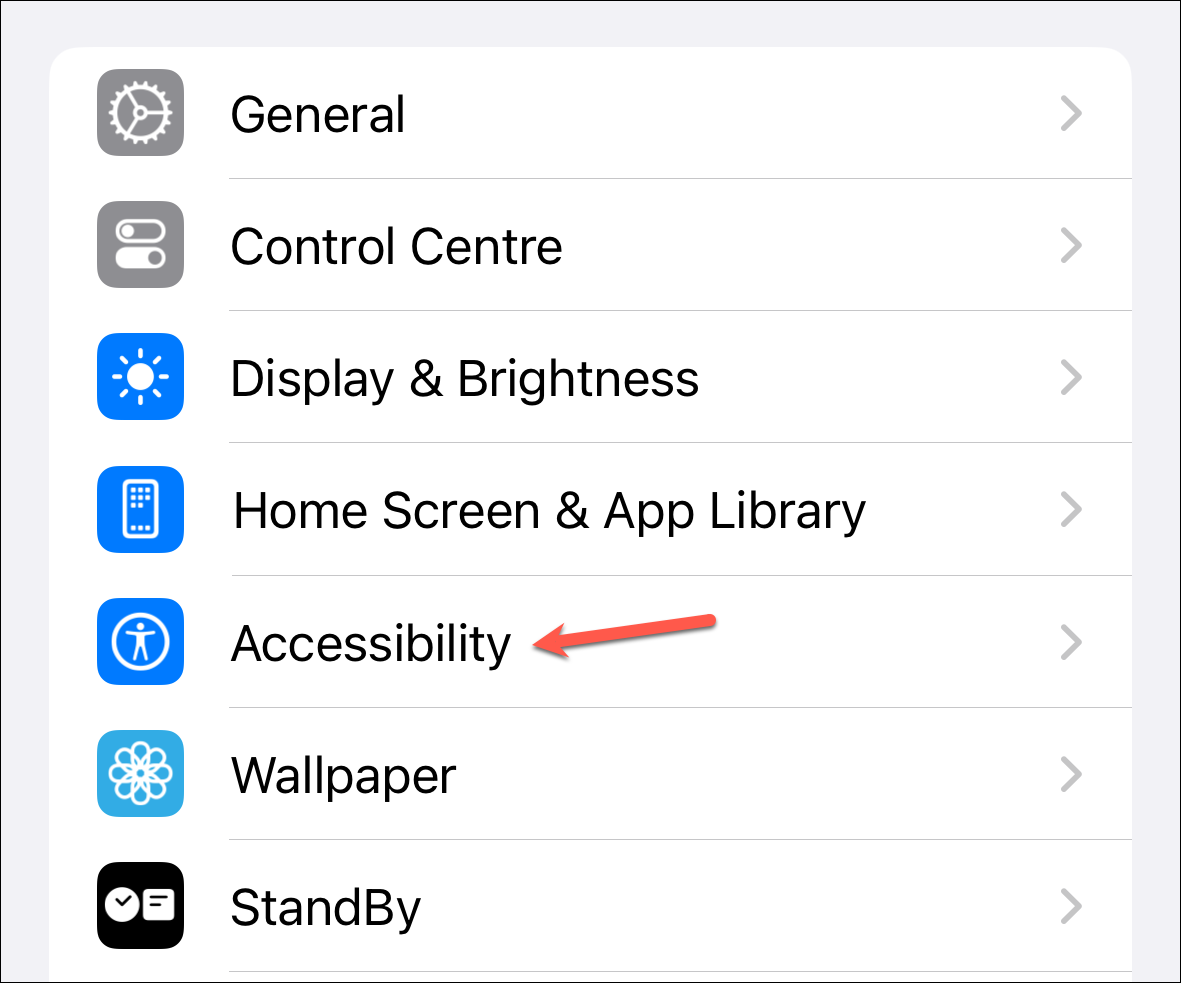
Time for some scrolling! Hunt down 'Personal Voice' nestled under the 'Speech' section.
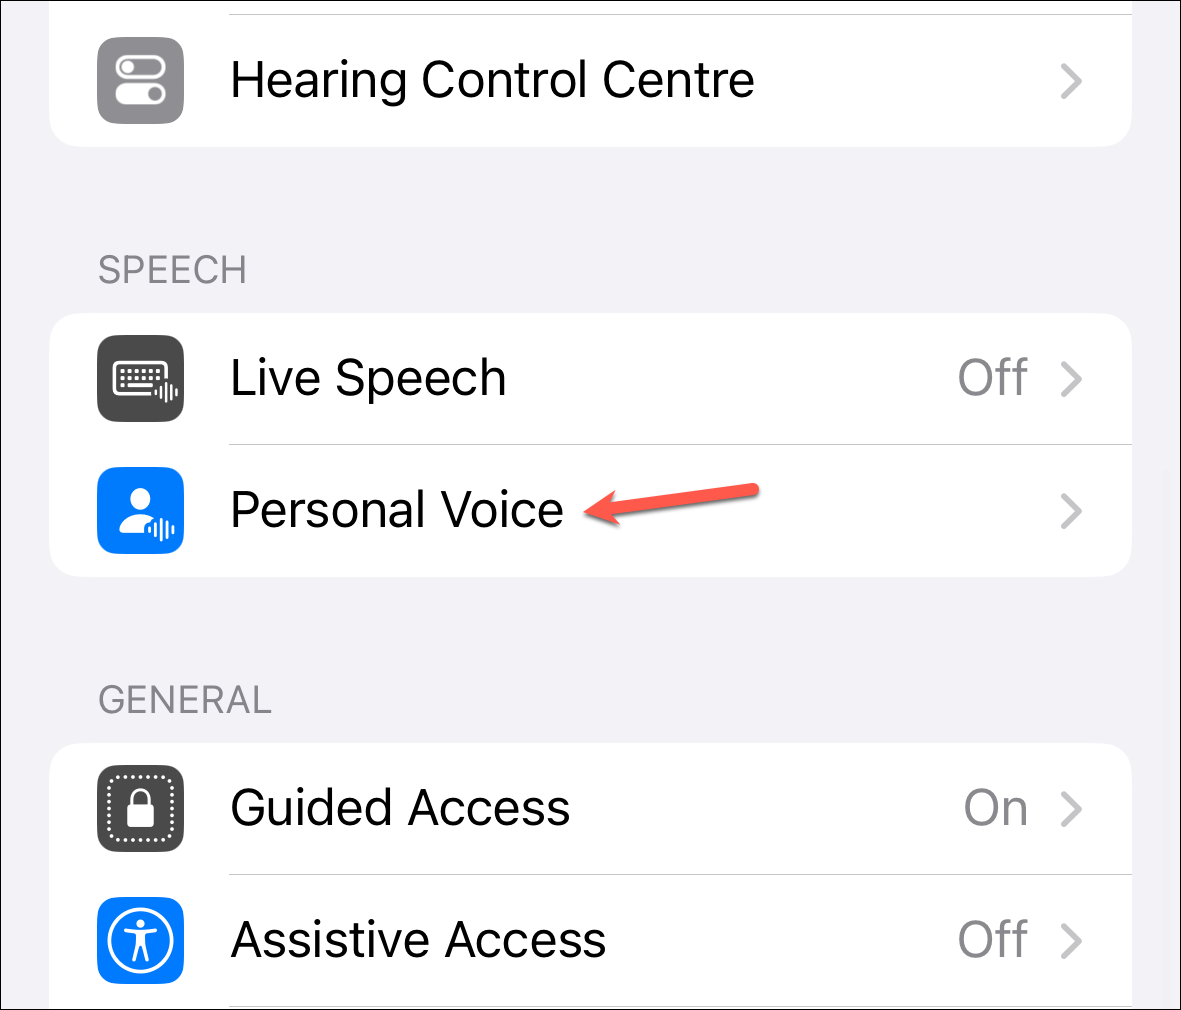
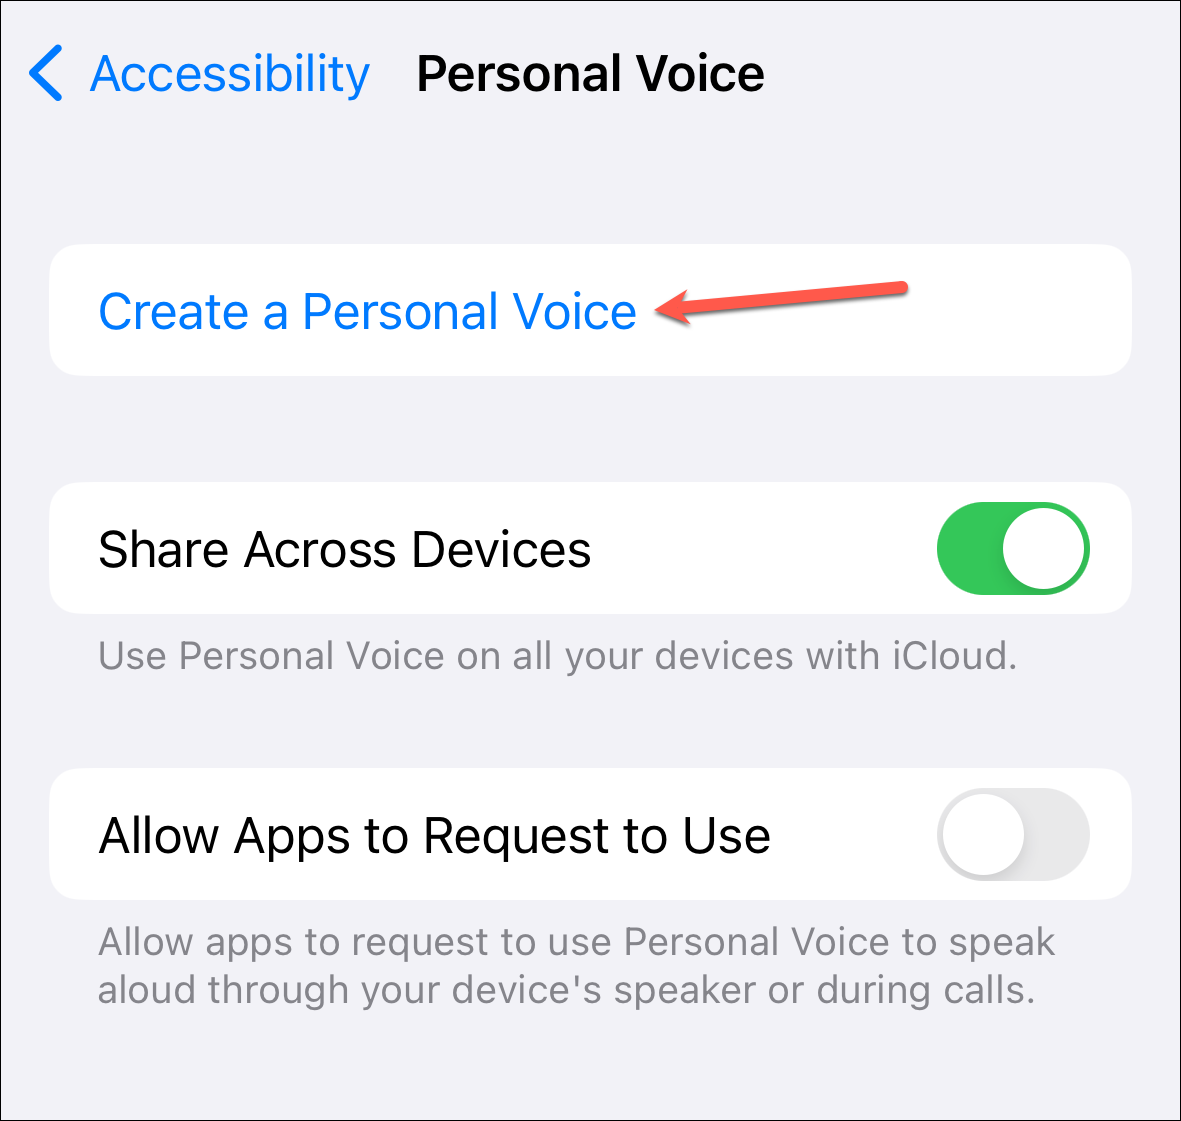
Tap on the 'Create a Personal Voice' option.
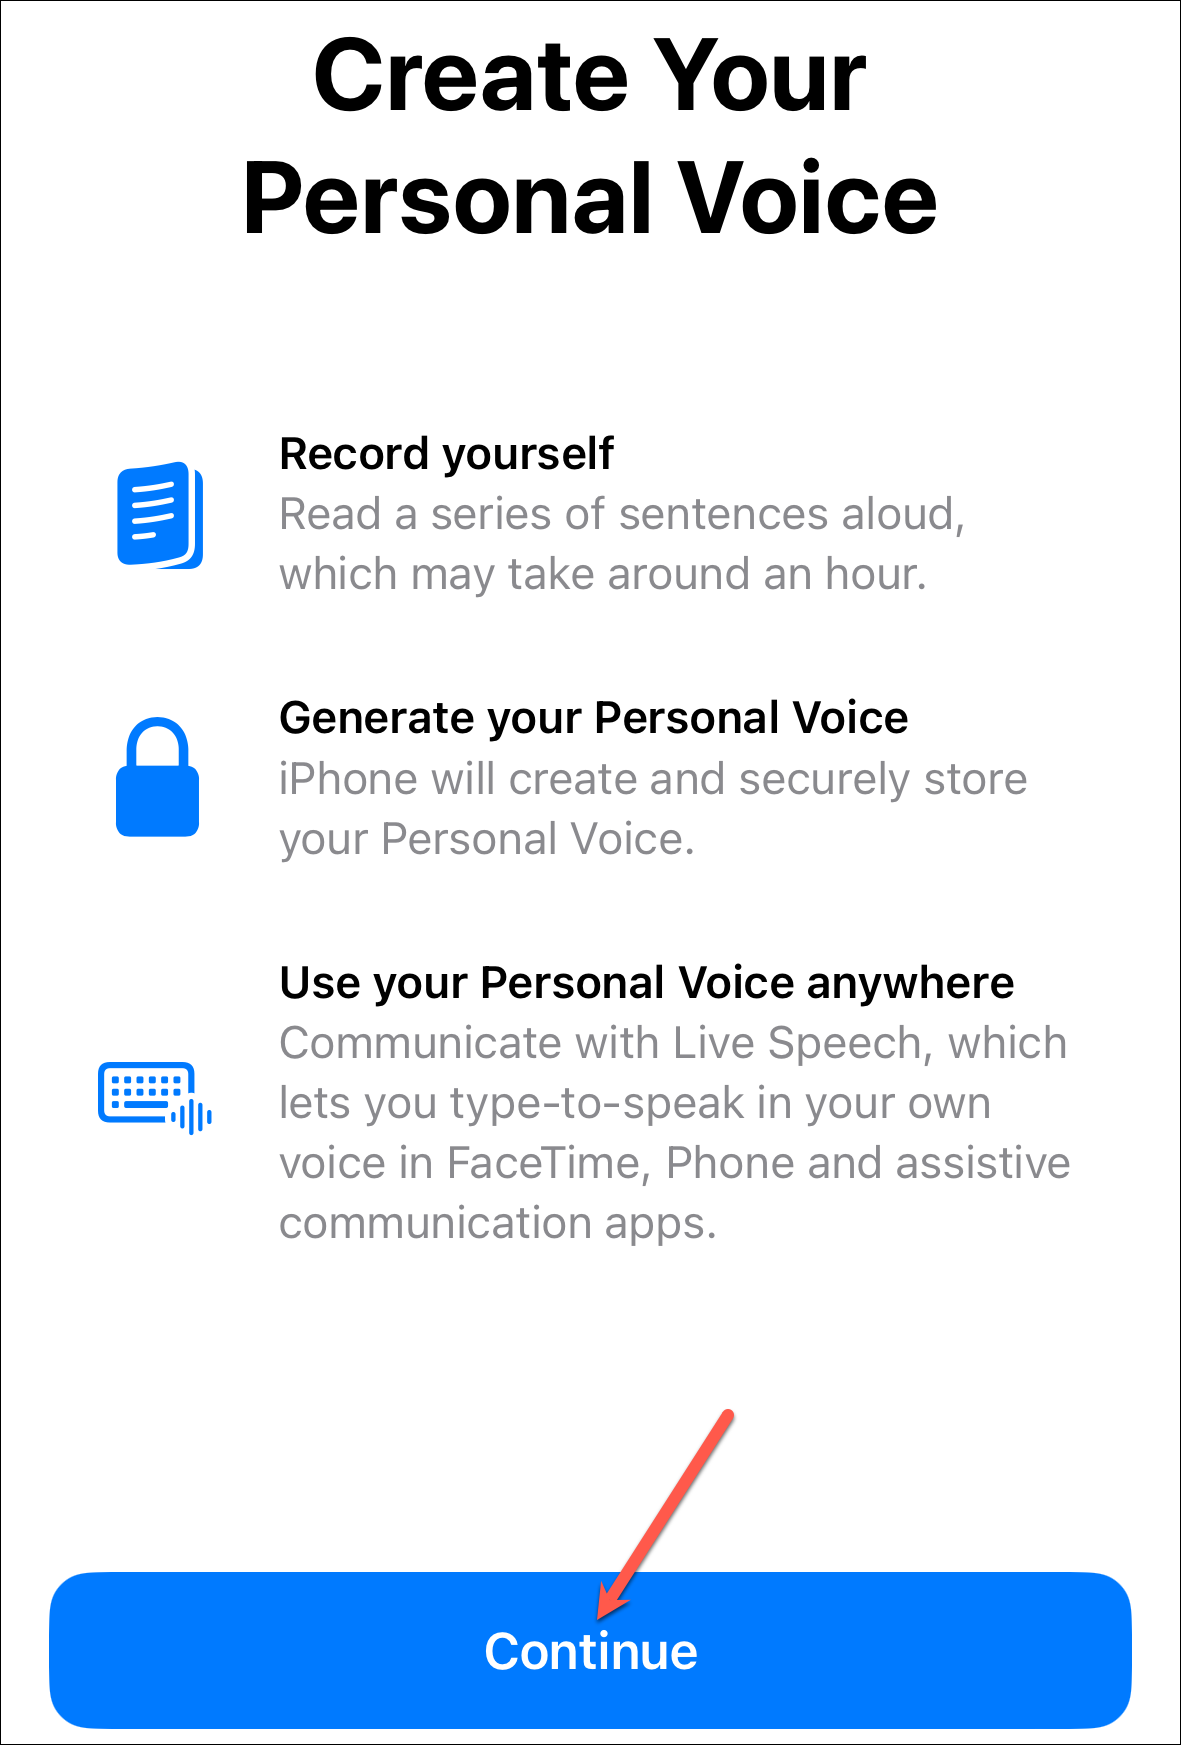
Next, tap 'Continue' to proceed.
Then, when you're ready to record, tap 'Continue' once again.

Enter a name for your voice, and tap 'Continue'.

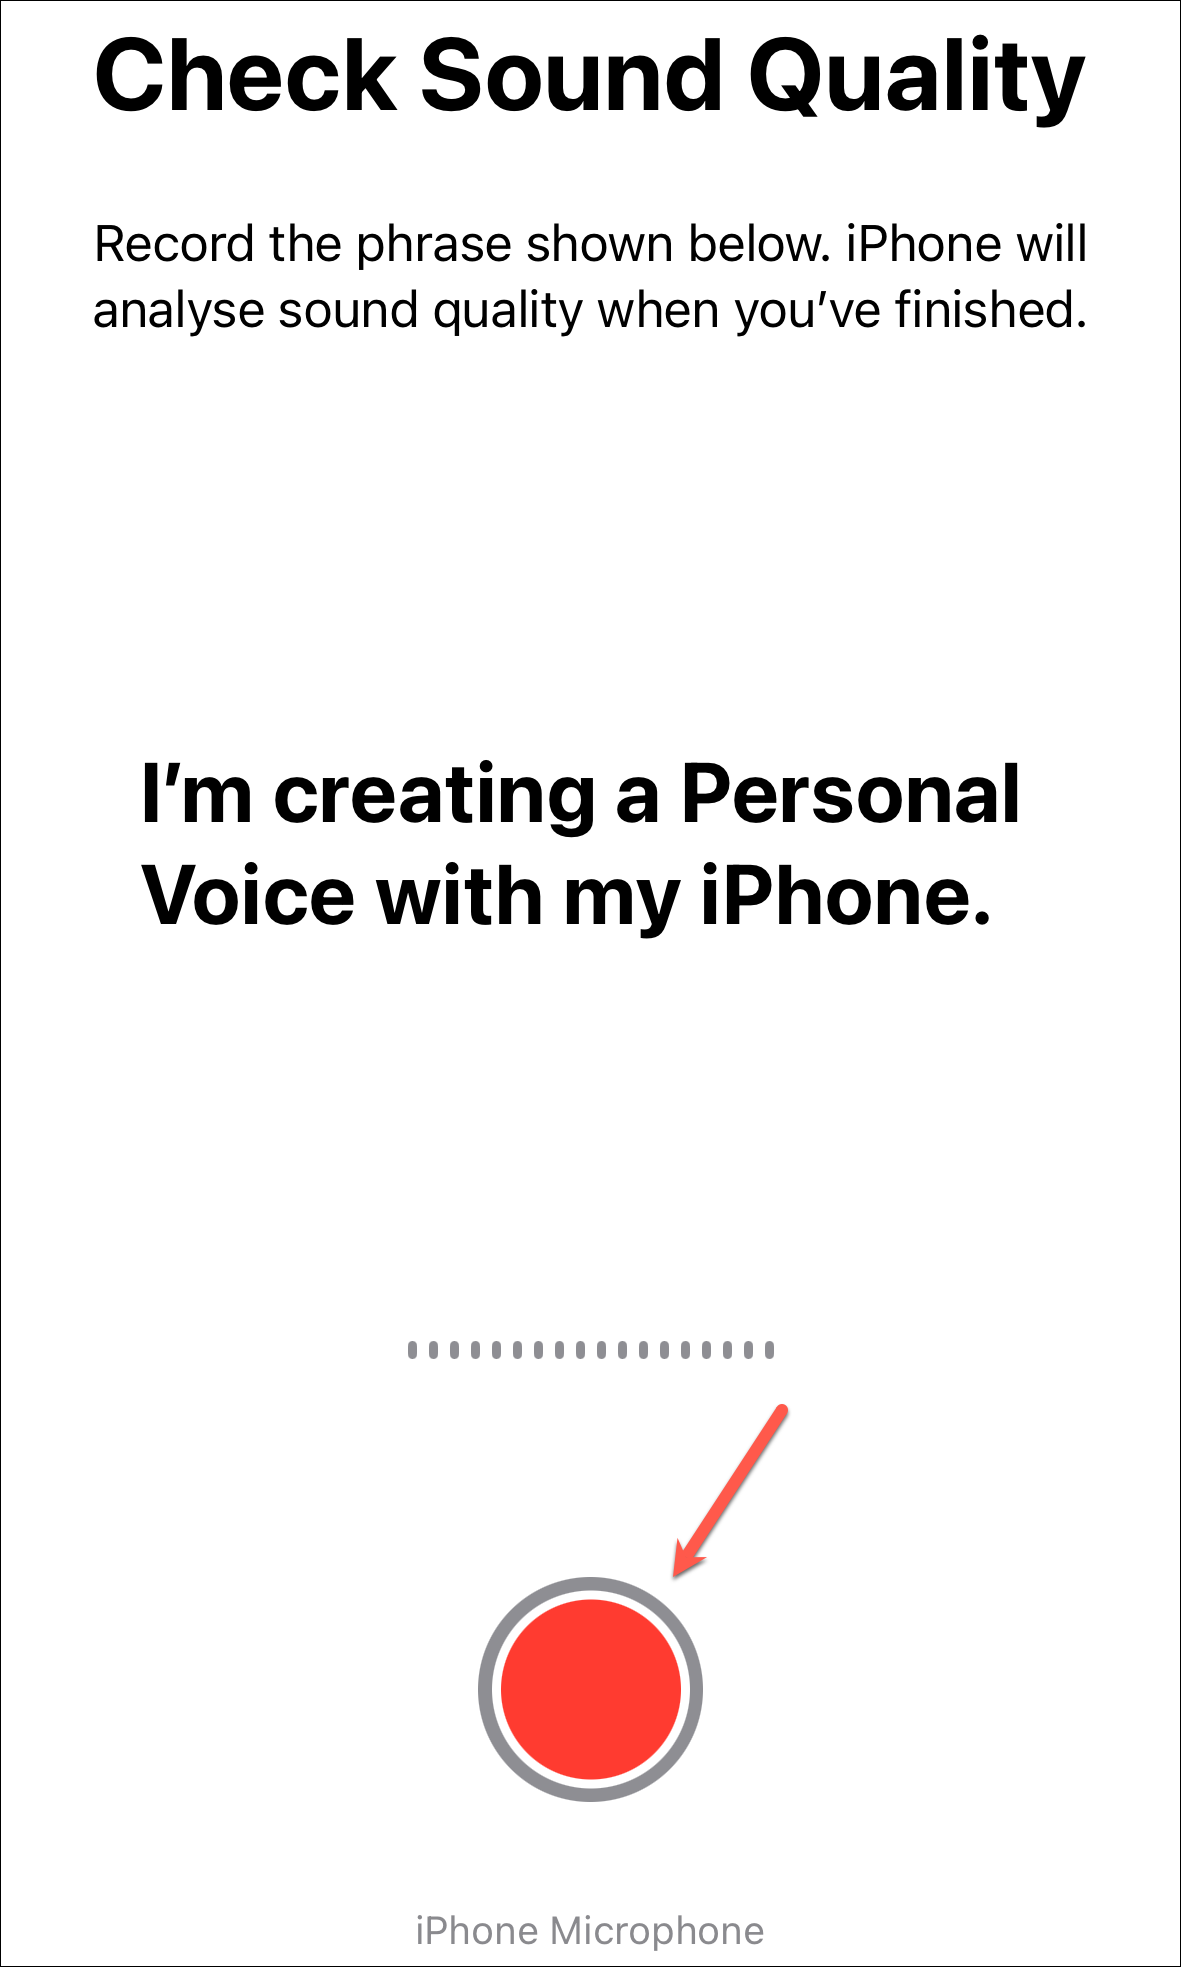
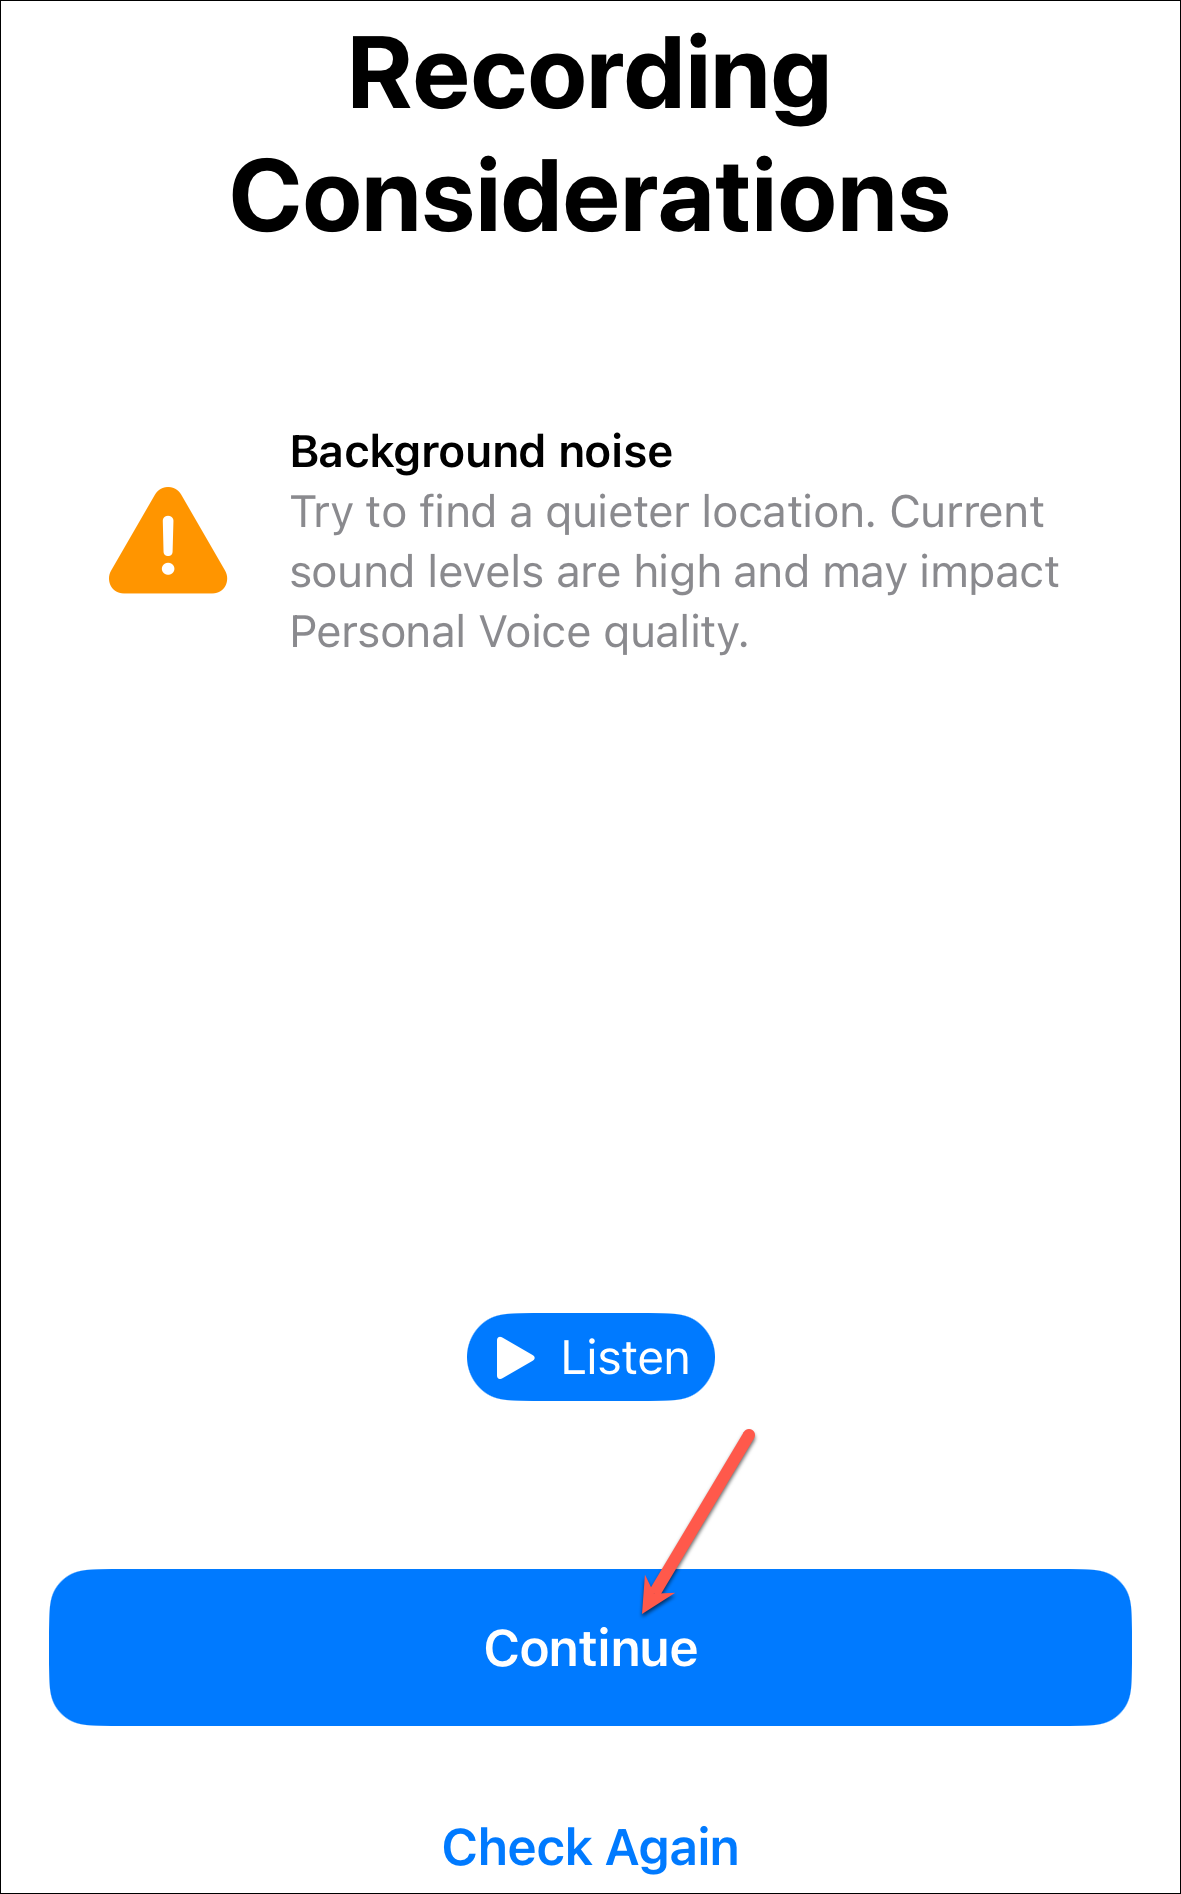
Then, perform the initial sound quality check. Make sure you're in a quiet place with no background noise or echo.
But it is possible that even though you're in a quiet room, you might get a message asking you to move to a quieter room. You can listen to the audio to make sure it's good. Then, tap 'Continue' anyway.
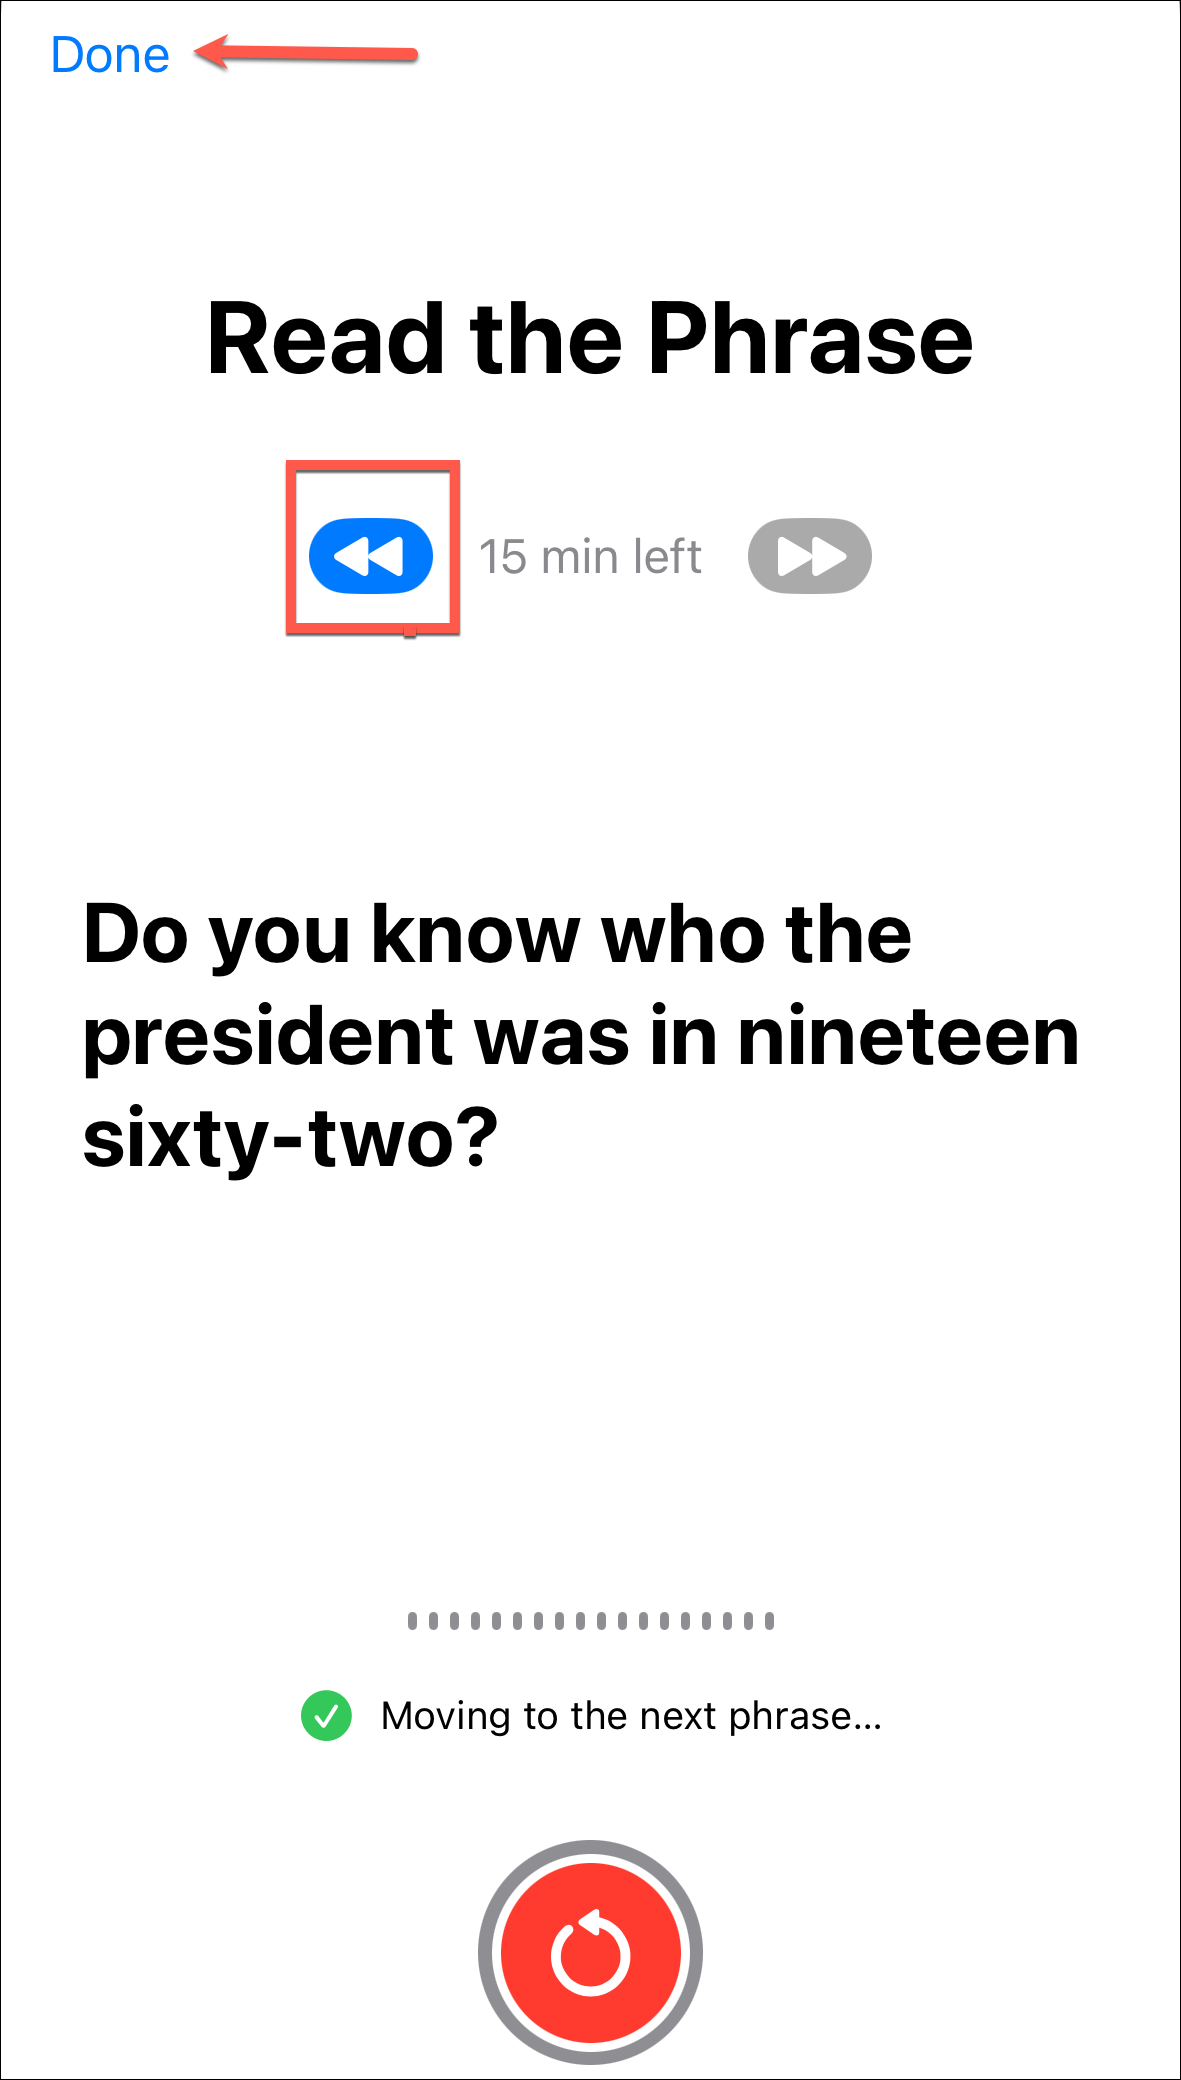
Afterward, complete the recordings by saying the text on the screen aloud. You can also listen to the text.

It will move on to the next phrase automatically. But you can go back to the previous phrase at any time by tapping the blue arrow. At any time, if you want to quit the session, tap 'Done' in the upper-left corner.
To continue recording, tap that personal voice. You'll need to authenticate using Face/ Touch ID or device passcode.
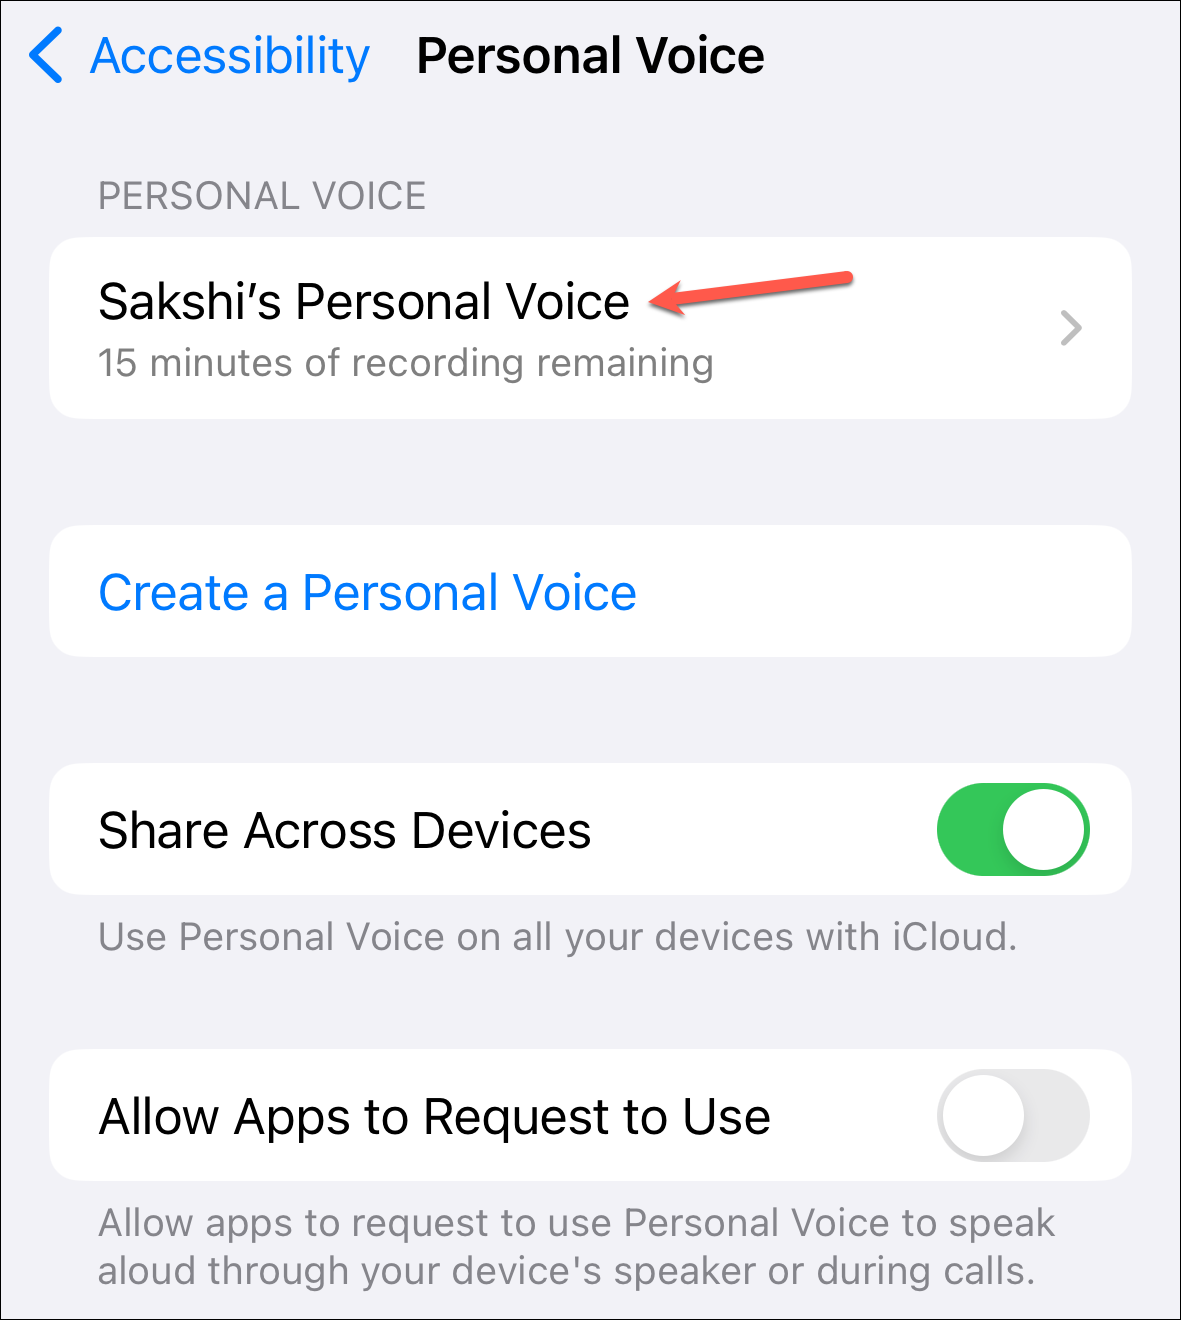
Then, tap 'Continue Recording'.
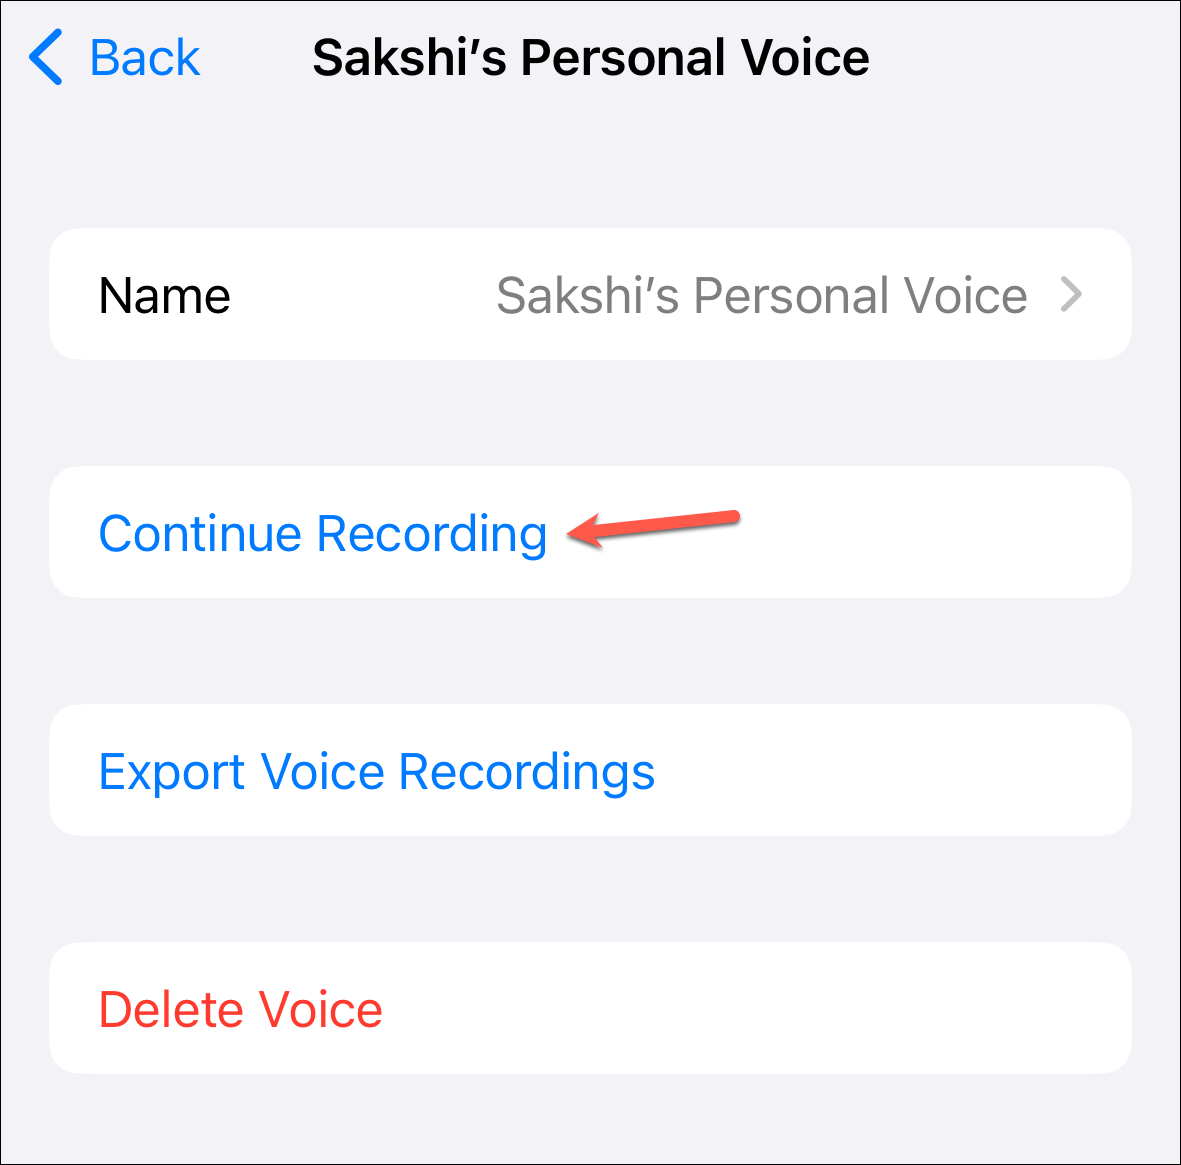
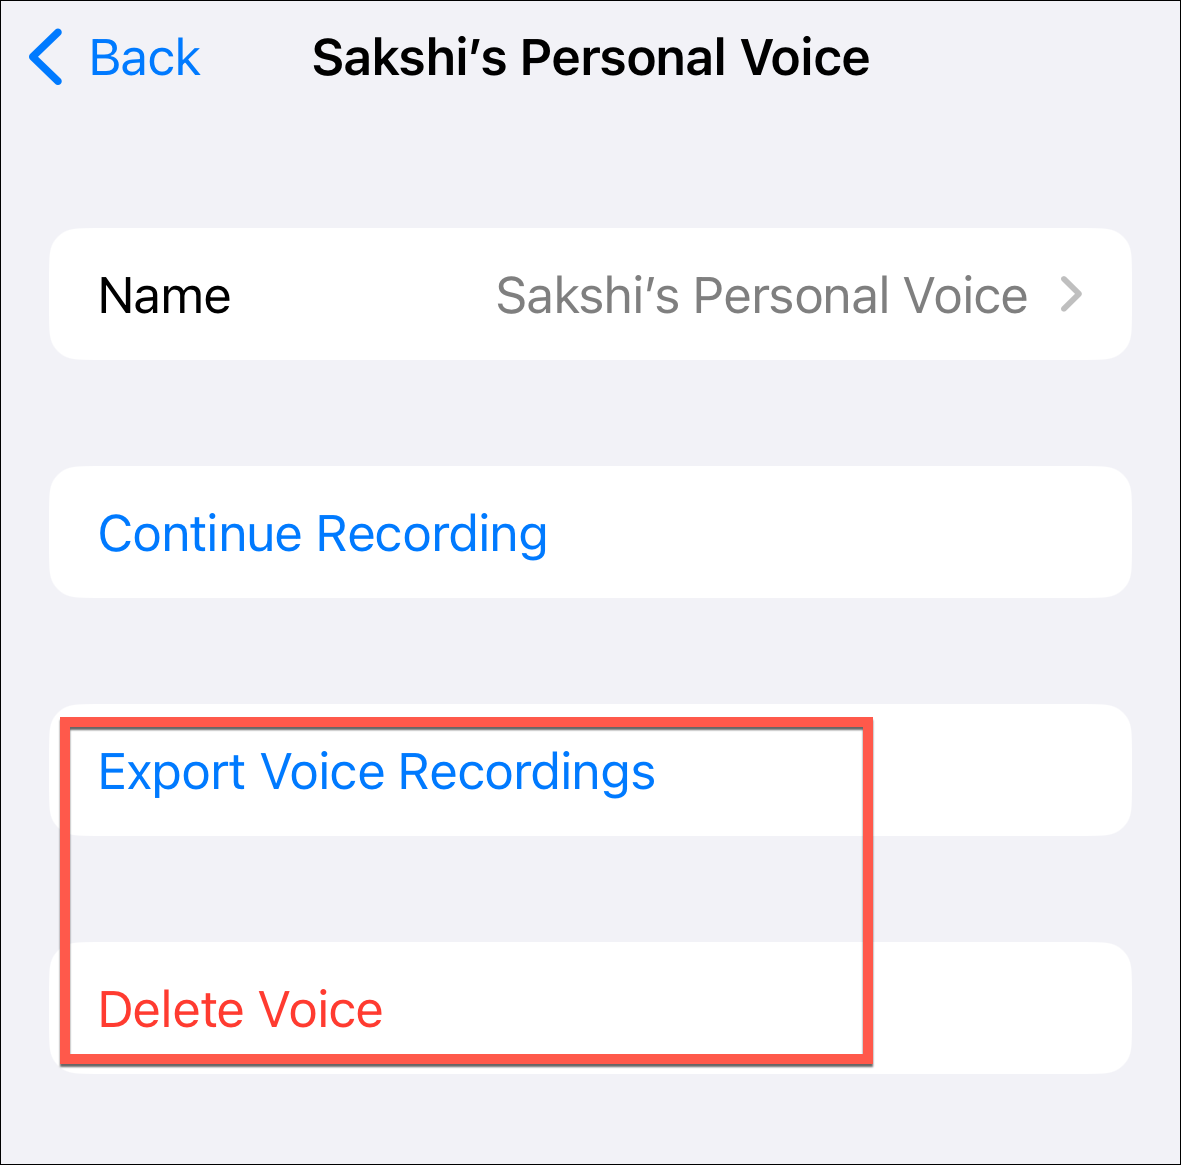
You can also export or delete the recordings at any time.
Once the recordings are complete, your iPhone will process them and generate the Personal Voice when your phone is connected to power, and the screen is off. Once the voice is ready for use, you'll get a notification.
If you want to use Personal Voice with Live Speech, you can enable it from the Accessibility settings.
Then, enable the toggle for 'Live Speech', and it will be set up with the triple-click shortcut for the side button.
Personal Voice is a great initiative for users who are facing the risk of speech loss. But anyone can use it to preserve their voice for the future.