Google Drive is an excellent cloud storage option for most people, offering 15GB of space for free users and higher storage options with paid plans. It is also tightly integrated with other Google services, like Sheets and Slides, making it easier for users to make changes online at any time.
Additionally, it lets you share items, like photos, documents, and more with others easily. In this guide, we'll be looking at how you can share your photos using Google Drive on a desktop or phone effortlessly. So, let's get started!
Share Photos on Desktop
Whether you're sharing photos through a desktop or a mobile device using Google Drive, the process is incredibly simple.
- Open your browser and log in to your Google Drive.
- Create a new folder for the photos you want to share. Alternatively, if you already have a folder for photos, move all the photos to be shared into it.
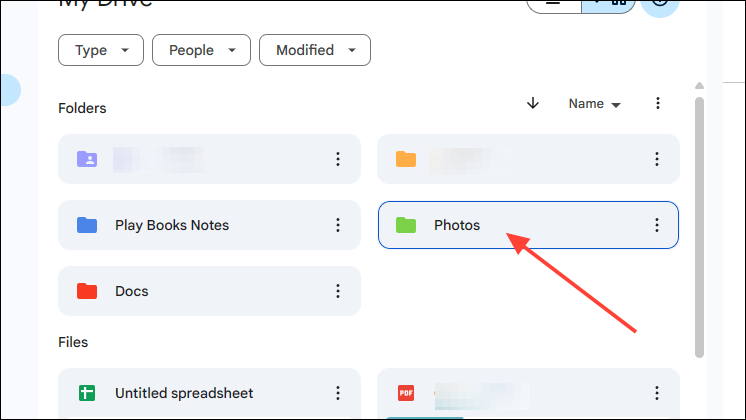
- Click on the three dots that appear on the right of the folder or right-click on the folder to access various folder options.
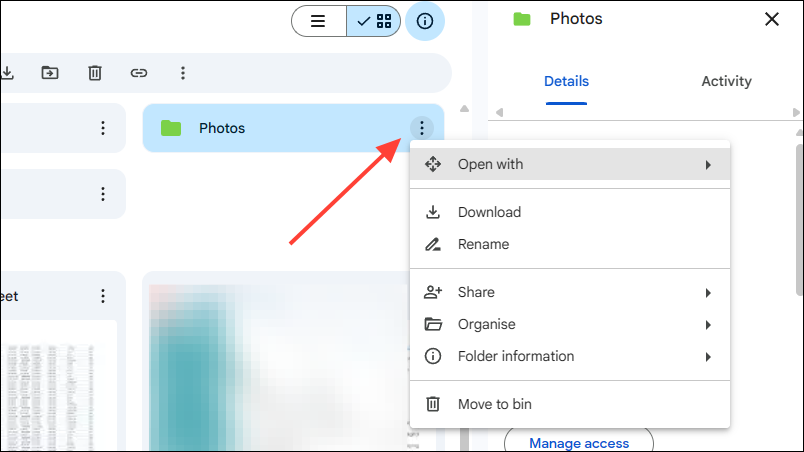
- Go to the 'Share' option, and you will see two options - 'Share' and 'Copy Link'.
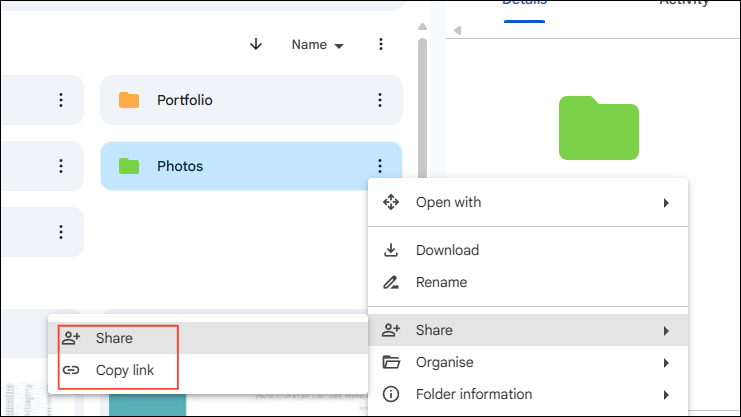
- Click on the 'Share' option again, and a box will appear where you can enter the name or email address of the person(s) you want to share the photos with.

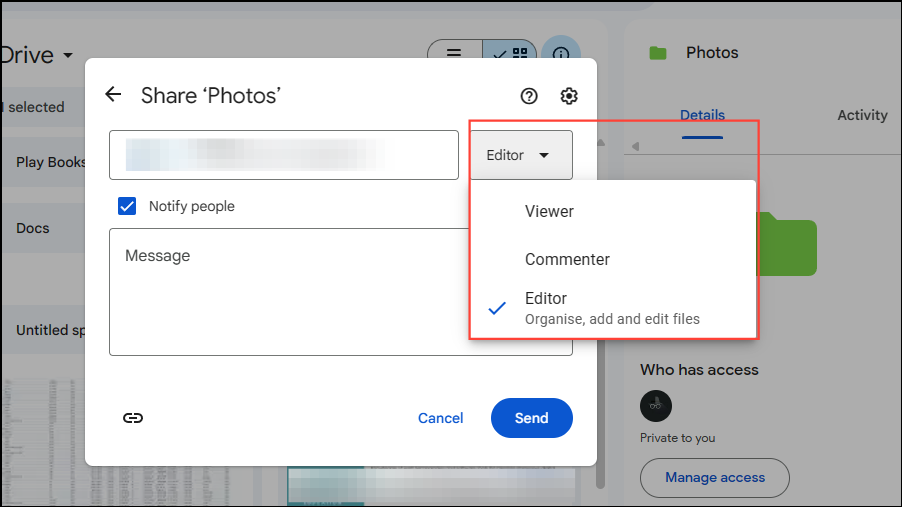
- Here, you can also choose the level of access you wish to provide to the people with whom you are sharing the photos. The 'Editor' option grants complete access, the 'Commenter' option allows limited access, and the 'Viewer' option only allows others to view the photos.
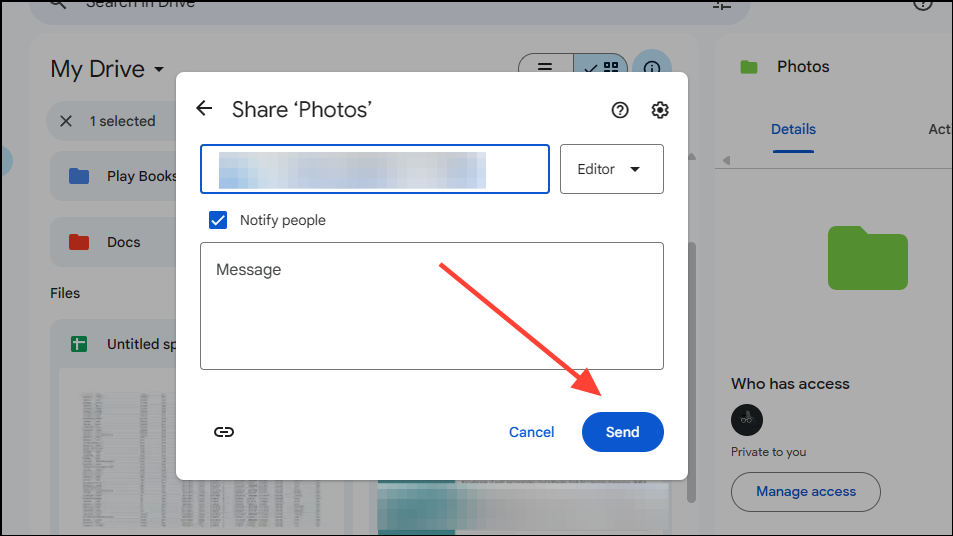
- After you have entered the name or email address of the people you want to share the photos with, click on the 'Send' button to complete the sharing process.
Share Photos on Mobile
Most Android devices come with the Google Drive app pre-installed, which makes things easier when you want to share photos using the service, and you can just as easily install it on an iOS device. If you do not have the app installed, just download it from the Play Store/ App Store and sign in using your Google account.
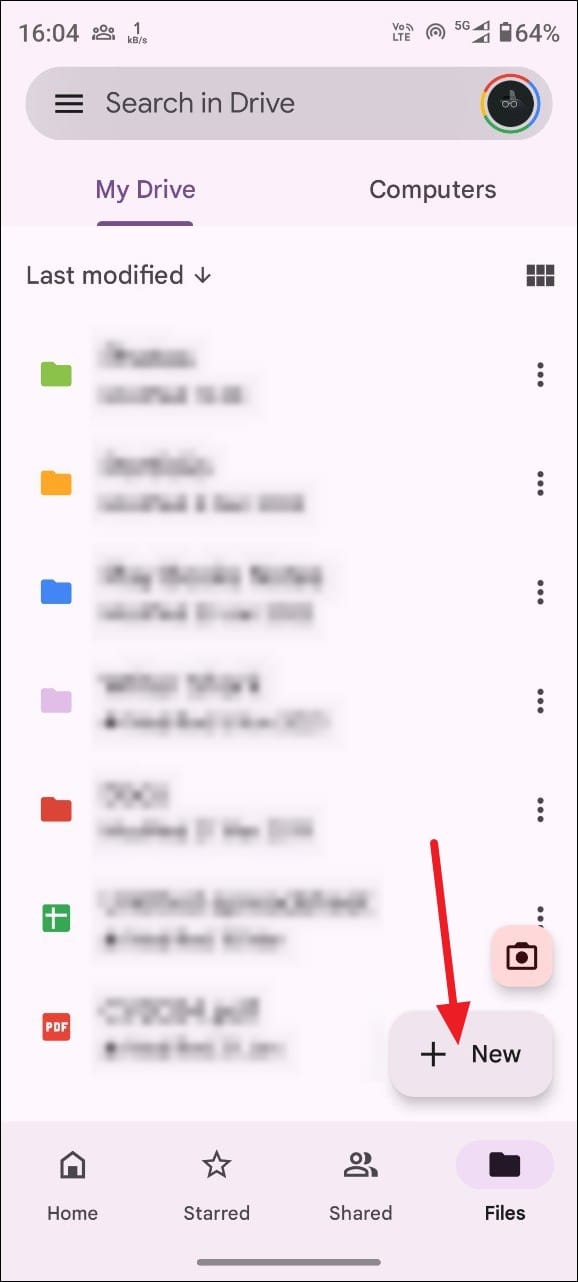
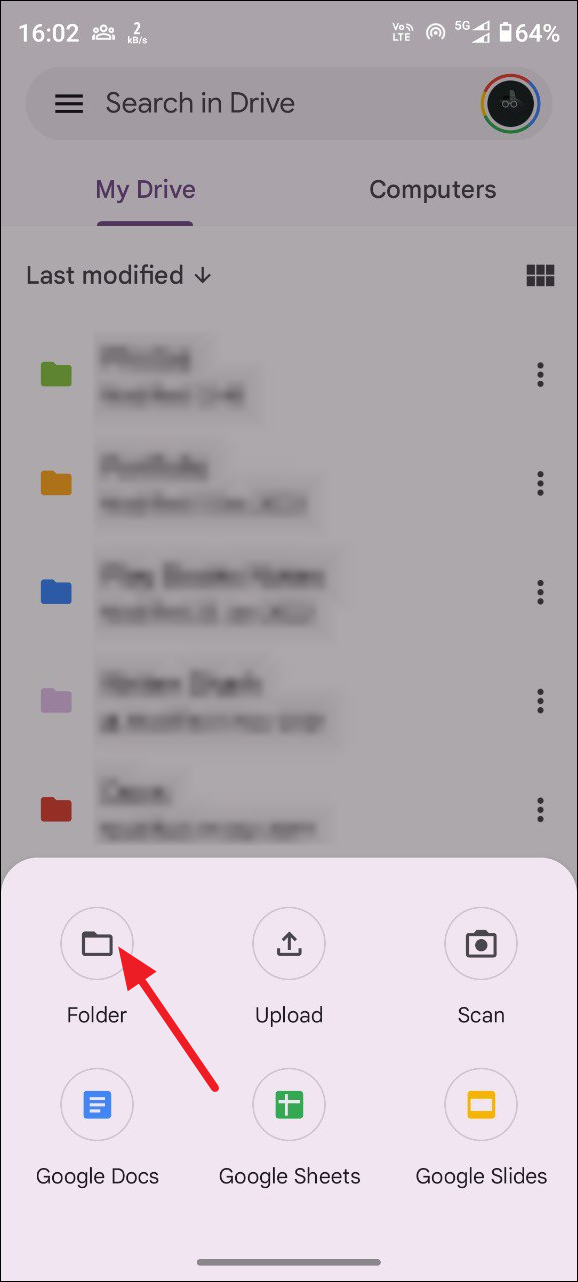
- First, open your Google Drive and tap on the 'New'/ '+' button. You will see a few options, such as one for creating a folder, uploading files, and scanning documents.
- Tap on the 'Folder' button to create a new folder where you can upload the photos to be shared.
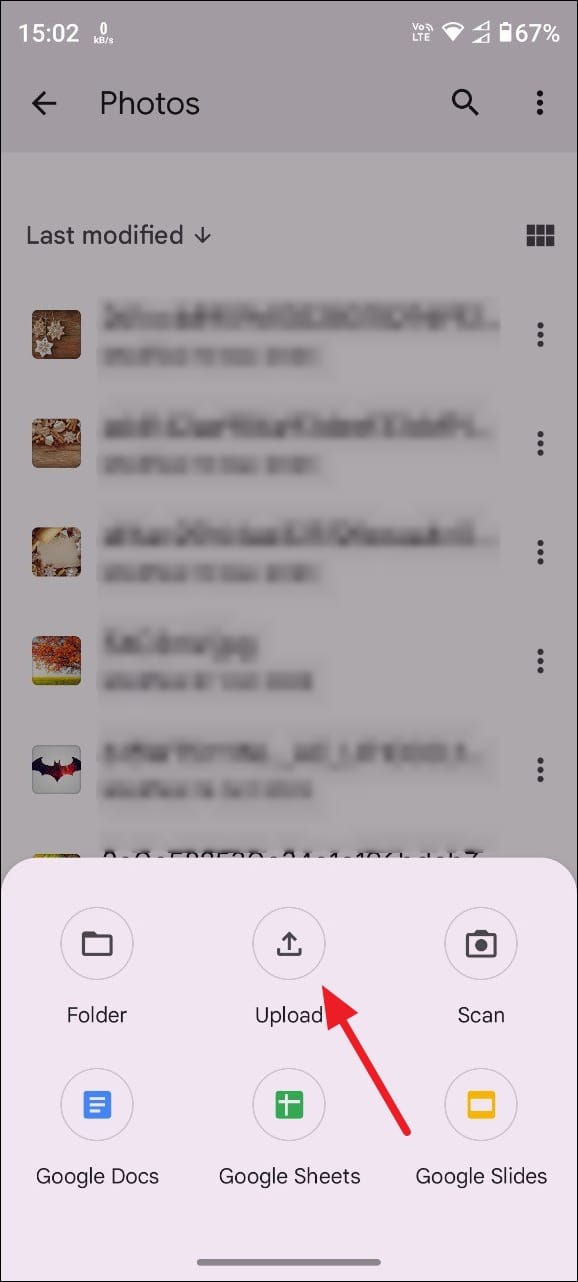
- Next, open the folder you created and again tap on the 'New' button to bring up the options.
- However, instead of the 'Folder' button, tap on the 'Upload' button. This will let you select the photos you want to upload to the folder.
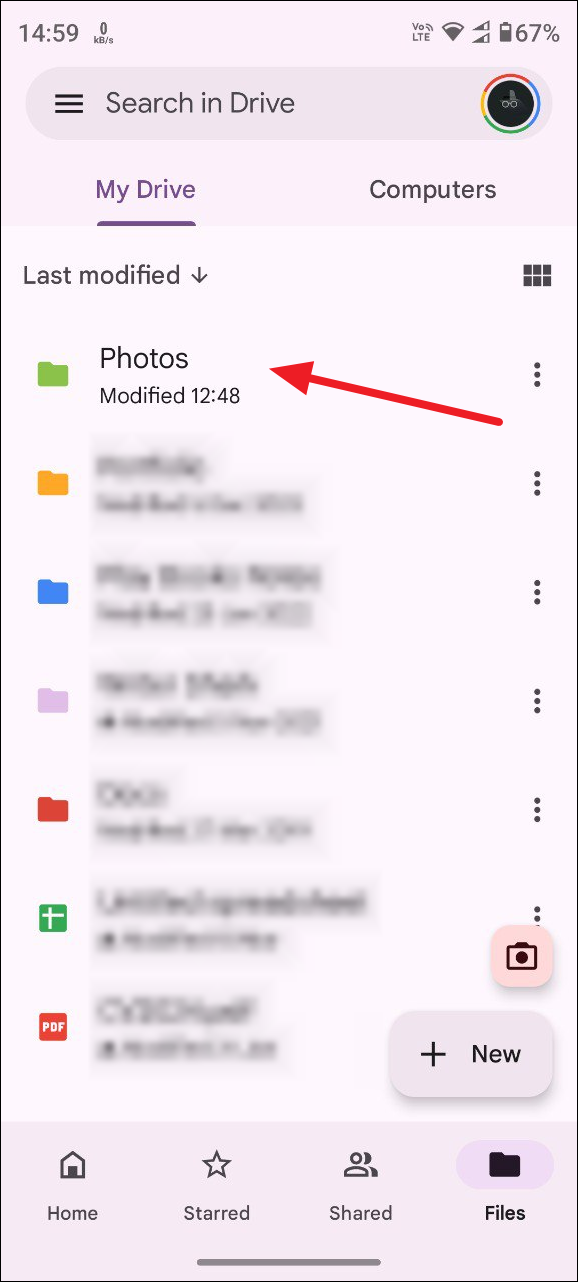
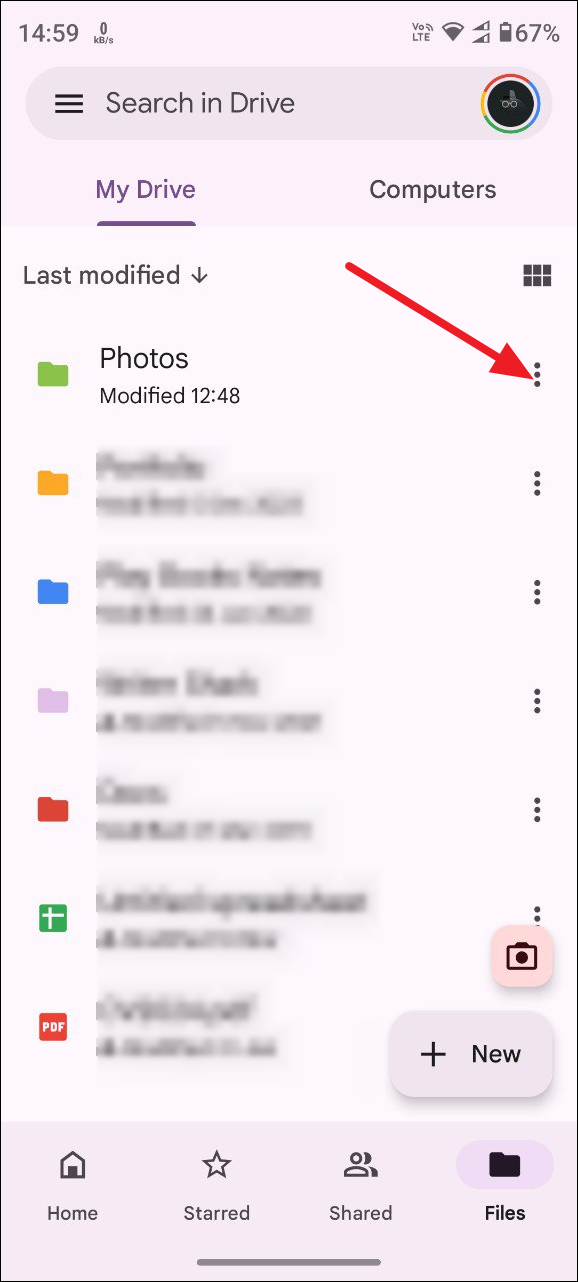
- Once you've uploaded the photos you want to share, tap the three dots next to the folder.
- This will provide you with various options, including the option to share the folder with others. Tap on the 'Share' option.
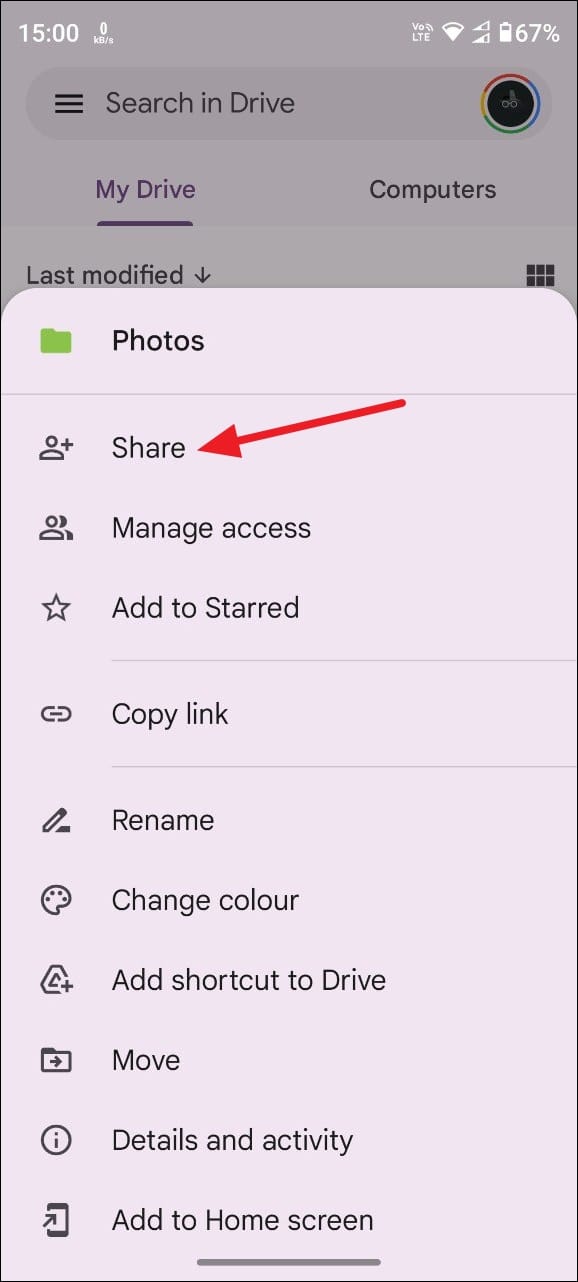
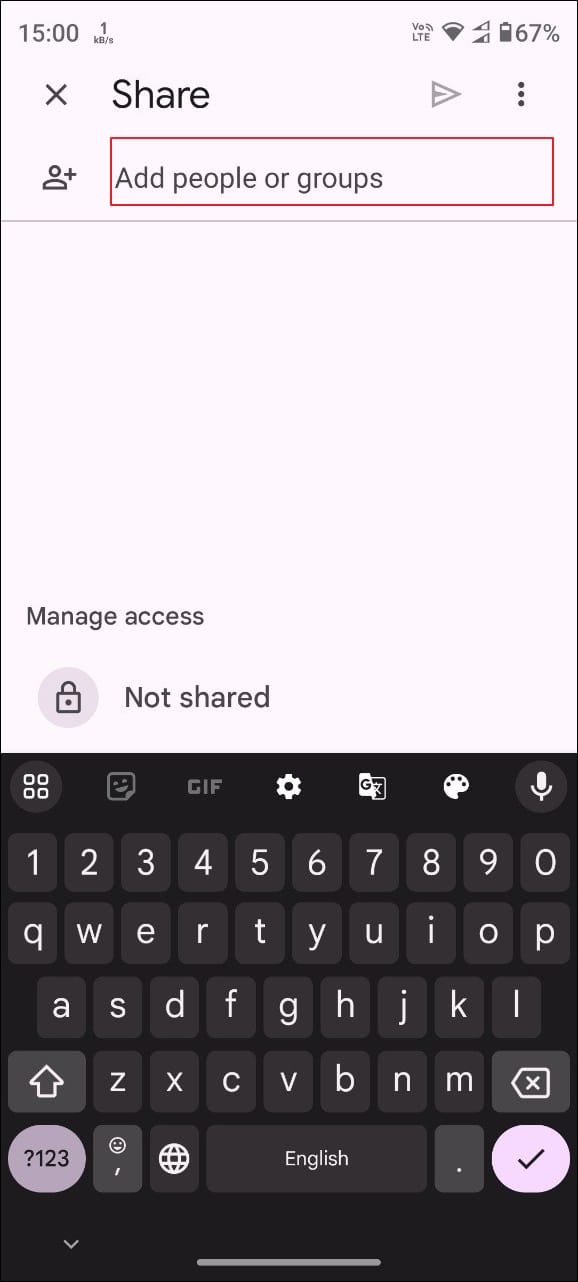
- Tapping the 'Share' option will open up a new page where you can enter the email addresses or names of people you want to share the photos with.
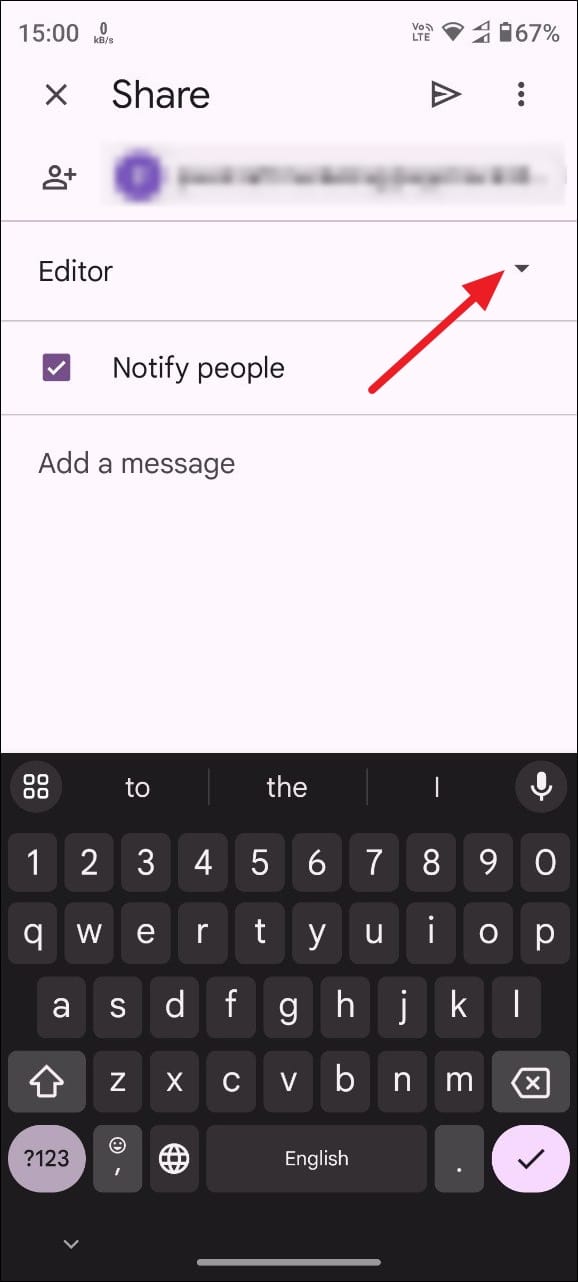
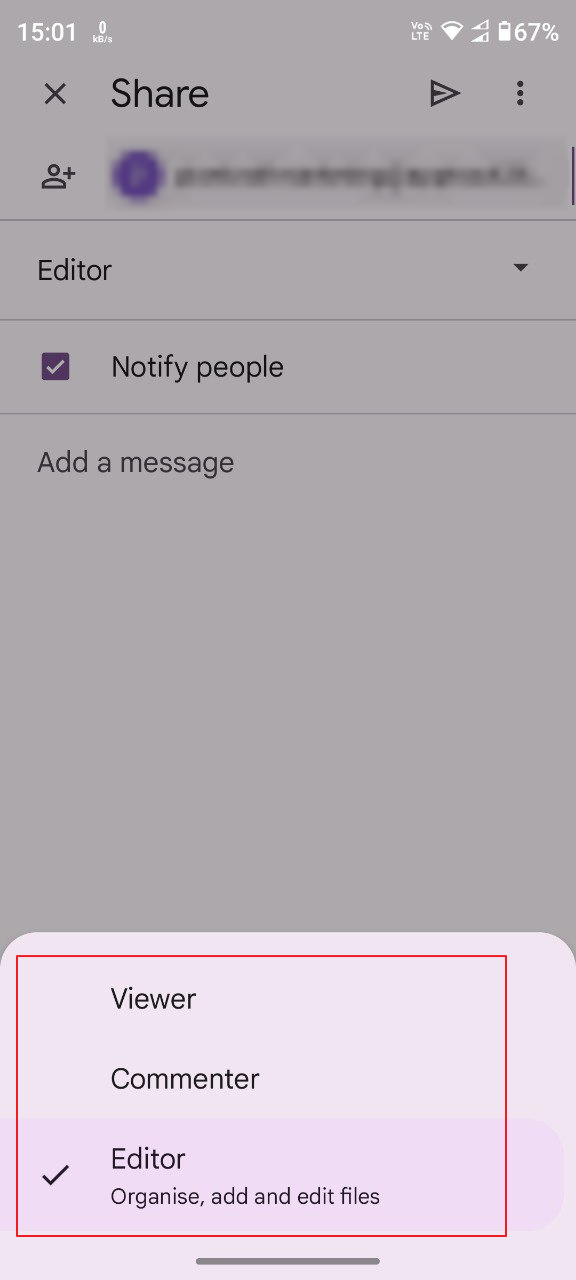
- After entering the details of the people you want to share the photos with, tap on the drop-down menu below to change the type of access.
- As with the desktop version, you can choose between Editor, Commenter, and Viewer.
- When you are done, tap on the small arrow next to the name of the person you are sharing your photos with.
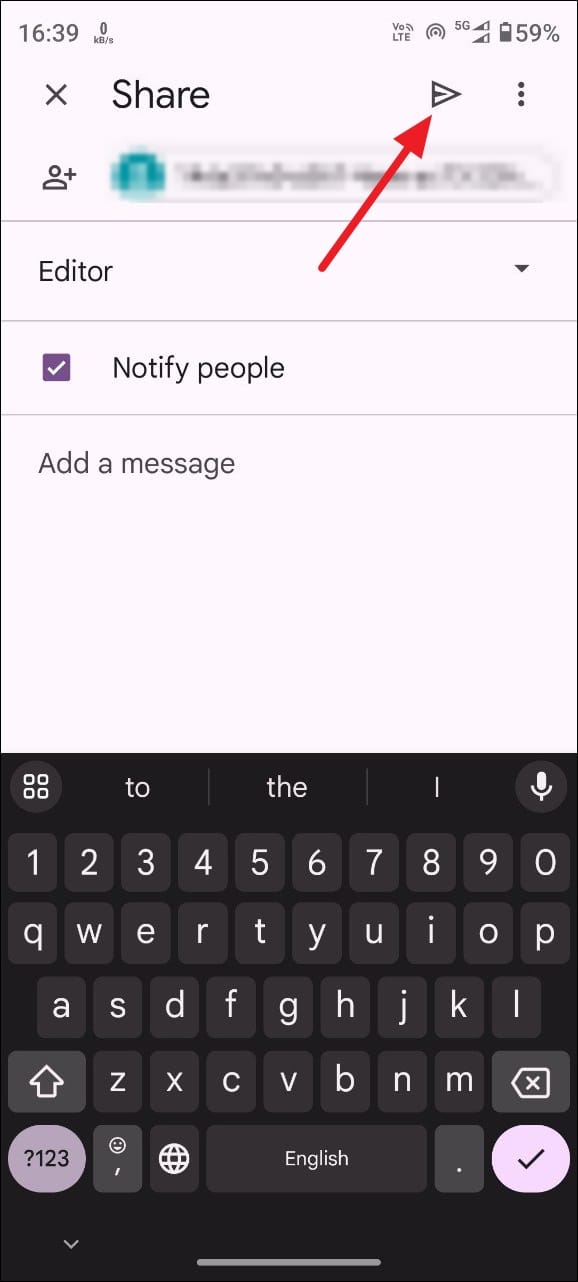
That's it! You've successfully shared your photos in Google Drive with others using the mobile app.
Google Drive is a powerful tool if you want to share your photos with others conveniently and securely. You can use it on both desktop devices and mobile devices without worrying about privacy or security. What is even more impressive is that you can control the level of access you wish to provide people when sharing your photos with them. So, you can allow or prevent others from making changes to your photos while still being able to view them.

