Spotlight is an essential tool in macOS, providing quick and easy access to files, apps, and information. However, Spotlight's indexing process can consume significant disk space over time, especially if you have a large number of files or frequently modify data. Fortunately, there are several effective methods to manage Spotlight's disk usage and reclaim storage space on your Mac.
Adjust Spotlight's Indexing Preferences
The quickest and most user-friendly way to reduce Spotlight's disk usage is by adjusting its indexing preferences in macOS System Settings.
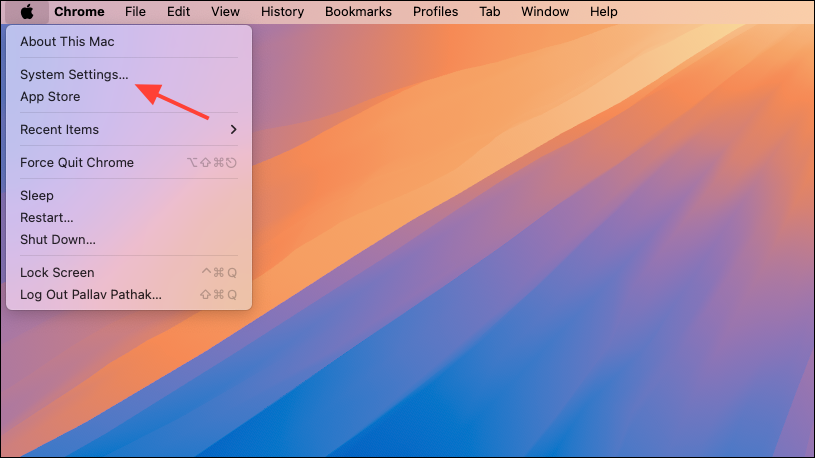
Step 1: Click on the Apple menu in the top-left corner of your screen and select System Settings (or System Preferences in older macOS versions).
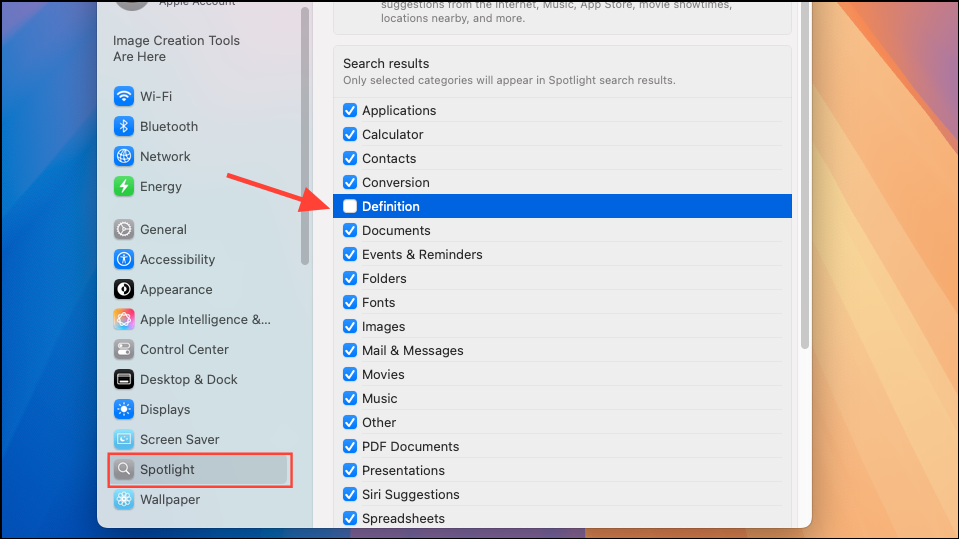
Step 2: In the sidebar, select Spotlight. You will see a list of file categories that Spotlight indexes. Deselect any categories you do not need, such as "Mail & Messages," "Music," or "Images." Reducing the number of indexed categories directly reduces the size of Spotlight's database.
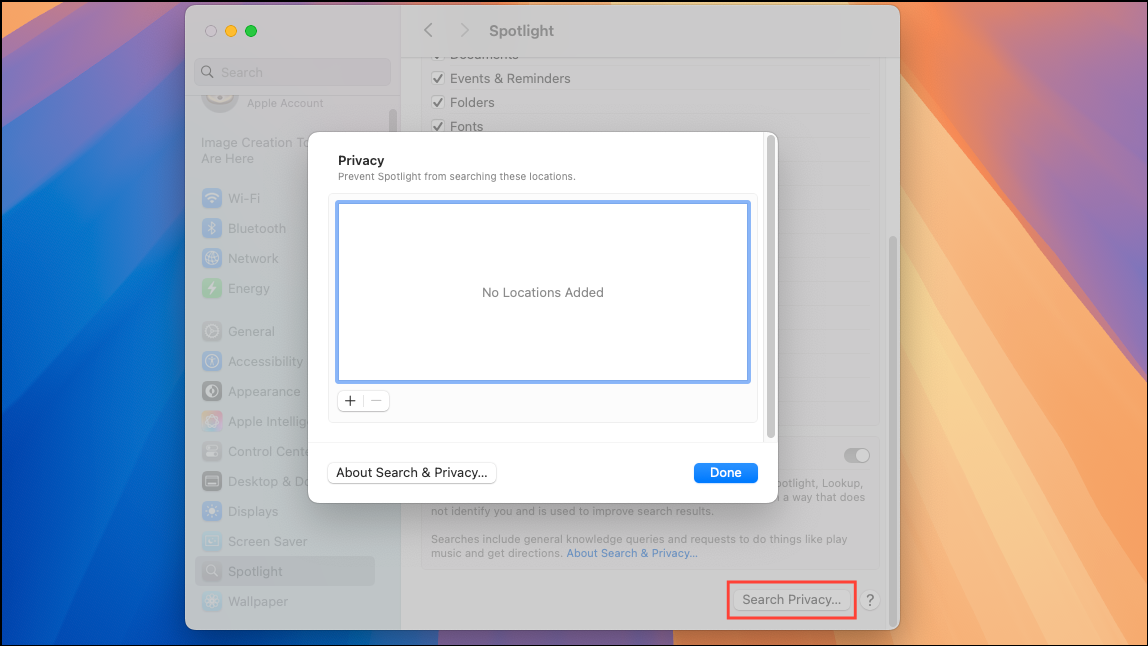
Step 3: To exclude entire folders or drives from Spotlight indexing, click on the Search Privacy button at the bottom of the Spotlight pane. Drag and drop folders or volumes from Finder into the exclusion list. macOS will immediately stop indexing those areas, freeing up storage space.
Delete Spotlight Index Files Manually
If Spotlight's index files have grown excessively large, you can manually remove them to reclaim disk space. Note that this will temporarily erase Spotlight's search data until the index is rebuilt.
Step 1: Open Finder and press Command + Shift + G to open the "Go to Folder" dialog.
Step 2: Enter the following path and press Return:
~/Library/Metadata/CoreSpotlight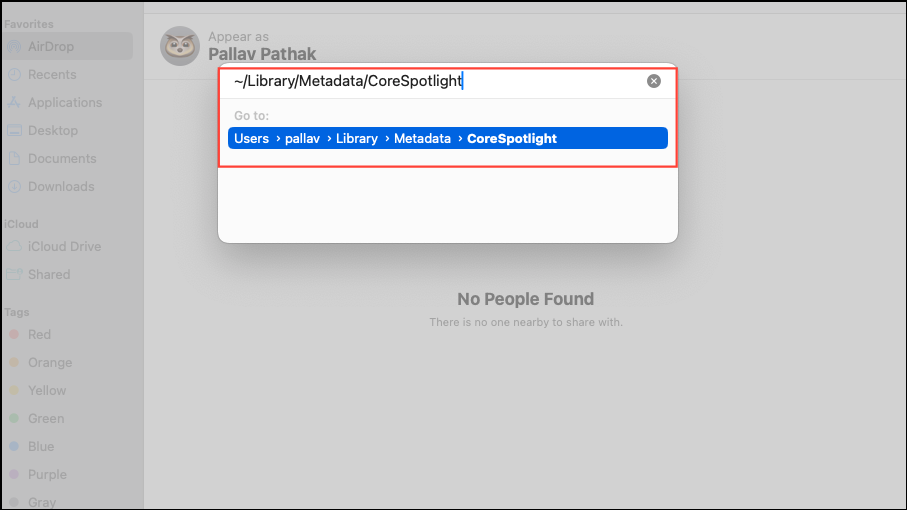
Step 3: In the CoreSpotlight folder, locate and delete the subfolders named "Priority" and "NSFileProtectionCompleteUntilFirstUserAuthentication". These folders contain the largest Spotlight index files.
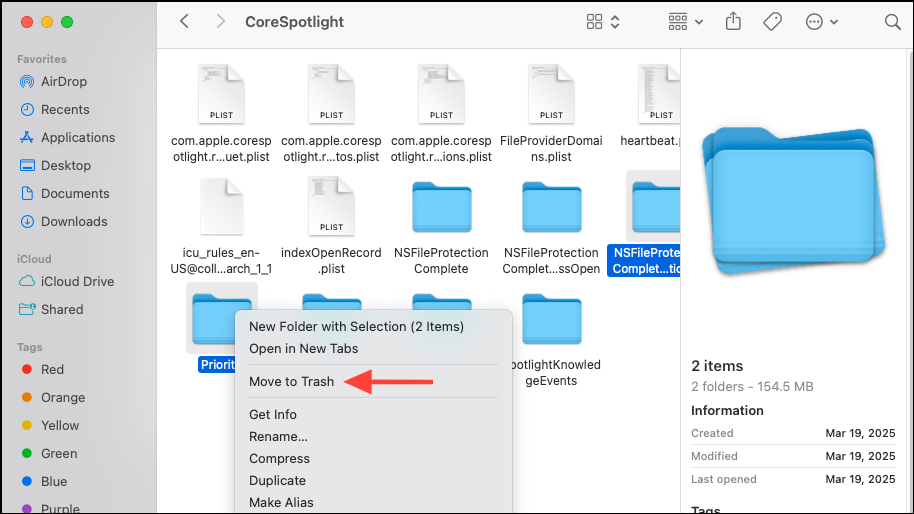
Step 4: Empty the Trash to permanently delete these files. Restart your Mac afterward to allow Spotlight to rebuild its index from scratch.
Disable Spotlight Indexing Using Terminal
If you rarely use Spotlight or prefer alternative search tools, you can completely disable Spotlight indexing using Terminal commands. This will prevent Spotlight from consuming any additional disk space.
Step 1: Open Terminal (found in Applications > Utilities).
Step 2: Type the following command and press Return to disable Spotlight indexing:
sudo mdutil -i off /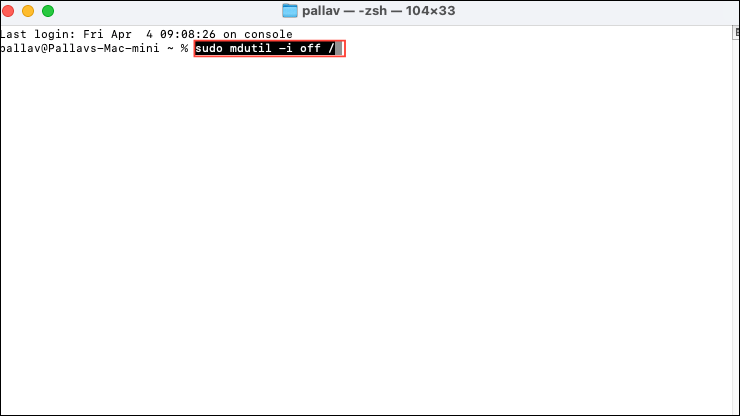
You will be prompted to enter your administrator password. After entering it, Spotlight indexing will be disabled immediately.
If you later decide to re-enable Spotlight indexing, use the following command:
sudo mdutil -i on /Rebuild Spotlight's Index
Occasionally, Spotlight's index can become corrupted or inefficient, leading to unnecessary disk usage. Rebuilding the index can fix these issues and optimize Spotlight's storage consumption.
Step 1: Open System Settings and navigate to Spotlight > Search Privacy.
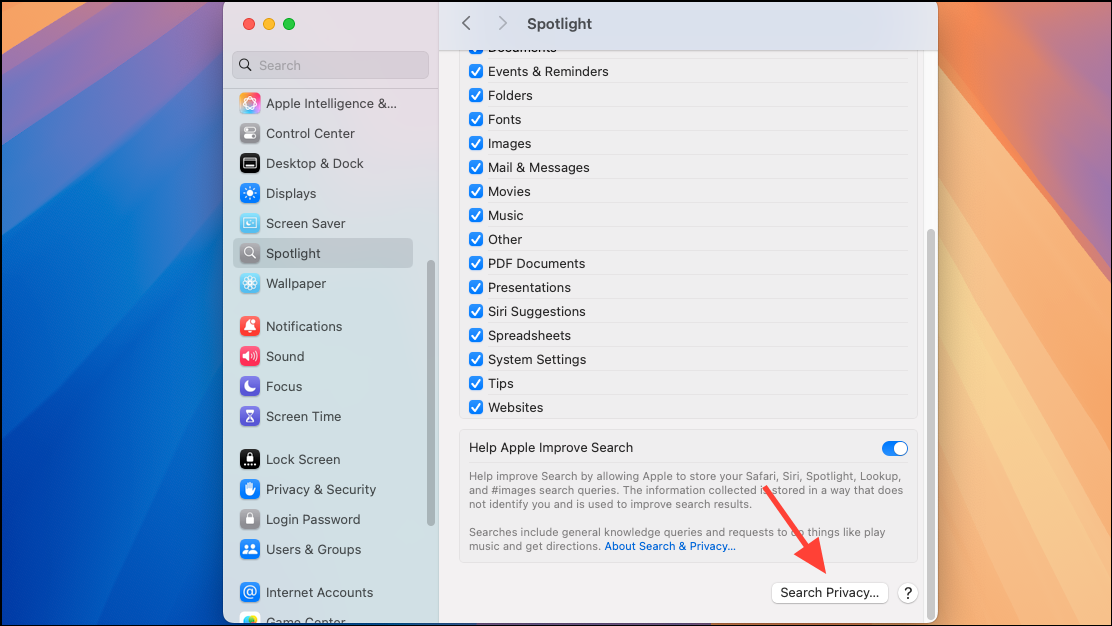
Step 2: Drag your startup disk (usually named "Macintosh HD") into the exclusion list. This action temporarily stops Spotlight indexing for the entire disk.m
Step 3: After a few moments, select your disk in the exclusion list and click the minus button ("-") to remove it from the list. Spotlight will automatically begin rebuilding the index for your disk.
This process may take some time, but it will ensure the Spotlight index is clean, efficient, and occupying minimal space.
With these straightforward methods, you can effectively manage Spotlight's storage usage, ensuring your Mac remains responsive and your disk space is used efficiently.

