
Switching keyboard languages in Windows 11 allows you to type efficiently in multiple languages or use special characters specific to certain languages. Windows 11 provides several convenient methods to switch between keyboard layouts, each suited to different user preferences and needs. This guide explains how to install additional languages, switch between keyboard layouts, and remove languages you no longer need.
How to Install Additional Keyboard Languages in Windows 11
Before you can switch keyboard languages, you must first install the language pack you wish to use. Follow these detailed steps to add a new keyboard language:
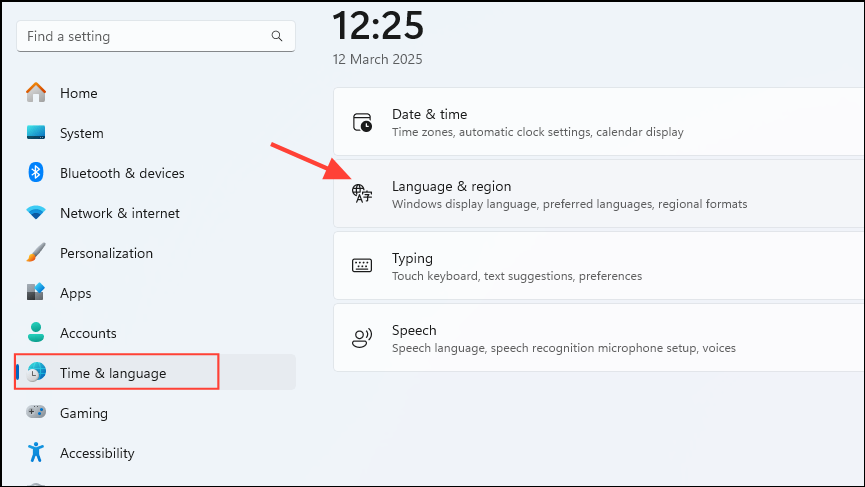
Step 1: Click on the Windows Start icon, then select "Settings" (you can also press Windows + I).
Step 2: In the Settings window, select "Time & language" from the left sidebar, then click on "Language & region" on the right pane.
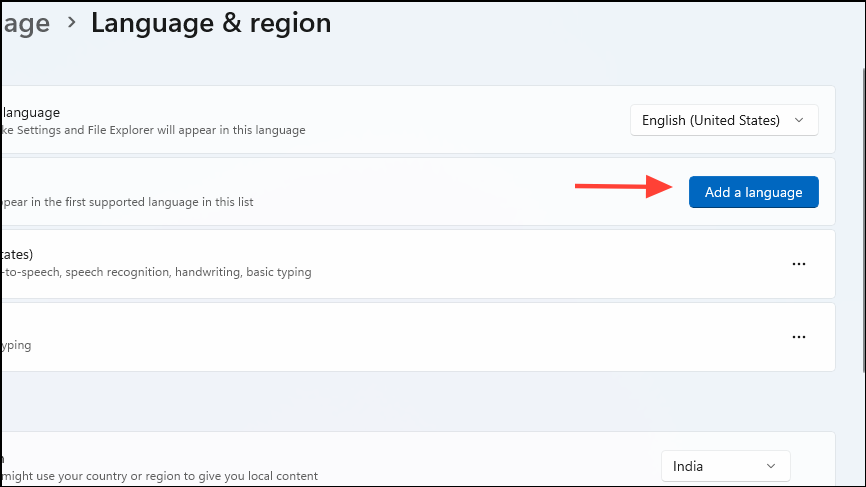
Step 3: Under the "Preferred languages" section, click on the "Add a language" button.
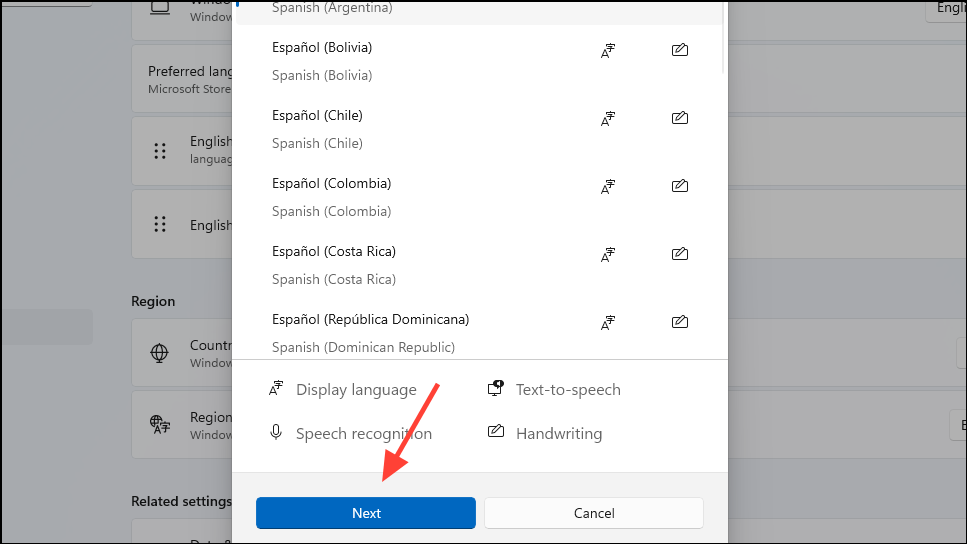
Step 4: In the pop-up window, type the name of the language you want to add or scroll through the list to find it. Select the language and click "Next".
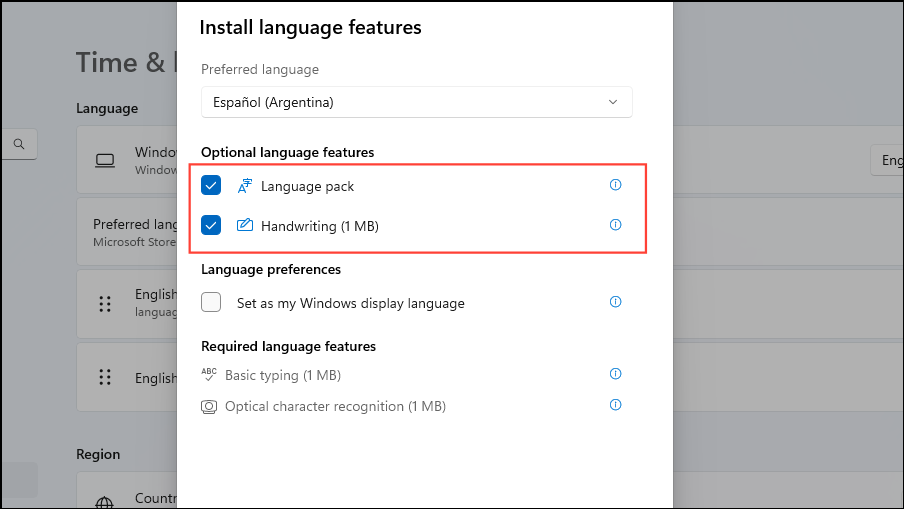
Step 5: Ensure "Language pack" is checked under Optional language features. You can also choose additional features like Text-to-speech or Speech recognition if needed. Click "Install" to begin downloading and installing the language pack.
Once the installation completes, the new language will appear under your Preferred languages list.
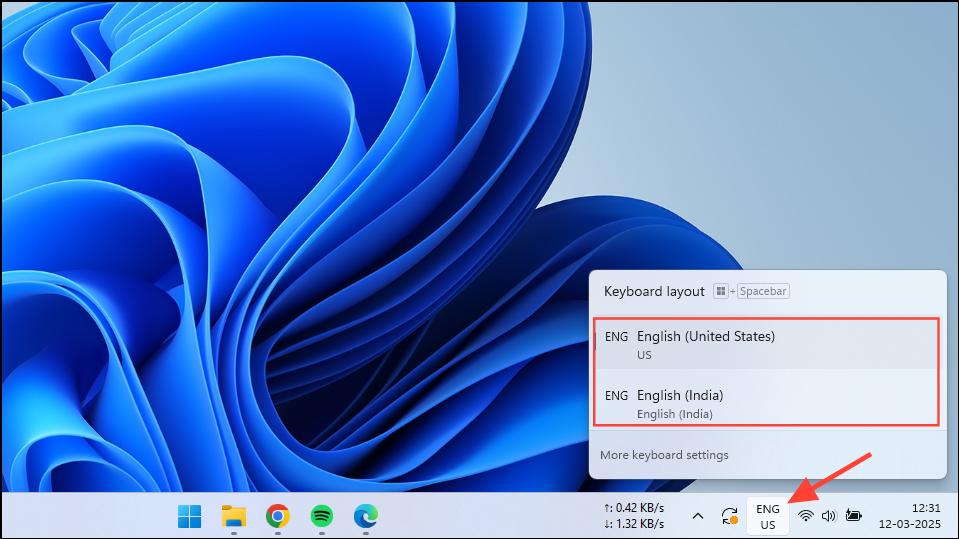
How to Switch Keyboard Language via Taskbar
The quickest way to switch keyboard languages is using the language indicator located on the taskbar:
Step 1: Locate the language abbreviation (such as "ENG") in the bottom-right corner of the taskbar near the clock.
Step 2: Click the language abbreviation to open a list of installed keyboard languages.
Step 3: Select the language you wish to use by clicking on it. The keyboard layout will immediately switch to the selected language.
How to Switch Keyboard Language Using Keyboard Shortcuts
If you frequently switch between languages, keyboard shortcuts offer a faster method:
- Press
Windows + Spacebarto cycle through the installed keyboard languages. Each press of the spacebar while holding down the Windows key moves to the next available layout. - Alternatively, press
Alt + Shiftto toggle between languages quickly.
How to Change Keyboard Layout for a Specific Language
Sometimes, the default keyboard layout for a language may not suit your typing preferences. Follow these steps to install and select an alternative keyboard layout:
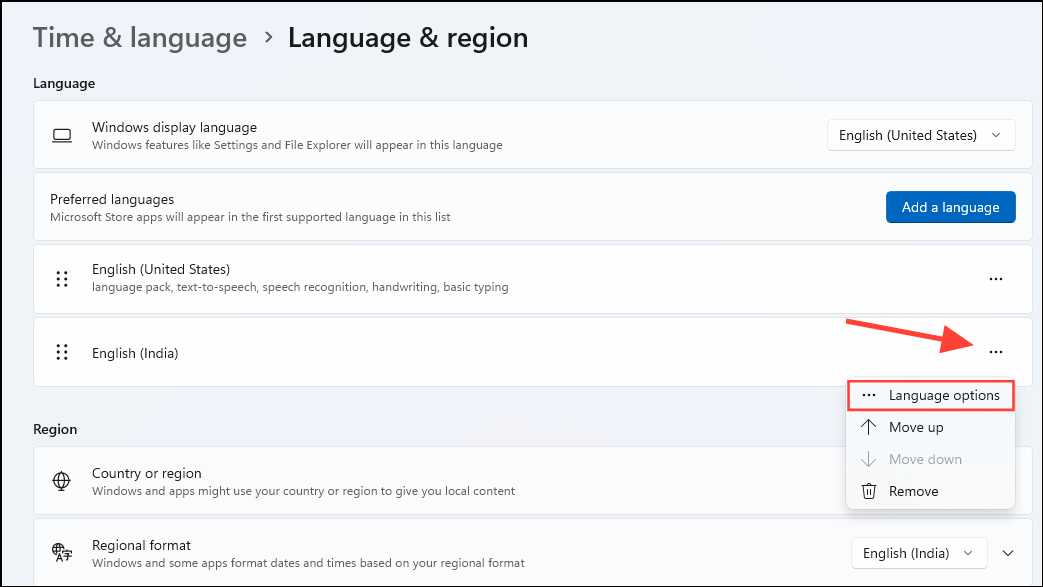
Step 1: Open the Settings app (Windows + I), then navigate to "Time & language" > "Language & region".
Step 2: Under the "Preferred languages" section, click the three-dot icon next to the language you wish to modify and select "Language options".
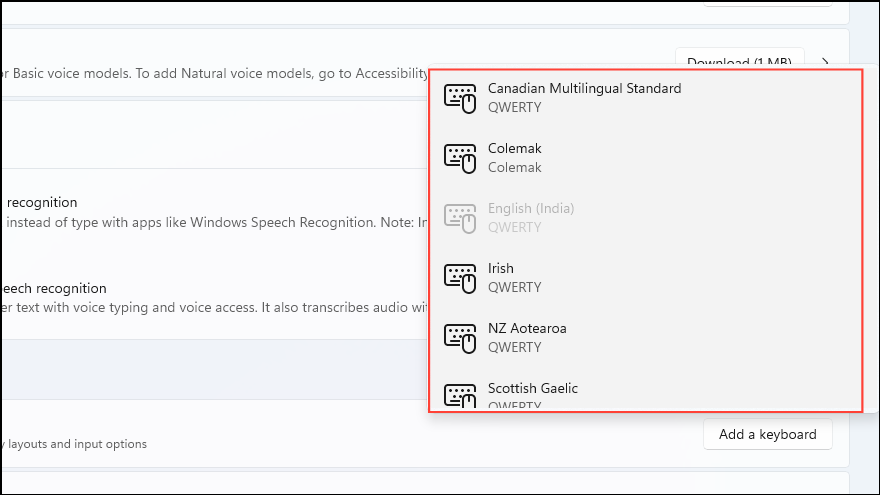
Step 3: Under the "Keyboards" section, click "Add a keyboard". A list of available keyboard layouts for that language will appear.
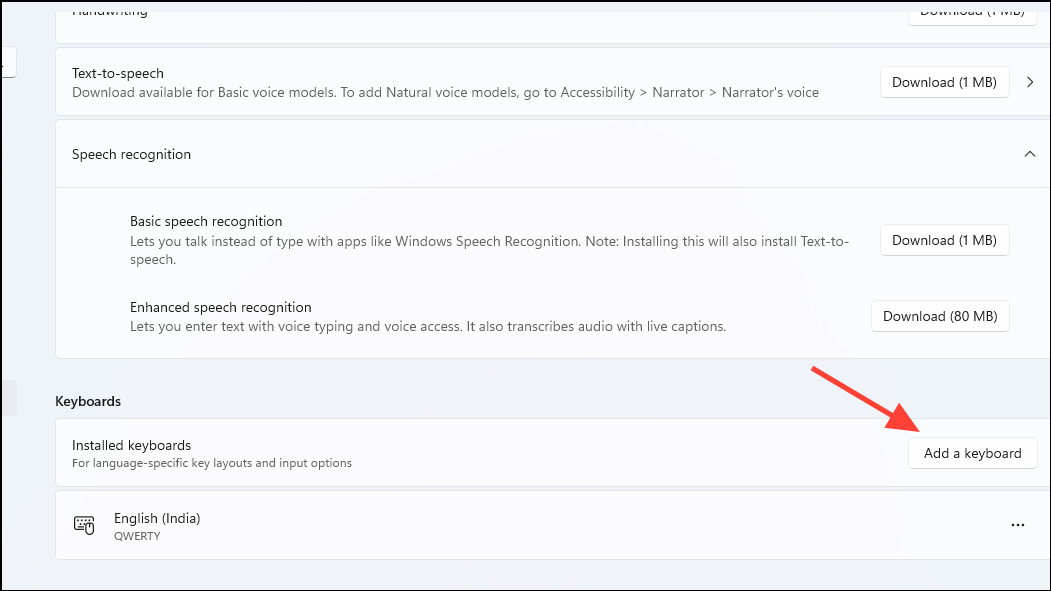
Step 4: Select the preferred keyboard layout from the list. The new layout will be added to your available options.
You can now switch between keyboard layouts using the taskbar language indicator or keyboard shortcuts.
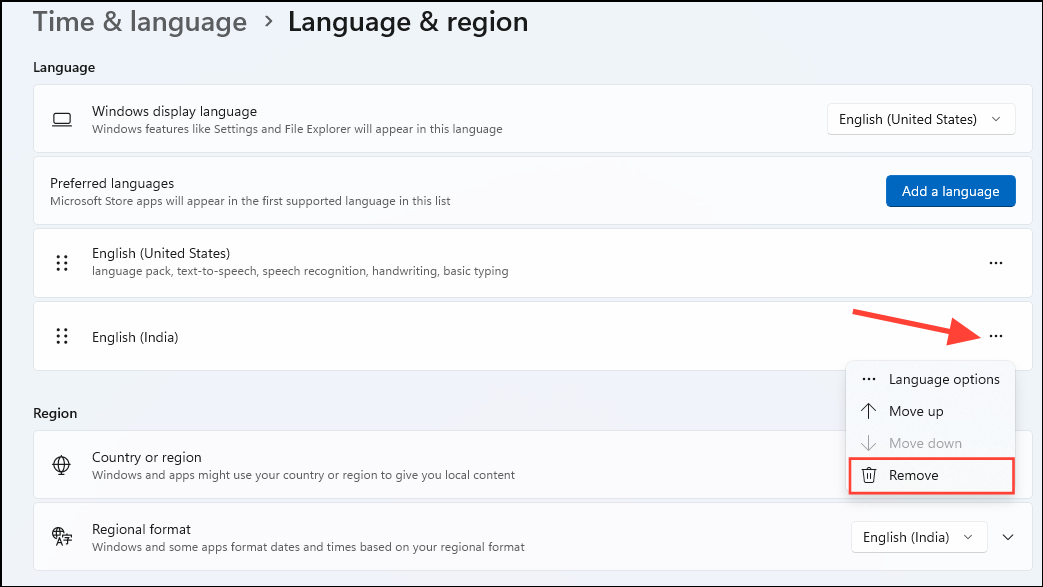
How to Remove Unused Keyboard Languages or Layouts
To keep your settings organized, you might want to remove languages or keyboard layouts you no longer use:
Step 1: Open Settings (Windows + I), navigate to "Time & language" > "Language & region".
Step 2: To remove an entire language, click the three-dot icon next to the language and select "Remove". Confirm the removal by clicking "Yes".
Step 3: To remove a specific keyboard layout, click the three-dot icon next to the language, select "Language options", and under "Keyboards", click the three-dot icon next to the layout you want to remove and select "Remove".
Now you're all set to efficiently manage and switch keyboard languages in Windows 11, making multilingual typing simpler and more streamlined.