Understanding your internet speed is crucial for optimizing online activities like downloading files, streaming videos, gaming, or remote work. It helps you identify if your network adapter or router is performing optimally and can assist in troubleshooting network issues. In Windows 11, there are several ways to check your internet speed and even display it on the taskbar for real-time monitoring. This guide will walk you through the most effective methods to accomplish this.
Display Internet Speed on Taskbar Using "Net Speed Meter" App
The "Net Speed Meter" app from the Microsoft Store offers a convenient way to monitor your real-time download and upload speeds directly from your desktop or taskbar. This free app provides live statistics, helping you keep track of your network performance at a glance.
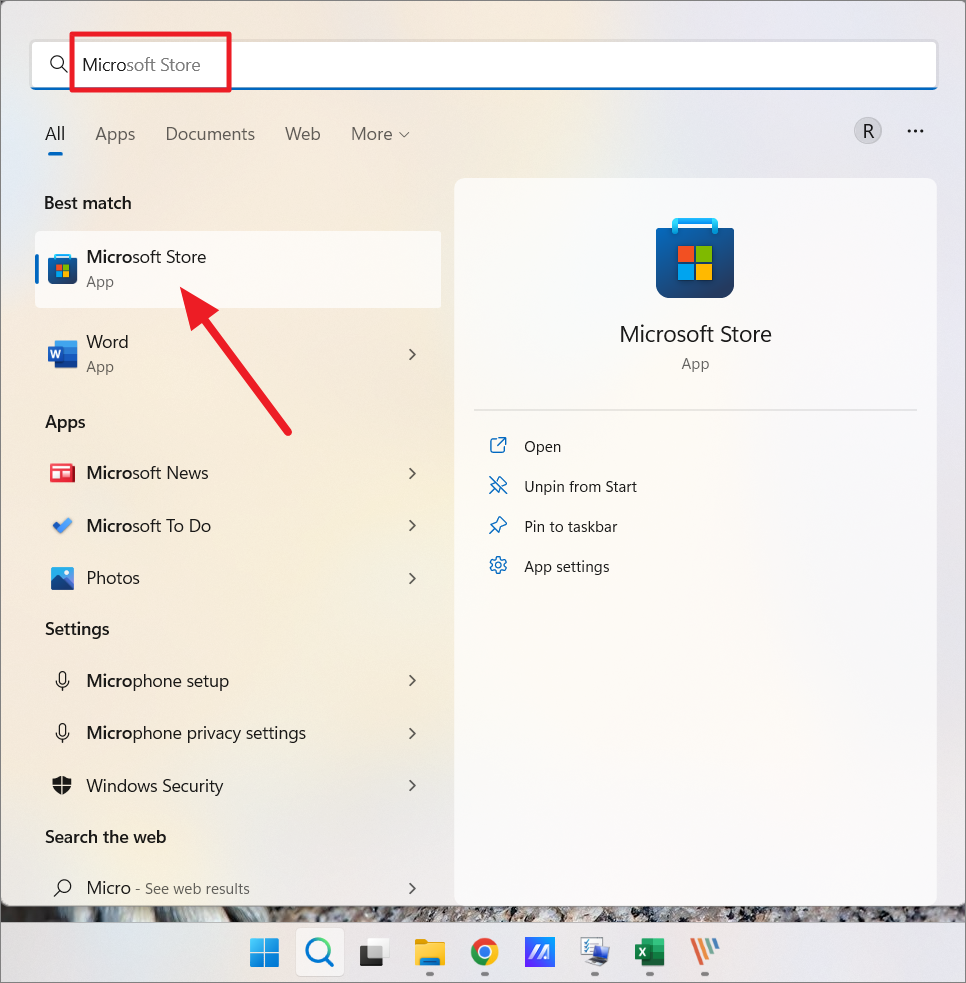
Step 1: Open the Microsoft Store on your Windows 11 PC. You can do this by clicking the Start button and selecting Microsoft Store from the menu, or by typing Microsoft Store into the search bar and selecting it from the results.
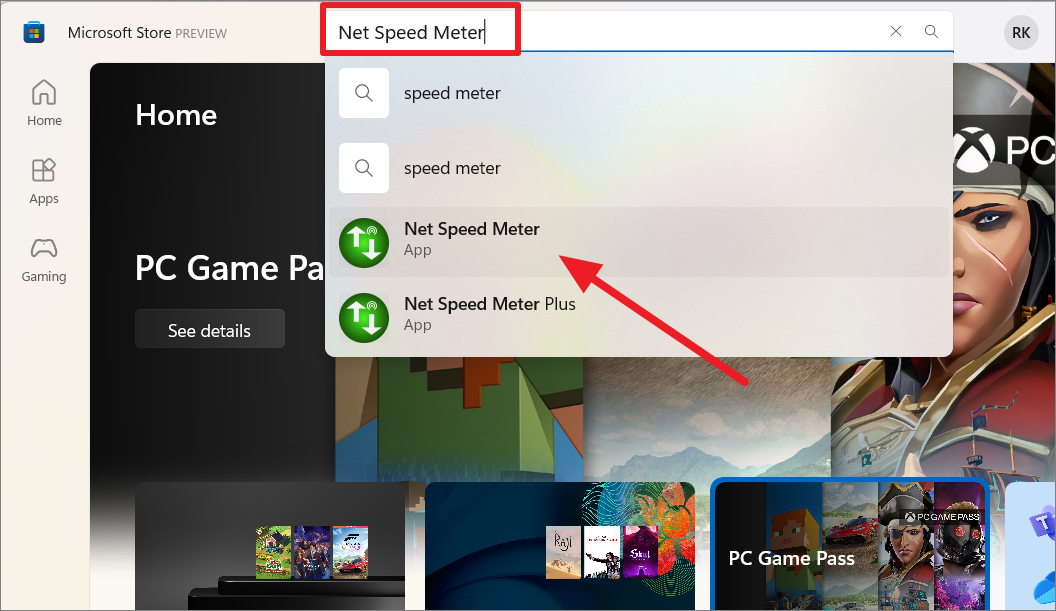
Step 2: In the Microsoft Store, use the search bar at the top to type Net Speed Meter. From the search results, select the Net Speed Meter app.
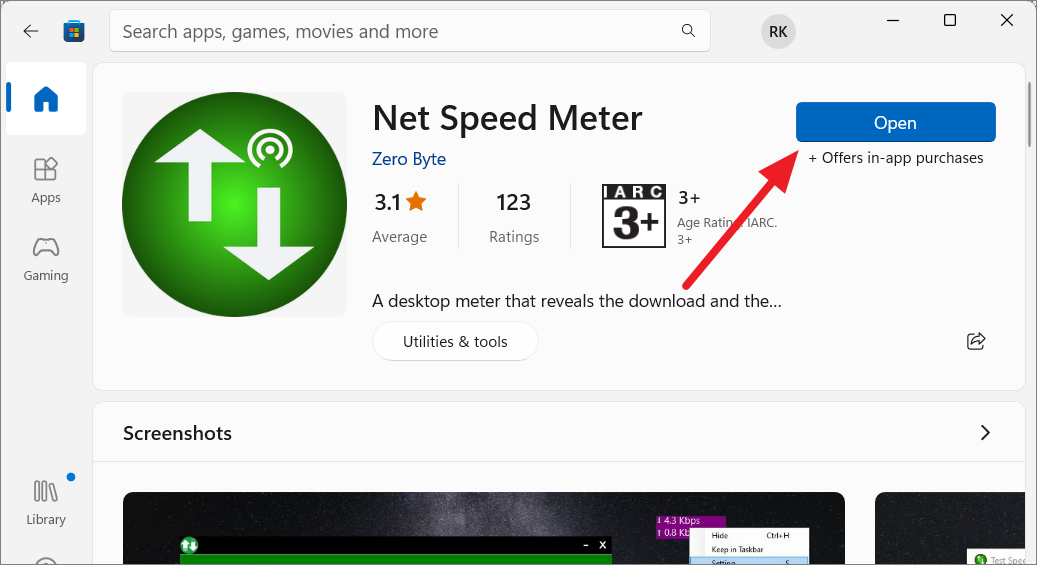
Step 3: Click the Get button to download and install the app on your system.

Step 4: Once the installation is complete, click the Open button to launch the app.
Step 5: When prompted to keep the "Net Speed Meter" running on the taskbar, select Yes. A small meter will appear on the top right corner of your desktop, displaying the live upload and download speeds.
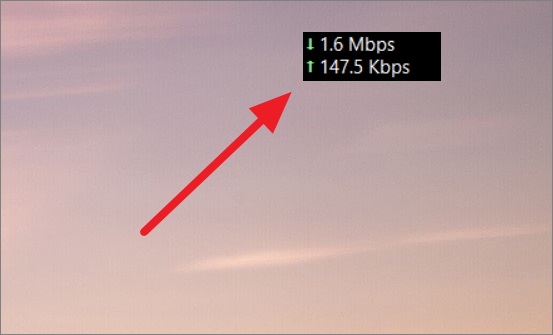
Step 6: You can move the speed meter to any location on your desktop by clicking and dragging it. To access it from the system tray, look for the app icon in the taskbar corner overflow.
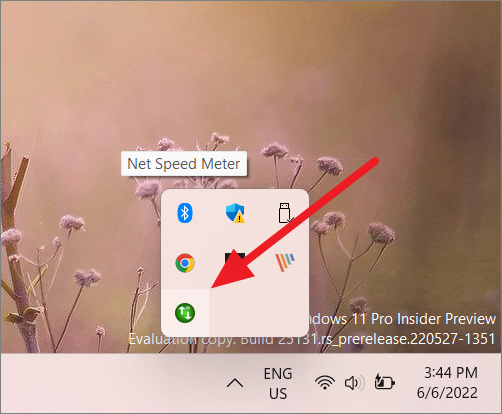
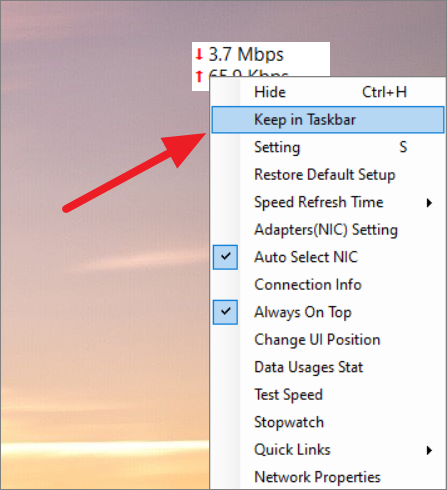
Step 7: To pin the speed meter to the taskbar, right-click on the meter and select Keep in Taskbar. This ensures the meter remains visible even when other applications are open.
Step 8: If the meter displays "0.0 kbps" when you're not actively using the internet, it's because there is no data being transferred at that moment. To test your maximum internet speed, right-click on the speed meter or its system tray icon and choose Test Speed.
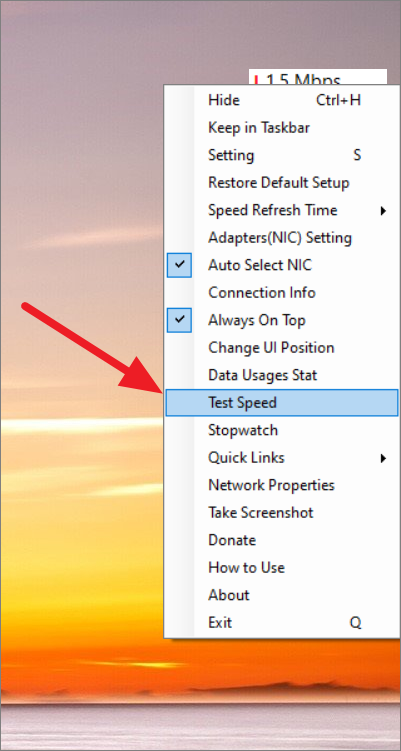
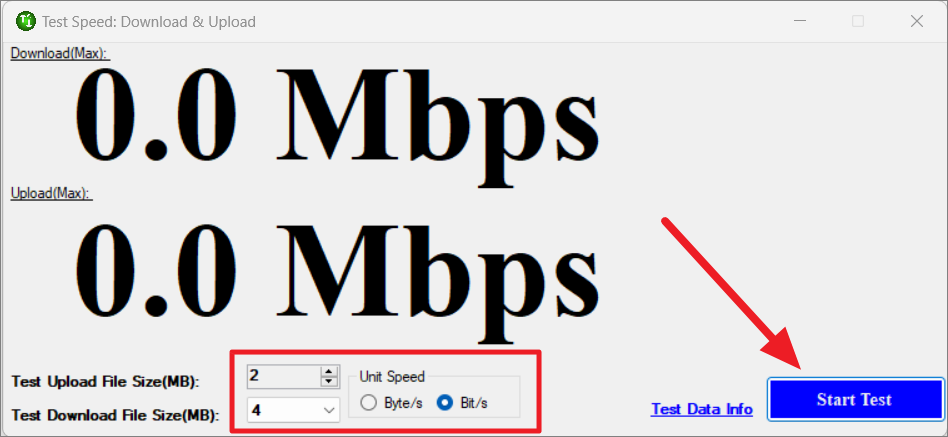
Step 9: In the Test Speed window, select the file sizes for upload and download tests. You can also choose the speed unit between Byte/s and Bit/s. Click Start Test to begin measuring your connection speed.
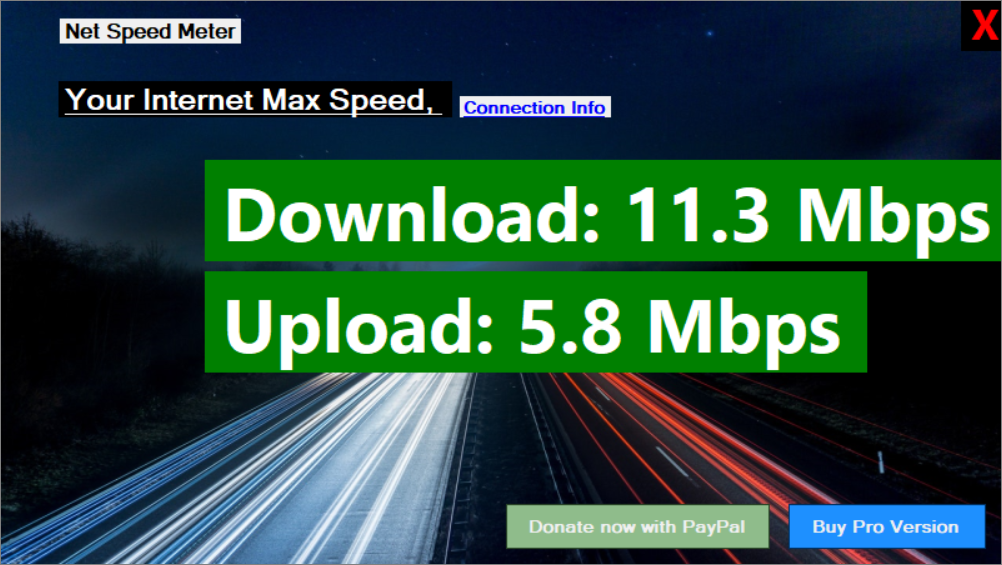
Step 10: After the test completes, a window will display your maximum upload and download speeds, giving you an accurate measure of your internet performance.
Test Network Connection Speed Using Windows PowerShell
Windows PowerShell provides a built-in method to check your network adapter's link speed. This reflects the maximum speed between your device and the router, which is helpful for diagnosing hardware capabilities.
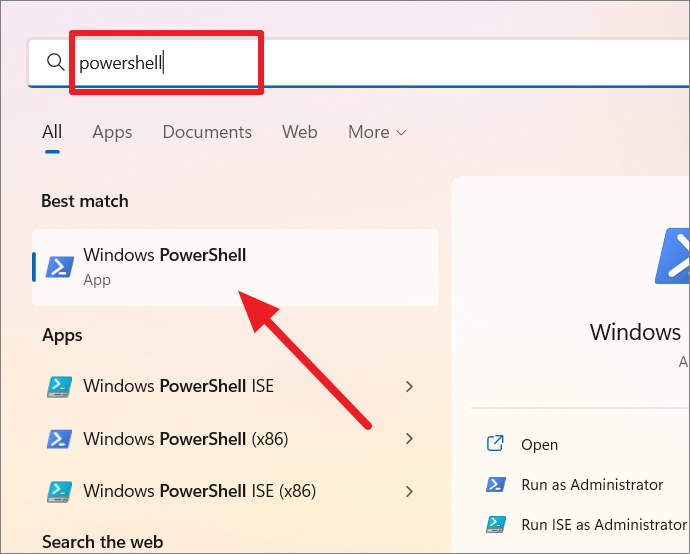
Step 1: Open the Start menu and search for PowerShell. Click on the Windows PowerShell app from the search results.
Step 2: In the PowerShell window, enter the following command and press Enter:
Get-NetAdapter | select interfaceDescription, name, status, linkSpeedStep 3: The output will display all network adapters with their respective link speeds. Look for the adapter with the status "Up" to identify your active connection and note the link speed in the LinkSpeed column.

Keep in mind that the link speed represents the theoretical maximum speed of your network hardware, not the actual internet speed you're experiencing during online activities.
Check Network Adapter Connection Speed Using Control Panel
The Control Panel offers another way to view your network adapter's link speed through the Network and Sharing Center.
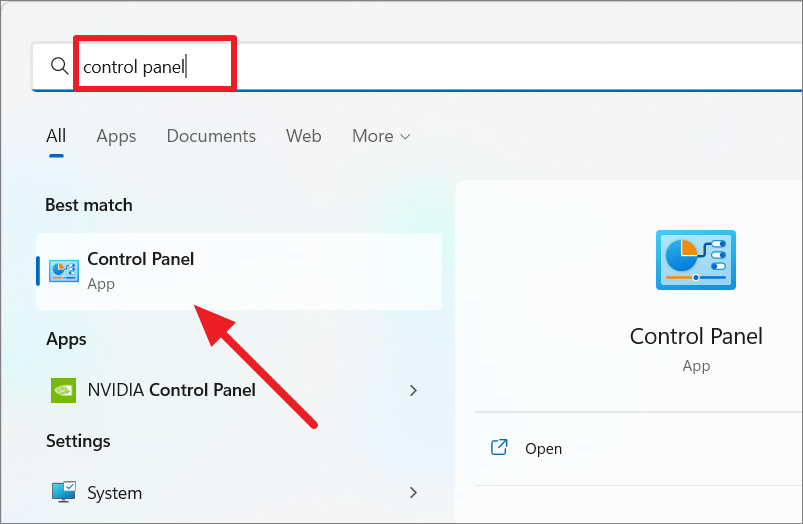
Step 1: Open the Control Panel by searching for Control Panel in the Start menu.
Step 2: In the Control Panel, click on Network and Internet.
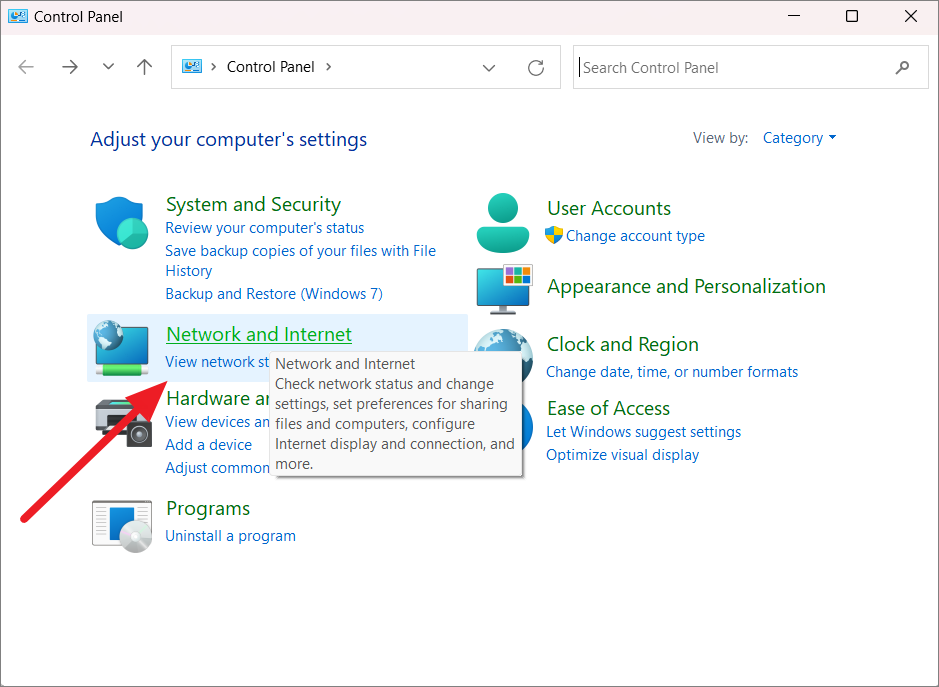
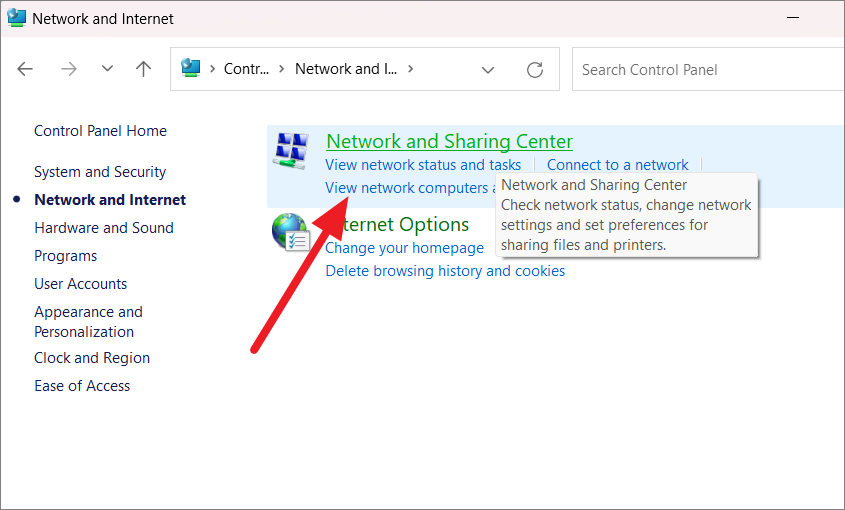
Step 3: Select Network and Sharing Center from the list of options.
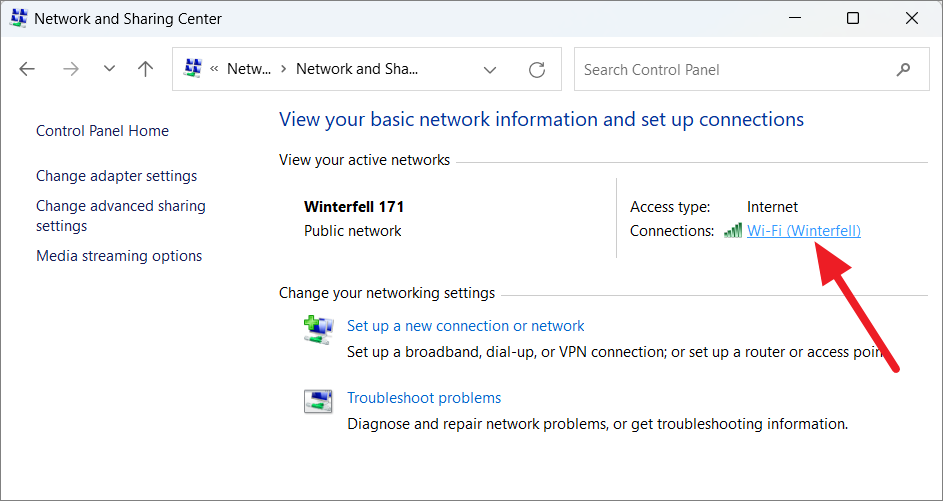
Step 4: In the Network and Sharing Center, find your active network connection next to Connections and click on the network link.
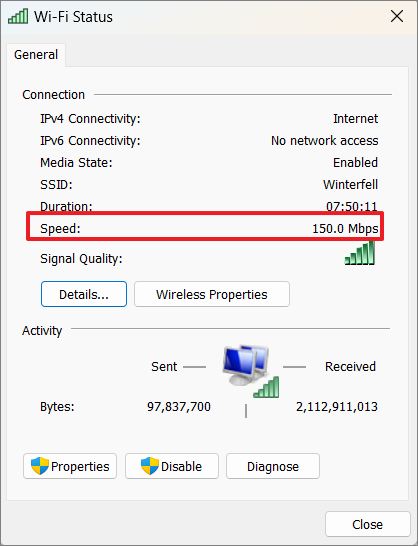
Step 5: A new window will open displaying your connection status. Here, you can see the link speed under the Speed field.
Check Network Adapter Speed Using Settings
Windows Settings also provide quick access to view your network adapter's link speed.
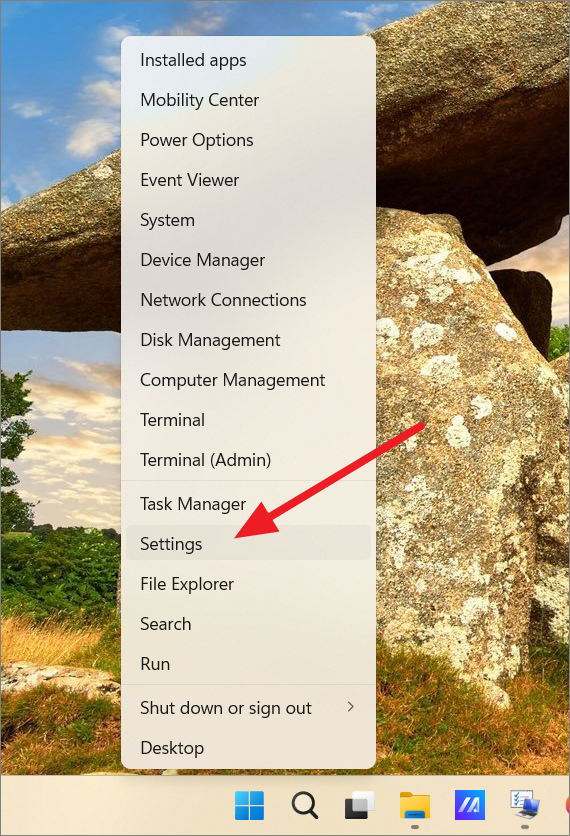
Step 1: Right-click the Start button and select Settings from the context menu.
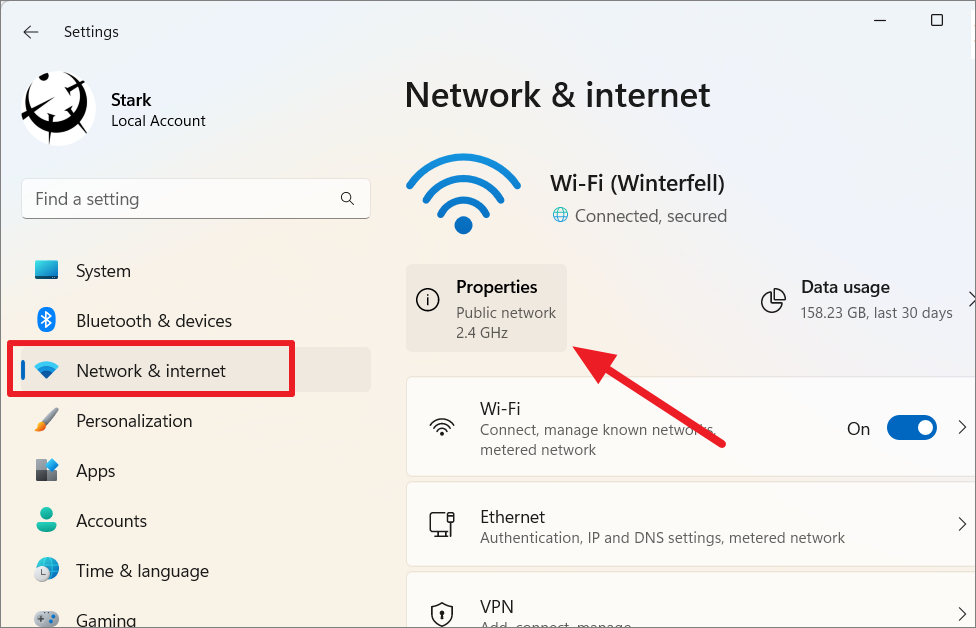
Step 2: In the Settings window, navigate to the Network & Internet section on the left pane. On the right side, click on Properties under your active network connection.
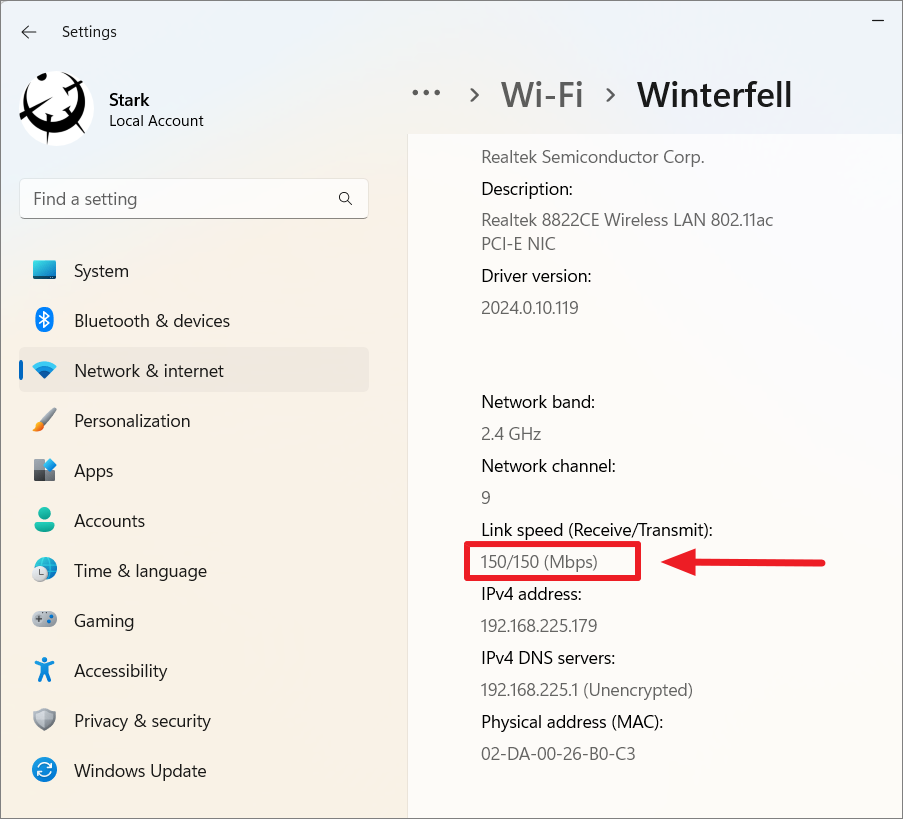
Step 3: Scroll down to find the Link Speed (Receive/Transmit) section, where you can view the current link speeds for data receiving and transmitting.
Check Internet Speed Using 8GadgetPack
For continuous monitoring of your actual internet speed (upload and download bandwidth), you can use the 8GadgetPack, which provides desktop widgets to display live network statistics.
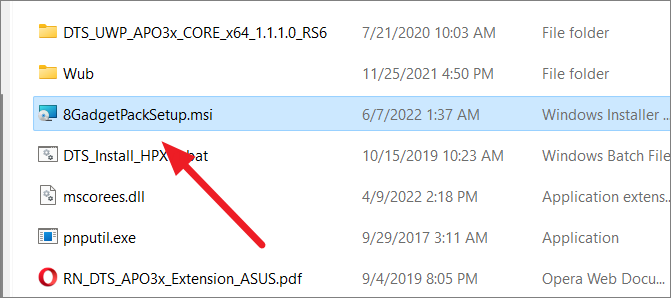
Step 1: Download the 8GadgetPack installer from the official website. Once downloaded, double-click the 8GadgetPackSetup file to begin the installation.
Step 2: In the installer window, click Install to proceed with the installation.
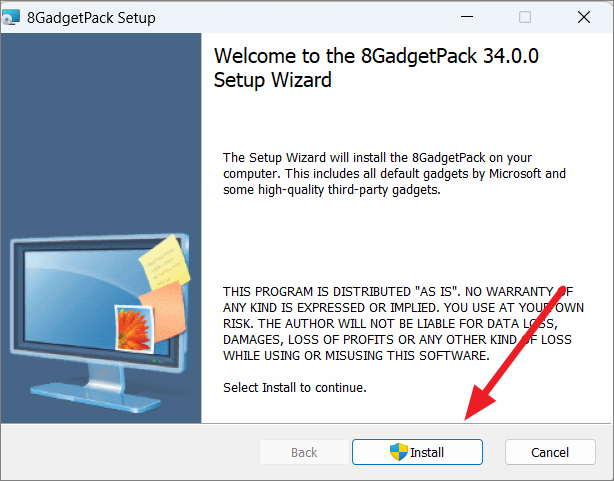
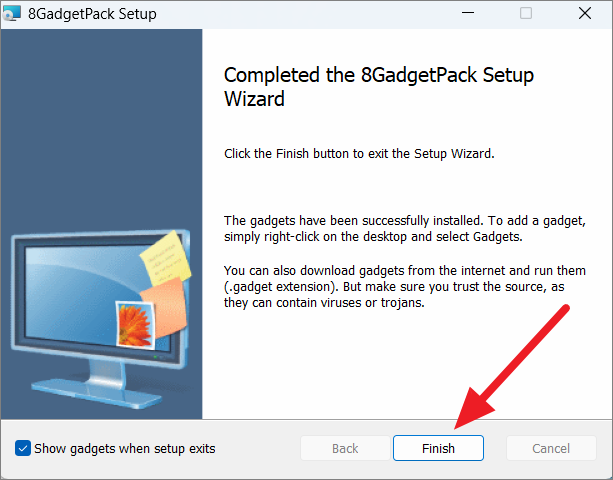
Step 3: If prompted by User Account Control, select Yes to allow the installation. After the installation completes, ensure the box next to Show gadgets when setup exits is checked, then click Finish.
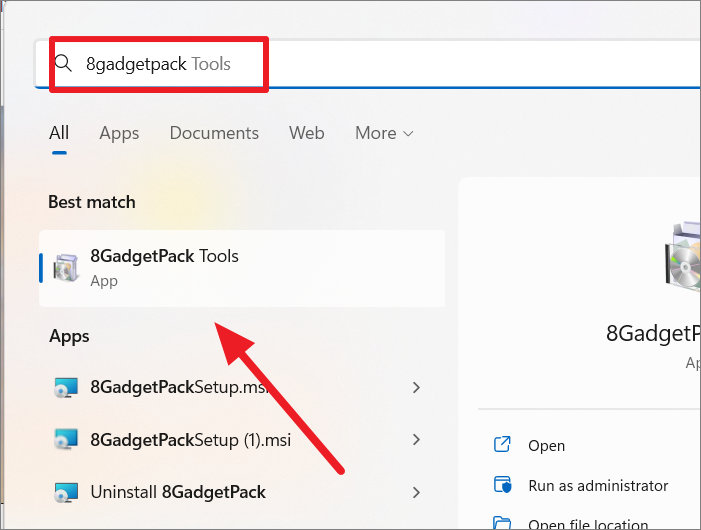
Step 4: The 8GadgetPack sidebar will appear on the right side of your desktop. If it doesn't open automatically, search for 8GadgetPack in the Start menu and select 8GadgetPack Tools.
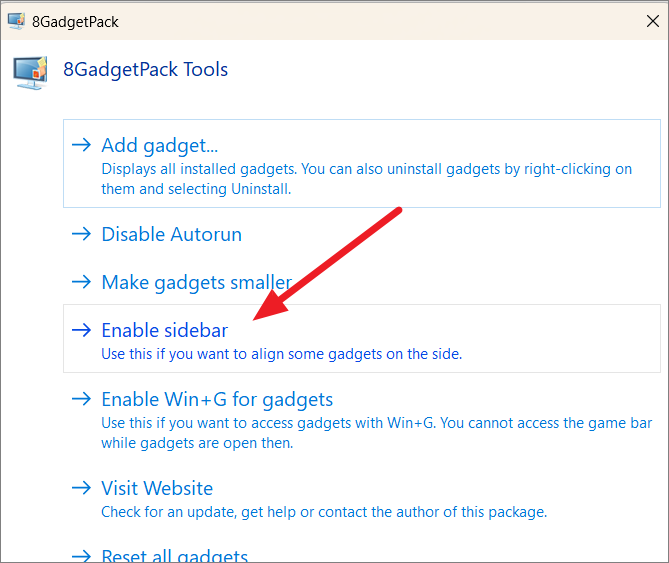
Step 5: In the 8GadgetPack Tools window, click on Enable Sidebar to activate the sidebar.
Add Network Meter Gadget to the Sidebar
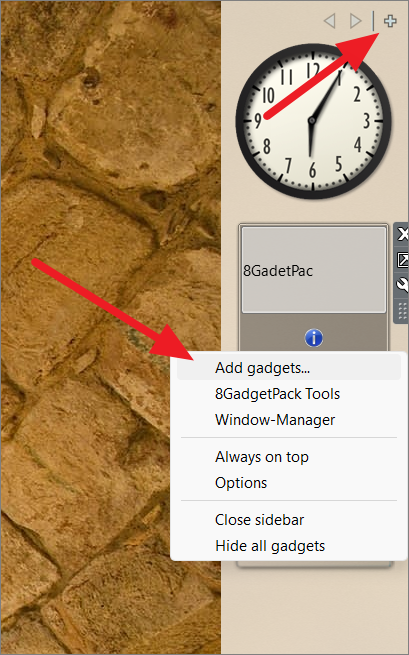
Step 6: To add the Network Meter gadget, right-click on the sidebar and select Add gadgets... Alternatively, click the plus icon at the top of the sidebar.
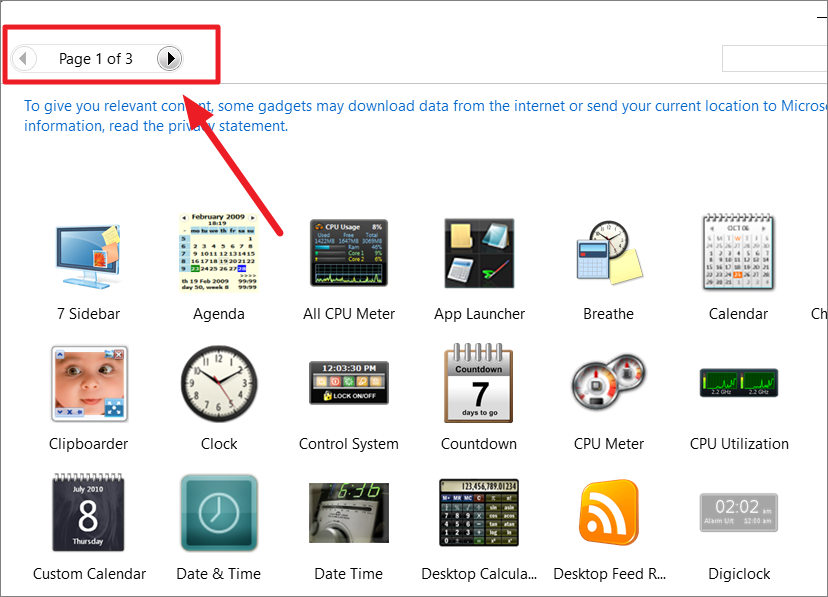
Step 7: In the gadgets window, navigate through the pages using the arrow buttons to find the Network Meter gadget.
Step 8: Double-click on the Network Meter gadget to add it to your sidebar. The gadget will display your current upload and download speeds, as well as other network statistics.
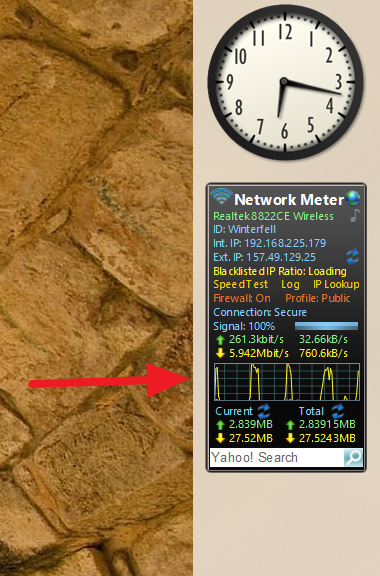
You can drag the gadget to any position on your desktop for easy visibility. This tool provides real-time monitoring of your actual internet speeds, helping you stay informed about your network performance.
Test Your Internet Speed Online
If you prefer not to install additional software, you can use online tools to test your internet speed directly from your browser.
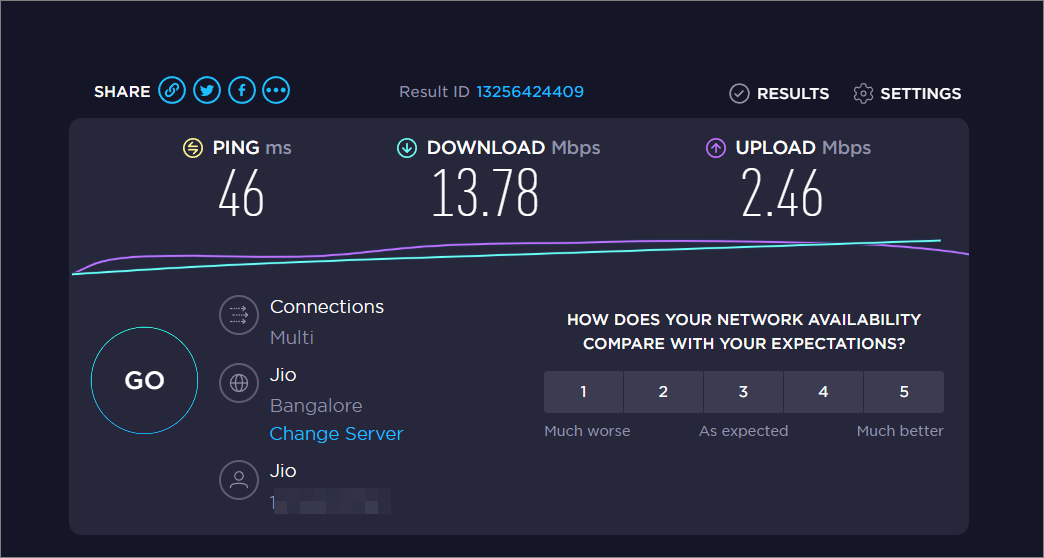
Option 1: Visit Speedtest by Ookla, a widely used platform for measuring internet speeds. On the website, click the Go button to start the test.
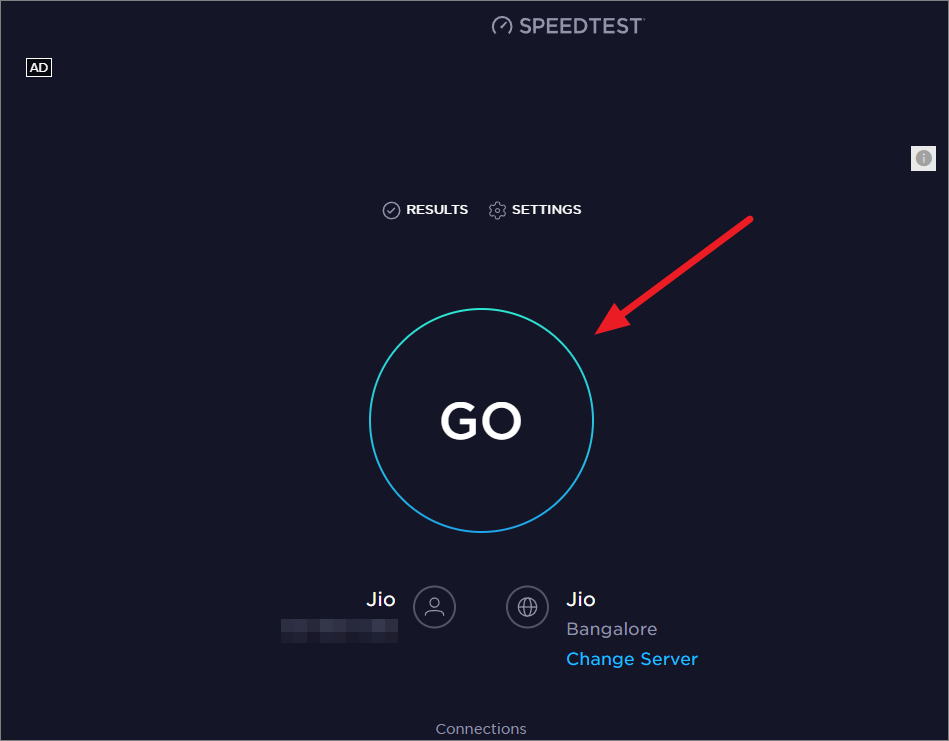
Within moments, the site will display your download and upload speeds, along with your ping rate.
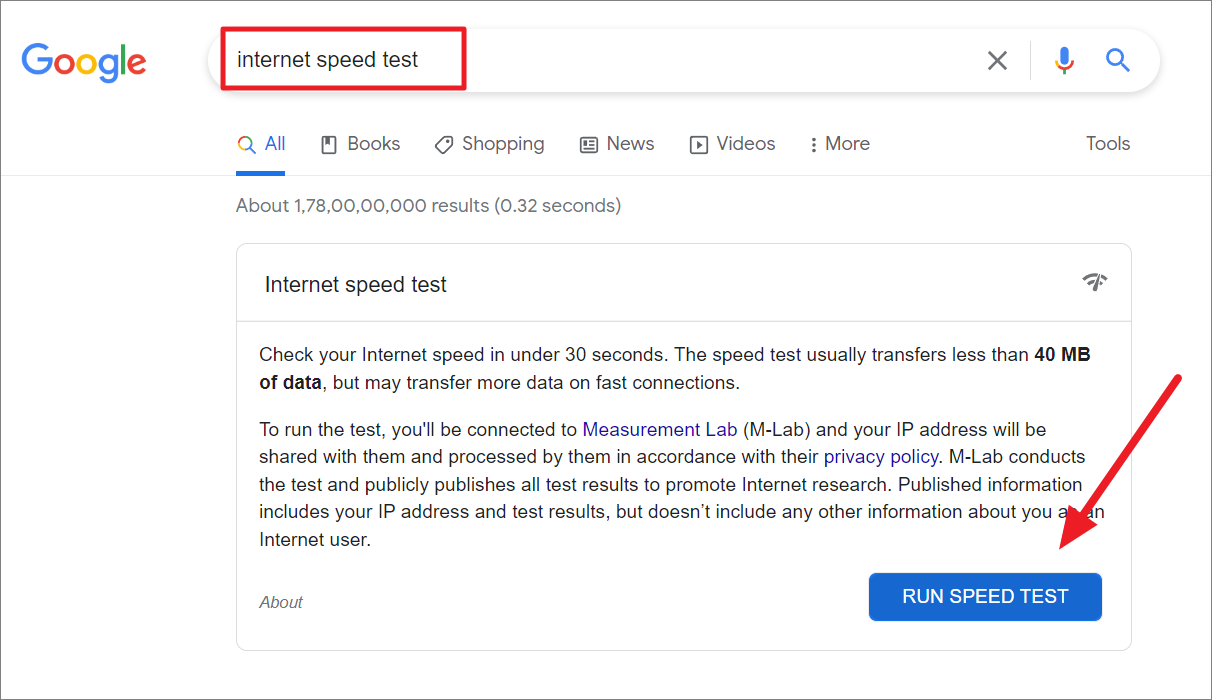
Option 2: Alternatively, you can use Google's built-in speed test. Simply search for Internet speed test on Google, and click the Run Speed Test button in the search results.
By utilizing these methods, you can effectively monitor your internet speed and ensure your network is performing at its best. Whether you prefer a desktop app, system tools, or online services, Windows 11 offers several options to keep you informed about your network performance.

