Apple previewed the macOS 13 Ventura at the WWDC this year. And needless to say, it’s going to be a great update, with wonderful features like Stage Manager, improved Spotlight search, the new Mail app, and many others.
While the public update is yet away, some of you early birds might have rushed to get the beta as soon as it dropped. We understand the allure of getting your hands on the newest OS before everyone else.
But running a beta is full of risks. From soft crashes to downright freezing of your system, there are daily annoyances to face. And the newer the beta, the more raw and full of bugs it is. That’s why you should always try to install the beta software on a spare system. Running it on your main machine can give you a headache like no other.
Now, if you did install the beta (whether on your main or spare Mac) and are now having major regrets, there’s no need to wallow in them. You can remove the beta version from your Mac and downgrade it to a stable build. Here’s everything you need to know.
Things to Know Before Downgrading
Before installing the macOS Ventura beta, it’s important to take a backup of your system. Even though taking the backup is a recommendation, you should treat it as a requirement. The backup plays a very important role even when downgrading to the previous build. You can backup your Mac easily using Time Machine.
But you cannot take a backup of your files when using macOS Ventura beta and use that backup to downgrade. Backups taken with newer OS versions aren’t compatible with older versions.
So, if you have an archived backup from macOS Monterey, you can easily downgrade with all your data intact. Otherwise, downgrading will delete your data.
Note: If you have any data that you have accumulated while using macOS Ventura, you should back up those files as they will be lost during the downgrading process. Since the backup we’ll be using to restore your data will predate these files, unless you manually back them up elsewhere – iCloud, any other cloud storage, or any external drive – you won’t get those files back.
There are many methods for downgrading your Mac. But the first step for any of these methods is to unenroll from the beta program.
Leave the macOS Ventura Beta Program
The first thing you should do before downgrading your Mac is to unenroll from the beta program for macOS Ventura. Unenrolling from the program will not remove macOS Ventura from your Mac. But it will tell the beta program that you do not want to receive any more beta updates on your system. Unenrolling from the beta program is essentially the equivalent of deleting the beta profile from your system.
You can unenroll from the program from system settings. One thing you must have found out while using the macOS Ventura beta is that System Preferences has been upgraded to System Settings in the new OS. The new settings app is now a lot like the settings app in iOS or iPadOS and very different from the previous iteration in macOS Monterey.
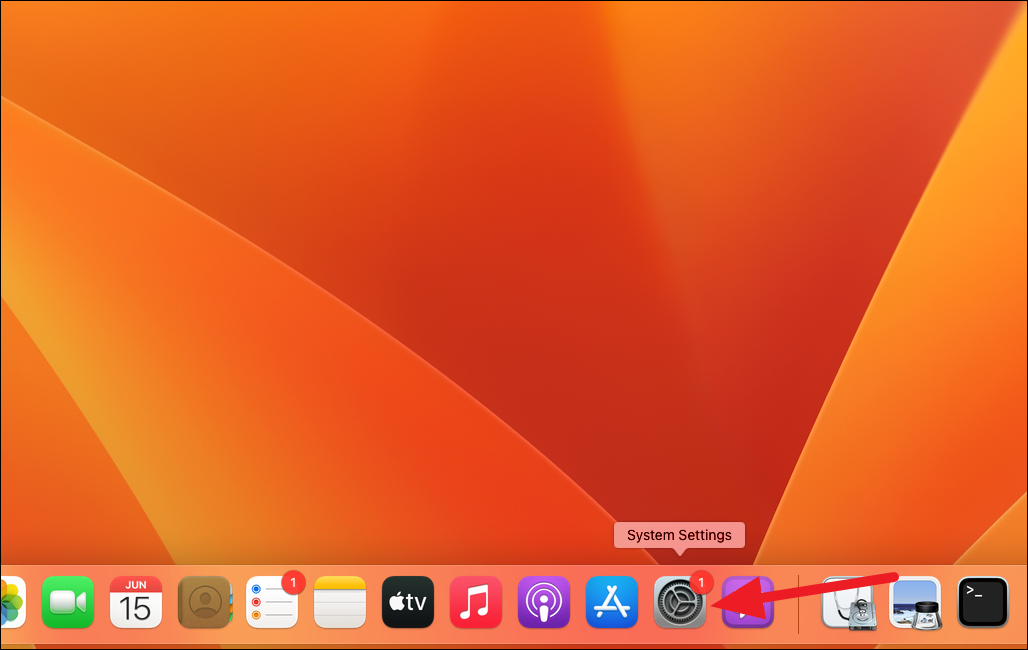
To unenroll from the macOS Ventura beta program, open the ‘System Settings’ app on your system.
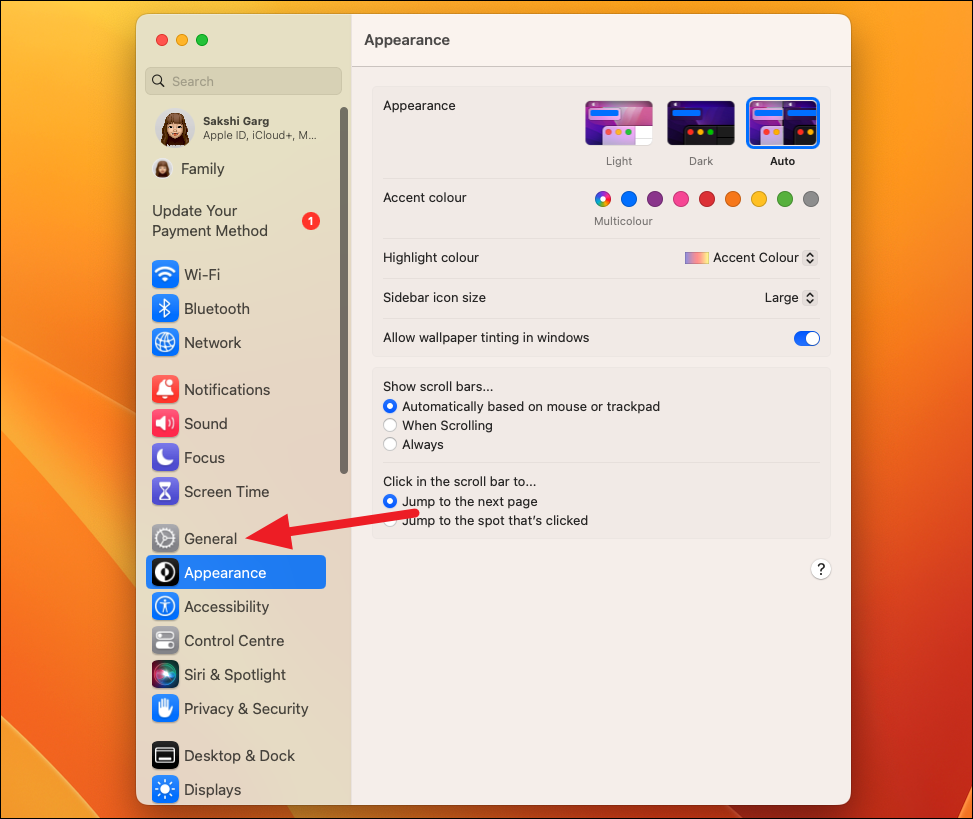
Then, go to ‘General’ from the sidebar on the left.
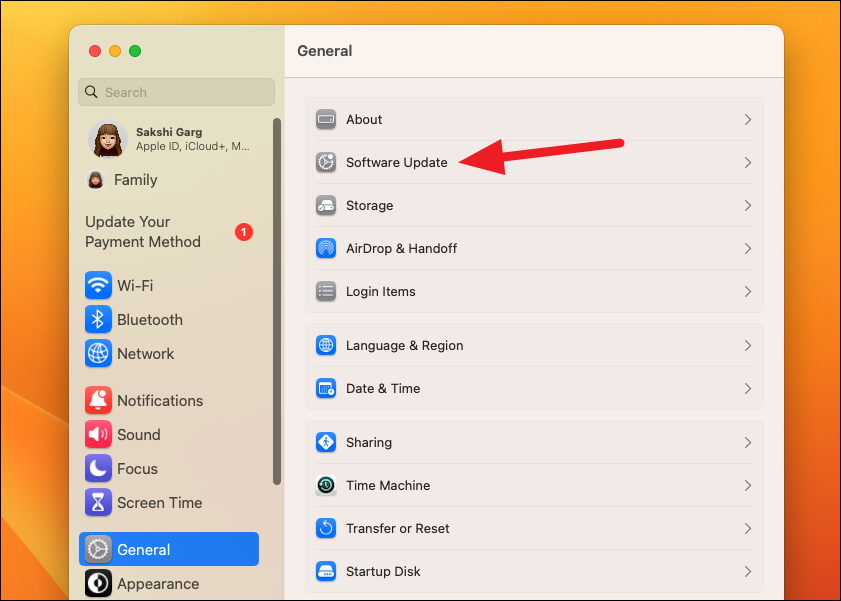
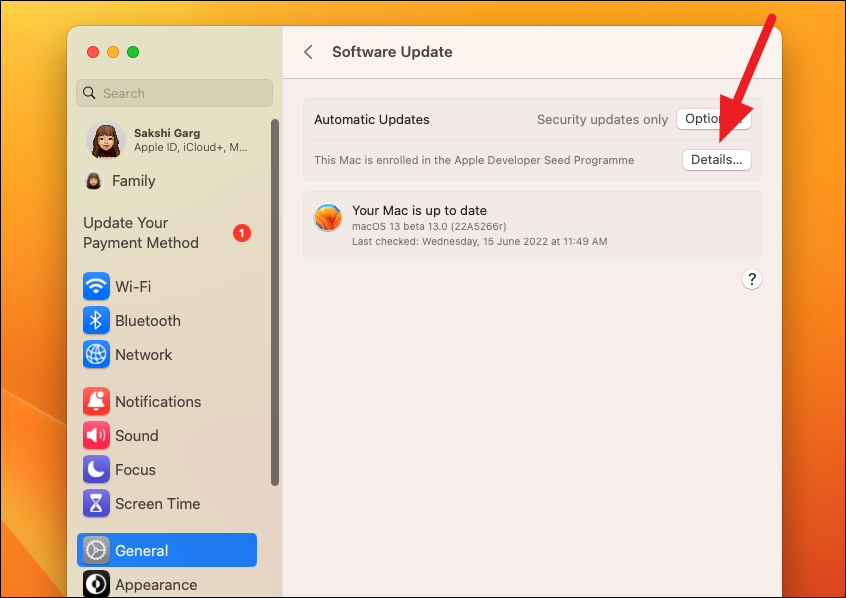
From the General settings on the right, click the option for ‘Software Update’.
Once the software update details load, you’ll find the message “This Mac is enrolled in the Apple Developer Seed Programme” on the screen. Click the option for ‘Details’ to its left.
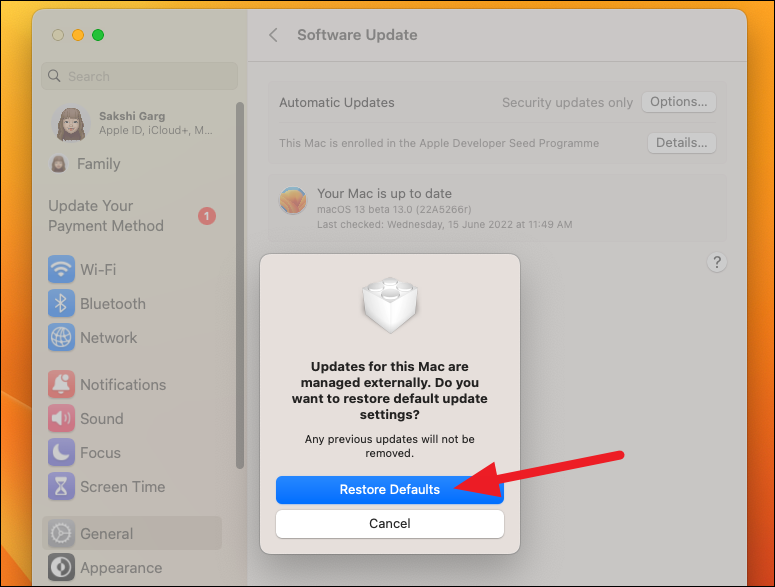
An overlay dialog box will appear on your screen. Click ‘Restore Defaults’ to stop receiving any more beta updates.
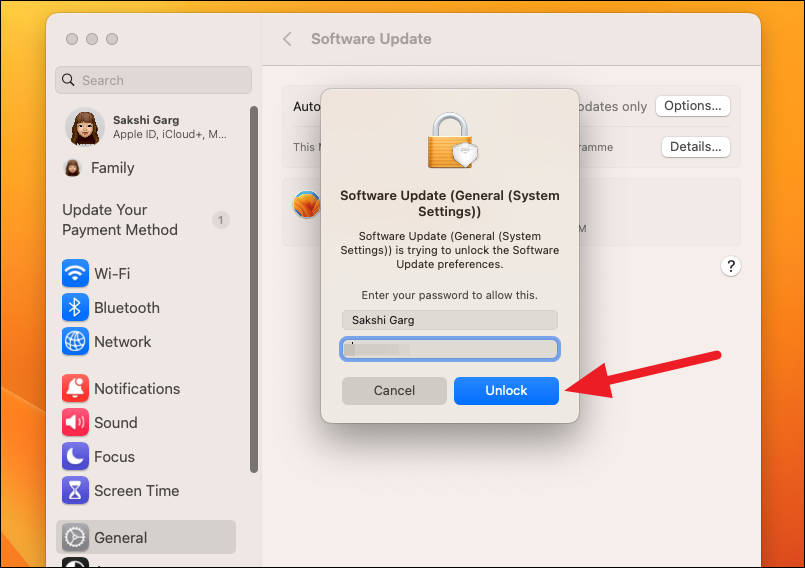
You’ll have to enter the password for your user account on Mac to unlock the setting. After that, it may take a few seconds to unenroll you from the program.
Downgrading to macOS Monterey
Once you unenroll from the beta program, the real work of downgrading to macOS Monterey begins. There are a few methods for downgrading your OS. You can use whichever suits you best.
Downgrade Using a Time Machine Backup
If you created a backup using Time Machine before upgrading to macOS Ventura, downgrading is a fairly easy feat. It’ll restore the older OS you used while creating the backup – in this case, macOS Monterey – as well as all your personal data in the backup.
To downgrade using Time Machine backup, plug your Time Machine disk into your Mac. Then, restart or shut down your Mac.
Now, we’ll boot the Mac into the Recovery Mode while it is starting (or restarting).
For Intel-based Macs, hold down the keys Command + R when your Mac is starting up until the Apple logo appears on the screen to enter the Recovery Mode.
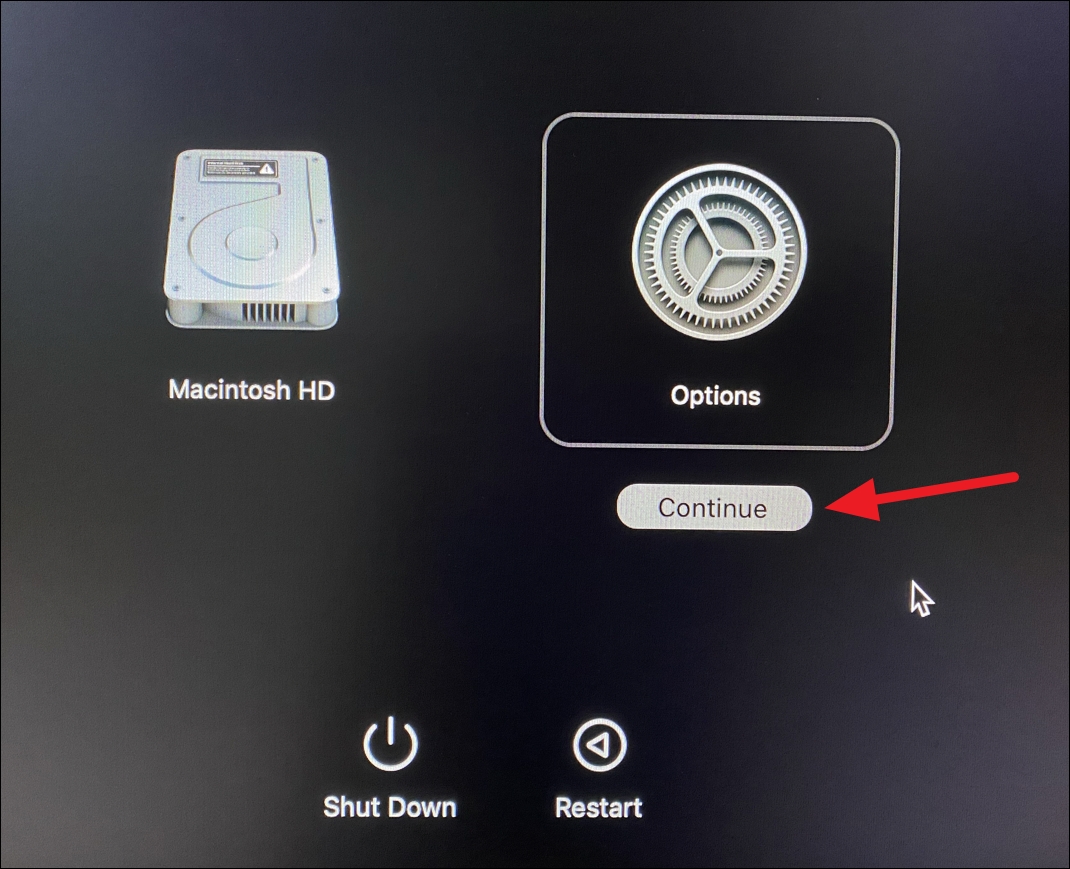
For an M1-based Mac, press and hold the power button while startup until the ‘Loading Startup Options’ screen appears. Select ‘Options’ from the screen and click ‘Continue’ to enter the recovery mode.
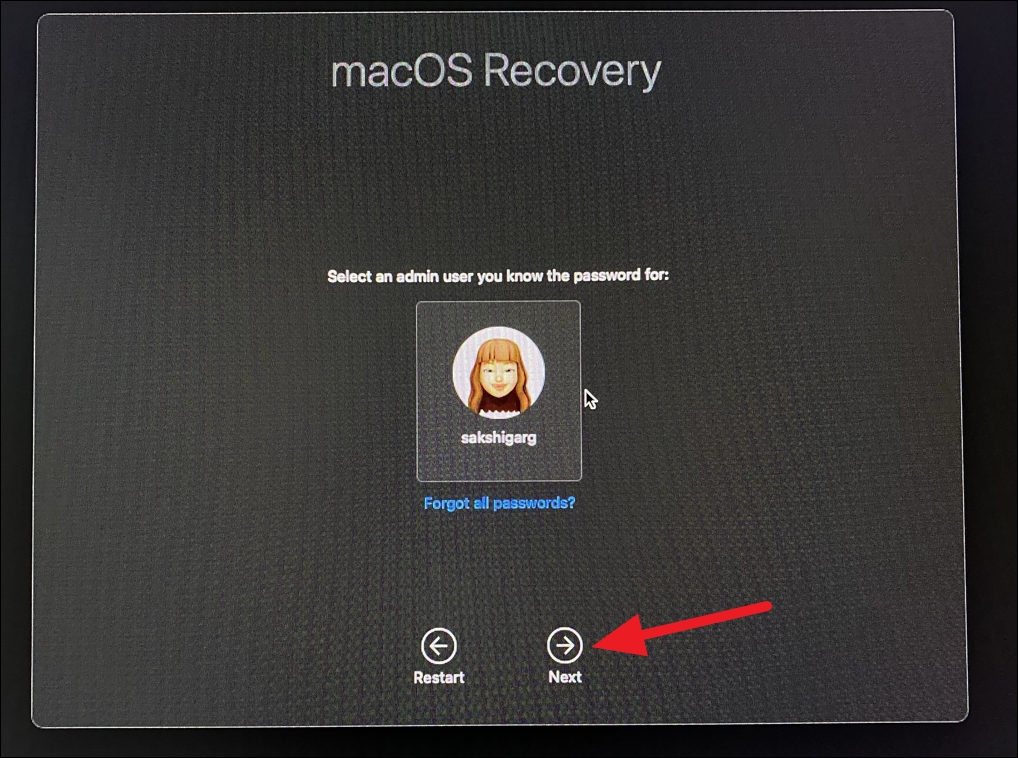
You will be asked to select your Mac user account for which you know the password (in case you have more than one) and enter the password for it to proceed further. Select your user account from the screen and click ‘Next’ at the bottom.
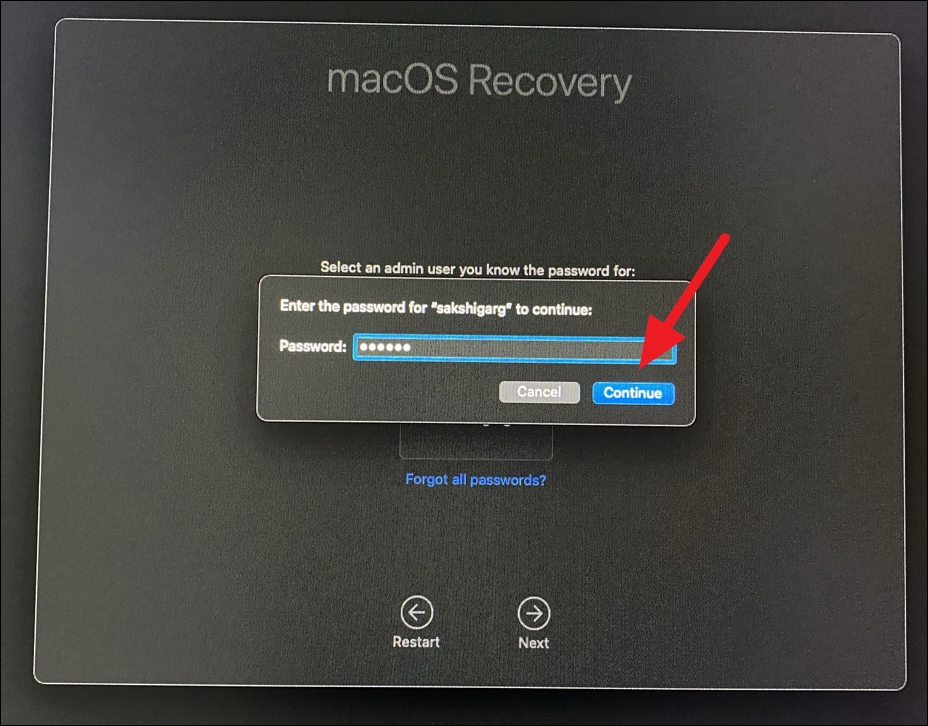
Then, enter your user password and click ‘Continue’.
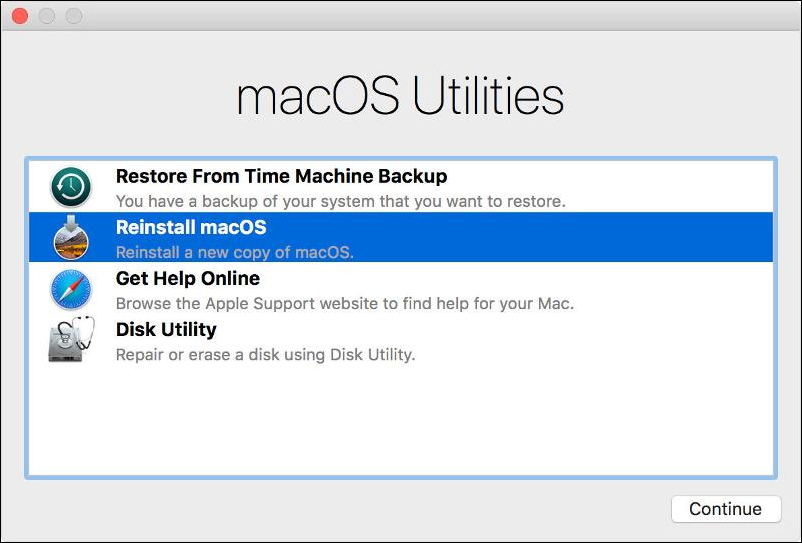
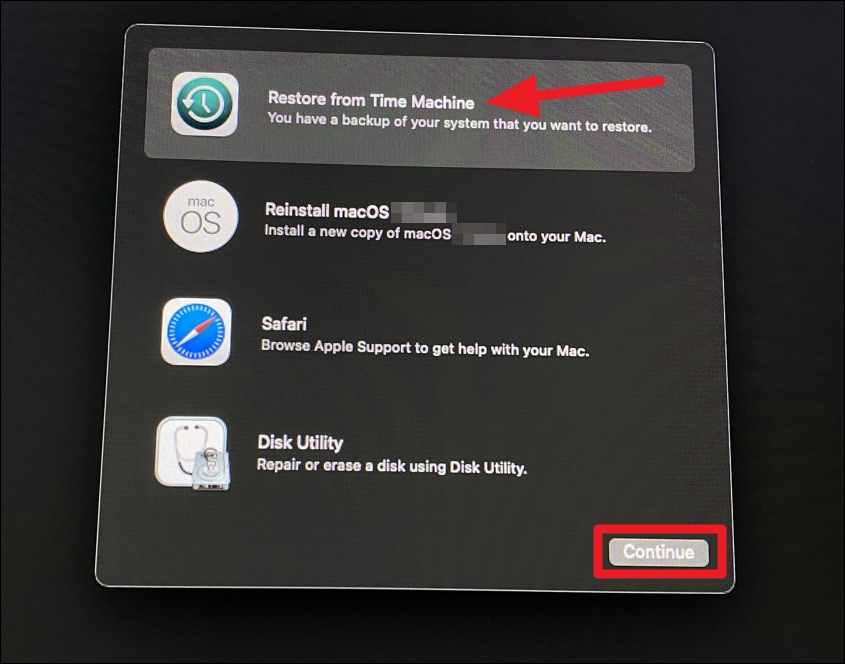
Once you enter the recovery mode on either machine, the next steps are the same. From the next screen, select the option ‘Restore From Time Machine Backup’/ ‘Restore from Time Machine’ and click ‘Continue’ at the bottom.
Select the backup source, i.e., the drive you plugged in earlier that has your backup, and click ‘Continue’.
On the next screen, select the backup you want to restore from. This would be the backup from before upgrading to macOS Ventura beta. The screen will also list the macOS version that was used to create the backup; it should say macOS Monterey in this case. Once you’ve selected the correct backup, click ‘Continue’.
Follow the instructions and prompts on the screen to complete the reinstallation of macOS Monterey and restore your files from the backup. Once it completes, your Mac would be running macOS Monterey.
Downgrade Using Recovery Mode
If you don’t have a time machine backup, you can use the built-in Recovery Mode to downgrade your OS. But remember that this method will wipe your entire hard disk and you’ll be essentially left with a system with no data and factory default settings. Make sure to back up your files elsewhere so you can recover them after downgrading your OS.
This method also requires a good internet connection since your Mac will download and install macOS Monterey from the internet.
Enter the recovery mode on your Mac. Depending on your Mac, the steps will vary.
For an M1-based Mac, press and hold the power button while startup until the ‘Loading Startup Options’ screen appears. Select ‘Options’ from the screen and click ‘Continue’ to enter the recovery mode.

For an Intel-based Mac, hold down the Option + Command + R keys on your keyboard at startup until the Apple logo appears. Using this keyboard shortcut will let you downgrade to the latest stable macOS, which happens to be our goal since macOS Monterey is the latest macOS that is stable. You can also downgrade your Mac to the OS it shipped with using a different keyboard shortcut – Shift + Option + Command + R.
On the next screen irrespective of which Mac you have, you’ll see the option to ‘Reinstall macOS’/ ‘Reinstall macOS Monterey’. Click the available option.
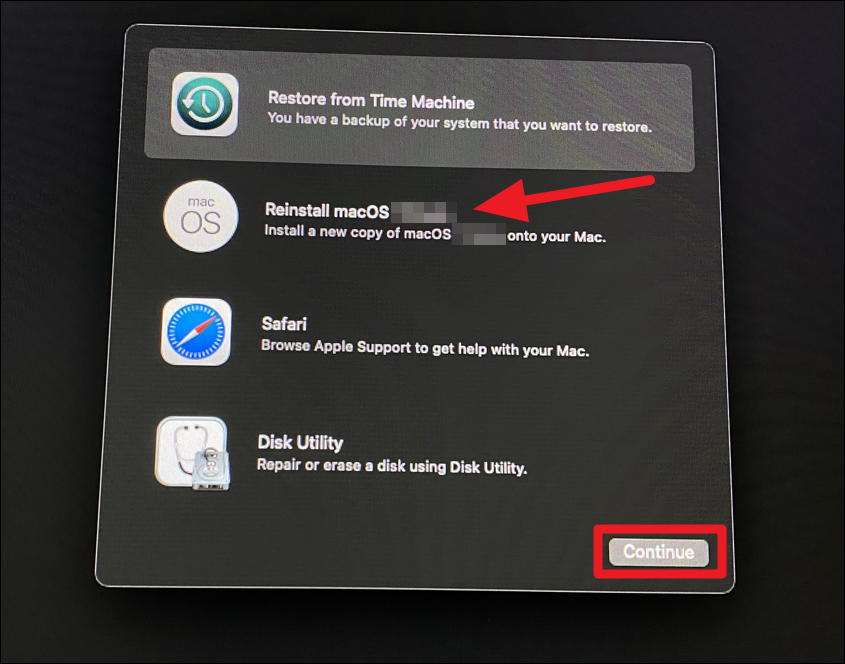
Then, follow the prompts on your screen and select your startup disk where you want to install macOS Monterey. Complete the rest of the instructions on your screen and Recovery will install macOS Monterey on your system. Keep your system plugged in and don’t close the lid while the installation completes. Your system may restart several times while macOS Monterey is installing and the screen may even go completely blank at times, giving the illusion that the system is shut down. Don’t close your system even then. Once macOS Monterey reinstalls, your system will start on its own.
Use a Bootable Drive to Install macOS Monterey
If you can’t use Time Machine or Recovery to downgrade to macOS Monterey, you can create a bootable USB drive with macOS Monterey Installer on it and use it to install the OS on your system. Even when using this method, create a backup of your important files so you can get them back later.
This is a multi-step process so it will take some time. But it will work and you’ll have macOS Monterey on your system by the time you’re done. Here’s an overview of what you’ll need to do:
- Download macOS Monterey Installer.
- Prepare an external drive (USB/ Thunderbolt drive, with at least 16 GB of Storage) for making it a bootable drive.
- Creating the bootable Installer drive for macOS Monterey.
- Installing macOS Monterey using the bootable drive you created.
Let’s get on with it!
Step-1: Download the macOS Monterey Installer
Currently, it’s fairly easy to download the macOS Monterey Installer from the Mac App Store. If you wanted to downgrade to another version, that would have included jumping through some hoops though since Apple makes it somewhat difficult to find the older versions.
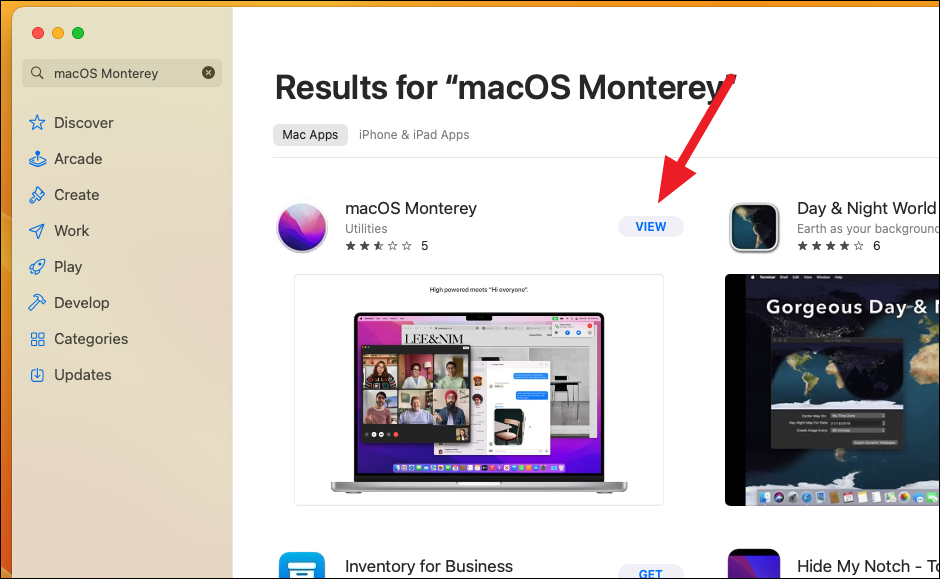
Go to the Mac App Store and search for macOS Monterey. Click ‘View’ to open it. You can also click this link to open it.
Then, click the ‘Get’ button to download the installer on your Mac.
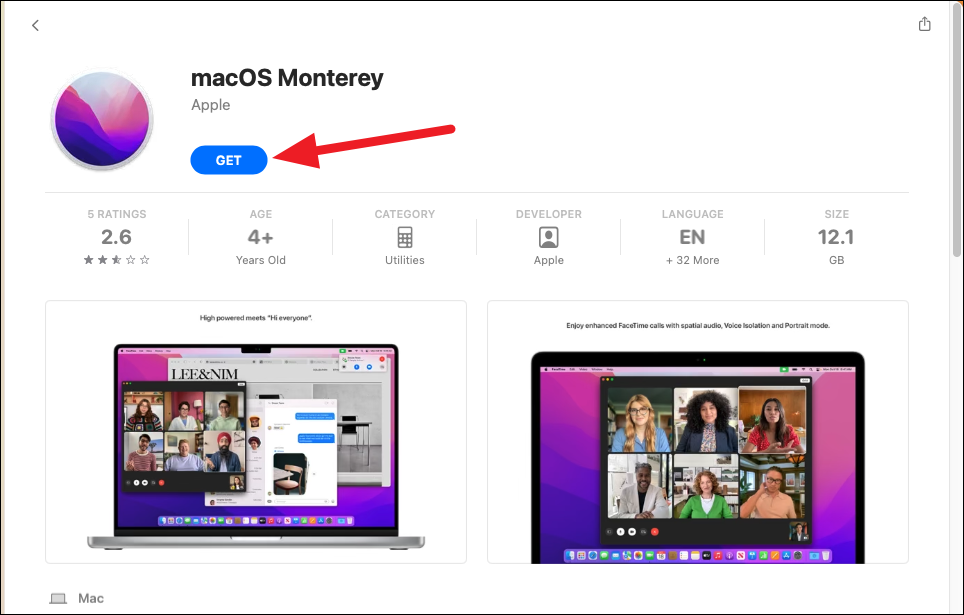
It’ll take a few minutes for it to download depending on your internet speed. Once it downloads, it will be available in your Applications folder in the Finder with the name ‘Install macOS Monterey’. Don’t open it since we want to use it later.
Step-2: Preparing the External Drive
Now, you need to format the USB or Thunderbolt drive you plan on using to create the installation media. If your drive is already formatted, you can skip this step. You need a drive with at least 16 GB storage size since macOS Monterey is slightly over 12 GB in size; a little extra space is for safety.
Also, if there is any data on your drive that you need, you should either make a copy elsewhere (not on the Mac since it will be wiped, too) or get another drive that you can format.
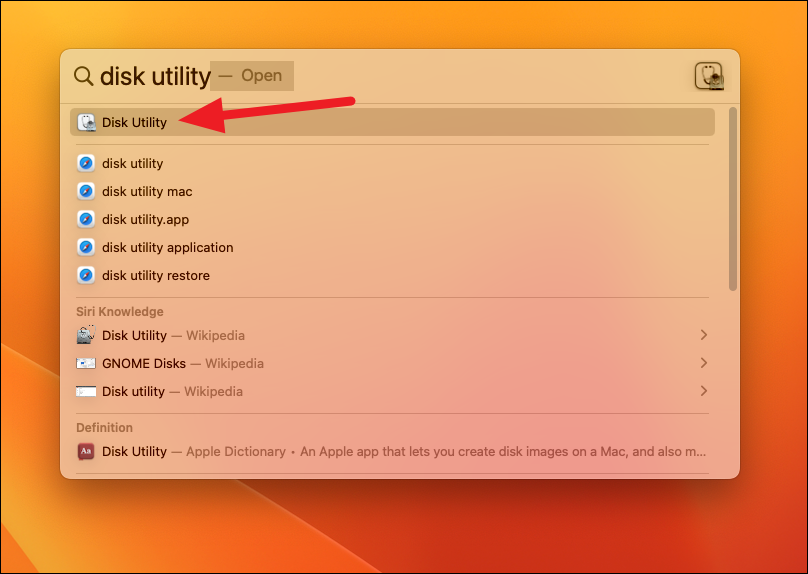
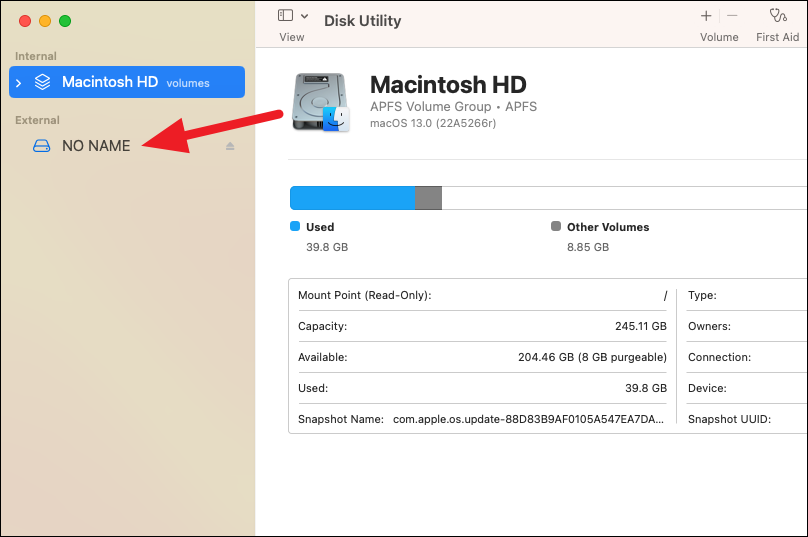
Connect your external drive to your Mac and launch Disk Utility using Spotlight or by going to Utilities from the Applications folder and then double-clicking Disk Utility to open it.
Now, select your USB drive from the left sidebar under ‘External’.
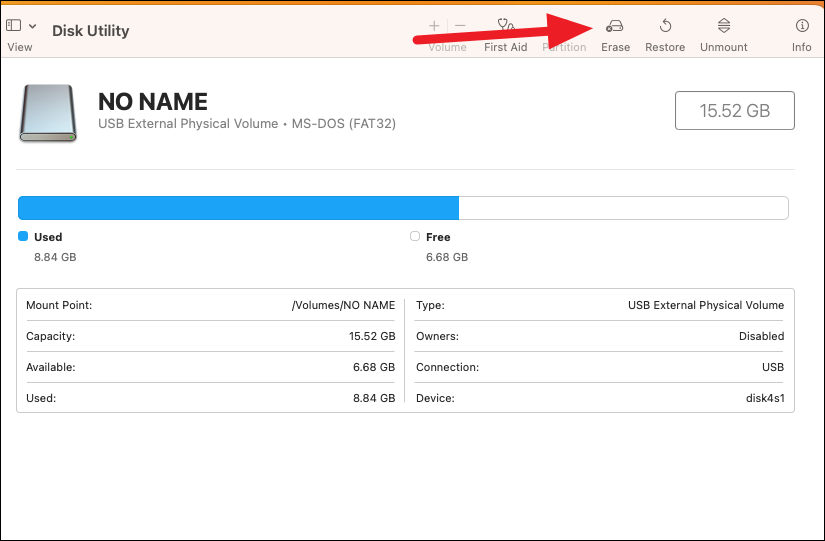
Then, click ‘Erase’ from the toolbar at the top.
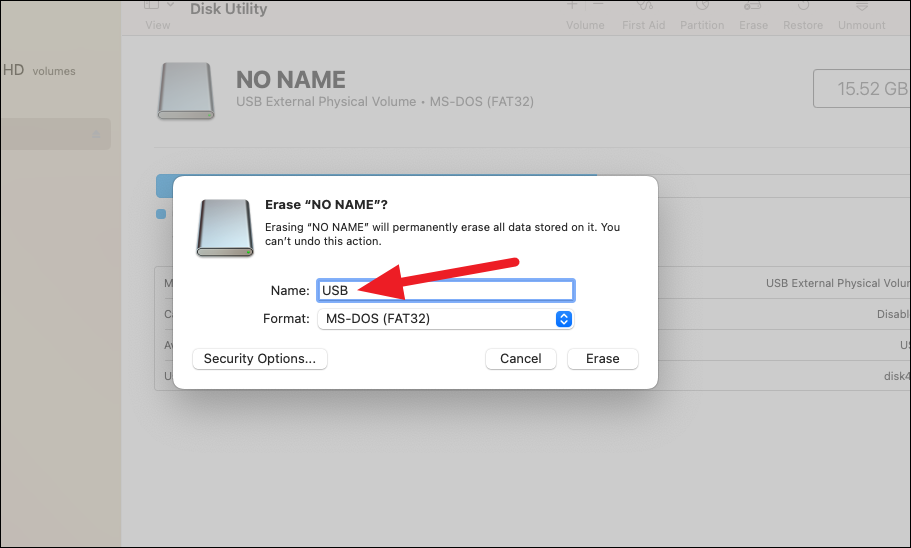
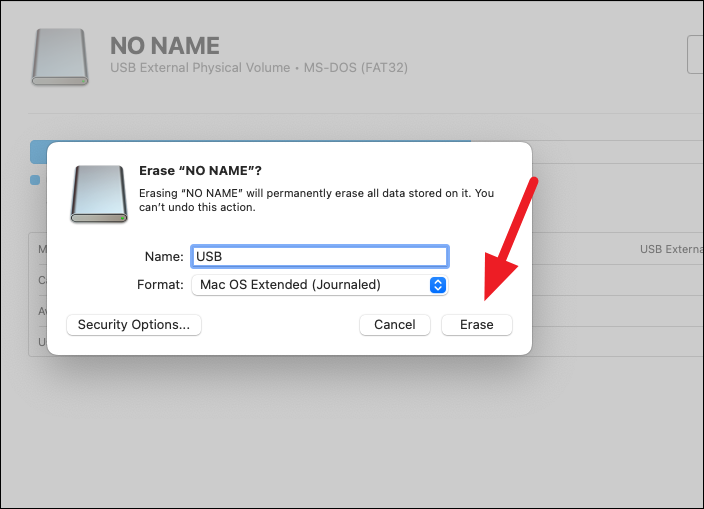
A dialog box will appear. You can change the name of the drive if you want. We’d advise you to keep it something simple, like “USB” or “macOS”, since you’ll need it in the next step. For this guide, we’ll be using the name “USB”.
Then, from the drop-down menu next to ‘Format’, choose ‘Mac OS Extended (Journaled)’. Choose ‘GUID Partition Map’ as the scheme if the option is available.
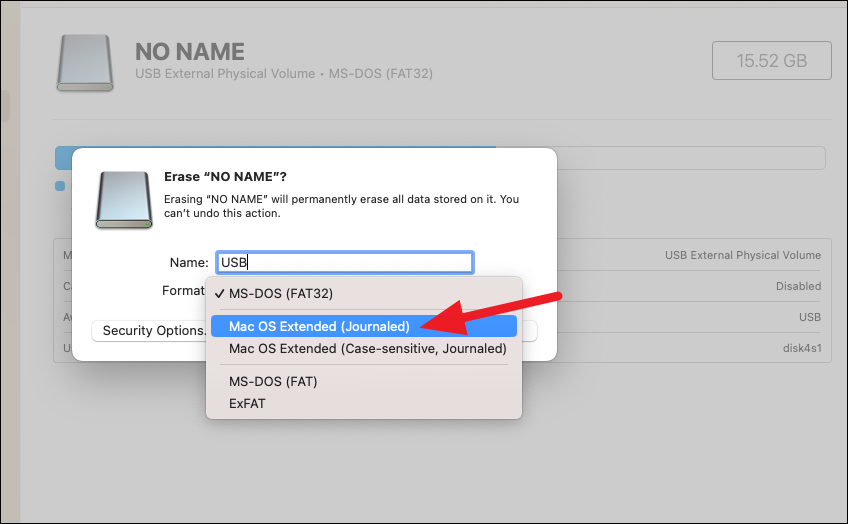
Finally, click ‘Erase’ from the dialog box. It’ll take a couple of seconds to complete.
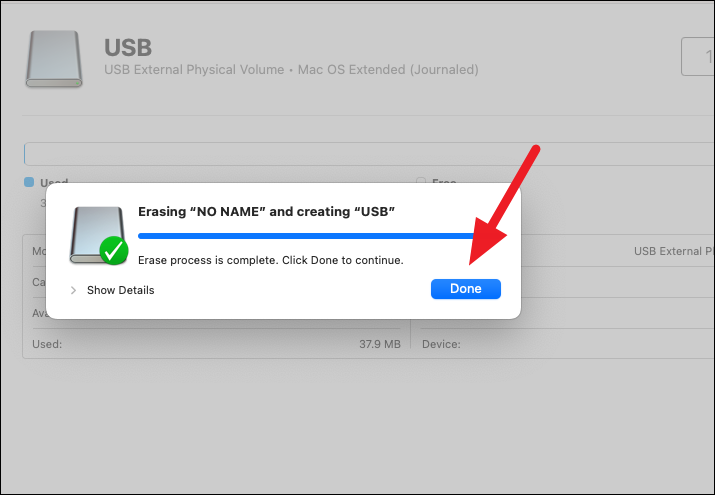
Wait till you get the message, “Erase process is successful”. Click ‘Done’ to close the dialog box. Your external drive is now prepared.
Step-3: Create the Bootable Installer Drive
Once your external drive is prepared, it’s easy to create a bootable Installer drive using the Terminal. All you need to do is execute a command in the terminal.
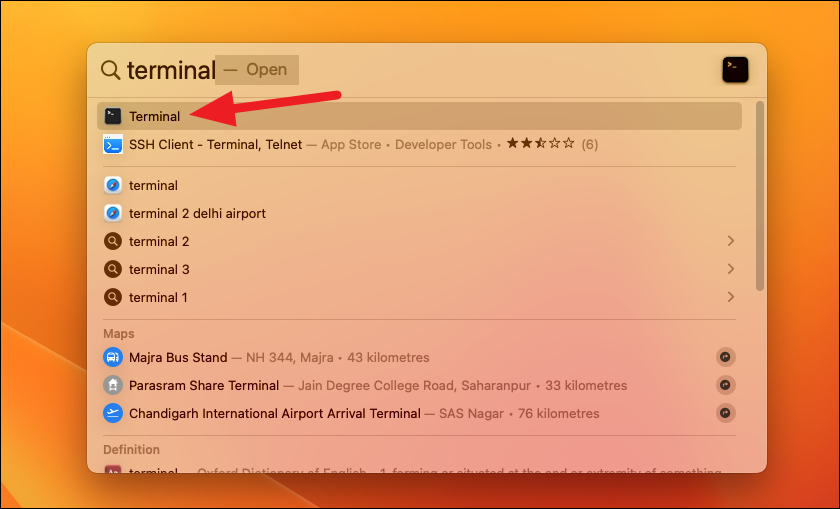
Open the Terminal on your Mac, either using the Spotlight or from the Utilities folder.
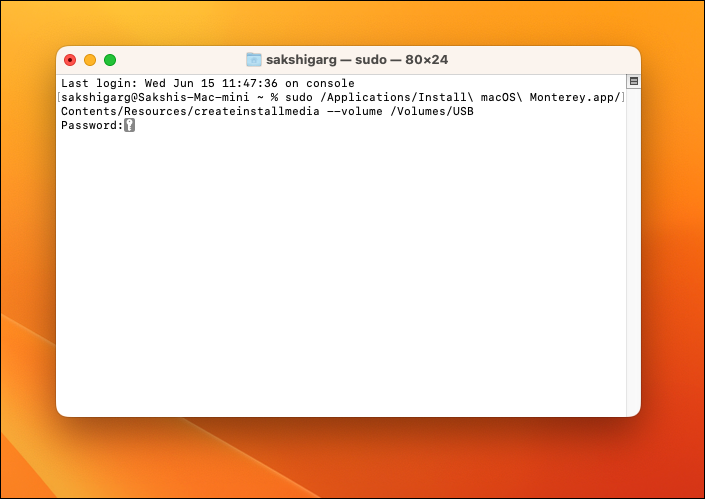
Then, enter or copy-paste the following command in the terminal, while keeping all the spaces and syntax intact:
sudo /Applications/Install\ macOS\ Monterey.app/Contents/Resources/createinstallmedia --volume /Volumes/USBNote: In place of USB at the end of the command, you have to enter the name of your external drive. Since we named our drive “USB” while preparing it, that’s what we’ve entered in the command.
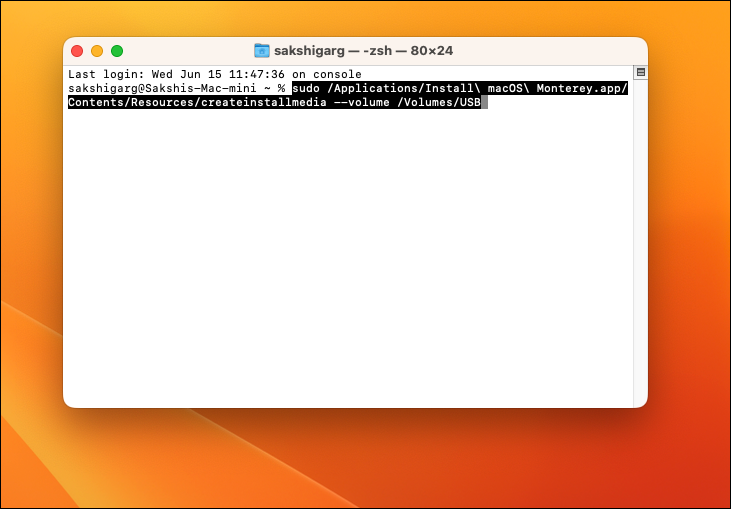
Press the Enter key to execute the above command.
The terminal will ask for the password for your user account on Mac. Enter the password. As you enter the password, you might not see any characters appear on the screen; that’s completely fine. Simply enter the complete password and press Enter.
The terminal will first begin erasing your device. You might have to enter the ‘Y’ command if it asks for your permission to proceed. Then, it might ask for your permission to access the external drive. Click ‘OK’ from the dialog box that appears.
It will then start copying macOS Monterey installation files to your external drive. Depending on the USB writing speed of your Mac and the type of device you’re using, it might take some time. Once the process is complete, you’ll see the message ‘Install Media Available at <device_name>’ on the terminal.
Close the terminal. It’s now time for the final step.
Step-4: Use the Bootable Drive to Install macOS Monterey
Installing macOS Monterey using the Bootable drive is a 2-part process. First, you’ll need to erase your Startup Disk, and then you can reinstall macOS Monterey.
Note: You can try to skip the erasing part and get on with trying to install macOS Monterey straightaway. But most likely, you’ll encounter the error “This Volume Cannot Be Downgraded.” When that happens, you’ll have to first erase the disk and then install macOS Monterey as outlined here.
Erasing the Startup Disk:
With the boot drive plugged into your system, shut down or restart your Mac. On Startup, boot the Mac into Recovery Mode.
For Intel-based Macs, hold down the keys Command + R when your Mac is starting up until the Apple logo appears on the screen to enter the Recovery Mode.
For an M1-based Mac, press and hold the power button while startup until the ‘Loading Startup Options’ screen appears. Select ‘Options’ from the screen and click ‘Continue’ to enter the recovery mode.
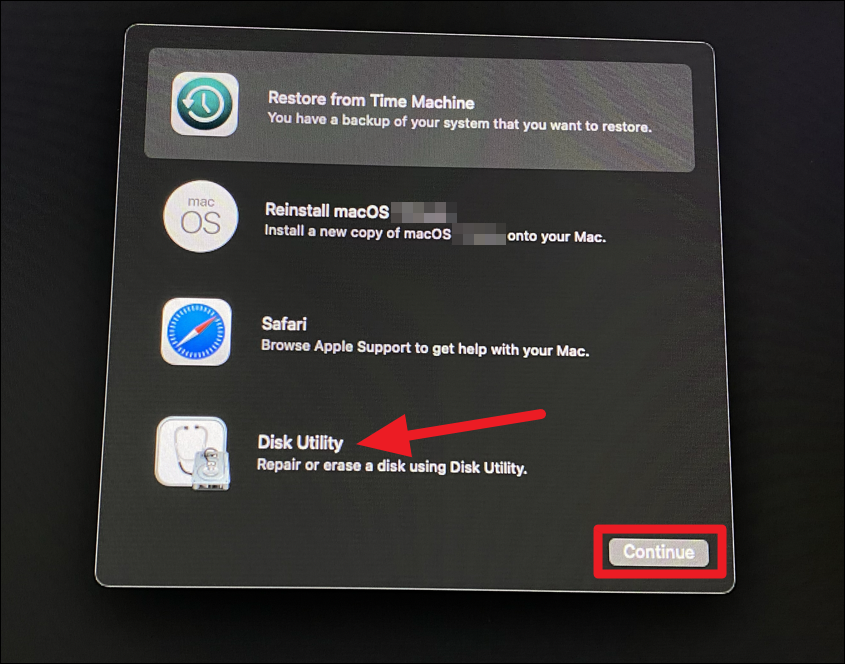
From the options on the screen, select ‘Disk Utility’.
Select your Startup Disk or the Volume that has macOS Ventura installed on it from the sidebar. Then, click ‘Erase’ from the options at the top.
Then, choose ‘APFS’ from the format options. If the option for Scheme is available, select ‘GUID Partition Map’.
Finally, click ‘Erase Volume Group’. Wait for the process to complete and quit Disk Utility.
Installing macOS Monterey:
Now, restart or shut down your Mac again. This time, on an Intel-based Mac, hold down the Option key at startup. On an M1-based Mac, the method is the same; hold down the power button at startup until you see some options appear.
The Startup Manager will appear. You’ll see your bootable USB drive among the other options on the screen; select it and click ‘Continue’.
Then, select the drive where you want to install macOS Monterey. In most cases, only one drive will appear. Select it and click ‘Next’.
The option to ‘Install macOS Monterey’ will appear on your screen; click ‘Continue’ to install it.
Once the installation completes, your system will be running the stable macOS Monterey.
macOS Ventura Beta may allow you to try all the great features it has, but all the bugs might not be worth it, especially if you’re trying it on your main system. It’s also possible you are looking to downgrade because you ended up installing macOS Ventura beta on your main startup disk, instead of a partition. After all, the macOS Ventura beta doesn’t ask for your choice, unlike its predecessors. Whatever the reason, these methods will get you back on macOS Monterey in no time.