
Snap Assist in Windows 11 automatically suggests and arranges open windows when you snap a window to an edge or corner of your screen. While this feature speeds up multitasking for some, it can disrupt workflows for users who prefer manual control over window placement. Disabling Snap Assist stops these automatic suggestions and lets you organize your desktop without pop-up thumbnails or layout prompts.
Turn Off Snap Assist Using Windows Settings
Step 1: Open the Settings application by pressing Windows key + I or by clicking the Start button and selecting Settings.
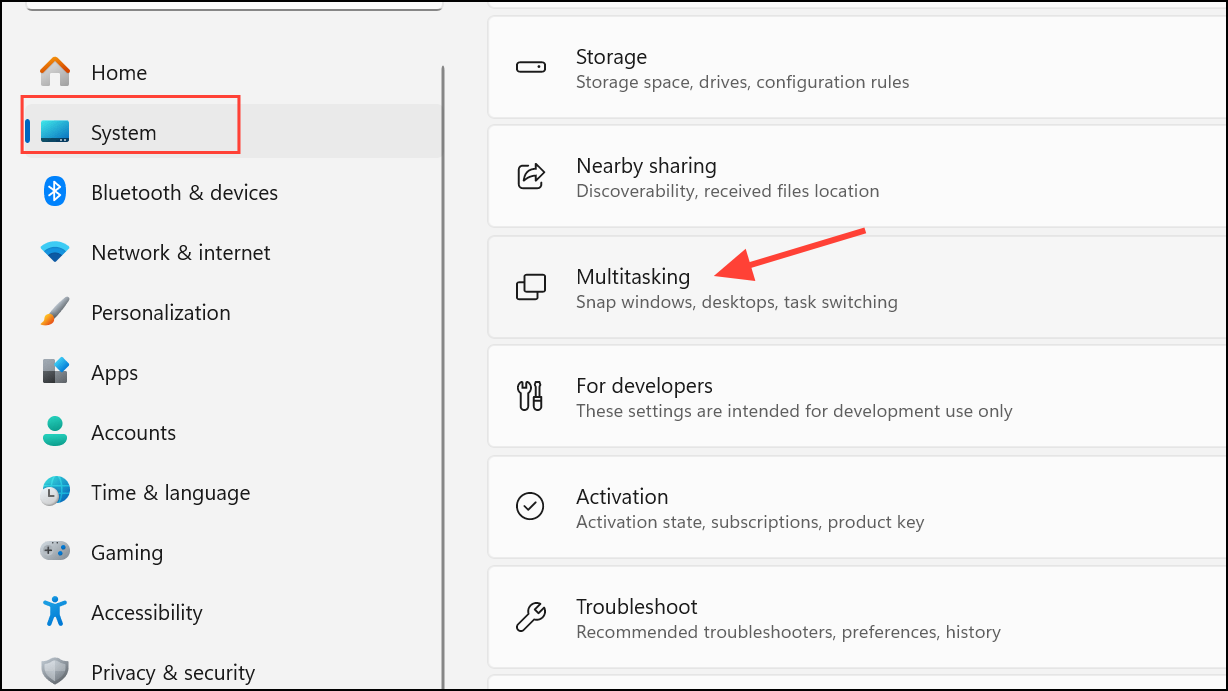
Step 2: In the Settings window, select System from the menu on the left. Then, click Multitasking on the right panel to access multitasking options.
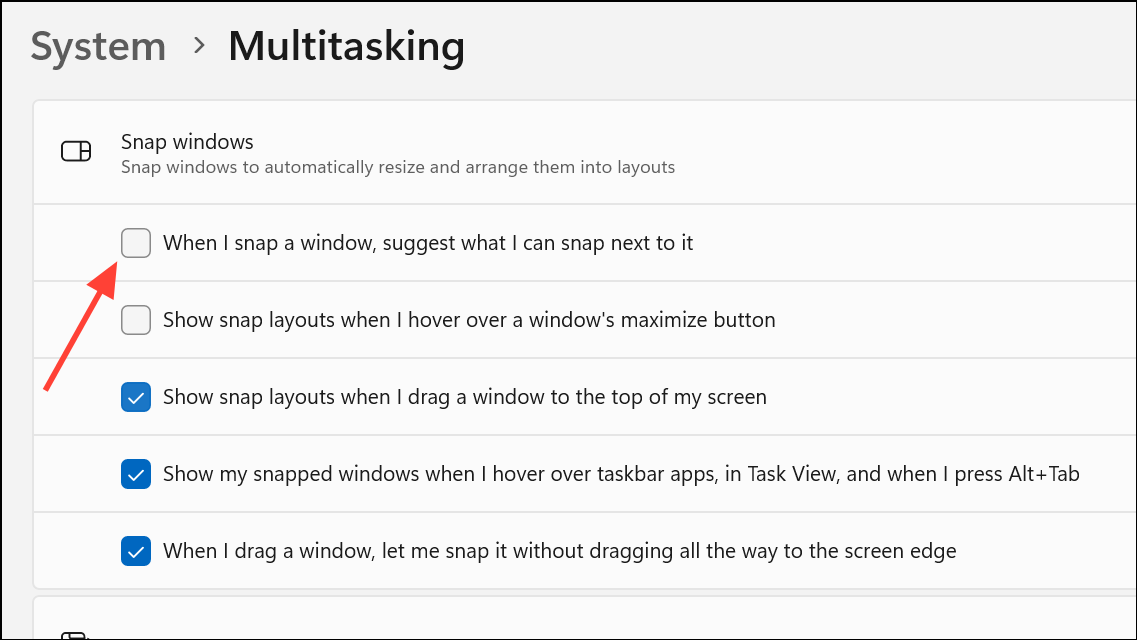
Step 3: Locate the Snap windows section. Click anywhere on the section to expand the available options. Here, you will see several checkboxes for customizing Snap behavior.

Step 4: Uncheck the box labeled When I snap a window, show what I can snap next to it. This disables Snap Assist’s automatic suggestions when snapping windows. The setting may be worded slightly differently depending on your system version, but it will always reference showing suggestions or what you can snap next to a window.
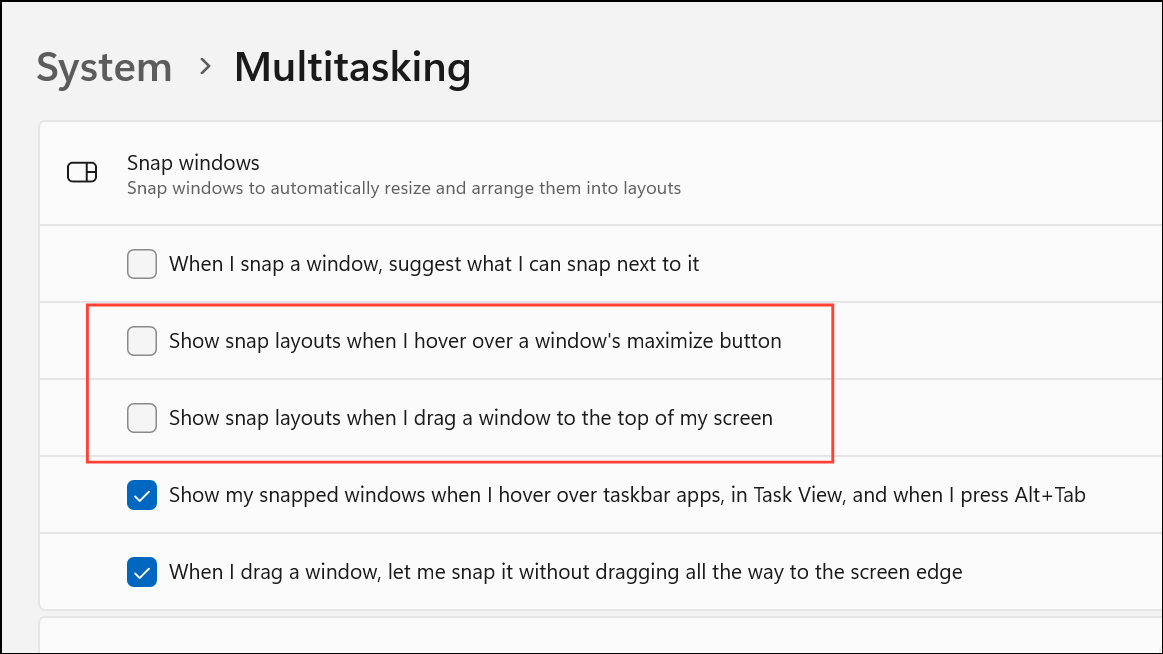
Step 5: Optionally, review and uncheck other Snap-related options if you want to further reduce automated snapping features, such as Show snap layouts when I hover over a window’s maximize button or Show snap layouts when I drag a window to the top of my screen.
Step 6: Close the Settings app. The changes take effect immediately, so you do not need to restart your computer.
Disable Snap Assist Using the Windows Registry
For users who want more granular control or need to apply this setting to multiple user accounts, editing the Windows Registry is an alternative. Caution: Modifying the registry can affect system stability. Always back up your registry before making changes.
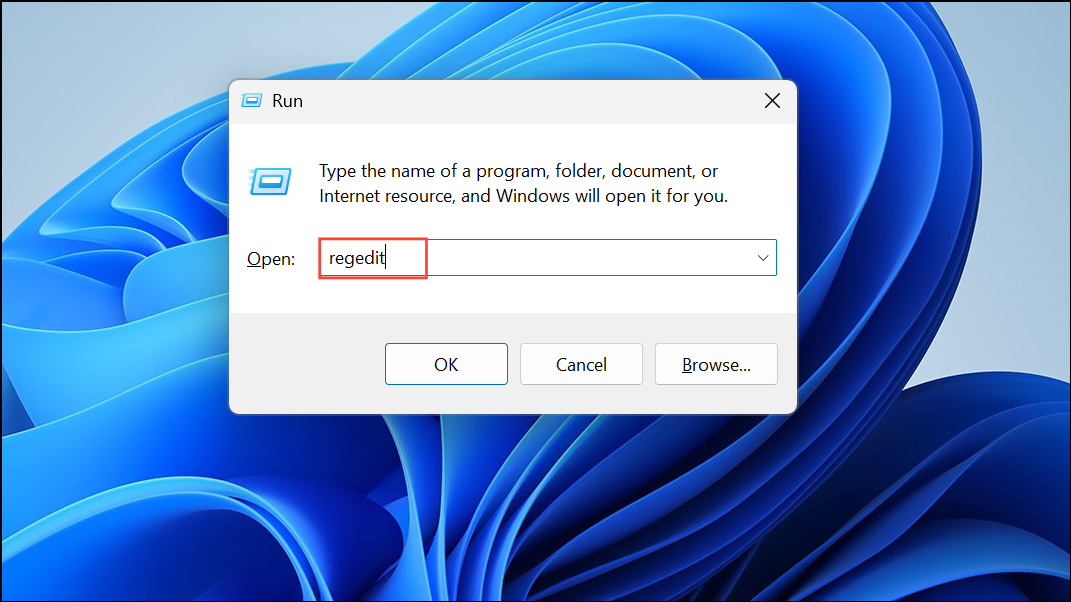
Step 1: Press Windows key + R to open the Run dialog, then type regedit and press Enter. Confirm any user account control prompts.
Step 2: In the Registry Editor, navigate to:
HKEY_CURRENT_USER\Software\Microsoft\Windows\CurrentVersion\Explorer\Advanced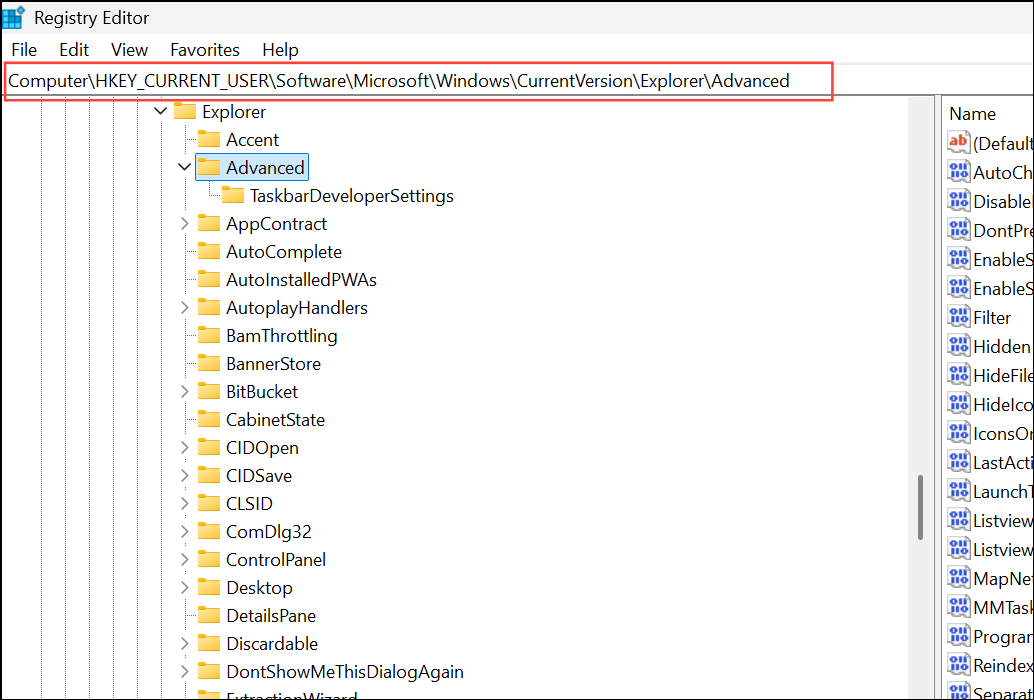
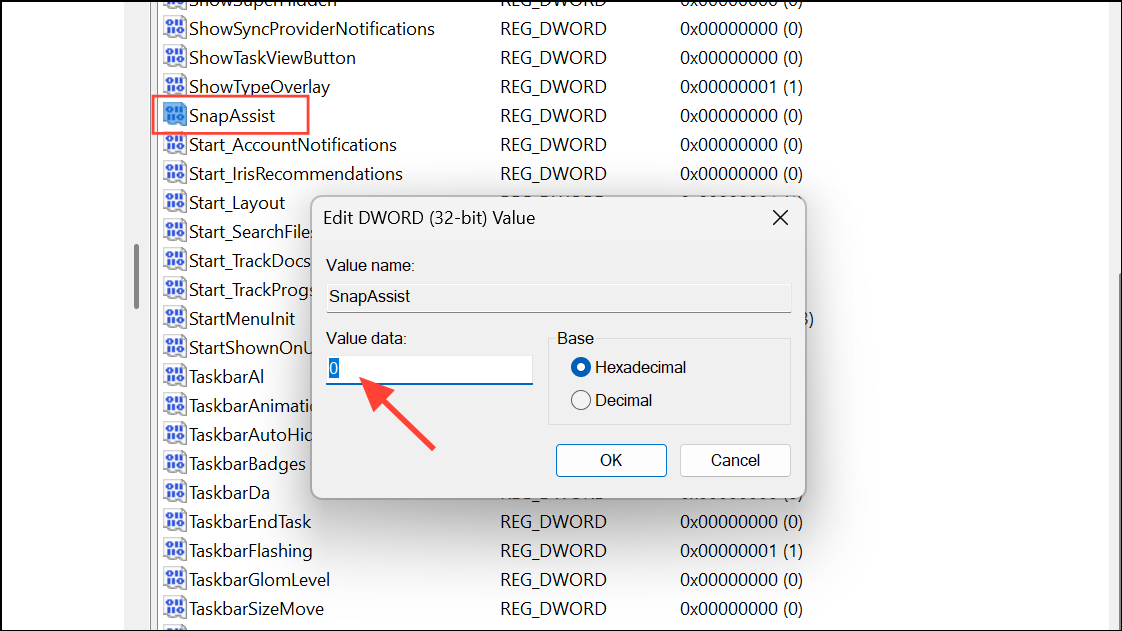
Step 3: In the right pane, find the SnapAssist entry. Double-click it to edit the value. Set the value data to 0 to disable Snap Assist. If the entry does not exist, right-click in the right pane, select New > DWORD (32-bit) Value, name it SnapAssist, and set its value to 0.
Step 4: Close Registry Editor. For the change to take effect, sign out and sign back in, or restart your computer.
Disable Snap Assist via Registry File
If you prefer an automated method, you can create a registry file to toggle Snap Assist. This is especially helpful for system administrators managing multiple devices.
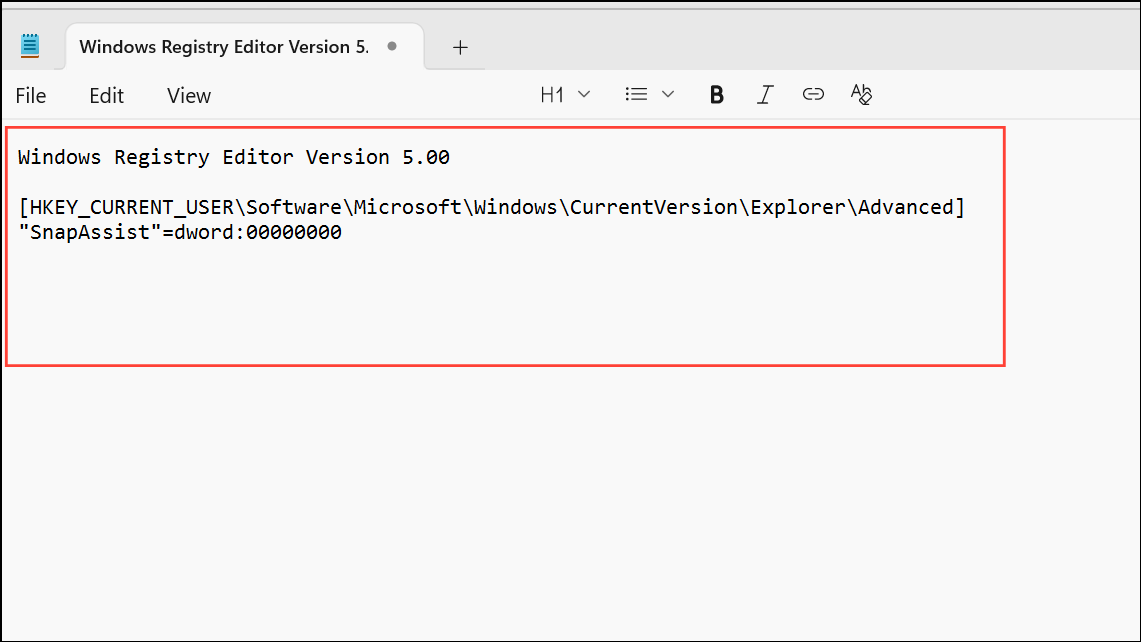
Step 1: Open Notepad and paste the following lines:
Windows Registry Editor Version 5.00

[HKEY_CURRENT_USER\Software\Microsoft\Windows\CurrentVersion\Explorer\Advanced]
"SnapAssist"=dword:00000000
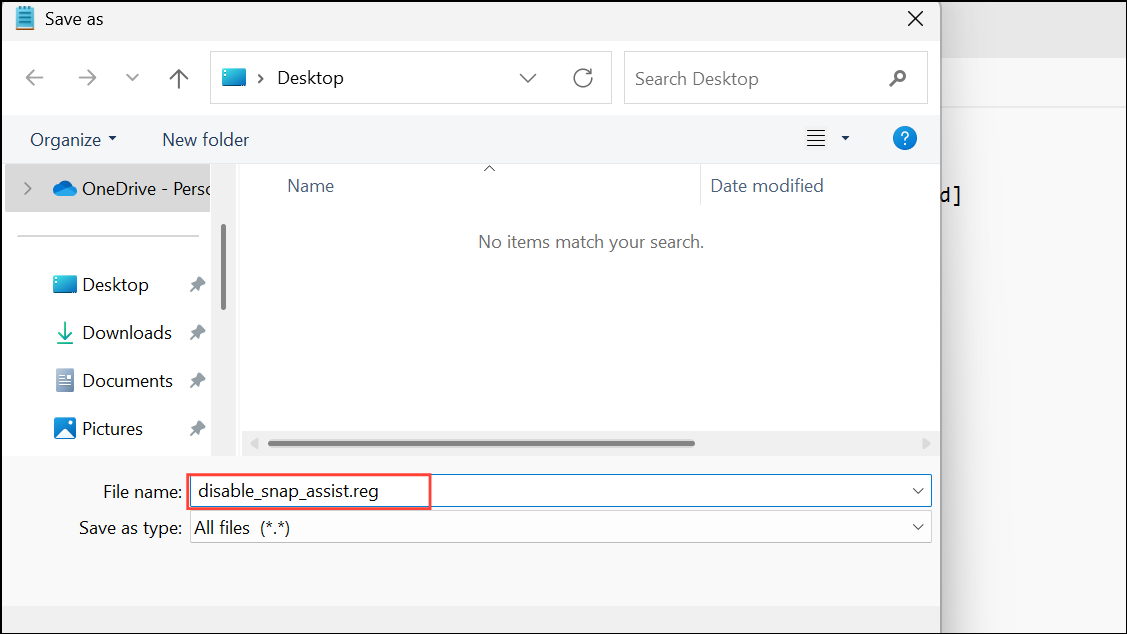
Step 2: Save the file with a .reg extension, such as disable_snap_assist.reg.
Step 3: Double-click the file to run it. Accept any prompts to allow changes to your registry.
Step 4: Sign out and sign back in, or restart your computer for the change to take effect.
Additional Snap Feature Customizations
Beyond Snap Assist, Windows 11 offers several related features that can be individually toggled for a more tailored multitasking experience. These settings are found in the same System > Multitasking section of Settings:
- Show snap layouts when I hover over a window’s maximize button: Disables the Snap Layouts pop-up, removing layout suggestions when hovering over maximize.
- Show snap layouts when I drag a window to the top of my screen: Turns off the Snap Bar, which appears when dragging windows to the top edge.
- Show my snapped windows when I hover over taskbar apps, in Task View, and when I press Alt + Tab: Hides Snap Groups previews in the taskbar and Task View.
- When I drag a window, let me snap it without dragging all the way to the screen edge: Requires dragging windows fully to the edge to trigger snapping.
Adjusting these options can help you further refine your multitasking workflow, especially if you want to minimize interruptions or accidental window grouping.
Disabling Snap Assist in Windows 11 restores manual control over window arrangement, letting you organize your workspace exactly how you want—no more automatic suggestions or grouping. If you ever want Snap Assist back, just reverse these steps.