
On iOS 26 and iPadOS 26, supported AirPods can act as a remote for the Camera app and other compatible camera apps. You press the stem to fire the shutter or start/stop video, and you can also route the camera’s microphone input to your AirPods for clearer voice capture.
This guide covers compatibility, setup, daily use, microphone options, and dependable fixes if the remote doesn’t respond.
- An iPhone or iPad running iOS 26 or iPadOS 26.
- AirPods 4, AirPods Pro 2, or AirPods Pro 3.
- The built-in Camera app or another supported camera app.
- At least one AirPod worn in your ear and connected via Bluetooth.
Check compatibility and prepare your devices
Step 1: Confirm your iPhone or iPad is on iOS 26 or iPadOS 26. This feature is only available on these versions. If you’re on an earlier release, update before continuing.
Step 2: Verify your AirPods model is supported. AirPods 4, AirPods Pro 2, and AirPods Pro 3 work with Camera Remote; earlier models don’t. You can check the model in Settings under your AirPods details.
Step 3: Wear at least one AirPod and check it’s connected. The remote expects in-ear wear detection for reliability. If you don’t see your AirPods as connected, put them in your ear and re-open Settings.
Step 4: Keep Bluetooth turned on. The camera remote operates over Bluetooth between your devices. Staying within normal Bluetooth range ensures consistent response.
Step 5: Allow any AirPods firmware updates if prompted. Updates may add the Camera Remote option or improve responsiveness. Keep the case near your iPhone until the update completes.
Configure Camera Remote on your AirPods
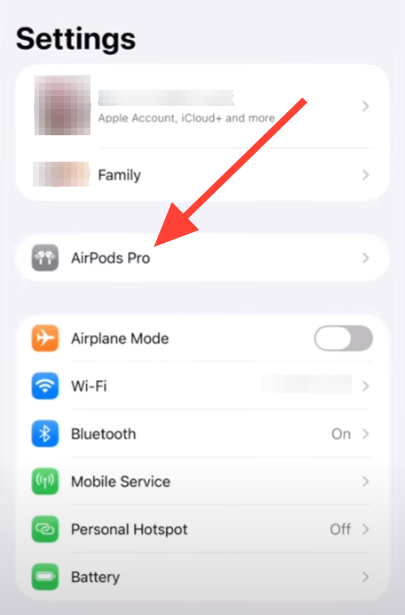
Step 1: Open the Settings app on your iPhone or iPad. Make sure your AirPods show as connected so their settings appear. If needed, insert an AirPod to trigger the connection.
Step 2: Tap the name of your AirPods near the top of Settings. This opens the dedicated AirPods controls. Wait a moment if the page loads options slowly.
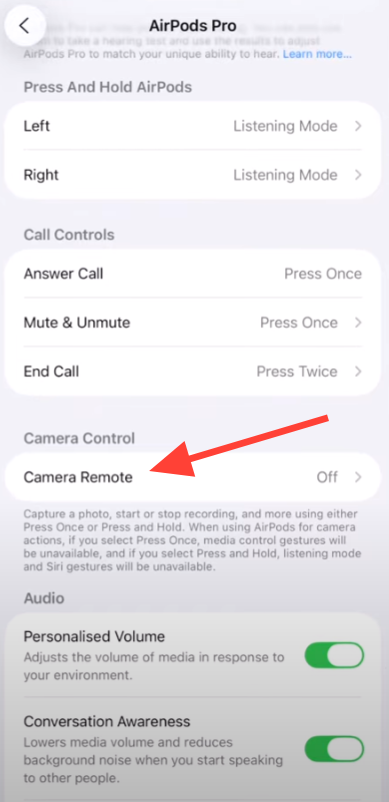
Step 3: Tap Camera Remote. This is the control that maps a camera action to an AirPods gesture. The setting only appears on supported models running the required software.
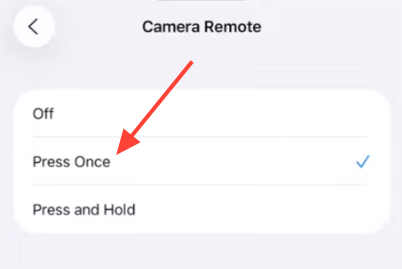
Step 4: Choose Press Once or Press and Hold. Your selection determines which gesture will fire the shutter or start/stop video. You can change this anytime using the same menu.
Capture photos with your AirPods
Step 1: Wear at least one AirPod and confirm it’s connected. This ensures the press is recognized as a camera action. Keep your iPhone or iPad positioned on a stable surface or tripod.
Step 2: Open the Camera app and select Photo. Frame the shot as you normally would. Ensure nothing blocks the lens or the subject.
Step 3: Press the AirPods stem using your chosen gesture to trigger the shutter. In many regions, you’ll see a 3‑second countdown before the photo is taken, giving you time to move your hand away. In some regions the countdown and feedback tone aren’t available, and you won’t hear a tone if the ringer is off or Live Photo is on.
Record video with your AirPods
Step 1: Open the Camera app and switch to Video. Wearing at least one connected AirPod is still required. Confirm your storage has space to avoid recording interruptions.
Step 2: Press the AirPods stem to start recording. This works like a remote record button, so you don’t need to touch the screen. Keep your phone stable to reduce shake.
Step 3: Press the stem again to stop recording. Wait a moment for the file to save. Review the clip to confirm audio and framing look right.
Use AirPods as a microphone in camera apps (Control Center)
Step 1: Wear your AirPods and ensure they’re connected. This allows the camera app to route input to them. Open the Camera app and select Video.
Step 2: Open Control Center and tap Camera Controls. This panel provides camera-specific options during shooting. If you don’t see it, ensure the Camera app is active.
Step 3: Tap Input, then select your AirPods. This assigns your AirPods as the capture mic for the current session. You might also see a Same as System option that follows your device’s input setting.
Step 4: Tap Mic Mode and choose Automatic, Standard, Voice Isolation, or Wide Spectrum. Voice Isolation boosts speech and reduces background noise; Wide Spectrum captures more ambient sound; Standard is balanced; Automatic selects based on context. Pick the mode that fits your recording environment.
Step 5: Press the AirPods stem to start recording video. Speak at a natural level; the microphone will sit closer to your mouth than the phone, improving voice clarity. Press again to stop when finished.
Select AirPods as the camera mic via Settings (alternative)
Step 1: Open Settings on your iPhone or iPad. Keep your AirPods connected and in your ear. This ensures they appear as an input option.
Step 2: Tap Sounds & Haptics, then tap Input. This screen lists available audio inputs. Select your AirPods to route mic input from them.
Step 3: Return to the Camera app and record video. Your device will use AirPods for audio according to the input setting. Change the mic mode in Camera Controls if needed.
Choose a gesture: Press Once vs Press and Hold
- Press Once: Quick to trigger, useful for fast shots or starting video. Media control gestures are temporarily unavailable while you use a supported camera app.
- Press and Hold: Harder to trigger accidentally, better if you often tap the stems while adjusting fit. Listening modes and Siri gestures are temporarily unavailable while you use a supported camera app.
- You can switch between these at any time in Settings if your usage changes.
Troubleshooting
Method 1: Verify eligibility and software
Step 1: Check you’re on iOS 26 or iPadOS 26. The Camera Remote feature isn’t present on earlier versions. Update first if you don’t see the setting.
Step 2: Confirm your model is AirPods 4, AirPods Pro 2, or AirPods Pro 3. Unsupported models won’t show Camera Remote in Settings. Check the model number in your AirPods info page if unsure.
Method 2: Check connection and in-ear detection
Step 1: Put at least one AirPod in your ear and verify it shows as connected. The feature is designed for in-ear use, not holding the case or a loose earbud. Re-seat the AirPod if connection drops.
Step 2: Toggle Bluetooth off and on if presses aren’t recognized. This refreshes the link and often restores the remote action. Keep the phone and case nearby to maintain a stable connection.
Method 3: Update AirPods firmware
Step 1: Place both AirPods in the charging case and set the case near your iPhone or iPad. Staying close helps the update start. Keep your device unlocked for a moment to allow checks.
Step 2: Open the case lid to nudge a firmware check. If an update is available, you may see prompts; follow them. Leave the lid open for a minute to allow the process to begin.
Step 3: Wait several minutes for the firmware to install. Avoid removing the AirPods during the update. Afterward, revisit Settings to look for the Camera Remote option.
Method 4: Confirm camera app support and mode
Step 1: Test with Apple’s Camera app first. If it works there, third‑party behavior depends on whether the app supports Camera Remote. Where supported, the same gesture will trigger the shutter or recording.
Step 2: Use the correct mode: Photo for pictures and Video for movies. The press starts the relevant action in the active mode. Switch modes within the Camera app if the gesture appears unresponsive.
Method 5: Check timer and tone indicators
Step 1: If you don’t hear a feedback tone, make sure your ringer isn’t muted. You also won’t hear a tone when Live Photo is on. This is expected behavior, not a fault.
Step 2: If the 3‑second countdown doesn’t appear in Photo, note that some regions don’t provide it. In those areas, rely on visual cues in the viewfinder or the timing of your press. Consider using the on‑screen timer if you need longer prep.
Tips and notes
- Keep at least one AirPod in your ear; this is how the feature is intended to work.
- The remote works within normal Bluetooth range; obstacles and interference can reduce reliability.
- Use a tripod or stable surface to reduce blur when you’re away from the device.
- For clean audio, try Voice Isolation in quiet-to-moderate environments; use Wide Spectrum when you want ambient sound.
- You can choose which AirPod serves as the microphone in your AirPods settings if needed.
Once configured, pressing your AirPods stem is a fast way to take photos, start video, and capture cleaner voice audio without touching the screen. Keep your software updated and revisit the gesture choice if your needs change over time.