With Microsoft's latest Windows 11 Moment 5 update, users can now transform their Android smartphones into webcams for their PCs. This feature mirrors Apple's Continuity Camera, offering enhanced webcam capabilities without additional hardware. Here's how to set it up and use your Android device as a webcam on Windows 11.
Connecting Your Android Device to Your PC
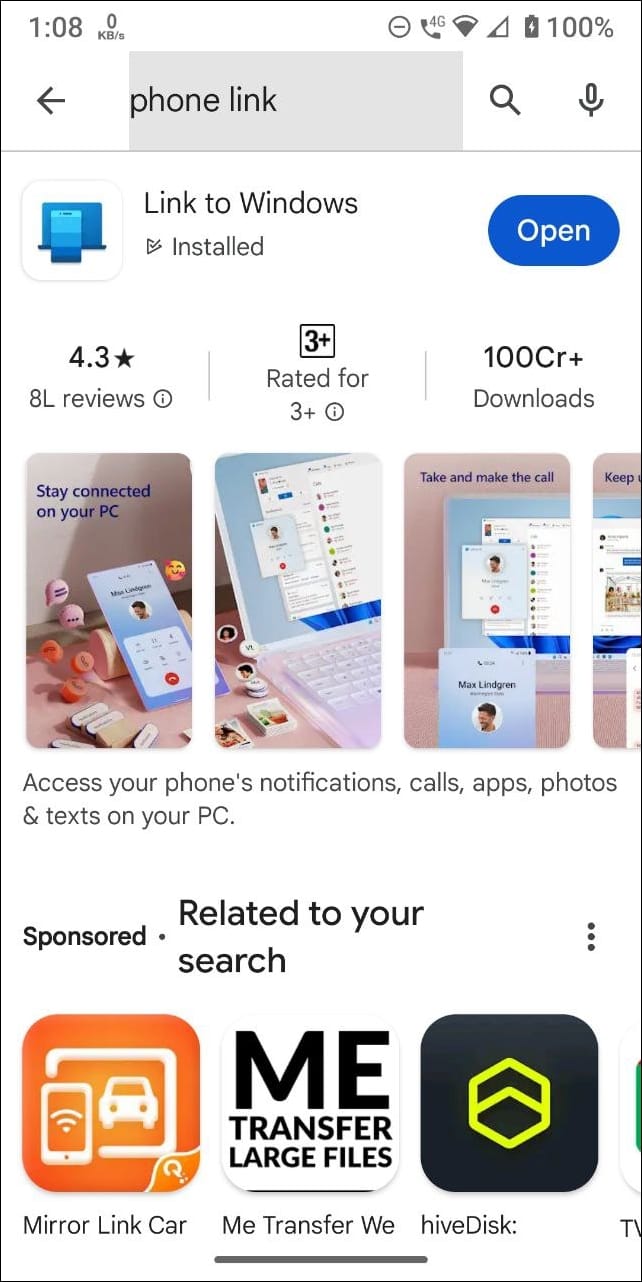
Step 1: Download the 'Link To Windows' app from the Google Play Store on your Android smartphone.
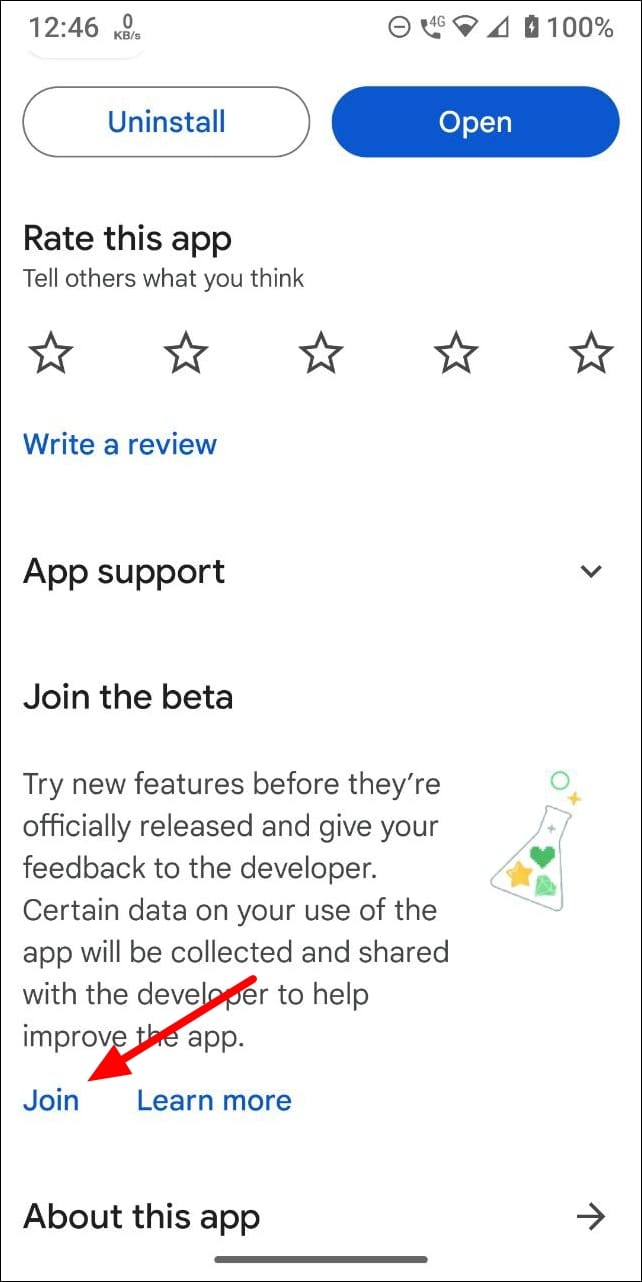
Step 2: Ensure that the app is updated to version 1.24012 or later. If you're on an older version, consider joining the beta program to receive the latest updates.
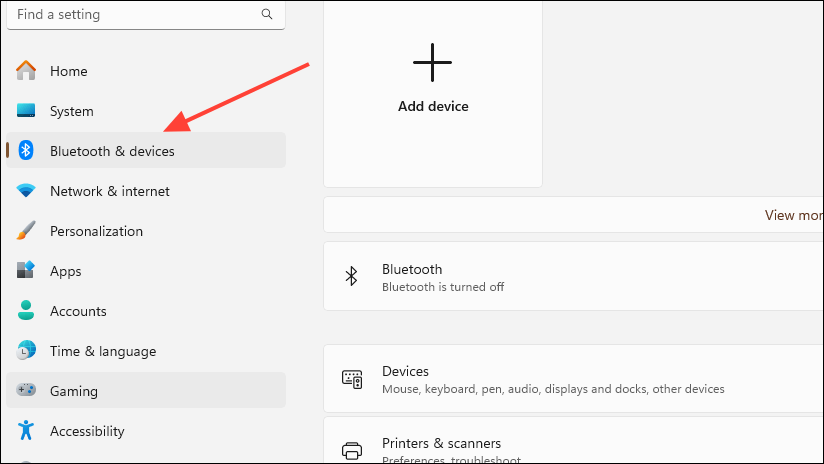
Step 3: On your Windows PC, open the Settings app. Navigate to the 'Bluetooth and Devices' section located on the left sidebar.
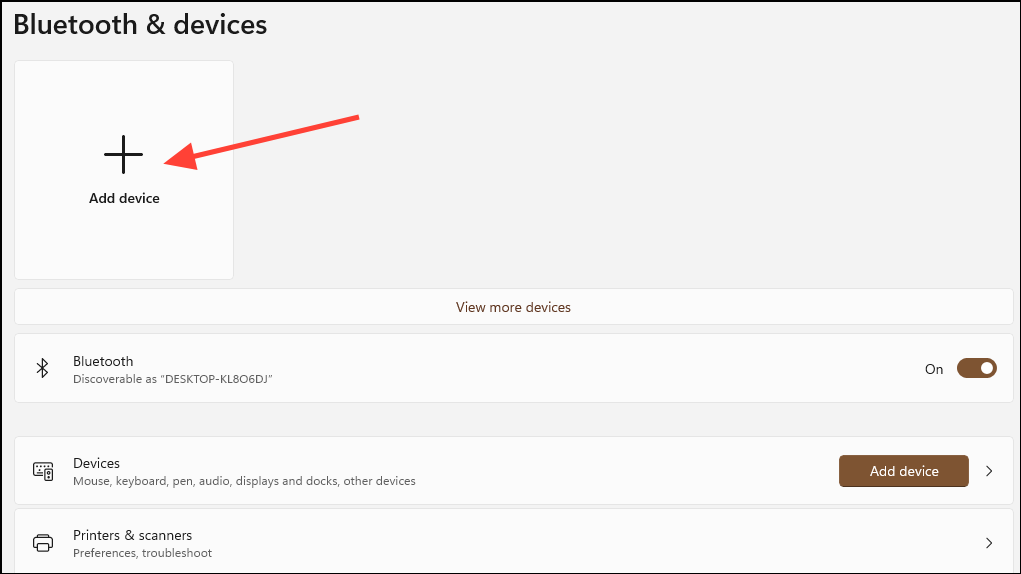
Step 4: Ensure that Bluetooth is enabled on both your PC and Android device. Then, click on the 'Add Device' option on your PC.
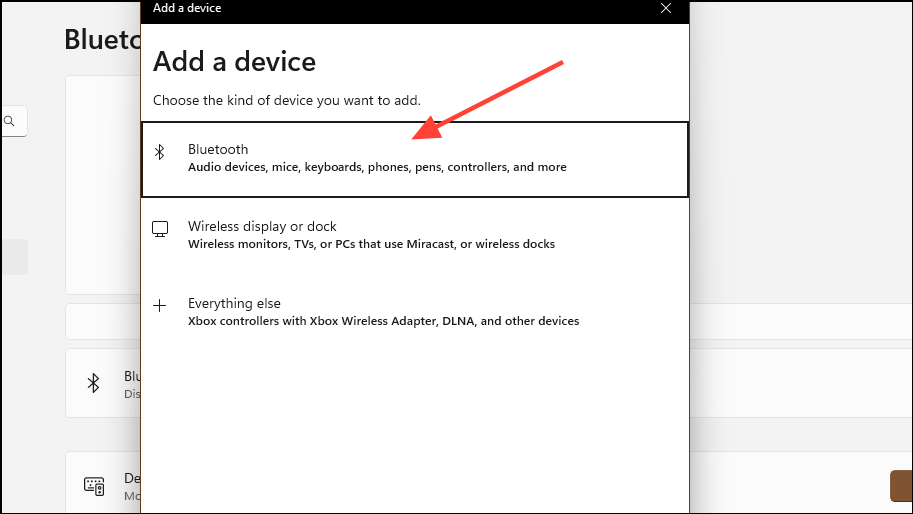
Step 5: A new window will pop up. Select the 'Bluetooth' option to search for nearby devices.
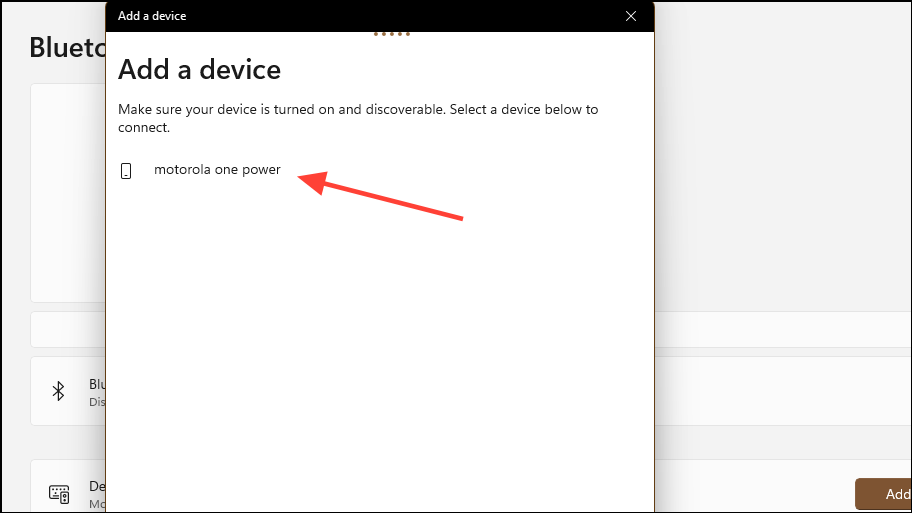
Step 6: When your Android device appears in the list, click on it to initiate the connection.
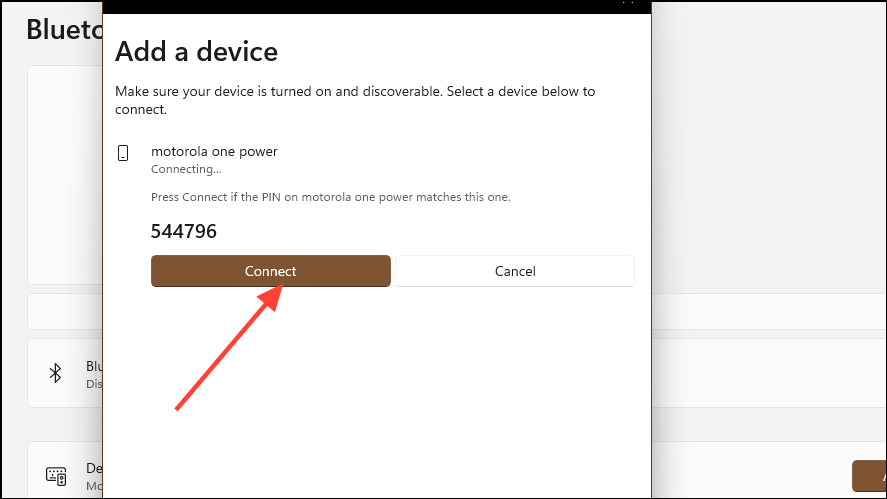
Step 7: A pairing code will be displayed on both devices. Confirm that the codes match, then click 'Connect' on your PC to complete the pairing process.
Setting Up Your Android Device as a Webcam
Step 1: With your devices now paired, return to the 'Bluetooth and Devices' page in your PC's Settings and click on 'Mobile Devices'.
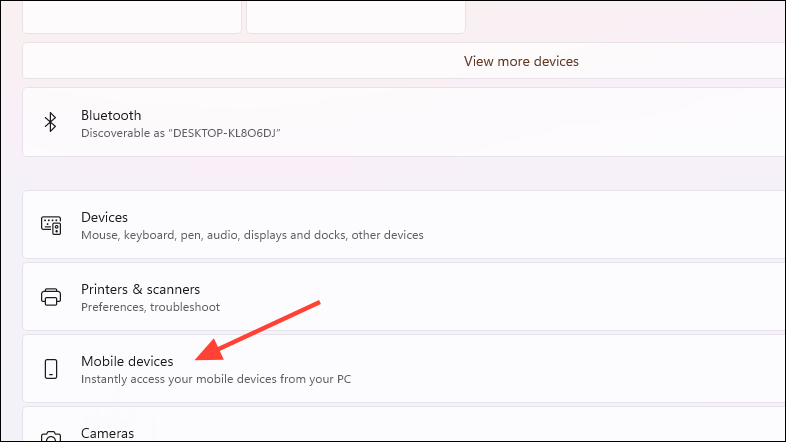
Step 2: Locate the option 'Allow this PC to access your mobile devices' and toggle it on.
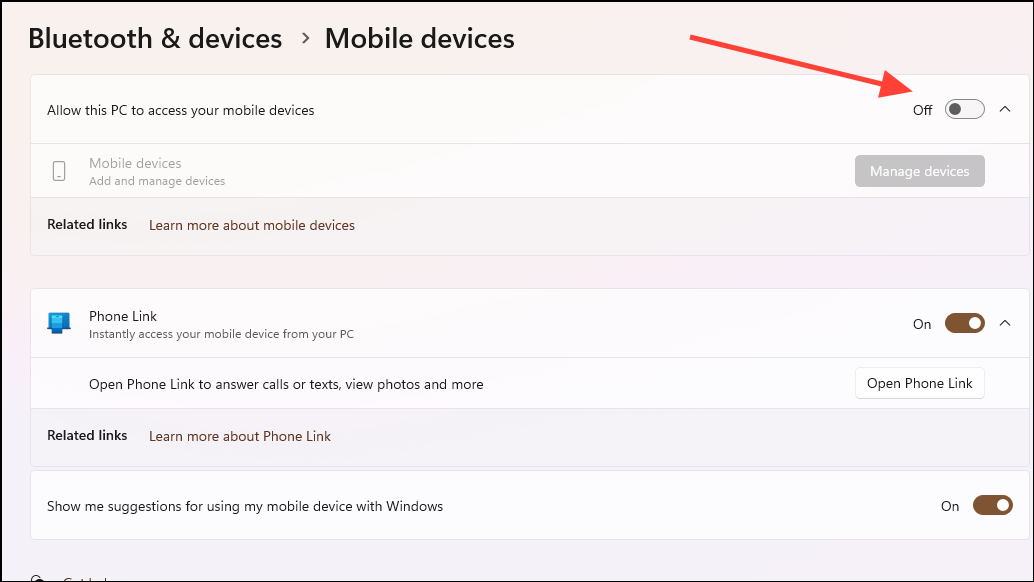
Step 3: Windows will begin installing the Cross-Device Experience Host Update, essential for this feature to function properly.
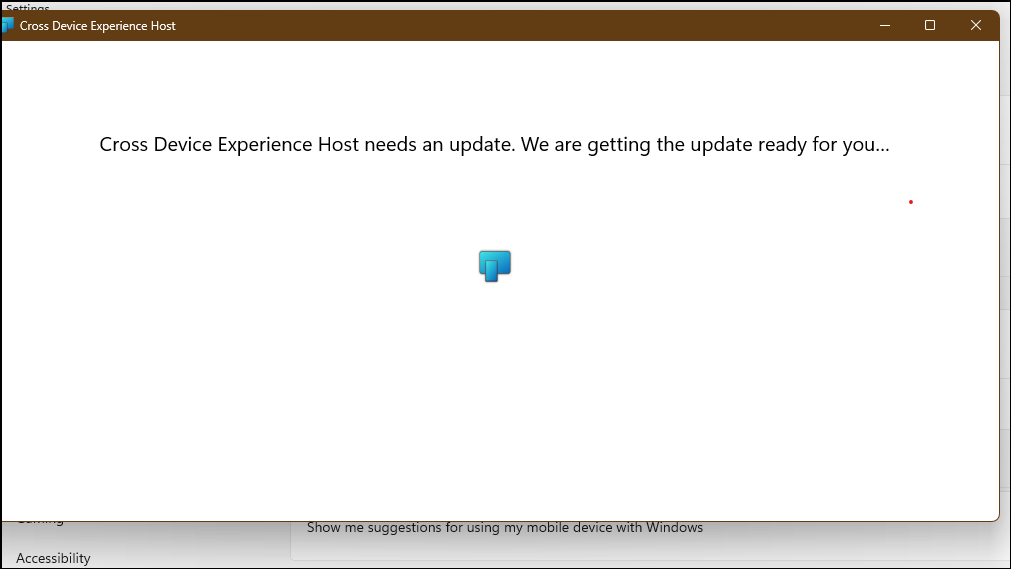
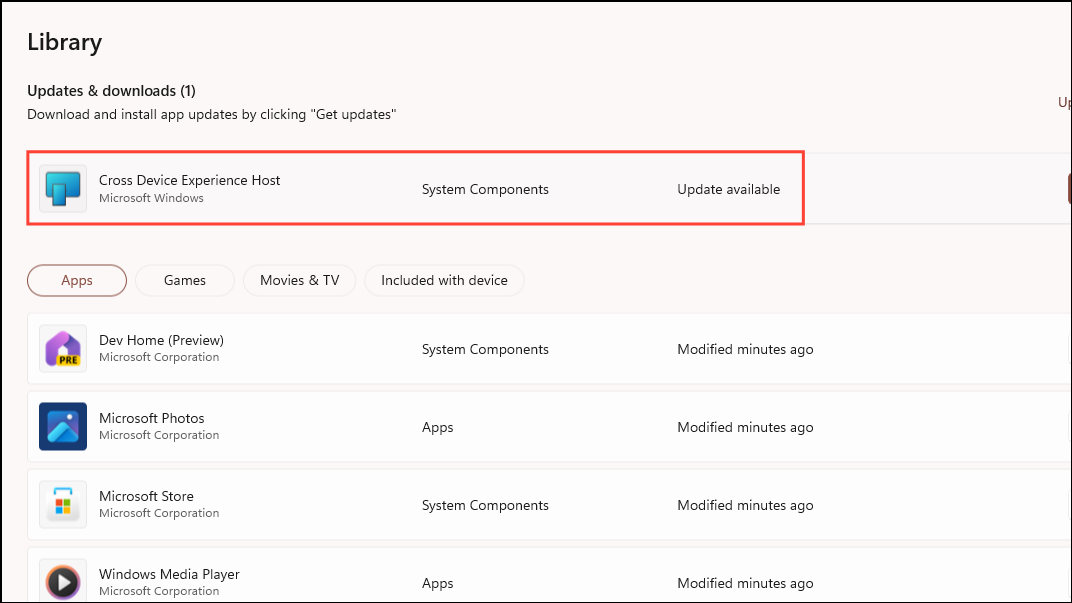
Step 4: If you encounter any issues with the update, you can manually install it via the Microsoft Store.
Step 5: After the update, click on 'Manage Devices' again. A pop-up will appear, allowing you to add your Android device.
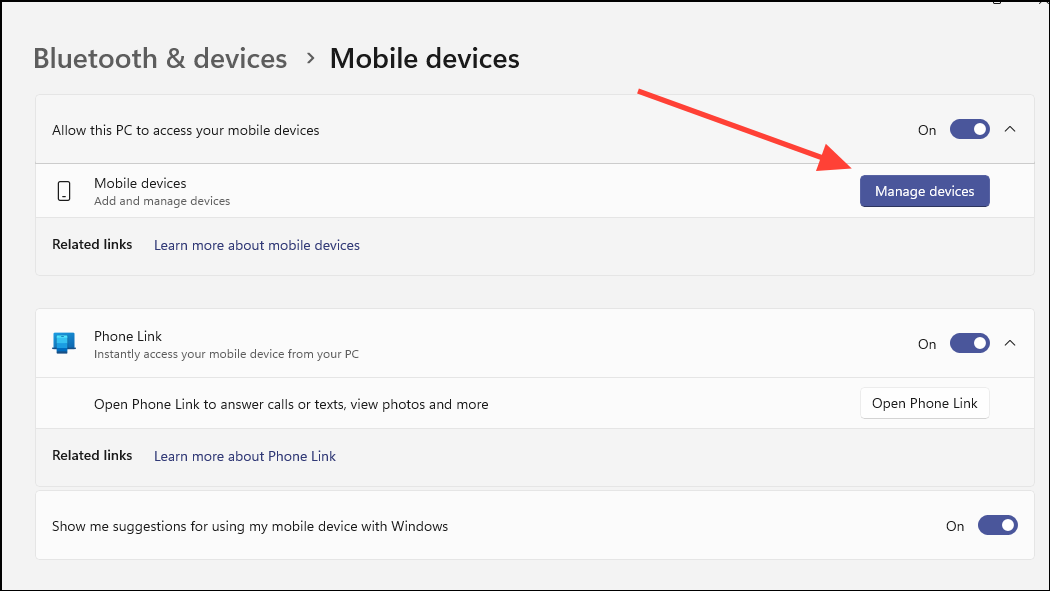
Step 6: In the pop-up window, select 'Add device' to proceed.
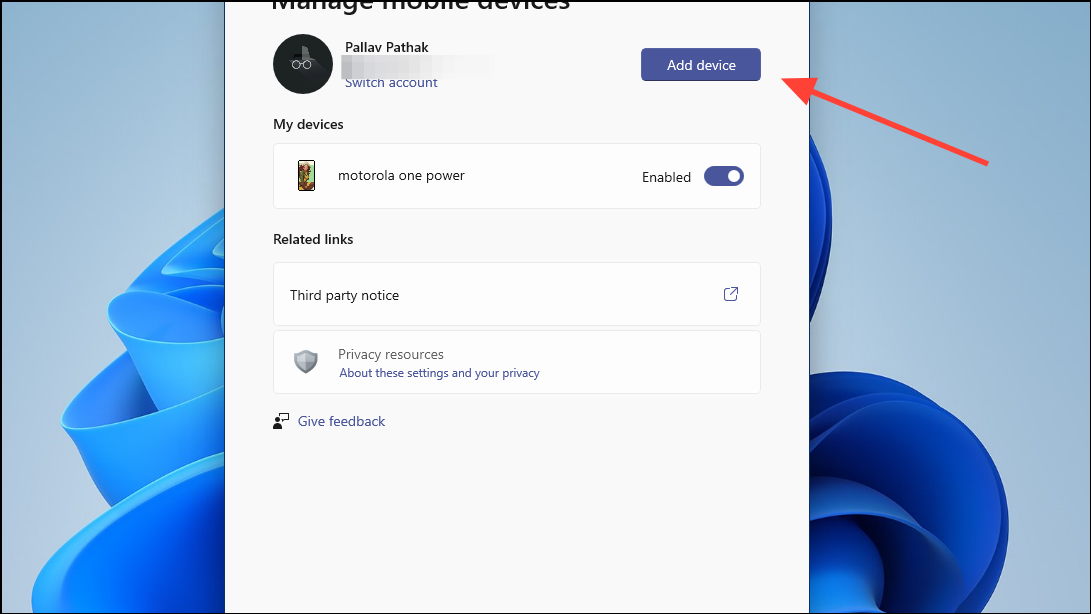
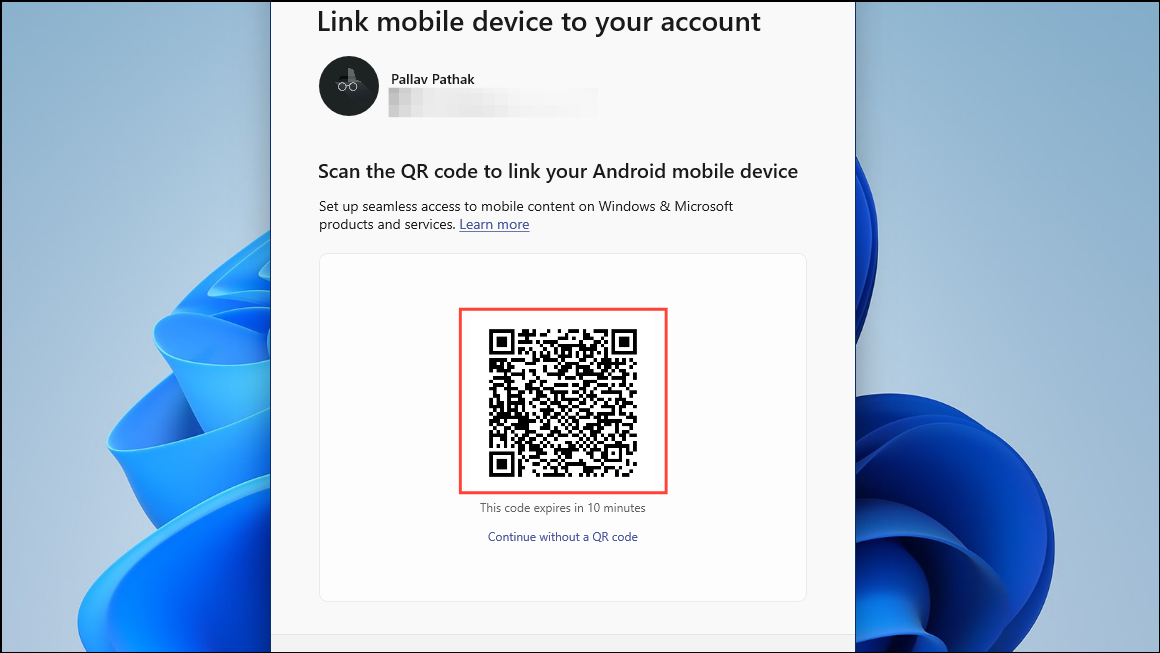
Step 7: A QR code will be displayed on your PC. Open the Link To Windows app on your Android device and scan this QR code.
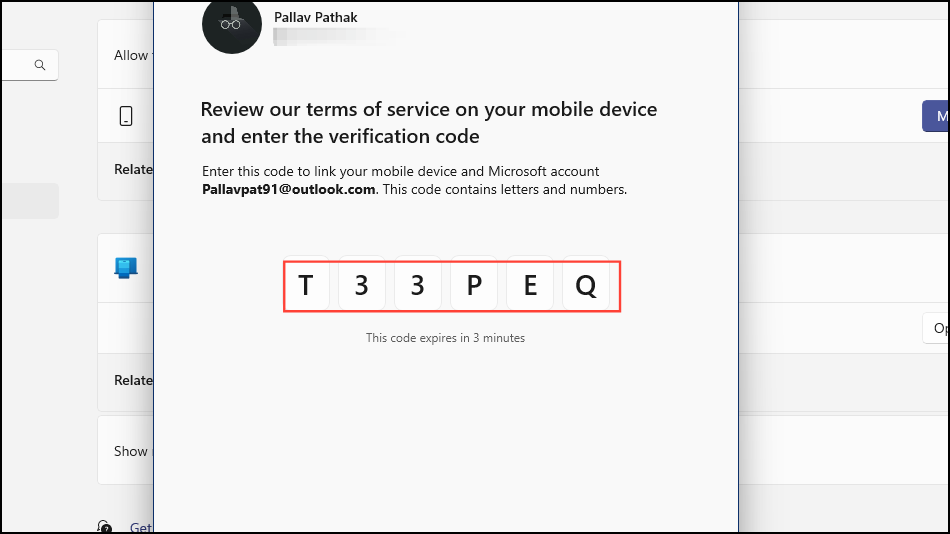
Step 8: After scanning, a six-digit alphanumeric code will appear. Enter this code on your Android device to verify the connection.
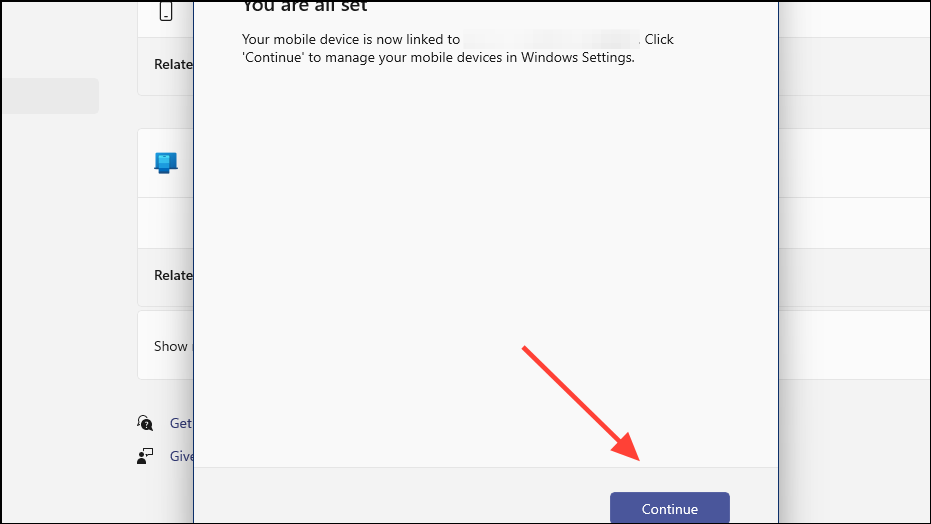
Step 9: Windows will take a moment to finalize the connection. Once paired, a confirmation message will appear. Click 'Continue' to proceed.
Step 10: Your Android device should now be listed under 'My mobile devices'. Toggle on the 'Use as a connected camera' option to enable webcam functionality.
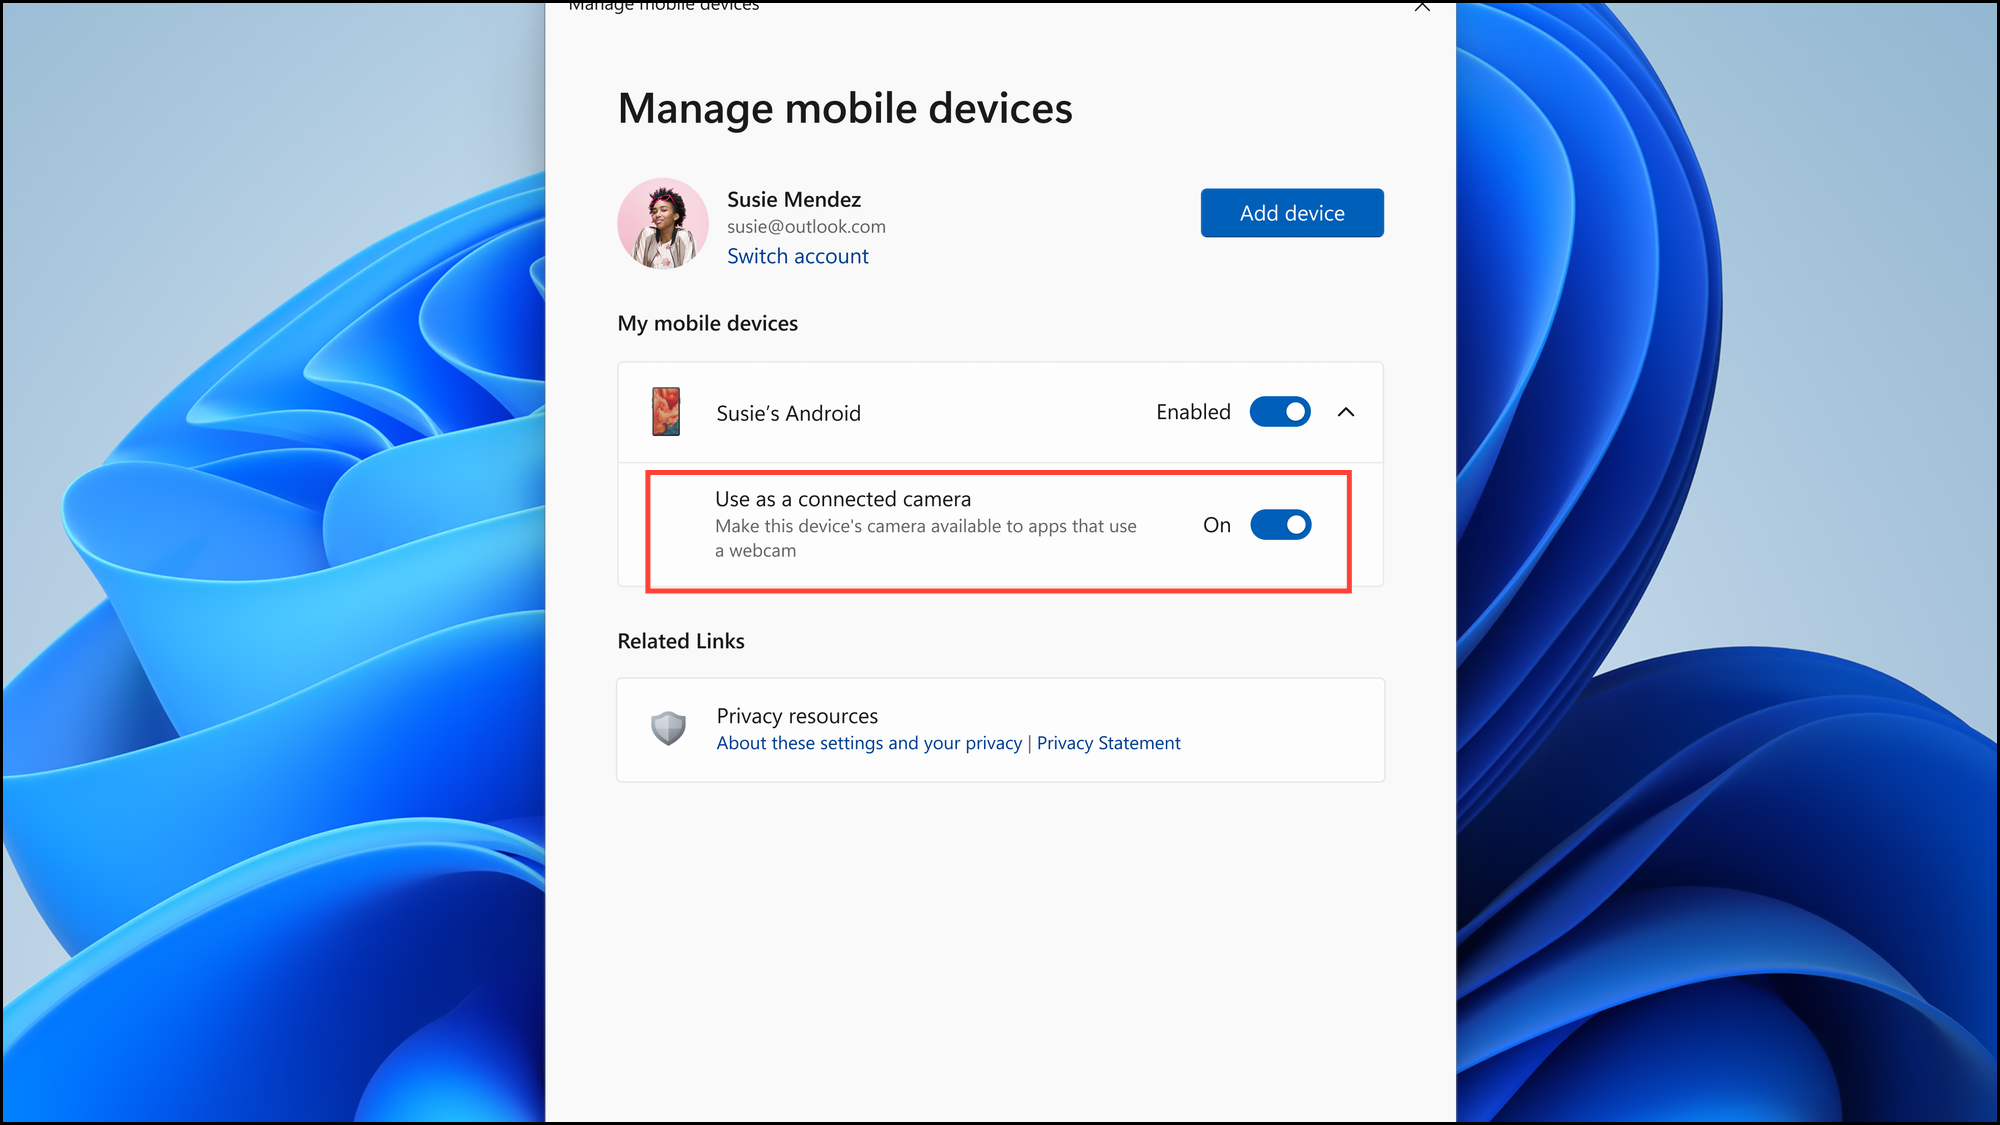
With these steps completed, your Android device is ready to be used as a webcam for your Windows 11 PC.
Using Your Android Device as a Webcam
Step 1: Open the Camera app on your Windows PC. A prompt will appear requesting permission to use your mobile device as a camera. Click 'Continue' to grant access.
Step 2: Your PC will now utilize your Android device's camera. This should happen instantaneously, providing a clearer and higher-quality video feed.
Step 3: When using video conferencing apps like Microsoft Teams or Google Meet, your Android device will be available as a camera option. Select it from the list of available cameras within the app's settings.
Step 4: You can switch between your phone's front and rear cameras directly from your PC. Additionally, you have the option to pin the camera window so it remains on top of other applications.
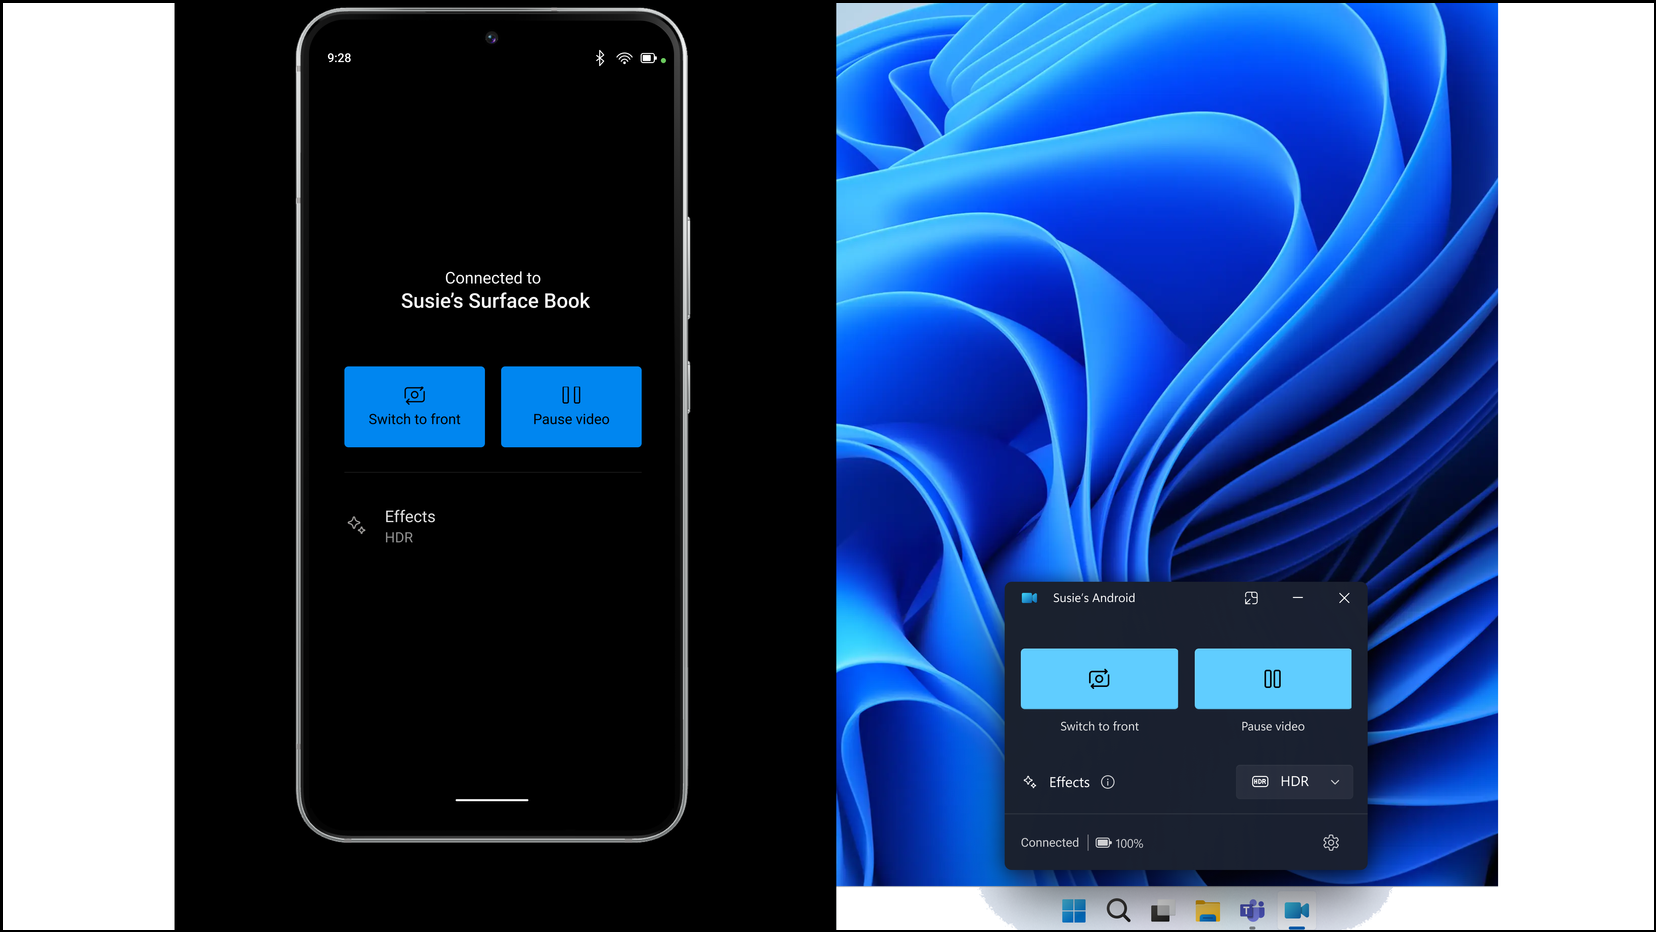
By enabling the use of Android devices as webcams, Microsoft enhances the versatility of Windows 11. This feature leverages the advanced camera capabilities of modern smartphones, often surpassing the quality of standard laptop webcams. It's a practical solution for users seeking improved video quality without investing in additional hardware.
Whether you're joining virtual meetings, recording videos, or streaming, using your Android phone as a webcam provides flexibility and enhances the overall experience on your Windows 11 PC.

