
Apple showcased the new operating systems for its products at WWDC this year. And for users who own both a Mac and an iPhone, the new Continuity Camera is one of the biggest game-changers.
Continuity Camera is another addition to the lineup of continuity features Apple has been adding to its ecosystem. Continuity features like Universal Control and Handoff nicely tie all the Apple products together. And the Continuity Camera is now taking it one step further.
What is the Continuity Camera?
With the Continuity Camera, you can essentially use your iPhone as a webcam for your Mac. The entire process is seamless. You don’t have to spend any time setting it up. Simply bring your iPhone near your Mac and your Mac will automatically pick it up as an external webcam. The camera will work in all four orientations of the iPhone. And it doesn’t work just for the camera, but you can also use your iPhone’s microphone.
With iPhone’s rear camera available as a webcam for your video calls (or any other apps where you can use the camera), you would have never looked so good on your Mac. And if you have a Mac mini with no external webcam, the continuity camera saves you from having to spend extra bucks. You can only use the rear camera with continuity, though.
The best part about this setup is that it’s completely wireless, although you can connect it over a USB cable as well. With such a drastic shift in the work dynamics where a majority of people are still working or attending school from home, this feature will blow your mind.
Apple is also developing stationary stands with Belkin for attaching your iPhone to the Mac that will be available later this year.
Video Effects with Continuity Camera
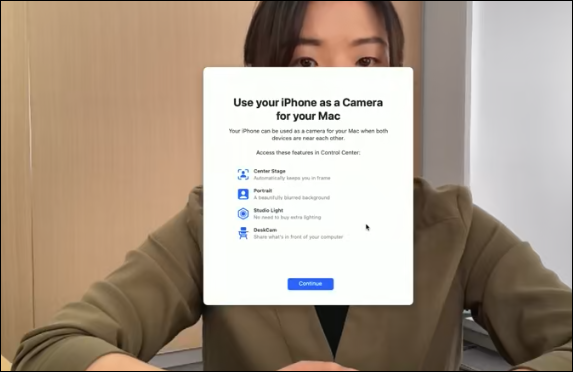
There are also additional video effects like Center Stage, Portrait video, and Studio Light available with the continuity camera.
Center Stage keeps you in the frame even as you move around. Portrait mode needs no introduction; it blurs your background and keeps the focus on you.
Studio Light is a new system effect that puts a beautiful light effect on you, making you look your best even in bad lighting conditions. It’ll make you look like you’re using a ring light, without the need for all that equipment. Not all of these effects were previously available on every Mac. For example, Portrait mode was only available on Apple silicon Macs. But with Continuity Camera, even Intel-mac users get to enjoy it. You can use these effects individually or in combination with each other.
Continuity Camera also brings a very new interesting effect with it – the Desk View. The Desk View uses the ultra-wide camera on the iPhone to provide a view of your desk. It gives the effect of using an overhead camera setup. You don’t even have to trade-off between showing your face or the desk; the camera splits the feed between the two. The desk view works with both orientations, but it works best when used in the Portrait view since there’s a larger view of the desk.
Note: Center Stage and Desk View are only available on iPhone 11 and newer models, whereas Studio Light is available from iPhone 12 upwards.
How Does It Work?
The continuity camera will work rather magically whenever you open an app that uses the camera and your iPhone is in proximity. Seeing as the iPhone’s rear camera is a lot better than the webcam on your Mac, apps like FaceTime can switch to the iPhone camera automatically. Although if you mostly end up preferring the Mac camera over the iPhone camera, it’ll remember your preferences and select the camera accordingly.
You can switch between the cameras at any time manually, though. Since your Mac will treat the iPhone as an external camera, it will be available in the list of webcams in video conferencing apps along with all the other webcams.
You don’t even have to wait for third parties to implement most of the functionality. Since Continuity Camera registers the iPhone as a system-wide webcam, it is already available for use in apps like Microsoft Teams, Zoom, Google Meet, Skype, etc. – basically, any app where you can switch cameras. Although automatic switching of the cameras based on user preferences needs to be implemented in third-party apps by app developers.
The most important question that’ll come to mind is will your iPhone disturb your meetings? The answer is no. Whenever you are using your iPhone as a webcam with Mac, notifications on your iPhone will be silenced to make sure your video session is not disturbed. But any important call notifications will be forwarded to your Mac. If you choose to answer the call, it’ll stop the video feed. But if you ignore or decline it, your video meeting will go on undisturbed.
Pre-Requisites for Using Continuity Camera
There are certain pre-requisites for the feature.
- First, you should be running iOS 16 on your iPhone and macOS 13 Ventura on your Mac. Since both these software are in beta at the time of writing this, you will have to wait till the fall of this year to get your hands on the public release or install beta versions.
- Next, both the devices should be signed in to the same Apple ID using two-factor authentication.
- For a wired connection, the iPhone should be connected to the Mac via a USB cable. And for a wireless connection, the devices should be in proximity, and Bluetooth and Wi-Fi should be enabled on both.
- Basic continuity camera features are only available on iPhone XR or newer devices, with other effects being device-dependent too as mentioned above.
- Most importantly, the Continuity Camera should not be disabled on your iPhone. Since the feature is enabled by default, it shouldn’t be a problem. But if you have previously turned it off, you need to enable it.
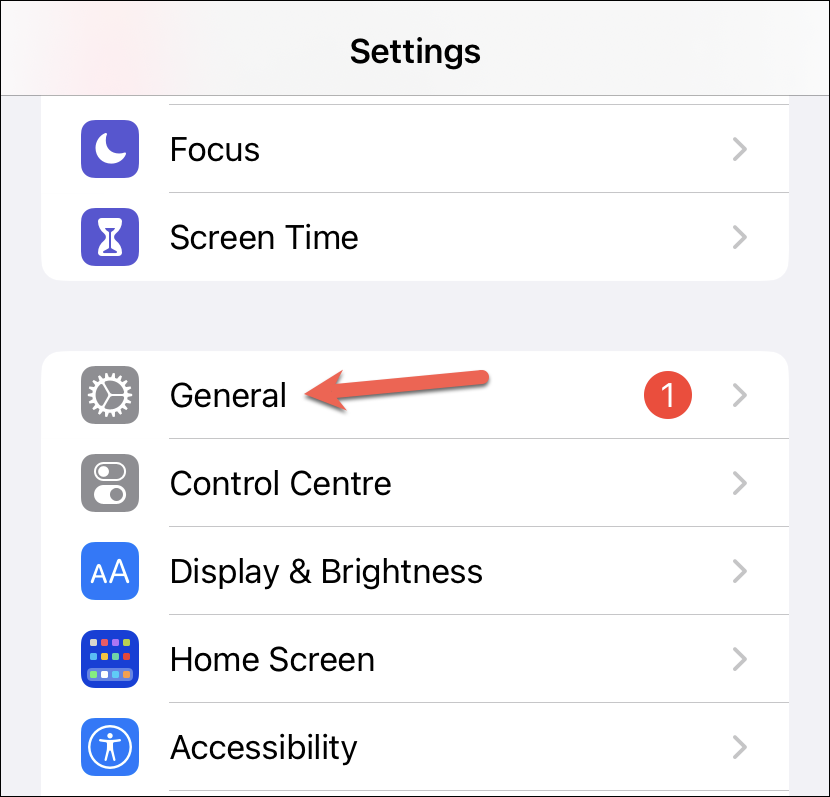
If you disabled the continuity camera on your iPhone, here’s how you can enable it again. Open the Settings app on your iPhone. Scroll down and tap the option for ‘General’.
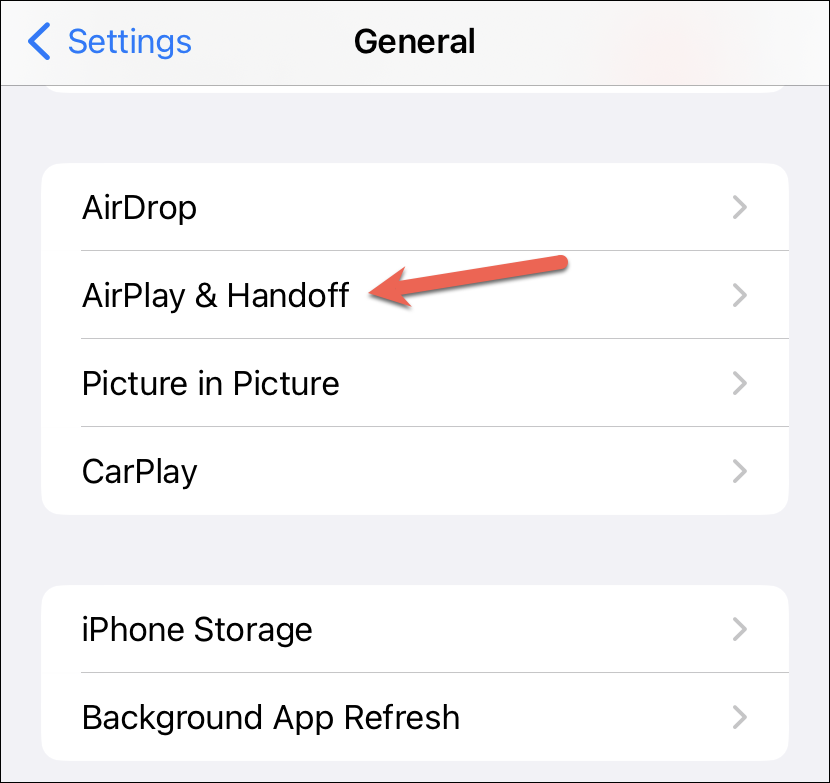
From the General settings, go to ‘AirPlay & Handoff’.
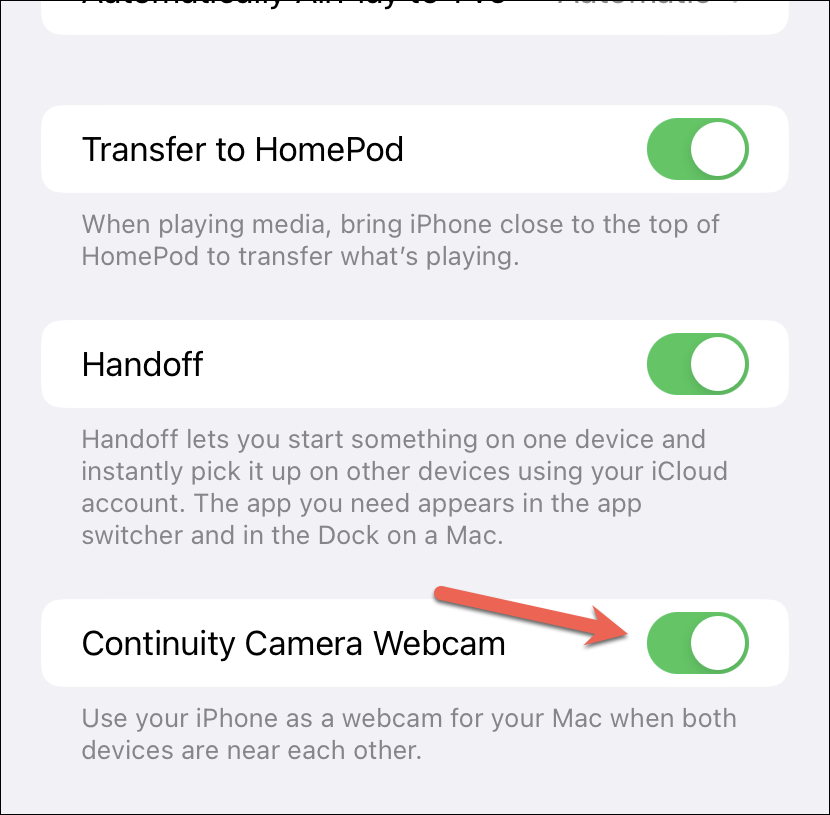
Then, enable the toggle for ‘Continuity Camera Webcam’.
The option to enable/ disable the continuity camera is only available on the iPhone and not the Mac.
How to Use the Continuity Camera?
Using the Continuity Camera is a piece of cake given that your devices meet the conditions specified above. Let’s see how to use the Continuity Camera with FaceTime.
Open FaceTime on your Mac. If your iPhone is near, FaceTime will automatically detect and choose your iPhone as the webcam. Your iPhone doesn’t even have to be unlocked for Mac to register it as a webcam.
In the future, depending on which camera you prefer to use, i.e., if you generally choose your Mac camera over your iPhone, FaceTime will not automatically choose your iPhone as the webcam. In this case, you can manually select it. But if your iPhone is mounted on a compatible stand and attached to your Mac, FaceTime will automatically understand your intention and choose your iPhone as the webcam regardless of your previous choice.
If this is the first time you’ll be using the continuity camera on your Mac since upgrading, an onboarding dialogue box will appear; click ‘Continue’ from the dialog box.
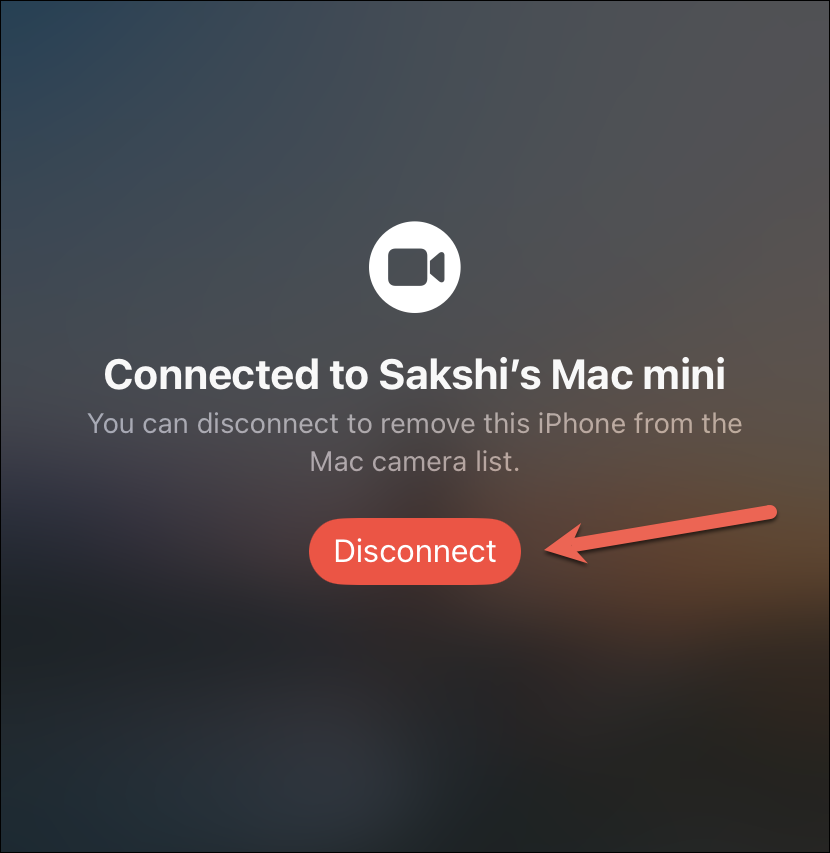
While the iPhone is being used as a webcam, a ‘Connected to <Mac’s name>’ screen will appear on your iPhone. To stop using your iPhone as a webcam, tap ‘Disconnect’ on your iPhone.Disconnecting will remove your iPhone from your Mac’s camera list. You’ll have to disable and then enable the Continuity Camera option from the settings to use your iPhone as a webcam again.
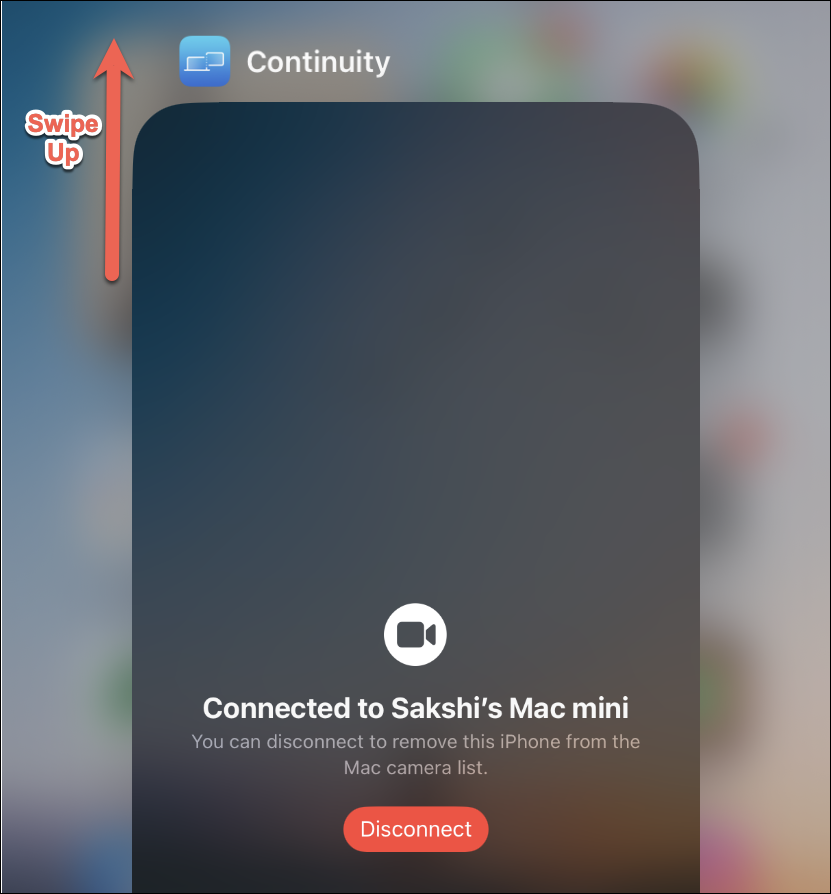
To stop the feed from your iPhone camera without removing it from the camera list, close the Continuity app from the app switcher by swiping up on the app thumbnail on your iPhone. The better alternative is to change the camera manually from your Mac.
You cannot use your iPhone while it’s being used as a webcam. The video feed will be paused until you lock your iPhone or return to the ‘Connected to Mac’ screen on the phone.
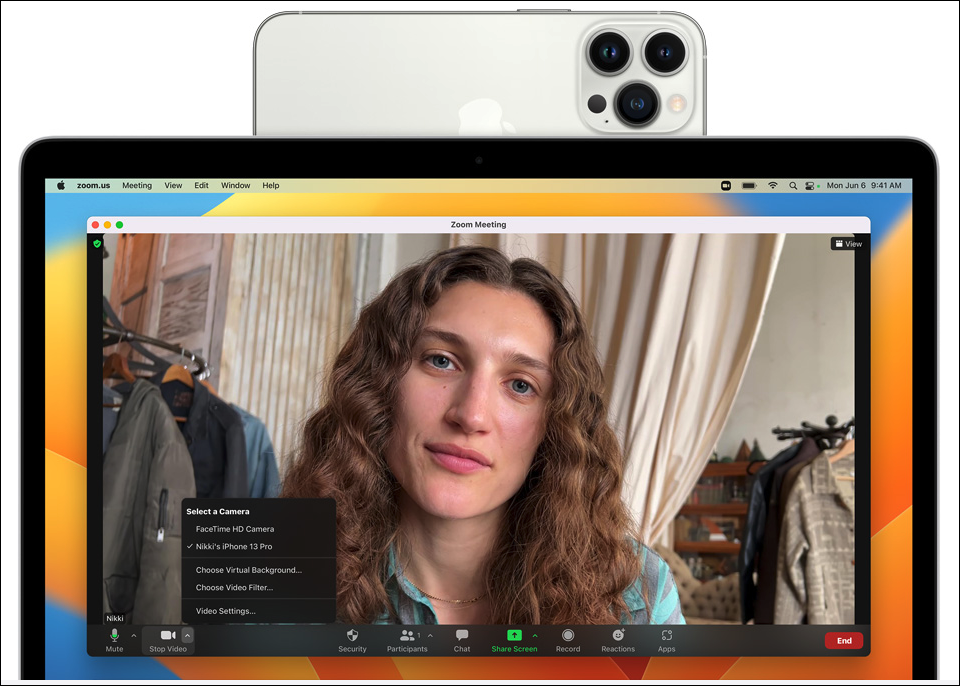
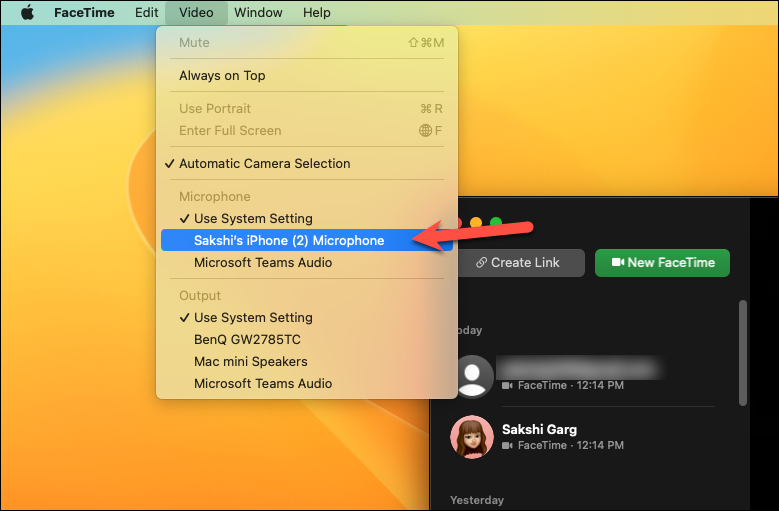
To change cameras on your Mac in the FaceTime call, go to the ‘Video’ option from the menu bar in the top-left part of the screen.
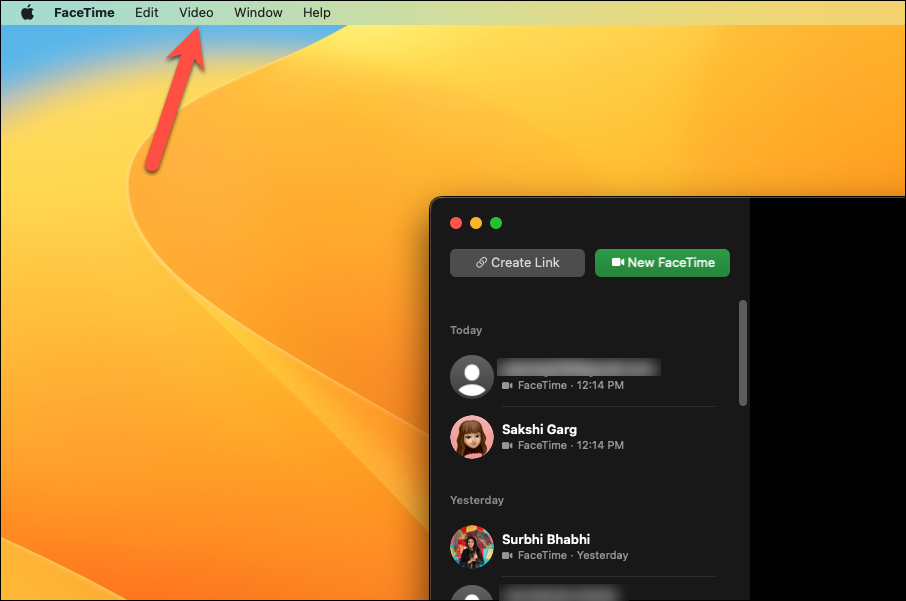
Then, select the preferred camera from the menu. You can also switch Microphones here. In the screenshot below, the iPhone camera is the only camera available, so there is no option to switch cameras. But your menu will have a Camera option, similar to the Microphone one.
Using the Video Effects
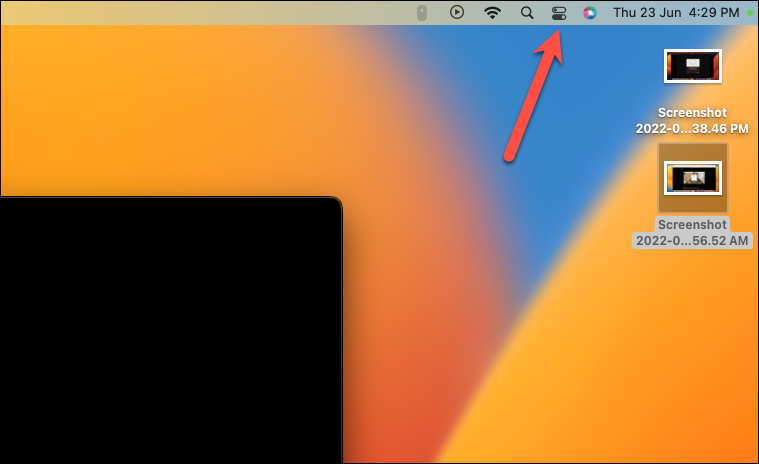
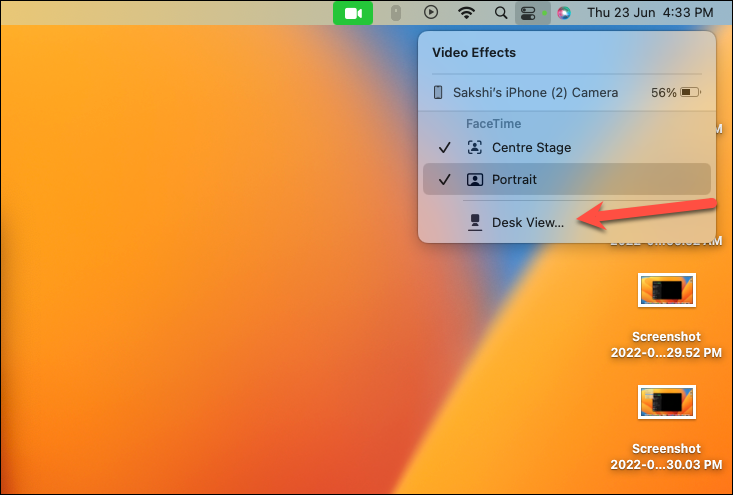
To use the video effects while on a call, click the ‘Control Center’ icon from the menu bar.
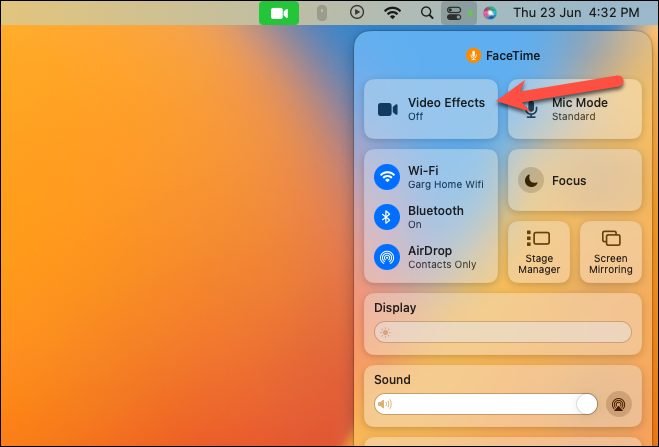
Then, from the Control Centre, click the option for ‘Video Effects’.
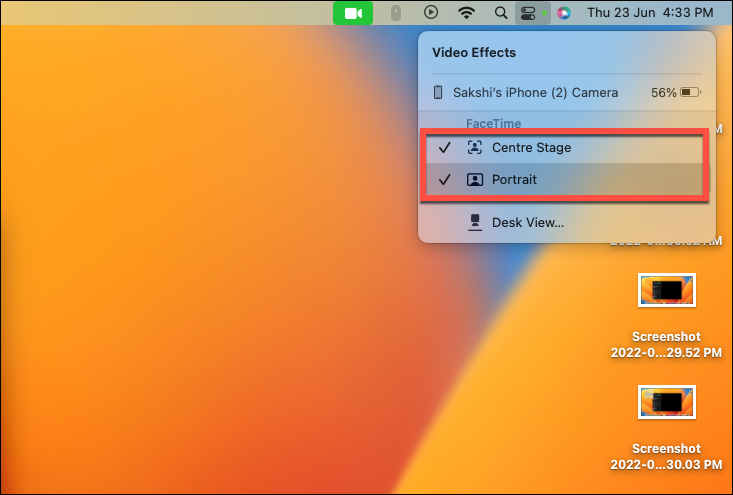
The video effects menu will open. The effects available for your device will appear. Select the effect you want to use. You can also use multiple effects in tandem. The effects which are selected will have a tick next to them. Click the effect again to unselect it.
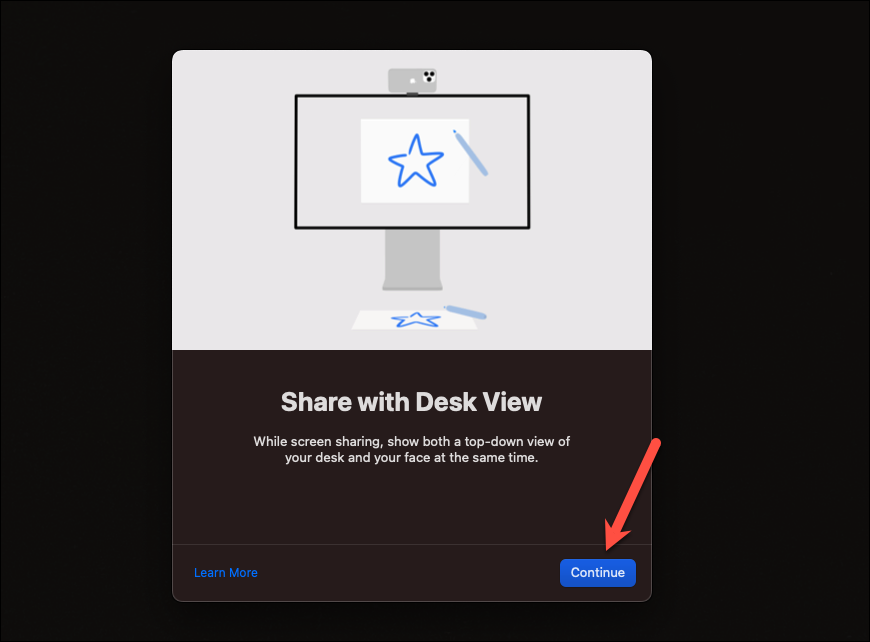
Now, on to the effect which is a bit tricky to use – the Desk View. To use the desk view, click its option from the Control Centre.
When using the desk view for the first time, an onboarding dialogue will appear. Click on the ‘Continue’ button in the bottom-right corner.
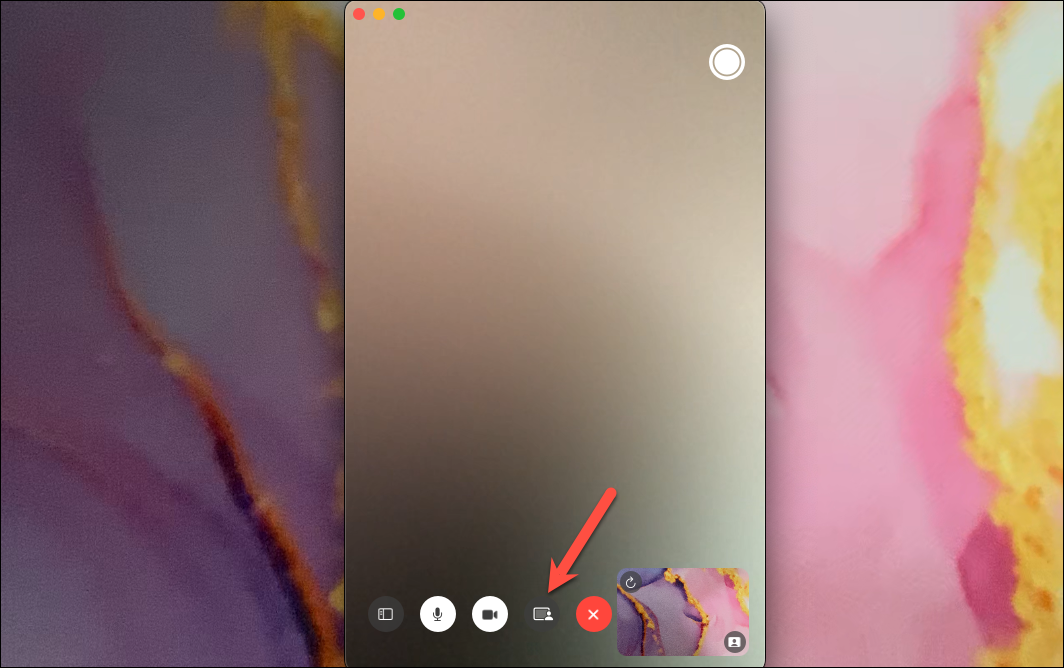
The desk view will open in a separate window. To share it with the other people in the call, you’ll have to share your screen and choose the Desk View window to share, no matter which video conferencing app you’re using.
Let’s demonstrate it again using FaceTime. Click the ‘Share Screen’ icon from the toolbar at the bottom of the FaceTime window.
Then, select ‘Window’ from the Share Screen overlay window that appears.
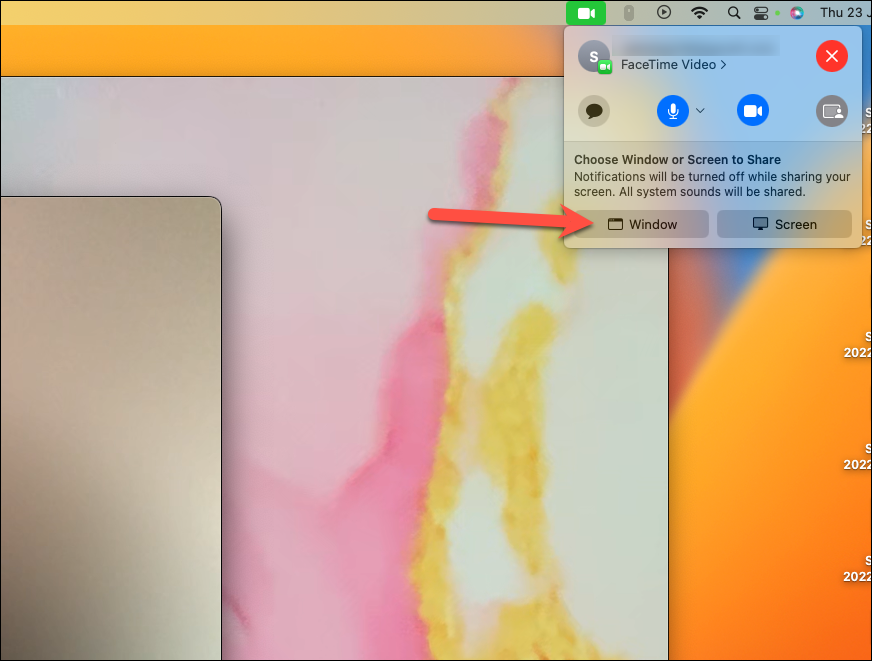
Now, go to the Desk View window and click the ‘Share this window’ option. Your desk view will become visible to the other participants in the call.
While the desk view is being shared, your video feed will also be visible, but you can choose not to share it and switch off your camera from the FaceTime app. This won’t affect the desk view feed.
When you select ‘Desk View’, the Center Stage effect is also activated automatically to keep you in focus as you share your desk. But you can disable it if you want from the Control Centre.
Note: Although we used FaceTime to demonstrate the continuity camera as well as video effects, you can use it in other apps even now. The only difference when using it with other apps would be the menus from where you can manually switch the camera or share your screen since each app places them differently. But the basic principle for using the continuity camera will be the same.
That’s all you need to know to use the Continuity Camera. It’s an amazing feature that’ll change the way you attend meetings on your Mac going forward. Seriously! The video quality is going to be amazing!


