Sometimes, when you enter a long text string in a cell of a Notion table, you can’t see the full string of the cell not unless you click on it. You can only see the text that fits the cell’s column width.
Fortunately, Notion offers you a simple Wrap cells toggle button (which can be turned on/off) that wraps text so it can be displayed on multiple lines in a cell. This post will show you how to wrap text in a Notion Table.
How to Enable Wrap Text Automatically in Notion Table
When you use the Wrap cells option in Notion, it will wrap text automatically so it can be displayed on multiple lines within the cell.
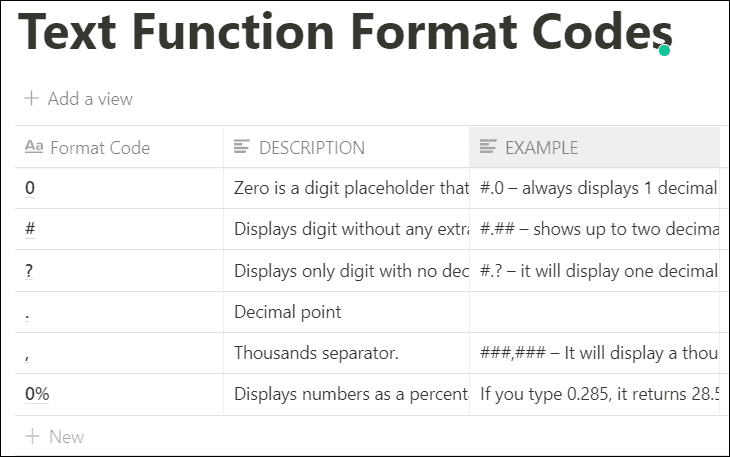
For example, when you type a long text string in the Description and Example column (below), you can only see the text that fits inside the cell. So we have to wrap texts to see entire text strings.

You could also re-size the column’s width manually by dragging the title cell’s vertical edge. But if you have hundreds of cells, you may have to resize them multiple times.
Instead, you can just use the Wrap cells toggle in the Notion table. But unlike the Excel table, you can’t wrap individual columns in Notion, you can only warp all columns in the table together.
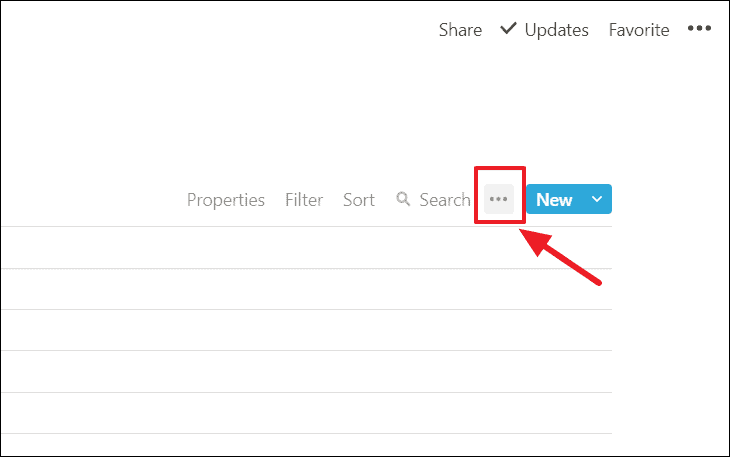
To turn it on, open the Notion table where you want to warp text and click on the horizontal ellipsis (…) at the top right corner of the table (not the one at the top right corner of the Notion window).

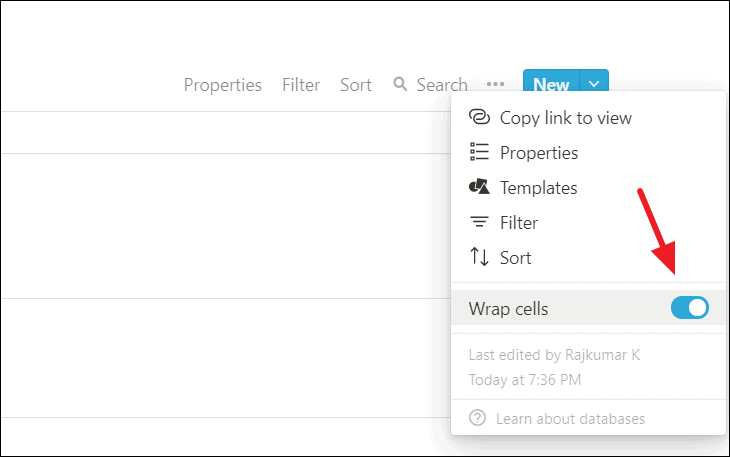
In the drop-down menu, turn on the ‘Wrap cells’ toggle.

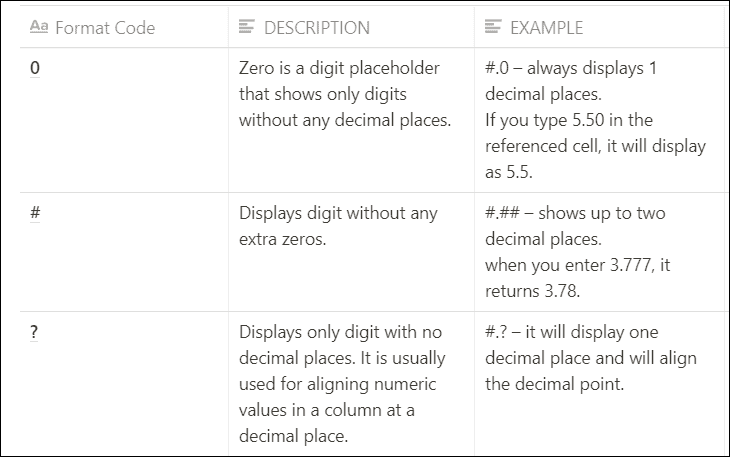
Now, your texts are wrapped automatically and you can see the entire text strings in cells.

That’s it.


