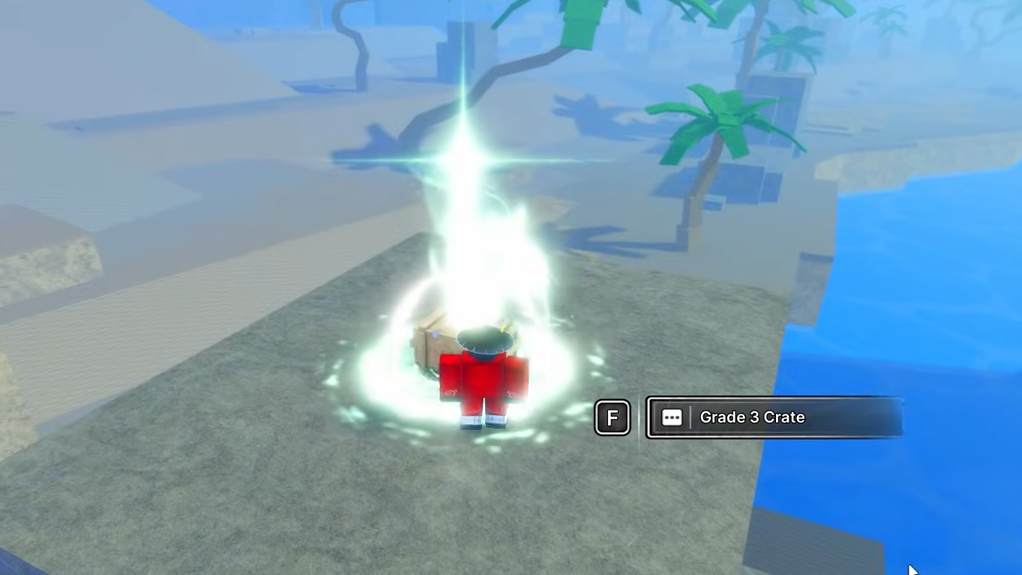
Crates sit at the center of progression in Jujutsu Zero. They feed you Yens, Lumens, Vows, Techniques, crafting materials, and even endgame weapons, but each crate type follows its own rules for where it appears and what it can contain.
The overview below focuses on permanent crate types, their main obtain methods, and their drop tables, so you can decide which activities to grind and which crates to prioritize when you are short on time.
Open-world grade crates (Grades 3, 2, 1, and Special Grade)
The basic way to get currency and high-end Techniques is to patrol the open world and grab grade crates. These are static chests scattered around the map, with different rules for how often you can loot them.
| Crate | How to get | Key drops |
|---|---|---|
| Grade 3 Crate | Respawning chest at multiple open-world locations. | Yens (up to 6,500), Lumens (up to 3,500), small chance for Domain Fragment (0.16%), Limitless (0.084%), Disaster Flames (0.084%), Shrine (0.084%). |
| Grade 2 Crate | Respawning chest at multiple open-world locations. | Yens (up to 12,500), Lumens (up to 3,500), plus slightly higher chances for Domain Fragment (0.253%), Limitless (0.135%), Disaster Flames (0.135%), Shrine (0.135%). |
| Grade 1 Crate | One-time chest per account at set open-world locations. | Lumen (up to 3,500), Domain Fragment (2.6%), Limitless (0.388%), Disaster Flames (0.388%), Shrine (0.388%). |
| Special Grade Crate | One-time chest per account at multiple rare open-world spots. | Yens (up to 30,000), Lumen (up to 3,500), Domain Fragment (1.8%), Limitless (0.18%), Disaster Flames (0.18%), Shrine (0.18%), Dragon Bone (0.919%), Inverted Spear of Heaven (0.919%), Festering Life Sword (0.919%). |
Grade 1 and Special Grade crates are limited to a single pickup per account. Once you loot them, they are gone permanently for that profile, which makes them a burst of progression rather than a farm. Grade 2 and Grade 3 crates, on the other hand, respawn in their locations, letting you loop a route to farm Yens, Lumens, and a low but non-zero chance at high-end Techniques like Limitless or Shrine.

Raid crates: Strengthened, Flame, and Volcanic
Raid content shifts crate rewards away from raw currency and toward build-defining items: Bindings, Vows, weapon drops, and exclusive accessories. Each raid has its own crate pool tied to difficulty.
| Crate | Source | Notable drops and chances |
|---|---|---|
| Strengthened Crate I | Sorcerer Killer Raid (Toji Raid) on Easy and Normal. | Crafting mats such as Iron (4.984%) and Cursed Iron (1.869%), upgrade pieces like Heavenly Fragment (0.623%) and Domain Fragment (0.312%), Inverted Fragment (0.872%), Physical Binding (0.623%), Sorcery Binding (0.623%), and Festering Life Sword (0.374%). A large share of the table is split across Vows: Defense Vow I–III, XP Vow, Mastery Vow, Attack Vow II–III, Yen Vow, Sorcery Vow II–III, each with mid to high single-digit or low double-digit chances. |
| Strengthened Crate II | Sorcerer Killer Raid (Toji Raid) on Hard and Nightmare. | Similar structure to Strengthened Crate I but with tuned chances: Iron (4.869%), Cursed Iron (2.435%), Heavenly Fragment (0.609%), Domain Fragment (0.304%), Physical and Sorcery Binding (1.096% each), Inverted Fragment (1.461%), Festering Life Sword (0.487%), and the same spread of Defense, XP, Mastery, Attack, Yen, and Sorcery Vows with slightly adjusted percentages. |
| Flame Crate | Disaster Flame Curse Raid (Jogo Raid) on Easy and Normal. | Iron (3.685%), Cursed Iron (1.566%), Heavenly Fragment (0.553%), Domain Fragment (0.230%), a trio of fire-themed accessories—Flame Talisman, Flame Ring, Flame Charm—each at 9.212%, and a large block of Vows (Defense, XP, Mastery, Attack, Yen, Sorcery) with chances ranging from roughly 2.7% to 9.2%. |
| Volcanic Crate | Disaster Flame Curse Raid (Jogo Raid) on Hard and Nightmare. | Iron (3.688%), Cursed Iron (1.568%), Heavenly Fragment (0.461%), Domain Fragment (0.231%), plus upgraded accessories—Volcanic Charm, Volcanic Artifact, Volcanic Talisman—each around 9.22%. The rest of the table mirrors Flame Crate with Defense, XP, Mastery, Attack, Yen, and Sorcery Vows at similar percentages. |
On lower difficulties, Strengthened Crate I and Flame Crate are a way to seed your account with Vows and the occasional raid weapon or accessory. Once your build can handle Hard or Nightmare, Strengthened Crate II and Volcanic Crate gently raise the odds on the rarest fragments and unique drops, while keeping the overall reward profile familiar.
Cursed Crate: mini-boss XP engine
Mini-bosses fill the gap between open-world roaming and structured raids. Every mini-boss can drop a Cursed Crate, which pushes heavily into XP for both weapons and gear.
| Drop | Chance |
|---|---|
| Iron | 2.837% |
| Cursed Iron | 0.709% |
| Grade 4 Weapon XP | 17.730% |
| Grade 3 Weapon XP | 12.766% |
| Grade 2 Weapon XP | 8.511% |
| Grade 1 Weapon XP | 5.674% |
| Special Grade Weapon XP | 3.546% |
| Grade 4 Gear XP | 17.730% |
| Grade 3 Gear XP | 12.766% |
| Grade 2 Gear XP | 8.511% |
| Grade 1 Gear XP | 5.674% |
| Special Grade Gear XP | 3.546% |
Most of the probability mass sits on XP items across all grades, which makes Cursed Crates an efficient route when your weapons and armor are lagging behind your player level. The small Iron and Cursed Iron chances are incidental bonuses rather than the main attraction here.

Progression crates: Valuable and Supply
Two crate types are tied directly into daily and quest systems and are meant to drip-feed crafting mats, basic accessories, and other supplies over time.
| Crate | How to get | Main drops |
|---|---|---|
| Supply Crate | Reward for completing Daily Quests. | Iron (3.130%), Cursed Iron (1.330%), a chance to roll another Valuable Crate (15.651%), tiny odds for Heavenly Fragment (0.055%) and Domain Fragment (0.016%), and a large section dedicated to XP Vow, Mastery Vow, Yen Vow, Defense Vow I–III, Attack Vow II–III, Sorcery Vow II–III with chances mostly between roughly 2.3% and 7.8%. |
| Valuable Crate | Quest rewards from the Lost Wanderer NPC and as a Supply Crate drop. | Iron (1.672%), Cursed Iron (0.418%), basic accessories (Basic Charm 4.179%, Basic Ring 3.343%, Basic Talisman 2.925%), small odds on Heavenly Fragment (0.084%) and Domain Fragment (0.042%), Light Katana (1.672%), and a large share of the table reserved for Basic Rank Supply (58.504%), Enhanced Rank Supply (20.894%), and Advanced Rank Supply (4.179%). |
Supply Crates are effectively your daily stipend: they hand out Vows at modest rates, a non-trivial chance to roll into a Valuable Crate, and the occasional fragment. Valuable Crates then convert that into starter gear (Light Katana and basic accessories), low-rate fragments, and a high probability of different rank-level Supplies to support your consumable usage.
Holiday and event crates: Jolly and Holiday Crates
Limited-time events introduce their own crate types, which pivot from standard Yens and Lumens into event currencies and cosmetics.
Jolly Crates are tied to the winter event around Jolly Jogo. They drop from the Jolly Jogo Boss and can also be bought from the Jolly Sorcerer NPC in exchange for Festive Lumens. Opening Jolly Crates yields Jolly Collectibles and Vows, letting you convert time spent in the seasonal loop into lasting power boosts.
Holiday Crates (also called Christmas Crates) use a simple global timer. They spawn in a fixed location every five minutes and despawn one minute later if no one picks them up. Each Holiday Crate can pay out up to 50,000 Festive Lumens, making them a bursty but time-sensitive way to stockpile the event currency for Jolly Crate purchases.

How to get Iron efficiently in Jujutsu Zero
Iron shows up across several crate types and is required for crafting weapons, so it is worth knowing which crates contribute most to your stockpile during normal play.
- Grade 3 and Grade 2 Crates give steady Yens and Lumens, but do not list Iron as a drop. Their value is primarily currency and rare Techniques.
- Raid crates (Strengthened I/II, Flame, Volcanic) all include Iron and Cursed Iron at a few percent each, turning raid farming into a reliable long-term source of crafting mats.
- Cursed Crates add a small amount of Iron on top of their XP-heavy tables, which is helpful if you are already running mini-bosses for progression.
- Valuable and Supply Crates both add Iron and Cursed Iron at low single-digit chances, meaning your daily login loop slowly feeds crafting even if you are not actively raiding.
If you need Iron specifically, raid crates and Cursed Crates are the most direct levers to pull, with daily Supply and Valuable Crates acting as passive background income.
Which crates to prioritize at different stages
The sheer number of crate types can be overwhelming, but their roles are fairly clean once you line them up against your progression needs.
- Early game: Hunt down your one-time Grade 1 and Special Grade crates first for a quick injection of Lumens, Yens, and a realistic shot at Domain Fragments and Techniques. Mix in daily quests for Supply Crates to start building a Vow base.
- Mid game: Rotate Grade 2 and Grade 3 crate routes for currency, then layer in mini-bosses for Cursed Crates to push your weapon and gear XP. Start running Sorcerer Killer Raid on Easy/Normal for Strengthened Crate I once your build can handle it.
- End game: Focus on Hard and Nightmare raid content—Strengthened Crate II and Volcanic Crate—to chase high-value fragments, Bindings, Vows, and signature weapons like Festering Life Sword, Dragon Bone, and Inverted Spear of Heaven. Event periods add Jolly and Holiday Crates as high-yield side tracks for limited-time rewards.
Each crate type nudges a different part of your build forward, from raw cash and Lumens to Techniques, XP, and accessories. Once you know which drops live where, it becomes much easier to build a daily or weekly loop that fits the specific holes in your account instead of opening crates at random and hoping for the best.

