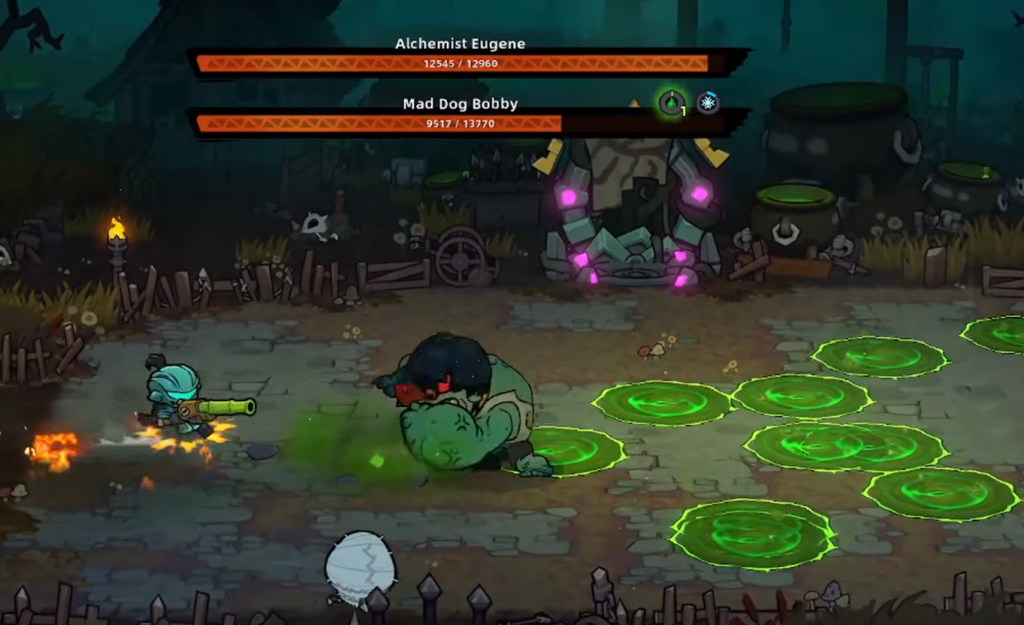
The “Alchemist” Eugene and “Mad Dog” Bobby fight is the only true two-on-one encounter in Lost Castle 2, waiting in the ruined cemetery of the Abandoned Village. Eugene stays at range and lobs explosive and poison potions while Bobby, a hulking zombie brute, chases you down. Clear it and the path to Crystal Mountain opens. Greed is what kills runs here, so the win comes from patience and timing, not raw aggression.
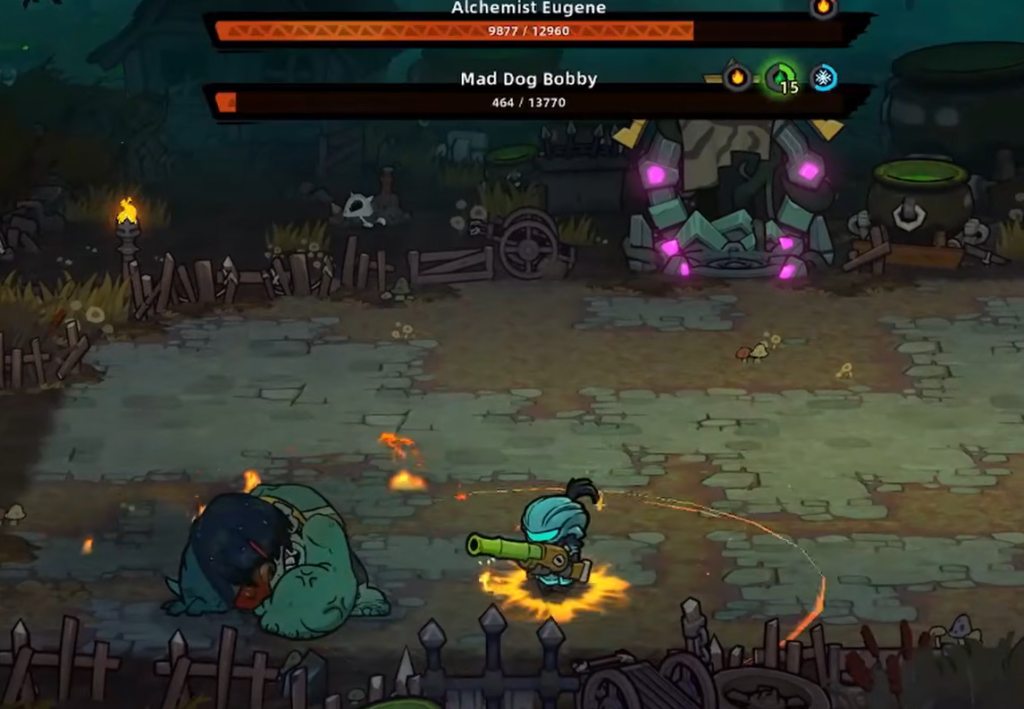
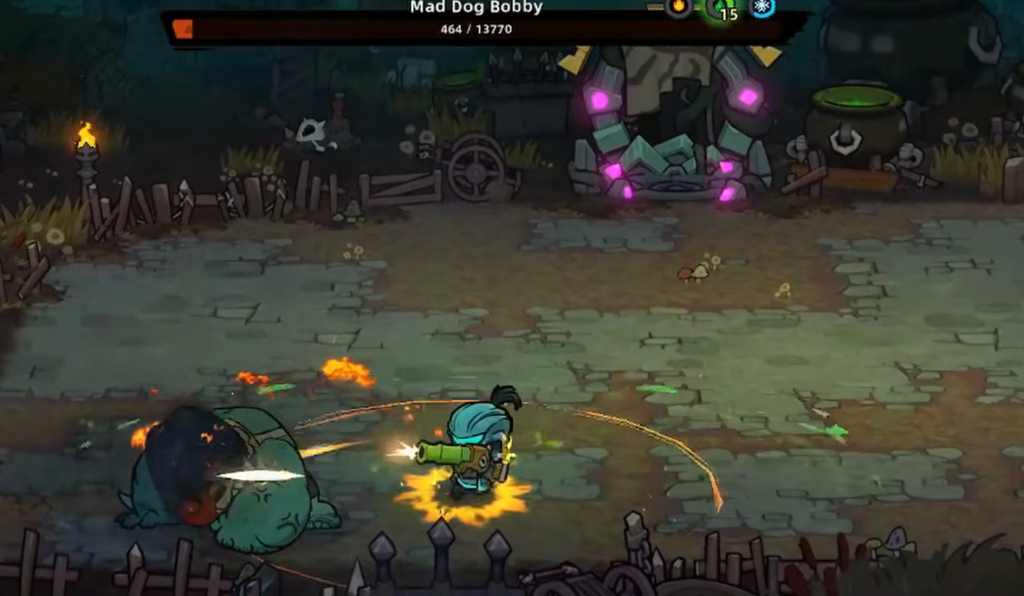
Quick answer: Kill Bobby first by staying mobile and only attacking when his three-charge combo ends and he collapses. The moment Bobby dies, rush Eugene during his brief rage stun for free burst, then dodge his potion storm and hit him only when he tires himself out.
Why Bobby dies first
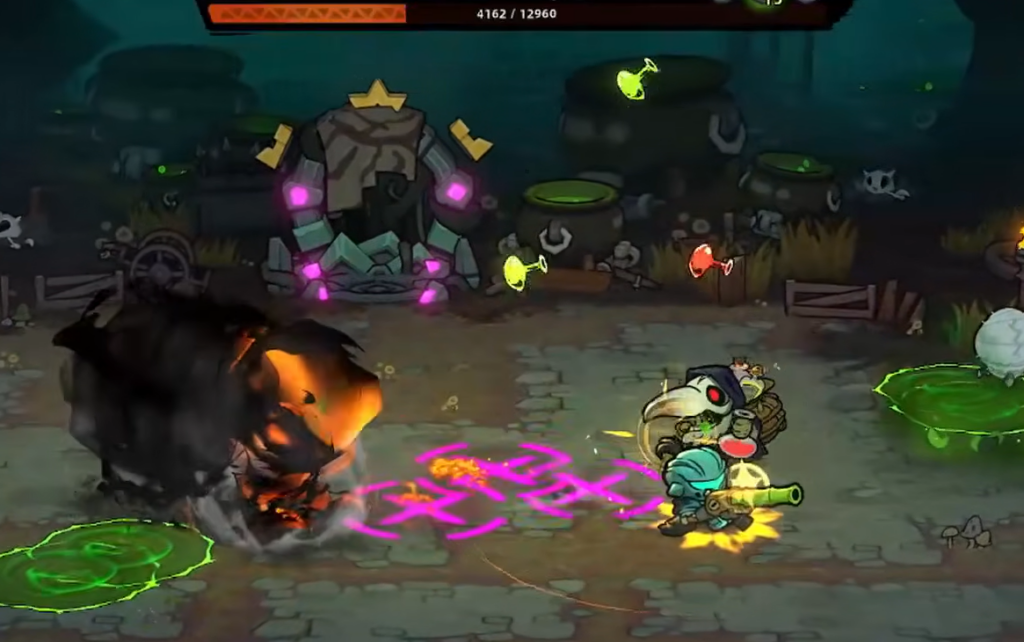
When the gate closes, Eugene summons Bobby and immediately starts the pressure. Bobby is your first target because he applies the most relentless threat, constantly closing distance while Eugene rains potions from a safe spot. Two active threats at once is what makes this fight punishing, so removing one cuts the danger in half.
Bobby’s signature move is a straight-line charge where he swings wildly in front of him. He repeats this up to three times, and the final charge leaves him winded and collapsed. That collapse is your damage window, since he is completely immobile and cannot punish you back. He also has a frontal slam, but he uses it rarely and prefers charging, so you will mostly be reacting to the charge pattern.
Tip: Burst weapons shine here. The dual blades’ dash attack lets you dump a lot of damage into Bobby during his short recovery, then dash clear before Eugene’s next volley lands.
Reading Eugene’s potions
While you deal with Bobby, Eugene throws two distinct potion types. Recognizing them on sight keeps you from eating burst damage you could have walked around.
| Potion | Behavior | How to avoid |
|---|---|---|
| Red | Fast-moving, explodes instantly on impact, often thrown in tight clusters | Stay out of the pink circles that mark the landing spots before they detonate |
| Green | Large clusters that leave a lingering poison cloud for a few seconds; more frequent than red | Keep moving and treat the pools as no-go zones that deny your dodge space |
Eugene uses the green potions to control the floor and shrink the room you have to dodge Bobby’s charges. He will sometimes drop green clouds directly onto Bobby while the brute is tired. If that happens, skip the attack. The poison damage you would take is not worth it unless you can finish Bobby off in that exact window.
Phase one: surviving while you whittle Bobby down
Phase two: punishing Eugene alone
Common mistakes that lose the fight
- Attacking Bobby mid-charge instead of waiting for his collapse, which trades your health for almost no damage.
- Standing still long enough for clustered red potions to land, stacking burst damage on top of Bobby’s pressure.
- Trying to fight through Eugene’s potion storm rather than waiting for his rest window.
- Hitting Bobby while he is buried in a green poison cloud when you cannot finish him in that window.
In co-op the fight flips in your favor. With a second player you can split the targets, one holding Bobby while the other pressures Eugene, instead of juggling both threats solo. Solo players should lean on mobility and burst, and bringing a free revive from the Emergency Mechanism camp upgrade gives you a buffer if a charge or potion cluster catches you out.
You will know the encounter is cleared when both fall and the rewards drop. The fight hands over a unique Alchemy Amulet, Black Iron Ore, a boss enchantment, and a piece of Eugene’s armor to equip. With that done, the Abandoned Village is behind you and Crystal Mountain is next on the boss ladder.