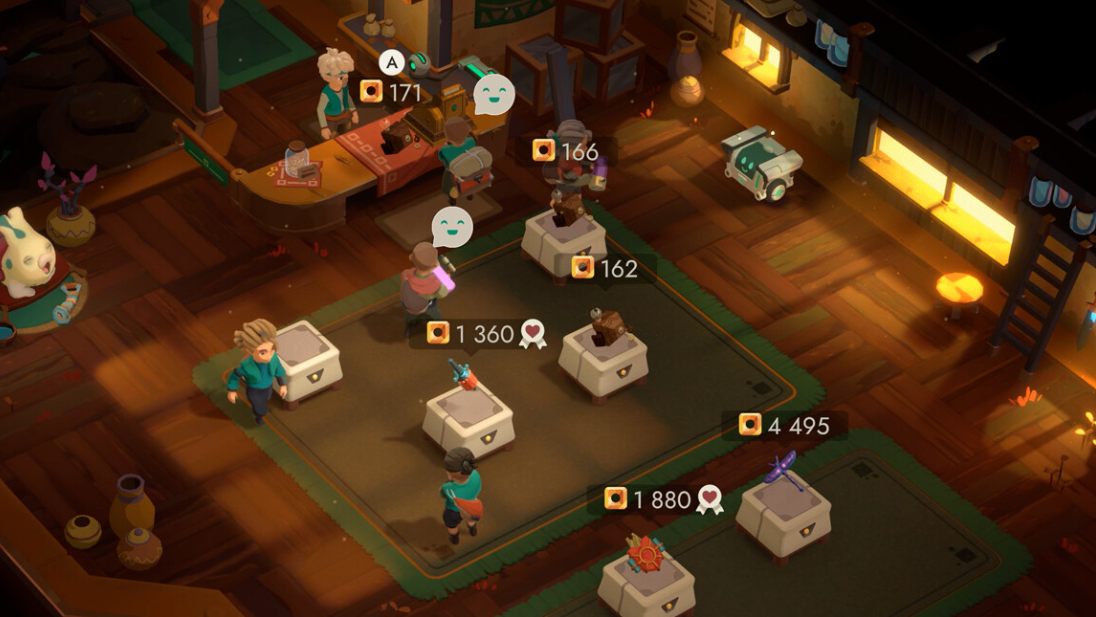
Gold in Moonlighter 2 flows from one place: relics you pull out of dungeons and sell in your shop. The difference between scraping by and comfortably funding upgrades is how well you understand those relics, how you price them, and how you structure each sales day.
Relic basics: rarity, quality, and price bands
Every relic has three layers that matter for gold-making:
| Property | What it means | Impact on gold |
|---|---|---|
| Rarity (Common → Legendary) | Color tier: grey, green, blue, purple, orange | Higher rarity multiplies the base value of the relic |
| Quality (number under name) | Small numeric score that increases with certain relic effects | Each digit is roughly a 5% increase on base price |
| Deluxe status | Unlocked through research with Tomo | Further boosts sale value and some quality-boosting effects |
In the shop, you set a gold value for each relic. The game then classifies that price into one of five bands:
| Price band | Customer behavior | Effect on Perk Meter | When to use |
|---|---|---|---|
| Cheap | Instant buy, often with a tip | Fills the Perk Meter | Early in a shift to grab perks quickly |
| Perfect | Instant buy, buyers stay happy | Fills the Perk Meter | Your default pricing target |
| Perfect Stamp | Top end of “Perfect” (marked with a stamp and red dot) | Fills the Perk Meter | Maximum profit without dropping into “Expensive” |
| Expensive | Some customers still buy, some hesitate | No Perk Meter gain | After all perks are unlocked for that shift |
| Overpriced | Buyers walk away angry, no sale | No gain, wastes time | Only useful to probe the upper limit, briefly |
Perfect and Cheap sales are your engine: they both push the Perk Meter forward, which unlocks powerful temporary boosts for the rest of that shop session. Perfect Stamp prices are the sweet spot for long-term income, but the “Cheap” band is just as important when you’re trying to ramp up perks early in the day.

First rule of pricing: aim high, then dial back
When you first find a relic, you know nothing about its ideal price. You’re meant to experiment, and the game is forgiving when you overshoot: customers will simply frown and walk away if something is Overpriced, and you can immediately adjust that number while the item sits on the showcase for the next visitor.
A simple pattern works well:
- Start with a high but plausible number for the relic’s rarity.
- Watch the reaction bubble (Cheap, Perfect, Expensive, Overpriced).
- Move the price in small steps until you land in Perfect or Perfect Stamp.
As a crude early-game frame of reference for base prices (before quality, popularity, and furniture boosts):
| Rarity | Typical early-game range (base price) |
|---|---|
| Common | ~20–80 gold |
| Uncommon | ~200–400 gold |
| Rare | ~500–900 gold |
| Epic | ~1,000–1,500 gold |
| Legendary | ~2,000–2,400 gold |
Once you’ve discovered a Perfect price, the game remembers it in the relic’s Codex entry and will auto-fill that number next time, so the “tax” you pay for experimenting only happens once per relic type.
Using the Codex to shortcut new prices
The Codex doesn’t just store discovered prices; it also sorts relics from cheapest to most expensive within each region. That order alone gives you a strong hint for new items.
A practical way to use this:
- Open the Codex and find your unknown relic’s position.
- Check the nearest known relics to the left and right and note their Perfect prices.
- Set your new relic’s price somewhere between those values, slightly biased upward.
For example, if a new Uncommon item sits just before Heretic Dagger (Perfect ≈ 400 gold), pricing it around 300–350 gold will usually avoid landing in Cheap while still giving you room to nudge upward.
Quality, popularity, and when to drop an item
Base price is only part of the equation; two hidden multipliers do most of the work once your shop is running:
| Factor | How it appears | Effect on value | Practical takeaway |
|---|---|---|---|
| Quality | Number under the relic name | Each digit adds roughly 5% to the base value | Invest relic effects into boosting Quality on rare/epic pieces, not trash |
| Popularity | Heart badge icon on the relic | Applies an extra percentage bonus on that day | Prioritize popular relics on showcases when the calendar favors them |
Some relic effects Shock, Burn, Petrify, or otherwise modify adjacent relics. Many of these can raise Quality, merge values, or transform fodder into something much more valuable. The key is to treat these modifiers as tools for your best items:
- Carry a few “tool” relics that inflict status or absorb Quality.
- Place them in your backpack so their effects point at rarer pieces.
- Trigger the effect once they line up, then move the modified relic somewhere safe.
Don’t carry basic materials back to town purely to reuse their curses; those effects reset once you leave the dungeon. Use them during the run to power up what you’re already holding, then drop low-value, low-quality relics if they’re only worth small amounts of gold after everything else is boosted.
Backpack layout: turning curses into profit
Your backpack is a puzzle as much as a storage space. Many relics carry conditional abilities that trigger when placed in certain slots or next to specific types, often described in their tooltip.
Some recurring patterns to exploit:
| Effect type | Typical behavior | How to profit |
|---|---|---|
| Shock / Burn / similar | Applies a status to adjacent relics or upgrades on trigger | Save these until you have rare/epic relics to power up |
| Petrify / Aetherium | Turns relics into Aetherium crystals (Aeolia) | Use on lower-tier relics if a later Absorb effect will consume them |
| Absorb | Destroys nearby crystals and adds their Quality to one relic | Feed it the highest-Quality fodder you can spare to create a few monsters |
| Home / Back to Tresna | Sends the relic (and sometimes neighbors) back to your shop | Trigger on your most valuable relics if your run is getting risky |
Two simple rules make the system much easier to manage:
- Keep “tool” relics parked where their effect will not trigger accidentally until you’re ready.
- Center your layout around 3–4 target relics whose Quality you intend to stack as high as possible.
Shop perks and the Perk Meter: front-loading the day
Every time you sell a relic at Cheap or Perfect, you add progress to a Perk Meter shown on the right side of the shop HUD. Filling segments of this meter unlocks shop perks you can activate during that same shift, using a console behind the counter when the teal exclamation mark lights up.
Perks vary, but they generally fall into three buckets:
- Flat bonus gold per sale (tips).
- Multipliers for specific rarities or customers.
- Adjustments to customer behavior, such as more tippers.
Because Expensive and Overpriced sales do not contribute to the meter, the most profitable pattern is:
- Open the shop with low-value relics priced Cheap or Perfect to rush the first few perks.
- Activate perks that increase tip value or payouts on rarities you have in stock.
- Once you’ve bought all perks for that day, start nudging prices for high-end relics into Expensive territory to squeeze more gold per piece.
Merchant Progression upgrades from K33P3R permanently improve this loop by raising base tip value and unlocking new perk options, so spending gold here is effectively an investment in future shop sessions.
Furniture, showcases, and tailoring the shop to your stock
Your floor plan is not cosmetic filler. Showcases and furniture from The Countess directly influence how much gold relics bring in.
| Item type | Where it goes | Typical effect |
|---|---|---|
| Showcases | Pedestals where relics are placed | Per-slot bonuses, such as fixed tip amounts for specific rarities |
| Furniture | Around the shop floor | Global or area-based multipliers (e.g., +100% on Common/Uncommon) |
| Decorations | Walls, floor, visual props | Purely cosmetic; no mechanical effect |
A few high-impact choices early on:
- Pick up furniture that boosts the rarities you actually bring back. In early Kalina runs, a piece that doubles Common and Uncommon sale value easily outperforms anything focused on Legendary items.
- Buy showcases that add flat gold tips for rarities you can consistently stock. A case that gives 200 extra gold whenever you sell an Uncommon relic is far more useful if you line it with Uncommons than leaving it to display a single Legendary.
- Before opening the shop, talk to K33P3R to rearrange furniture so modifiers align with the relics you plan to sell that day.
Furniture recipes found in “recipe stages” during dungeon runs unlock more powerful options. These stages appear as scroll icons on Tomo’s Radar and only show up once per run; they’re worth detouring for, even if it means skipping a few combat rooms in that branch.
Reading the calendar and timing your sales
Open the Codex and you’ll see a small six-day calendar that forecasts special conditions for upcoming days. These modifiers often highlight:
- Specific rarities (for example, Uncommon relics).
- Relics from a particular region (such as Kalina).
When a category is “hot,” affected relics gain a popularity bonus, visible as a heart icon on the item and a noticeable percentage bump on the final sale price.
To exploit this:
- Stockpile relics from an upcoming boosted category in K33P3R’s chest instead of selling them immediately.
- On the boosted day, rearrange furniture and showcases to favor that type (e.g., Humility Toy for Common/Uncommon).
- Fill most or all showcases with these popular relics to maximize the per-sale multiplier.
Dungeon habits that protect relic value
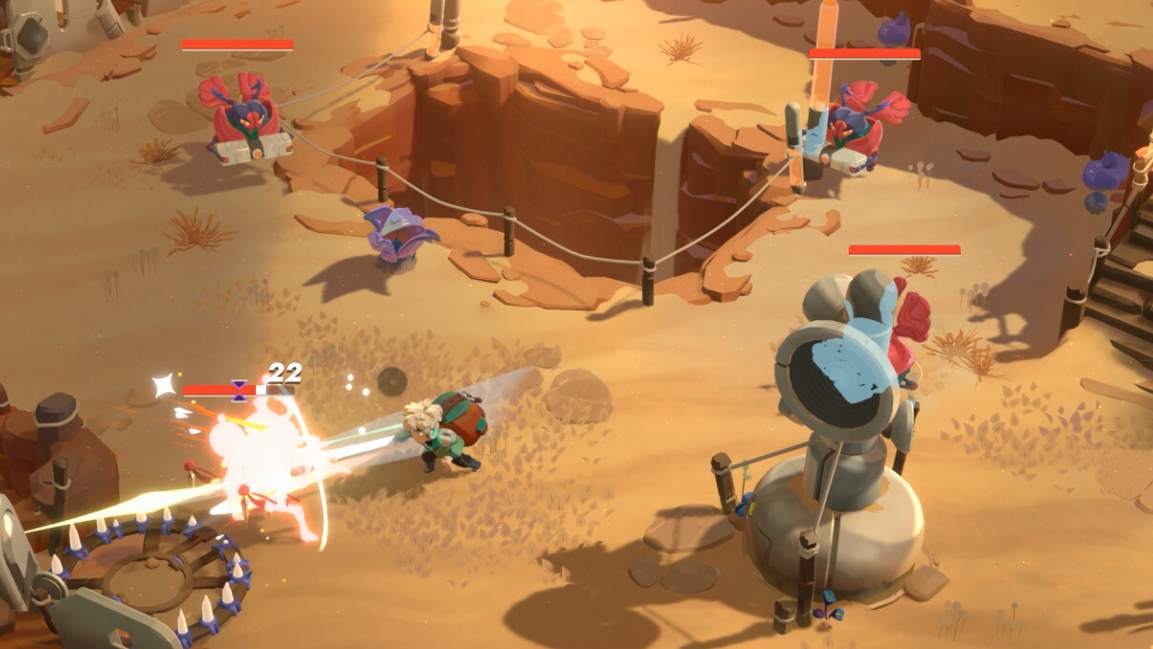
Shop mastery is useless if relics lose value before you bring them home. A few structural rules on the combat side prevent that:
- If you die, every relic in your backpack loses 50% of its Quality. That penalty is huge. If you’re low on health and your pendant icon is lit, seriously consider bailing out.
- You can use the pendant even in boss fights. Holding the pendant button while dodging a few attacks is safer than gambling a full backpack on a risky finish.
- Dungeon layouts sometimes offer “Home” or “Back to Tresna” relics that return items instantly. Use them on your best finds if a run is spiraling.
Your run plan should therefore aim for a balance:
| Situation | Best move for gold |
|---|---|
| Strong health, potions in reserve, good perks | Continue deeper, seek minibosses and chest nodes |
| Backpack nearly full of high-Quality relics, low health | Use pendant to leave before the final boss if needed |
| Calendar shows an upcoming boost for today’s loot type | Accept leaving a little early to sell them on the right day |

Scaling up: when to expand the shop
At certain story beats, Ms. Scratch will offer to expand your shop for large sums of gold (for example, 25,000 and then 50,000 for later tiers). These expansions add more showcase slots and a bigger chest for K33P3R, directly increasing how many relics you can sell per day and how flexibly you can respond to calendar bonuses.
Because gold challenges from the Endless Vault only count up to a specific target before advancing to the next, it’s more efficient to:
- Sell just enough to clear the current Vault objective.
- Leave surplus relics for the next challenge or a better calendar day.
- Put major gold infusions toward permanent infrastructure like shop expansions and Merchant Progression rather than over-upgrading the first weapon set you find.
More showcases, better furniture coverage, and stronger perk systems all compound your daily gold intake far more than a single early weapon upgrade ever will.
Moonlighter 2’s gold economy rewards attention to detail more than grinding. Treat every relic as both a combat trophy and a financial instrument: boost its Quality in the dungeon, route it to the right showcase under the right furniture on the right calendar day, and price it to feed your Perk Meter before chasing Expensive margins. Once those systems are working in concert, gold stops being the bottleneck, and the real question becomes how you want to shape Will’s arsenal and the labyrinth underneath Tresna.


