
macOS 26 Beta removes the familiar Launchpad, shifting the way users access and organize applications. This change introduces a new Applications interface, inspired by iOS and iPadOS App Library, and integrates it into Spotlight. Many users find this adjustment disrupts their established workflows, especially those who rely on visual organization or quick icon-based app launching. Below, you'll find clear steps to adapt to the new system, explore top third-party replacements, and recover Launchpad if needed.
Using the New Applications Interface in Spotlight
The new Applications interface in macOS 26 Beta organizes all installed apps by category, such as Utilities, Productivity and Finance, Social, Creativity, Information and Reading, Entertainment, and Other. This interface is now part of the upgraded Spotlight, which centralizes search, app launching, and quick actions.
Step 1: Open Spotlight by pressing Command + Space or clicking the Spotlight icon in the menu bar.
Step 2: Switch to the Applications view by pressing Command + 1. This shortcut immediately displays the Applications interface, showing your apps as large icons sorted by category.
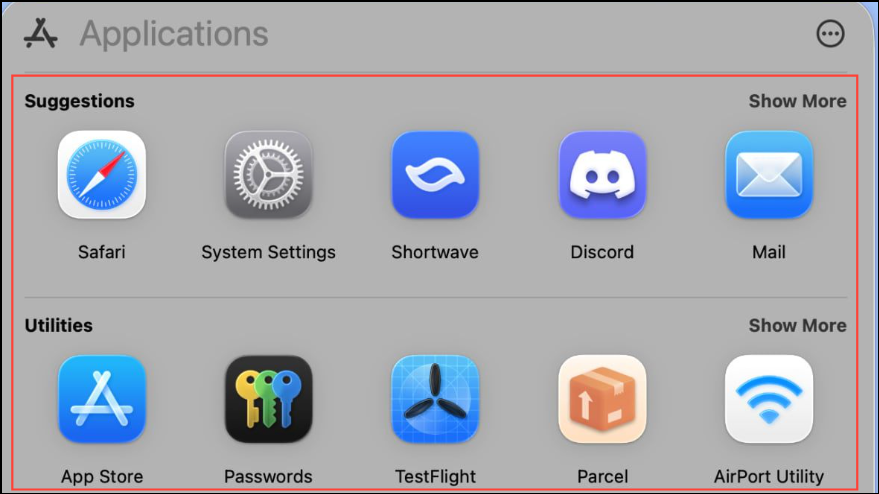
Step 3: Browse your apps visually or use the search bar at the top to quickly locate a specific app by name. You can also switch between tiled and list views, and sort alphabetically or by category, using options in the interface.
Step 4: To open an app, click its icon. For additional actions—like moving, uninstalling, or tagging—right-click the app or use the available menu options.
Step 5: If you want to access other Spotlight features, use these shortcuts:
Command + 2for Files.Command + 3for Actions (such as sending messages or starting timers).Command + 4for Clipboard history.
This new approach streamlines app access for users who prefer keyboard navigation or want to benefit from Spotlight’s expanded capabilities. However, it lacks the folder-based visual organization and custom icon placement that some users valued in Launchpad.
Third-Party Launchpad Replacements
For users who miss Launchpad’s visual layout and folder organization, several third-party applications offer similar or improved experiences. The most notable among these is Quick App Launcher Pro (QAL Pro), which has gained popularity for its flexibility and user-driven features.
Step 1: Download and install Quick App Launcher Pro from the Mac App Store or the developer’s official website. Installation is standard—drag the app to your Applications folder and launch it.
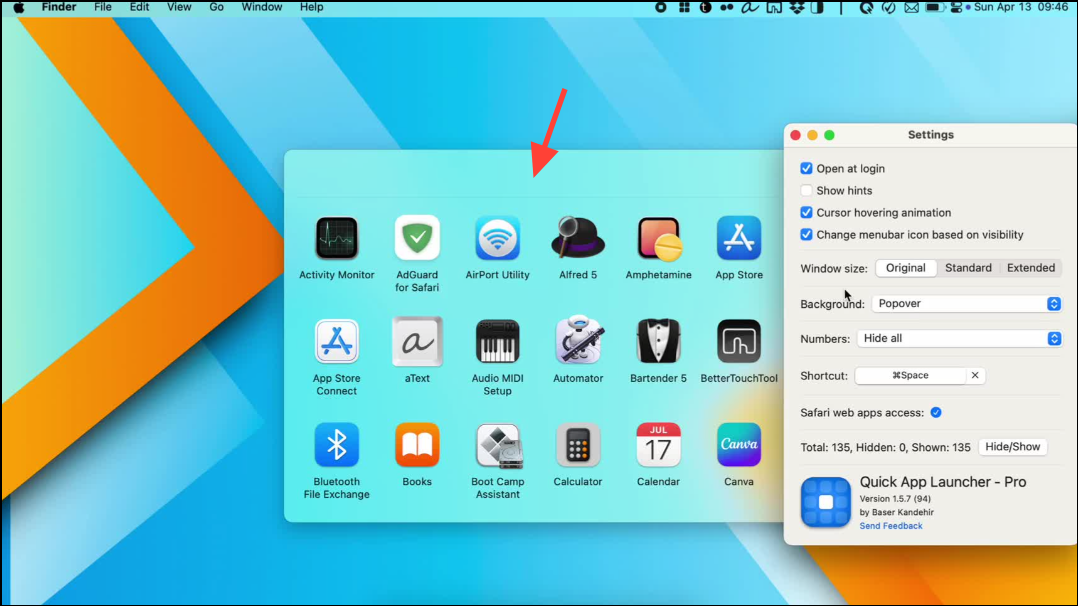
Step 2: On first launch, QAL Pro opens a window displaying your installed apps. Unlike Launchpad, QAL Pro uses tags instead of folders for organization. Tags can be created, renamed, reordered, and assigned to multiple apps, allowing for flexible grouping (e.g., “Work,” “Media,” “Utilities”).
Step 3: Add or edit tags by selecting the tag management option within the app. To assign a tag to an app, simply drag the app onto the desired tag or use the app’s menu. You can assign multiple tags to a single app, making it easy to find apps that fit into several workflows.
Step 4: Adjust the app’s display settings to choose between different window sizes, enable or disable the dock icon, and select your preferred layout for tags (top bar, sidebar, or dropdown menu). These settings help tailor the launcher to your workflow and screen size.
Step 5: For faster access, set a global keyboard shortcut to open QAL Pro. This allows you to bring up your app grid instantly, similar to how Launchpad worked with multi-finger gestures or dock icons.
QAL Pro continues to evolve based on user feedback, with upcoming features like AI-based automatic categorization, improved tag stacking, and potentially folder-based grouping for those who prefer traditional organization. Other alternatives worth considering include Alfred (for keyboard-centric launching), Folder Peek, and XMenu, each offering distinct approaches to app access.
Restoring Launchpad Using Terminal Commands
Advanced users or those who need Launchpad’s exact interface can attempt to restore it using a system-level workaround. This method involves modifying macOS feature flags via Terminal to revert Spotlight’s behavior and re-enable Launchpad. Caution: This approach involves administrative privileges and may not be supported in future macOS releases.
Step 1: Open Terminal. You’ll find it in Applications > Utilities.
Step 2: Enter the following command to create the required feature flag directory:
sudo mkdir -p /Library/Preferences/FeatureFlags/Domain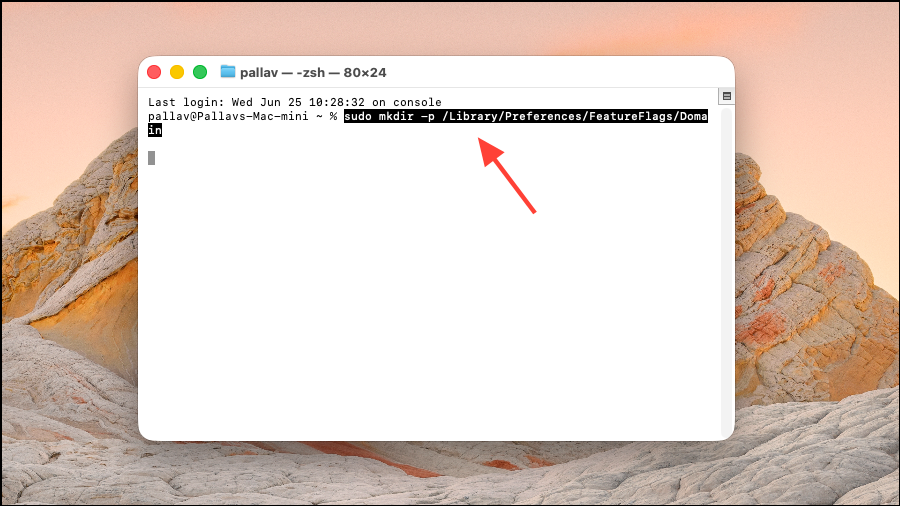
This step ensures the necessary folder exists for the next command. You’ll need to enter your administrator password.
Step 3: Disable the new Spotlight Applications interface by entering:
sudo defaults write /Library/Preferences/FeatureFlags/Domain/SpotlightUI.plist SpotlightPlus -dict Enabled -bool false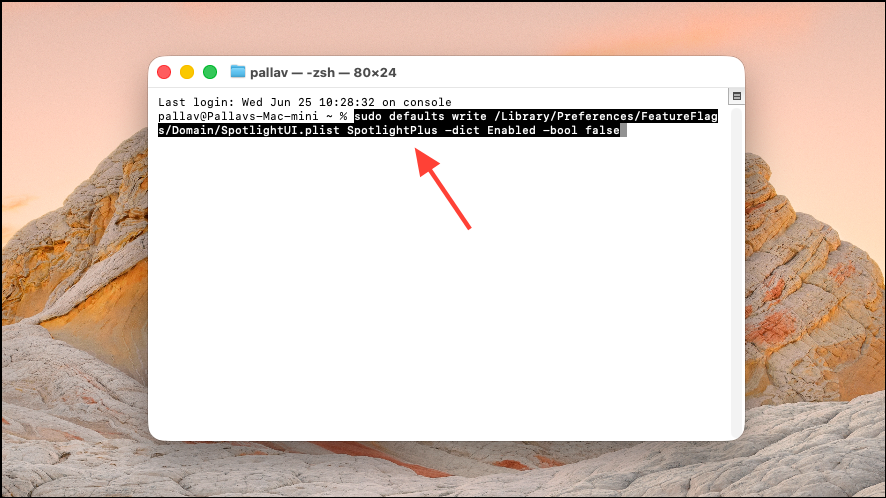
This command instructs macOS to turn off the new Spotlight-based Applications interface, which triggers the system to revert to the previous Launchpad behavior.
Step 4: Restart your Mac to apply the changes. After rebooting, Launchpad should reappear in your Applications folder and function as before, including your custom folders and icon arrangements.
Step 5: To return to the new Applications interface, repeat the steps but change false to true in the second command.
Alternative Methods for App Access
Some users may prefer simple, low-maintenance solutions:
- Drag the
Applicationsfolder to the Dock. Right-click the folder to display apps in a grid or list view, offering a quick visual overview. - Use Spotlight’s search (
Command + Space) and begin typing the app’s name for fast launching, especially for those who remember app names rather than icons. - Organize frequently used apps on the Dock for single-click access, and rely on Finder for less-used applications.
While these methods lack the full-screen, icon-based experience of Launchpad, they provide simple and reliable ways to access all installed apps.
Whether you adjust to the new Applications interface, try a third-party launcher, or restore Launchpad via Terminal, macOS 26 Beta offers several paths to keep your workflow smooth. Experiment with these options to find the setup that best matches your habits and needs.