Your Safe Senders list is supposed to be a promise. Add an email address or domain to it, and Outlook should drop those messages straight into your inbox. When that promise breaks in Windows 11, mail from people you trust keeps sliding into the Junk Email folder anyway. The fix usually comes down to your junk mail filter level, a stale local data file, or a misconfigured account, and you can work through all of them in a few minutes.
Why Outlook ignores the Safe Senders list
The Safe Senders list works alongside the junk mail filter, not above it in every case. A few specific conditions cause trusted mail to get diverted, and identifying yours tells you which fix to apply.
| Cause | What happens |
|---|---|
| Junk filter set too aggressively | A High threshold can flag legitimate mail and move it to Junk before the safe list helps. |
| Corrupt or stale .ost file | The local cache holds outdated filter and list data, so changes don’t take effect. |
| Outdated Outlook client | Older builds mishandle list syncing and filtering rules. |
| Sender spoofing | Mail appears to come from a different address than the real sender, so it never matches your safe entry. |
| Third-party account in new Outlook | New Outlook does not support blocking or full junk control for Gmail, Yahoo, iCloud, and similar domain-based accounts. |
Before changing anything, check which Outlook you run, because the steps differ. Microsoft’s version check page walks you through identifying new Outlook versus classic Outlook.
Set the correct junk mail filter level
Outlook does not filter junk by default, and the level you pick decides how strict the system gets. If the level is too high, good mail gets caught before your Safe Senders entries matter.
| Filter level | Behavior |
|---|---|
| No Automatic Filtering | The junk filter is off; only blocked senders are moved. |
| Low | Catches only obvious spam; best if you want to keep most mail in the inbox. |
| High | Strongest protection, but misclassifies real messages, so check Junk often. |
| Safe lists only | Only mail from your Safe Senders and Safe Recipients reaches the inbox. |
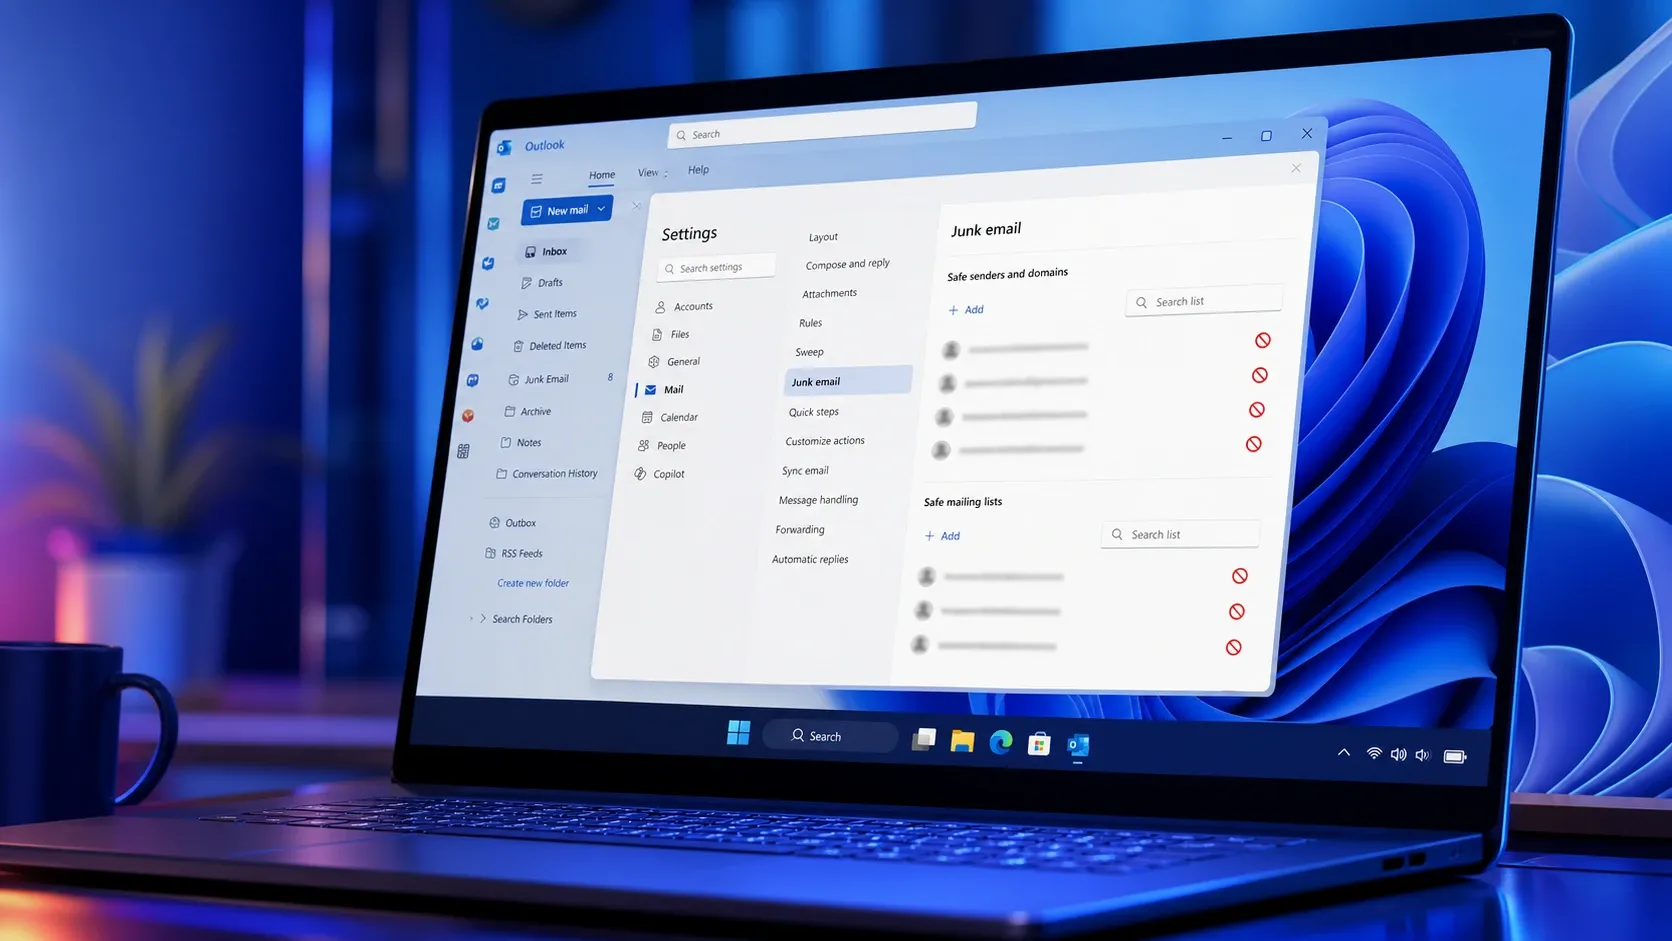
Confirm the address is actually on the Safe Senders list
A surprising number of cases come down to the entry simply not being saved correctly. Verify it directly on the Safe Senders tab.
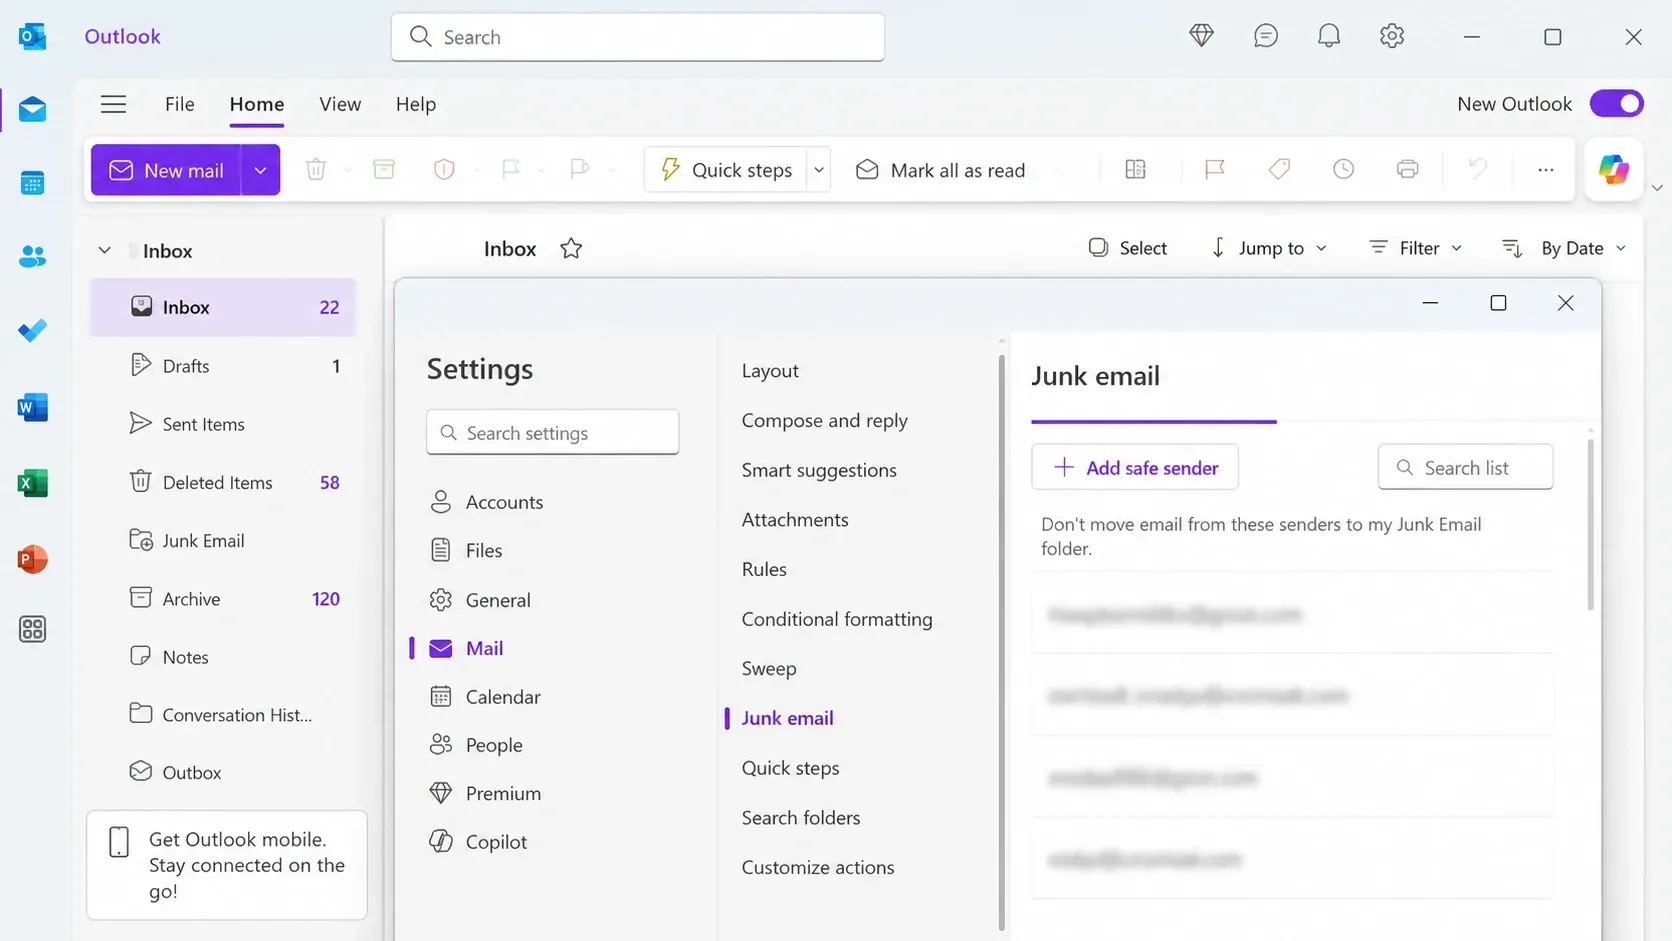
In new Outlook, the lists live in a different place. Open Settings, choose Mail, then Junk email, and manage entries under the safe and blocked sections there. Remember that new Outlook does not give third-party accounts the same junk controls, so a Gmail or Yahoo address may need to be allowlisted from that provider instead.
Clear the cached .ost file to force a resync
If settings look correct but Outlook still misbehaves, the local cache is likely holding stale data. Deleting the offline data file rebuilds it from the server.
%LOCALAPPDATA%\Microsoft\OutlookCreate a rule when filtering still fails
For stubborn spoofing or phishing that slips past the filter, a custom rule gives you precise control over where mail goes. This is the most flexible option because you define the exact conditions.
How to confirm the fix worked
You know the problem is resolved when a message from a Safe Senders address arrives directly in your inbox instead of Junk. Send yourself a test message from the trusted address, or wait for the next legitimate email from that sender. If it lands in the inbox and stays there after a sync, the list is being honored. If it still drops into Junk, recheck the filter level first, then confirm the exact address matches the one the mail is actually sent from, since spoofed mail will never match your entry.
Keep an eye on the Junk Email folder for a few days after any change, especially if you raised the filter to High. The strict setting catches more spam but also more false positives, so a quick review keeps anything important from getting lost while your Safe Senders list does its job.