
Quarantine Zone: The Last Check tracks almost everything you do at the checkpoint, from basic inspections to brain basketball. There are 25 achievements in total, and every single one can be earned in a single-player run, mostly in either Campaign or Endless mode.
The table below lists every achievement by its in-game name, with the exact requirement and any important mode limitations. After that, sections group them by type so you can plan efficient runs.
All Quarantine Zone: The Last Check achievements
| Achievement | Requirement | Notes / Mode limitations |
|---|---|---|
| Tooling Up | Get your first inspection tool. | In Campaign, this triggers when you pick up the first tool at the checkpoint; in Endless, all tools are already unlocked. |
| First Time, Huh? | Finish your first day. | Complete all inspections on Day 1 in Campaign and go to sleep. |
| City Builder | Upgrade a building in the survivors' block. | Spend money on any base upgrade in the survivors' block. |
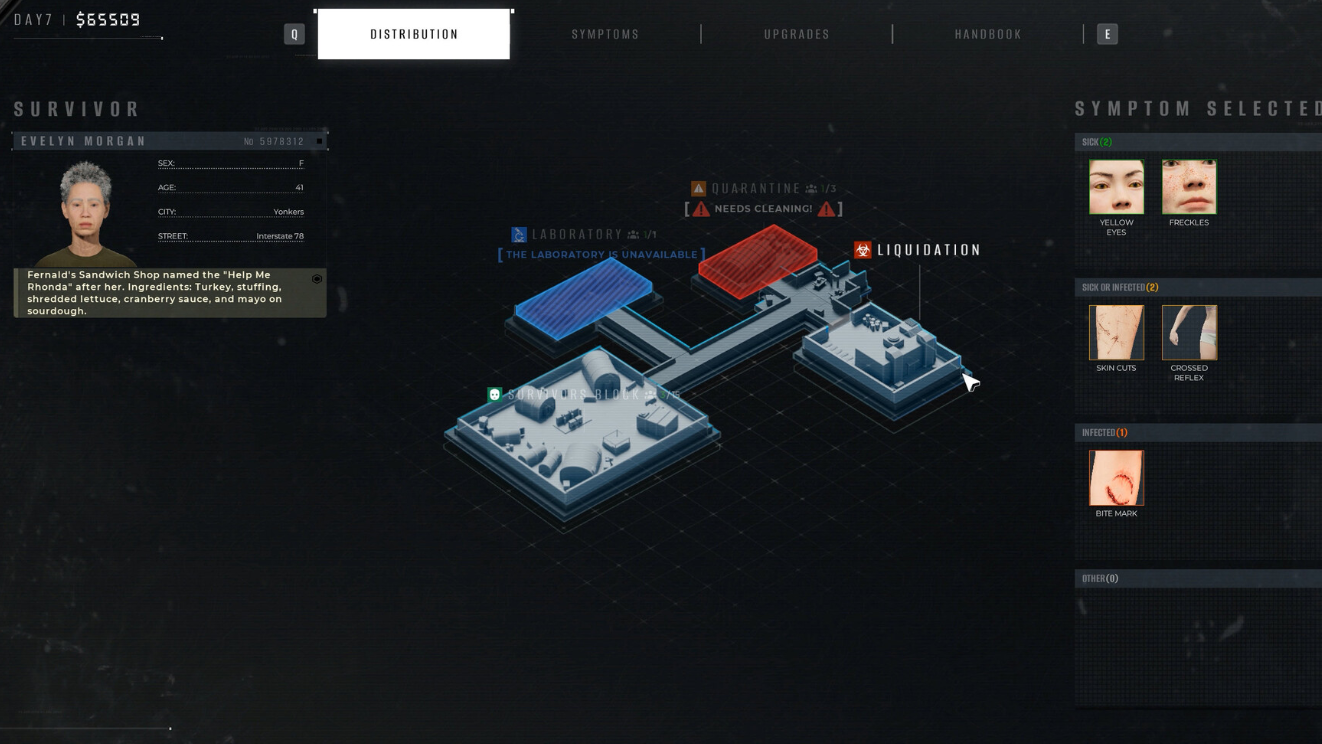
| Evacuator | Achieve evacuation quota. | Reach the required number of survivors for any evacuation. |
| Light My Fire | Cleanse the quarantine cell for the first time. | Use the purge mechanism on the quarantine cell once an infected turns into a zombie. |
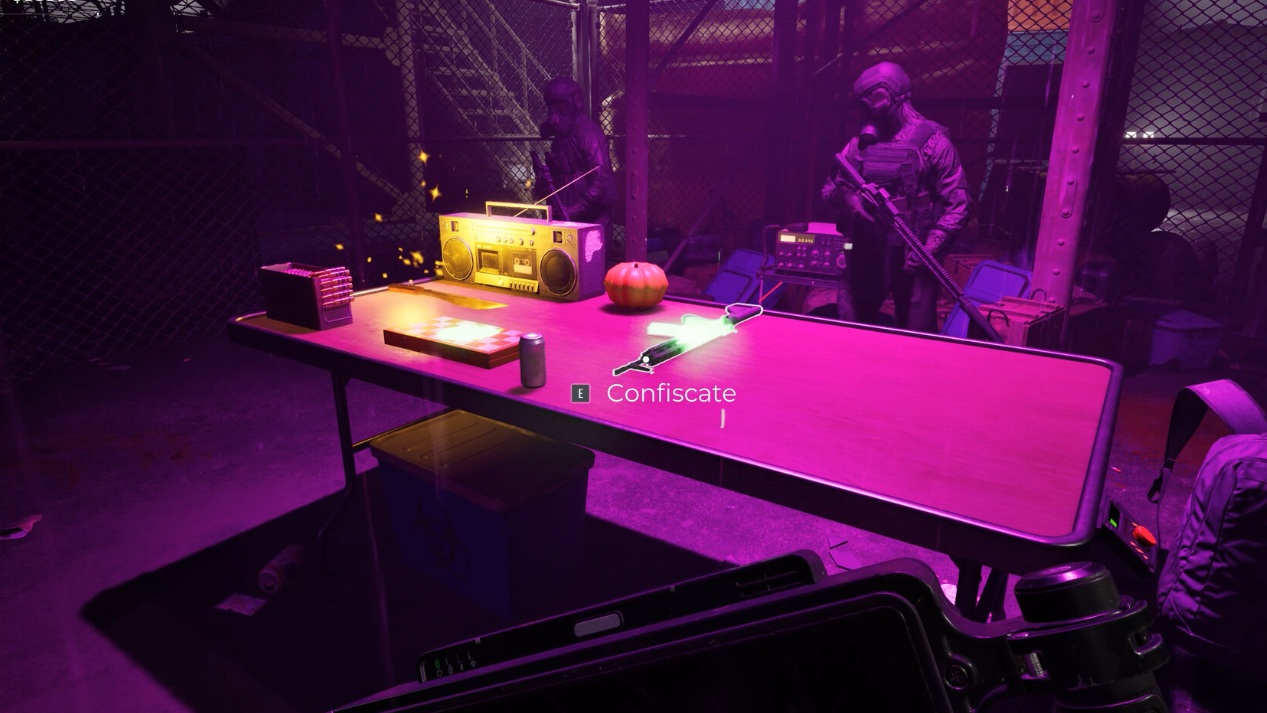
| Finders Keepers | Confiscate contraband. | Take any contraband item from a survivor, such as weapons or ammo, during a bag search. |
| I Can Read | Complete one task from the bulletin board. | Finish any bulletin board objective, such as finding a specific named survivor. |
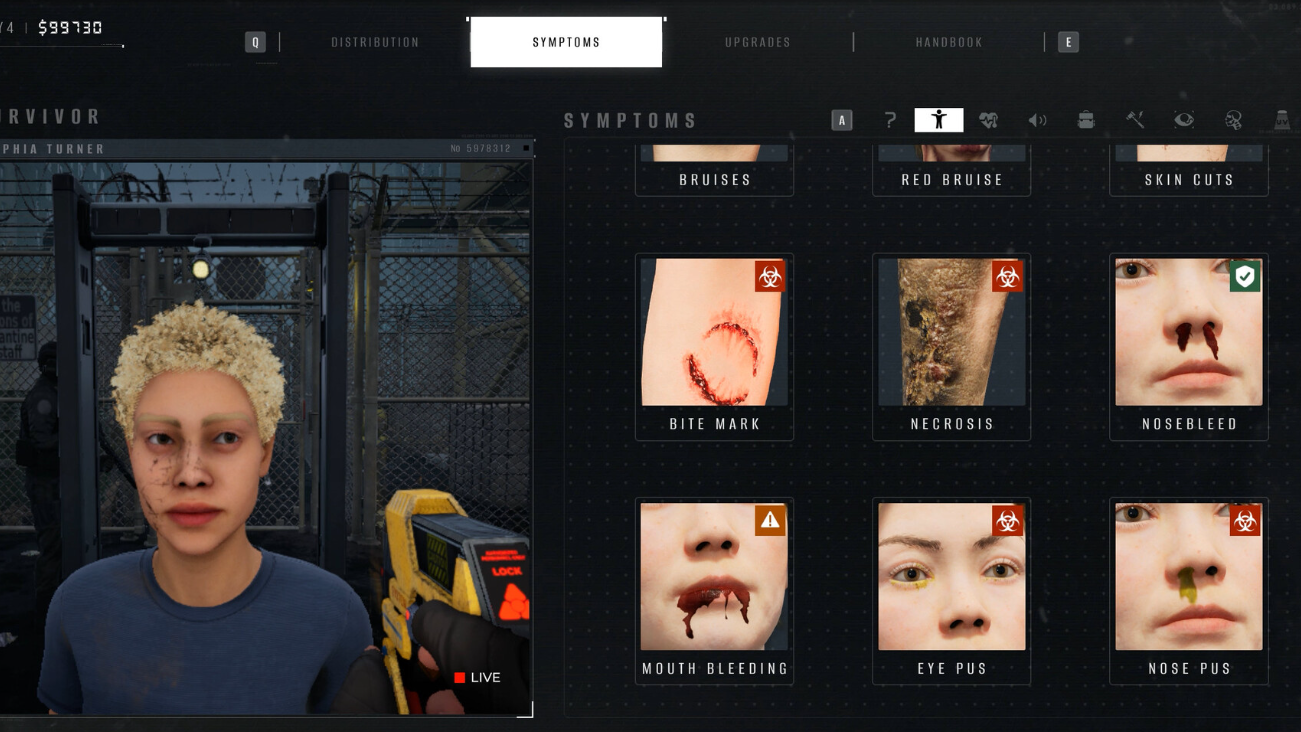
| Yeah! Science! B...aby! | Research a symptom in the laboratory. | Send a survivor with an unknown symptom to the lab and complete organ analysis to reveal a new symptom. |
| Headhunter | Eliminate a contract target from the bulletin board. | Identify and kill a bulletin-board target by sending them to Liquidation or shooting them. |
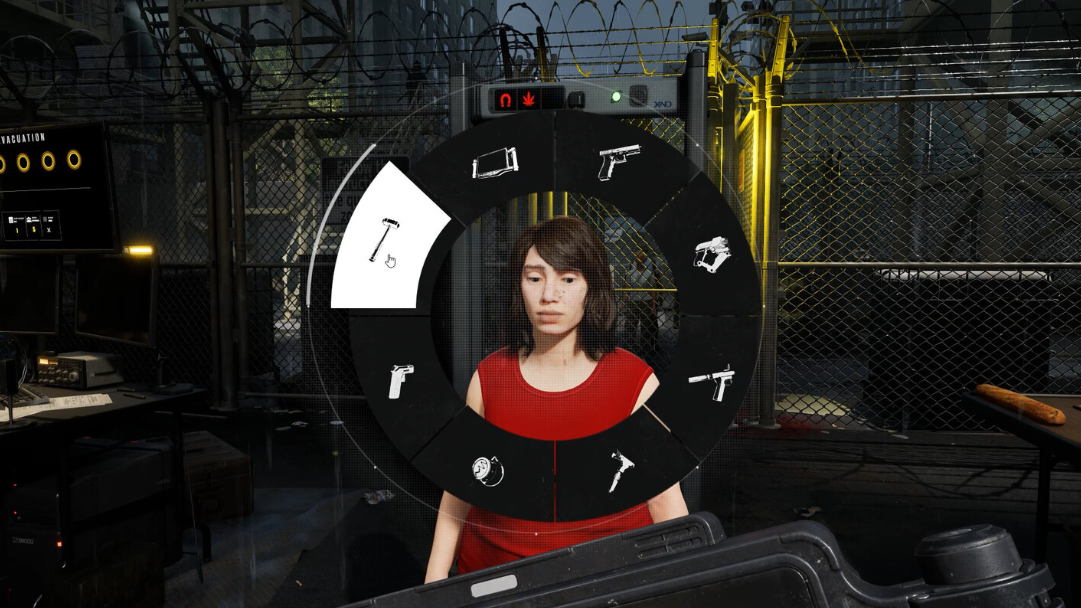
| Ain't That a Kick? | Knock out a survivor with the medical hammer. | Hit any survivor on the head with the medical hammer. |
| Safety First | Use an inspection tool on a checkpoint staff member. | Point any inspection tool (for example a thermometer or scanner) at a soldier or staffer. |
| Perfect Day | Score a perfect inspection on every check in a single day. | Complete one full shift where every survivor is judged correctly and all necessary checks are performed. |
| Jackpot! | Earn 50,000 dollars. | Reach a cumulative total of $50,000 from successful inspections, evacuations, and confiscated contraband. |
| Certified Next-Shouter | Shout "Next" 100 times. | Call in 100 survivors over time; each inspection summons counts. |
| Watch Them Closely From Now On | Liquidate a survivor who attacked you. | Kill or send to Liquidation any survivor who has physically attacked you; a guard kill also counts. |
| Can't Touch This | Confiscate a zombie body part. | Find a zombie body part in a survivor's backpack and confiscate it instead of treating it only as infection evidence. |
| Janitor | Kill a rat. | Kill a single rat anywhere in the compound. |
| Rat Slayer | Kill 30 rats. | Kill 30 rats across all sessions; progress is cumulative. |
| Under My Skin | Confiscate contraband hidden internally. | Use the X-Ray, tag internal contraband, have it removed in the lab, then confiscate it from the tray. |
| Dinner Is Served | Feed a zombie in the cage. | Move a corpse on the trolley to the lab cage and feed it to the contained zombie. |
| Brain Slam | Shoot a human brain through a basketball hoop. Clean shot, zero conscience. | Extract a brain, carry it to the survivors' block hoop, and score a basket with it. |
| Lights Out | Shoot and break 5 light bulbs. Total blackout, courtesy of you. | Destroy five ceiling lights with your handgun in a single round. |
| Good Work, Son | Get the good ending. | In Campaign, hit at least four evacuation quotas and handle the zombie cage correctly to trigger the good ending. |
| Master Evacuator | Achieve every evacuation quota in a single playthrough. | In Campaign, meet all five evacuation quotas in one run. |
| SNAFU | Get the bad ending. | In Campaign, fail evacuation quotas and allow standards to slip until the bad ending triggers. |

Story and progression achievements
Several achievements unlock naturally as you learn the game loop. Tooling Up triggers the first time you collect an inspection tool at the start of your shift in Campaign. In Endless mode, all tools are already unlocked, so this one is effectively tied to starting Campaign at least once.
First Time, Huh? is tied to finishing Day 1. Inspect everyone, go to bed, and the achievement pops. There is no special scoring requirement; surviving the day is enough.
Evacuator appears the first time you meet any evacuation quota. The current quota is always visible, with a people icon and a number indicating how many survivors must be present in the survivors' block. As soon as those spots are filled when an evacuation is called, the achievement unlocks.
City Builder focuses on base management. Once you have some spare money, open the survivors' block management view and pay for any building upgrade. It does not matter which structure you pick; the first successful upgrade is enough.
Jackpot! is cumulative. Every correctly handled inspection, each evacuation, and contraband you confiscate adds to your balance. As long as you are not burning money on unnecessary upgrades or overusing resources, 50,000 dollars comes naturally within a couple of campaigns or an extended Endless run.
Inspection and laboratory achievements
Inspection accuracy and lab work form the backbone of the harder mid-game unlocks. Perfect Day is the strictest requirement here: every single survivor you process in one day has to be judged correctly and checked as thoroughly as the tools available to you allow. That means no missing symptoms, no clearing someone who is infected, and no shooting or rejecting people who are actually clean when evidence says otherwise.
Early days are the best target window for Perfect Day. Traffic is lighter, the symptom set is smaller, and there are fewer overlapping systems to juggle. Move slowly, use each available tool where relevant, and double-check documentation and visible symptoms before committing.
Finders Keepers is much easier. At any checkpoint, open a survivor’s bag and remove a clear contraband item — usually a gun, grenade, sword, or ammunition. Once it is confiscated, the achievement unlocks.
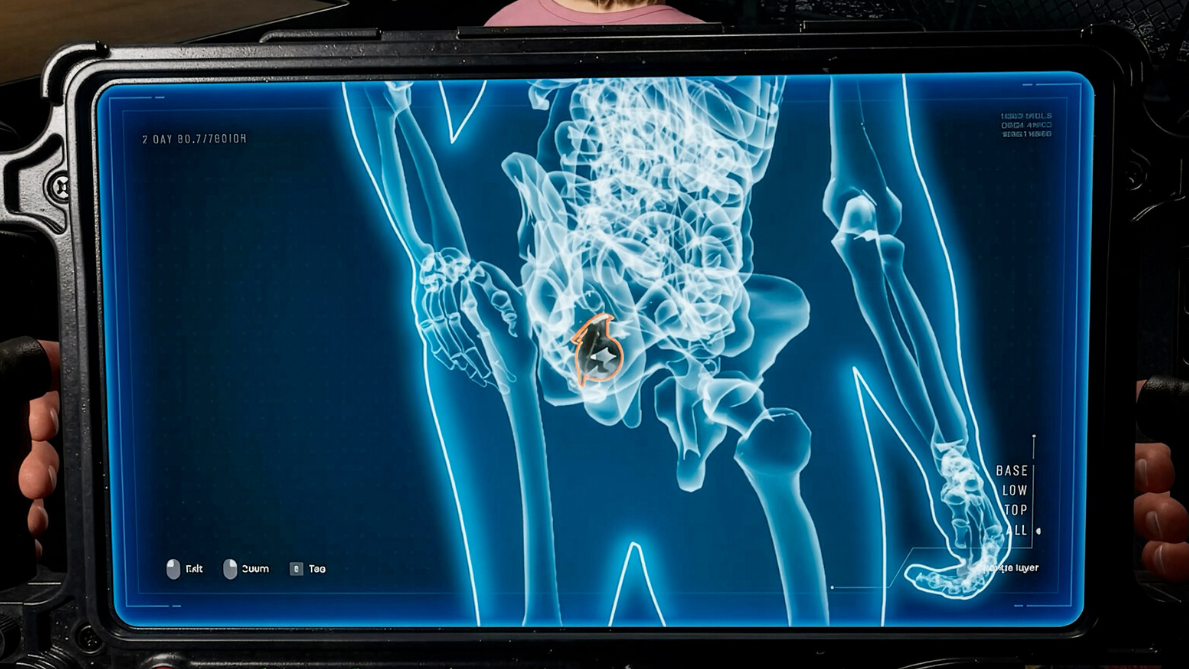
Under My Skin is the advanced version of this idea. Once the X-Ray is part of your toolkit, some survivors carry contraband inside their bodies. You need to:
Step 1: Send a suspicious survivor through the X-Ray and look for a highlighted object inside the body outline.
Step 2: Tag the internal object using the appropriate control on the X-Ray machine.
Step 3: Speak to the staff member in the white hazmat suit in the lab so they remove the tagged object.
Step 4: Take the extracted item from the tray and mark it as confiscated.
Once you pick that item up from the tray, Under My Skin is complete.
Can't Touch This is a specific contraband case. At some point a survivor will turn up with a zombie body part in their backpack. Normally, the correct response is to treat this as hard infection evidence and send them to Liquidation or quarantine. For the achievement, you must also formally confiscate that body part from their belongings.
Yeah! Science! B...aby! lives in the lab. When you encounter a survivor whose symptoms do not match any known pattern, you can route them to the Laboratory once it is unlocked. There, the workflow is always the same:
Step 1: Select the survivor routed to the lab with an unknown symptom.
Step 2: Perform the required organ extraction, using the prompts and tools in the lab.
Step 3: Place the extracted organ in the analyzer and wait for the research to complete.
As soon as a new symptom is identified, the achievement unlocks.
Bulletin board and contract achievements
The bulletin board behind the checkpoint window drives several achievements tied to reading and acting on extra tasks. I Can Read is as simple as completing any listed job. Early examples include tracking down a man with a specific name or matching graffiti to an address. Pay attention to names, addresses, and minor details in documents; when you identify the right survivor and handle them as instructed, the objective completes.
Headhunter is the lethal version of that idea. Contract notices can specify that a certain person is a threat and must be eliminated when encountered. To trigger the achievement:
Step 1: Read the bulletin board and identify any contract that explicitly calls for a target’s elimination.
Step 2: During inspections, match incoming survivors to the contract using the key details provided.
Step 3: Once you are sure you have the right person, either send them to Liquidation or shoot them with your handgun.
Completing at least one of these contracts unlocks Headhunter.
Certified Next-Shouter is a slow burn that tracks how often you call in the next survivor. Every time you hit the button or control that brings someone new to the checkpoint, it counts as one. Normal play will easily push you past 100 calls over time, but if you ever want to rush it, you can summon survivors and end their inspections quickly.
Combat, staff interaction, and environment achievements
Several trophies revolve around using your tools on people and objects they were not intended for. Safety First asks you to point an inspection tool at a colleague. The least disruptive way is to use a non-invasive tool such as a thermometer or scanner on a soldier or staffer standing nearby.
Ain't That a Kick? and Watch Them Closely From Now On are tied to direct violence. For Ain't That a Kick?, equip the medical hammer — normally used to test reflexes — and swing it at a survivor’s head until they are knocked out.
Watch Them Closely From Now On has stricter conditions. At some point, survivors begin to push back against your decisions and may physically attack when you send them someplace they do not like, such as Liquidation. To earn the achievement:
Step 1: Continue the Campaign until aggressive survivors start appearing and you have access to a handgun.
Step 2: When a survivor attacks you, defend yourself by killing them with the gun, or send them to Liquidation if you can still access the switch.
If a guard kills the attacker on your behalf, it also counts.
Light My Fire focuses on the quarantine cell, not the people. When someone in quarantine dies and reanimates as a zombie, use the lever or button next to the cell that triggers the cleansing system. Doing this once unlocks the achievement.
Environmental destruction comes into play with Lights Out. Once you have your handgun, you can aim at ceiling bulbs in your sleeping area and nearby buildings. Destroy five of these lights during one round, and the achievement unlocks. They do not need to be in the same room, but they must all be shot in the same in-game day.
Rats, zombies, and “Dinner Is Served”
Rats scurry around almost every area of the base and are key to two achievements. Janitor is unlocked after killing your first rat by any means — either with the hammer if you can land a hit or, more practically, with the handgun once it is available.
Rat Slayer tracks 30 total kills. The count persists across days and playthroughs, so you do not need to grind them in one sitting. Once you have a firearm, it is usually easiest to take shots at any rat that wanders through high-traffic corridors or around storage areas as you move between duties.
Zombies themselves are the focus of two notable achievements. Dinner Is Served is tied to the cage in the lab area. To feed a zombie properly:
Step 1: When a survivor in quarantine turns into a zombie, send them to the lab cage instead of destroying them immediately.
Step 2: Go behind the Liquidation area and find a body bag on the ground.
Step 3: Load the body bag onto the nearby trolley.
Step 4: Push the trolley to the cage where the zombie is contained and interact to deliver the corpse.
Once the zombie receives its meal, Dinner Is Served unlocks.
On the more grotesque side, Brain Slam is one of the game’s signature oddities. It requires a “clean shot” with a brain through the basketball hoop in the survivors' block. The easiest path is:
Step 1: Route a survivor with no specific brain-related requirement to the Laboratory.
Step 2: During the extraction process, choose to remove the brain instead of the organ marked for analysis, even though it is highlighted as the wrong choice.
Step 3: Pick up the brain and carry it all the way to the survivors' block, where the basketball hoop is mounted.
Step 4: Stand under the hoop, jump, and release the brain so it passes directly through the rim.
If it misses, you can retrieve the brain and try again until you land a clean shot.
Endings and evacuation quota achievements
Three achievements are tied directly to how well you manage survivors across the full Campaign. Master Evacuator is the most demanding: every evacuation event has a quota, and you must meet all of them in a single playthrough. That means keeping enough healthy survivors alive in the survivors' block and avoiding unnecessary executions or misdiagnoses.
To keep quotas on track, consistent use of quarantine and the lab is essential. When you are unsure about someone, isolating and later researching them is almost always better than gambling and sending them to the truck or to their death. Upgrades that improve survivor capacity and inspection tools both make this more manageable.
Good Work, Son represents the positive Campaign ending. While the exact thresholds are invisible, the structure is clear: you need to hit at least four of the five evacuation quotas and demonstrate that you can make the zombie cage system work as intended. That includes putting zombies in the cage for a subset of evacuations rather than relying purely on killing them outright.
SNAFU sits at the other end of the spectrum. The bad ending usually appears when you repeatedly fail evacuation quotas and allow mistakes to snowball. Common triggers include killing too many healthy people, approving too many infected survivors, ignoring wall safety, and skipping the zombie containment mechanics. A quick route to this achievement is to fail three evacuation quotas by ensuring there are never enough survivors in the block when an evacuation is called.
Good Work, Son, and SNAFU are mutually exclusive in a single Campaign. Reaching 100 percent completion means playing the story at least twice: once while maintaining high standards and quotas, and once while intentionally letting the situation collapse.
Most achievements in Quarantine Zone: The Last Check will fall naturally as you get comfortable with inspections and base management. The outliers are Perfect Day, Master Evacuator, and the two endings, which benefit from planned runs. Everything else — rats, brains, light bulbs, and zombie dinners — can usually be slotted around those goals as you move through the Campaign and experiment in Endless mode.