Factory resetting a Mac before handing it off to a new owner is crucial for protecting your privacy and ensuring the system is ready for a fresh start. Macs store sensitive data, account credentials, and personal files—simply deleting files or logging out isn’t enough. A thorough reset removes all traces of your information, signs out of linked services, and reinstalls macOS so the next user gets a clean slate. The exact steps vary depending on your Mac’s hardware and operating system version, but the process can be streamlined using Apple’s built-in Erase Assistant on newer models or completed manually on older devices.
Erase All Content and Settings (macOS Monterey or Later, Apple Silicon or T2 Chip)
Macs with Apple silicon (M1, M2, M3, or later) or an Apple T2 Security Chip running macOS Monterey (12) or newer offer a dedicated tool to reset your device quickly and securely. This method is the most efficient, as it automates sign-outs, data erasure, and system preparation.
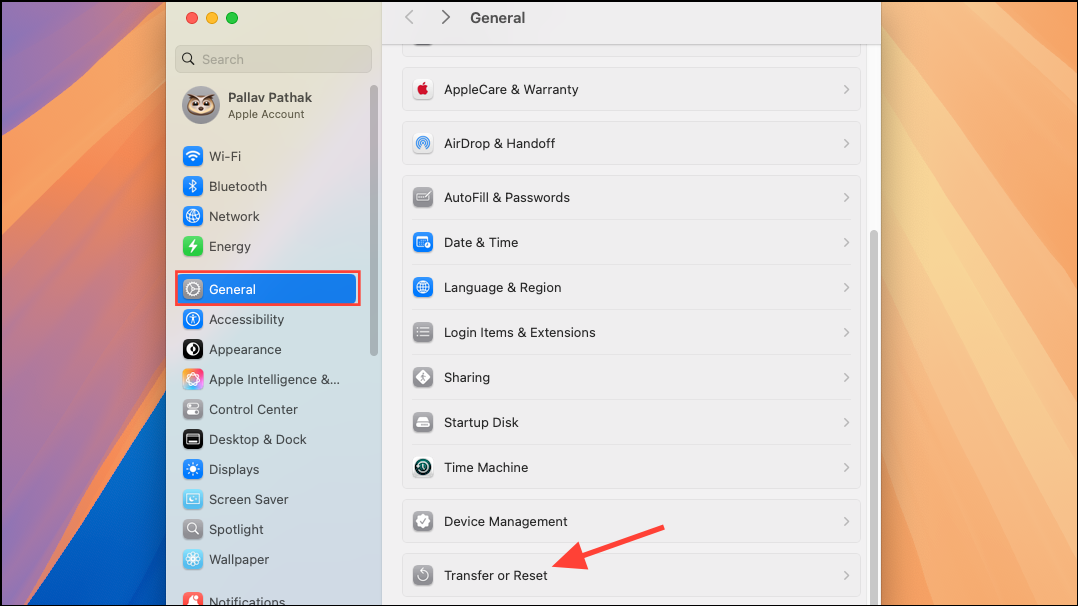
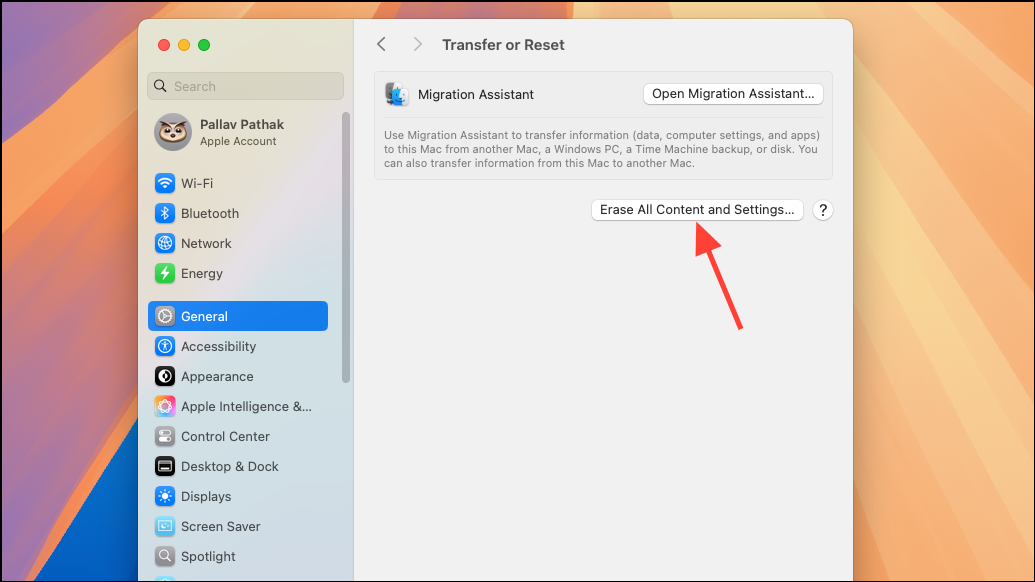
Command + Q to shut down instead of continuing the setup.Using this tool streamlines the process, ensuring nothing is left behind. If you’re trading in or recycling your Mac, this step is sufficient to prepare it for the next user.
Manual Reset for Older Macs or Unsupported Systems
Older Macs or those running macOS versions prior to Monterey, or without Apple silicon or a T2 chip, require a more hands-on approach. This method involves manual sign-outs, disk erasure, and system reinstallation.
Back Up Your Data
Before wiping your Mac, save important files. Use Time Machine with an external drive, migrate files to a new Mac, or manually copy essential documents and media to another storage device. This ensures you don’t lose anything important during the reset.
Sign Out of Accounts and Services
Disconnect your Mac from all personal accounts to prevent lingering connections and licensing issues.
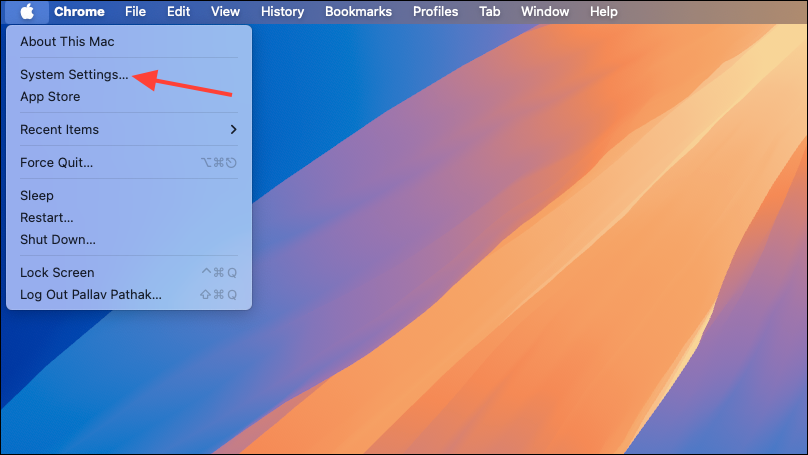
- iCloud: Open System Preferences > Apple ID (or iCloud on older systems), then click Sign Out. When prompted, choose whether to keep a copy of iCloud data locally (you’ll erase the disk later).
- iTunes/Music/TV/Books: For macOS Catalina and earlier, open each app, go to Account > Authorizations > Deauthorize This Computer, and enter your Apple ID to remove authorization.
- iMessage: Open the Messages app, go to Messages > Preferences, select the iMessage tab, and click Sign Out.
- Find My Mac: In System Preferences > Apple ID > iCloud, uncheck Find My Mac.
Unpair Bluetooth Devices (Optional)
If you plan to keep accessories like keyboards or mice, unpair them to prevent accidental connections. In System Preferences > Bluetooth, hover over each device and click the X or Remove button.
Reset NVRAM (Intel Macs Only)
Clearing NVRAM (non-volatile random-access memory) restores default security and hardware settings.
Option + Command + P + R for about 20 seconds, then release.This clears user settings from memory and prepares the Mac for its next owner.
Erase the Startup Disk and Reinstall macOS
With accounts signed out and accessories unpaired, you’ll need to erase the Mac’s internal drive and reinstall the operating system.
Command + R to boot into macOS Recovery. For Apple silicon Macs, power off, then hold the power button until “Options” appears, then select it to enter Recovery.Command + Q to shut down. This leaves the Mac ready for its next user to complete setup.Additional Preparation Steps
- Cancel or Transfer AppleCare: If your Mac is covered by AppleCare+, cancel the plan via your Apple account or transfer it to the new owner to avoid unnecessary charges or provide added value.
- Clean the Device: Physically clean your Mac’s keyboard, screen, and body with a soft, lint-free cloth to improve its resale or handoff condition.
- Check System Information: For resale or trade-in, find your Mac’s specs by selecting About This Mac in the Apple menu. This helps you accurately describe the device’s configuration.
Following these steps thoroughly removes your data and prepares your Mac for a secure transition to its next owner. Whether you’re selling, donating, or recycling, a full reset protects your privacy and gives the recipient a true fresh start.
Resetting your Mac before selling or giving it away protects your information and ensures a smooth experience for the next user. Taking the time to follow these steps means you can part with your device confidently, knowing your data is safe and the Mac is ready for its new chapter.