
Unusually high CPU usage from Windows processes can slow down your computer, cause overheating, and drain battery life. When background services or system processes like System, svchost.exe, or audio services consistently consume an excessive percentage of your processor—even when your PC is idle—it signals a deeper issue that needs direct attention. Addressing these problems quickly restores system responsiveness and prevents long-term hardware stress.
Identify the Process Responsible for High CPU Usage
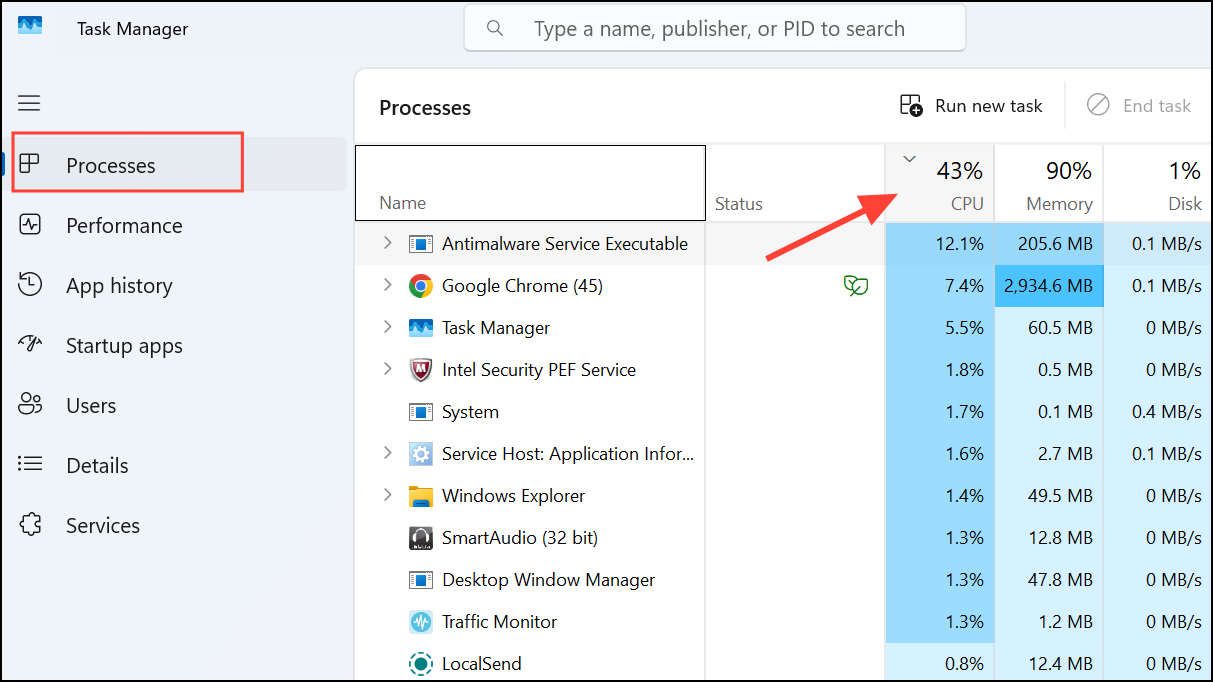
Step 1: Open Task Manager by pressing Ctrl + Shift + Esc or right-clicking the taskbar and selecting Task Manager. If needed, click More details to expand the view.
Step 2: Click the Processes tab, then sort by the CPU column. This will display which applications and background processes are using the most processor resources at that moment. System processes or services using more than 10% of CPU at idle are abnormal and require investigation.
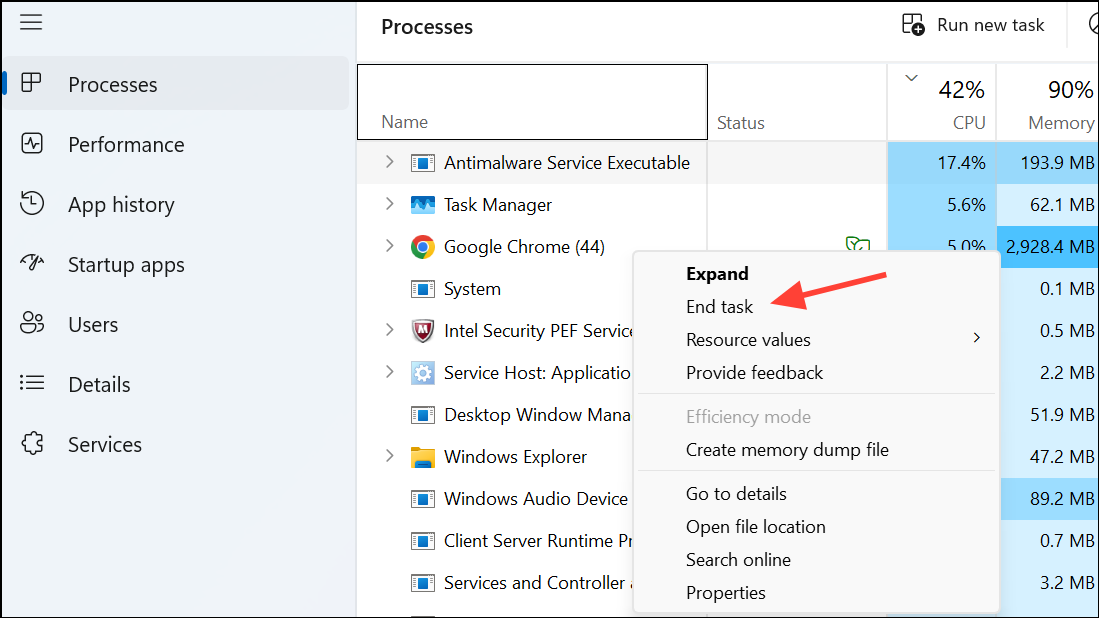
Step 3: For each high-usage process, right-click and select Properties or Go to details to view more information. If the process is not critical to Windows operation and you recognize it, select End task to stop it temporarily. Note the process name for further troubleshooting or online research.
Update Device Drivers and Windows
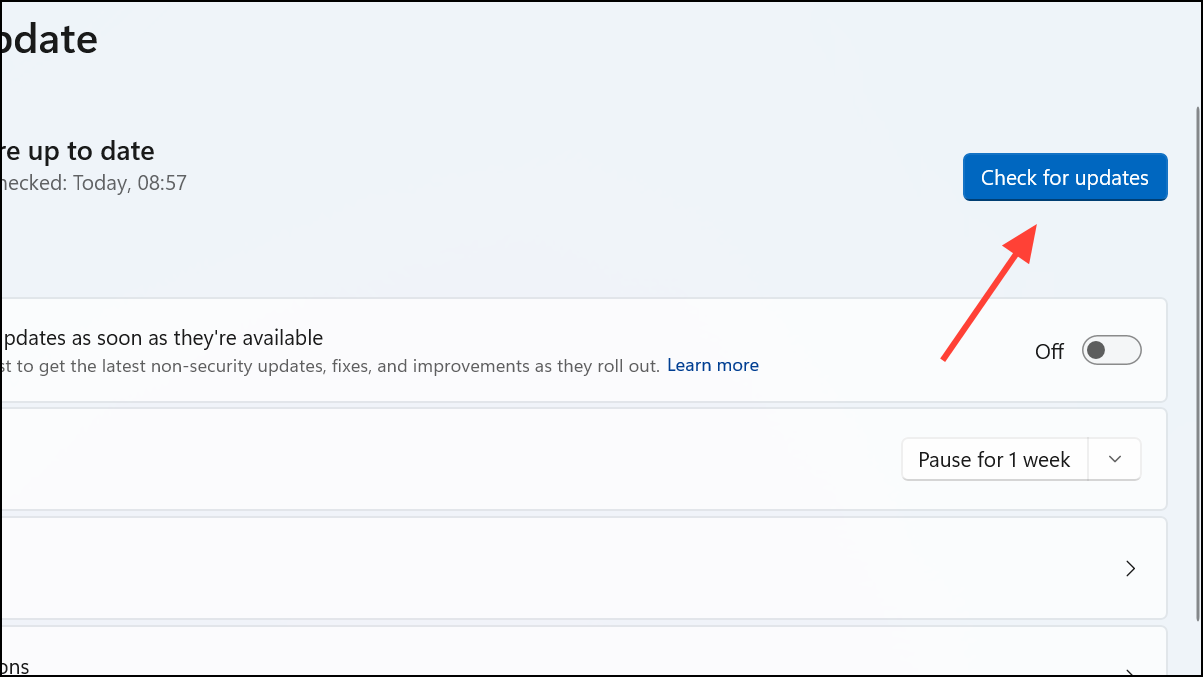
Step 1: Outdated or buggy drivers are a common cause of persistent high CPU usage, especially after major Windows updates. Open Settings by pressing Windows + I, then go to Windows Update and click Check for updates. Install all available updates, including optional driver updates.
Step 2: For graphics drivers, especially if you use an NVIDIA or AMD GPU, visit the manufacturer’s website to download the latest stable driver. Recent issues with Windows 11 24H2 and NVIDIA drivers (such as version 566.36 and above) have caused the System process to spike CPU usage at idle. Downgrading to a known stable version (e.g., 561.09) or upgrading to a later fixed release (e.g., 572.60 or 576.02) can resolve the issue. Always use the clean install option during driver setup to remove remnants of problematic versions.
Step 3: If standard driver installation does not resolve the issue, use Display Driver Uninstaller (DDU) in Safe Mode to fully remove previous GPU drivers before reinstalling the desired version. This ensures no leftover files interfere with system performance.
Scan for Malware and Unwanted Programs
Step 1: Malicious software can disguise itself as normal Windows processes while consuming significant CPU resources. Run a complete scan using Windows Security (Defender) or a reputable third-party antivirus tool. Remove any detected threats and restart your computer.

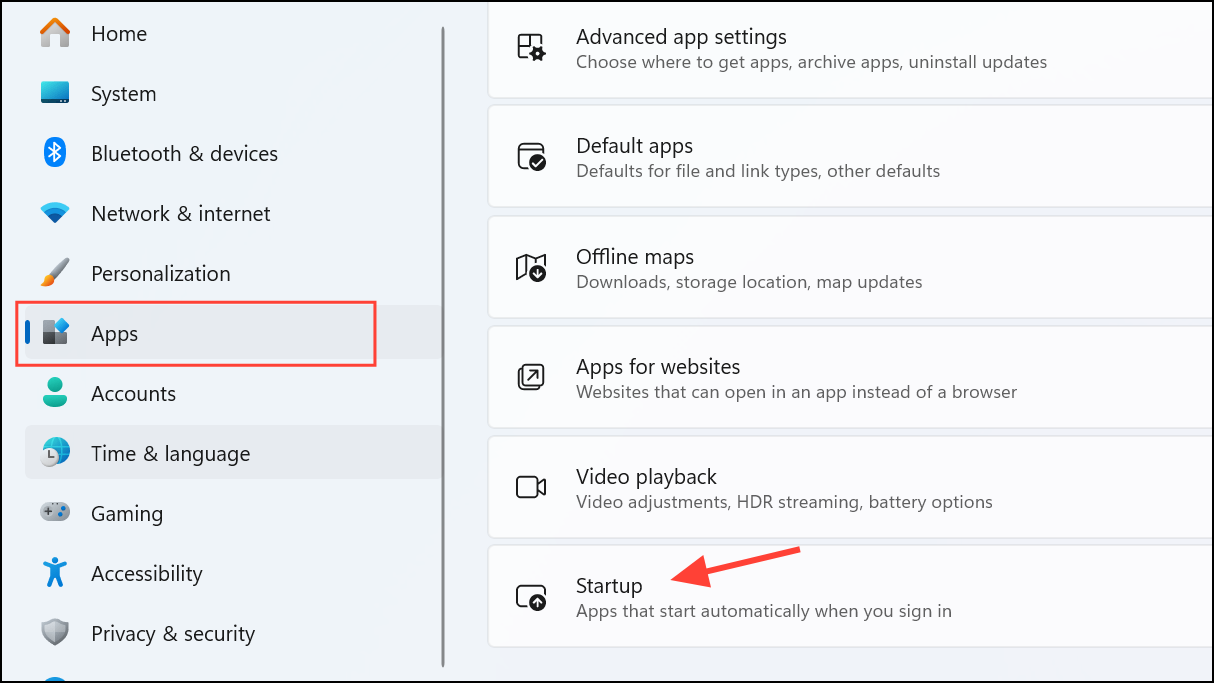
Step 2: If the high CPU usage persists, check Task Manager for unknown or suspicious process names. Research any unfamiliar entries online to determine if they are safe or potentially unwanted programs (PUPs). Remove or disable unnecessary startup applications by navigating to Settings > Apps > Startup and toggling off non-essential apps.
Adjust Windows Power and Performance Settings
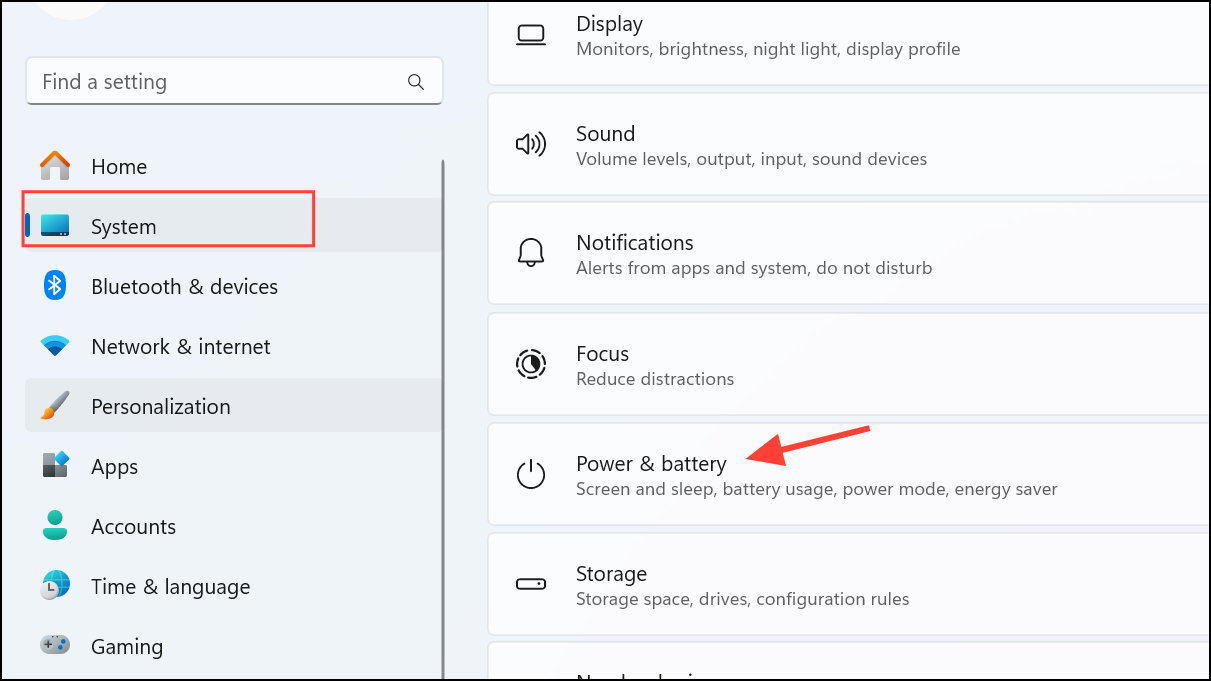
Step 1: Open Settings and go to System > Power & battery (Windows 11) or Power & sleep (Windows 10).
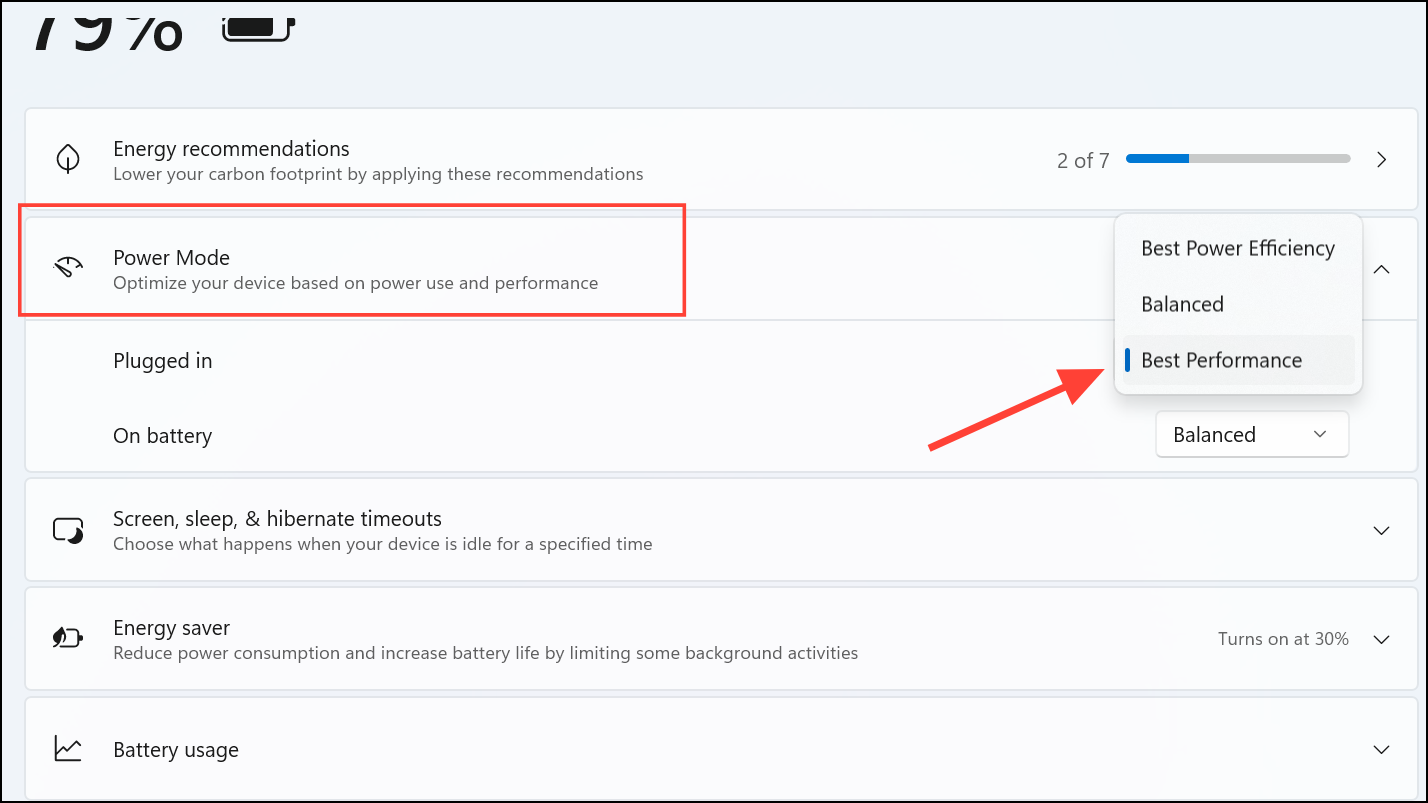
Step 2: Select Power mode and choose Balanced or High performance to prevent unnecessary CPU throttling.
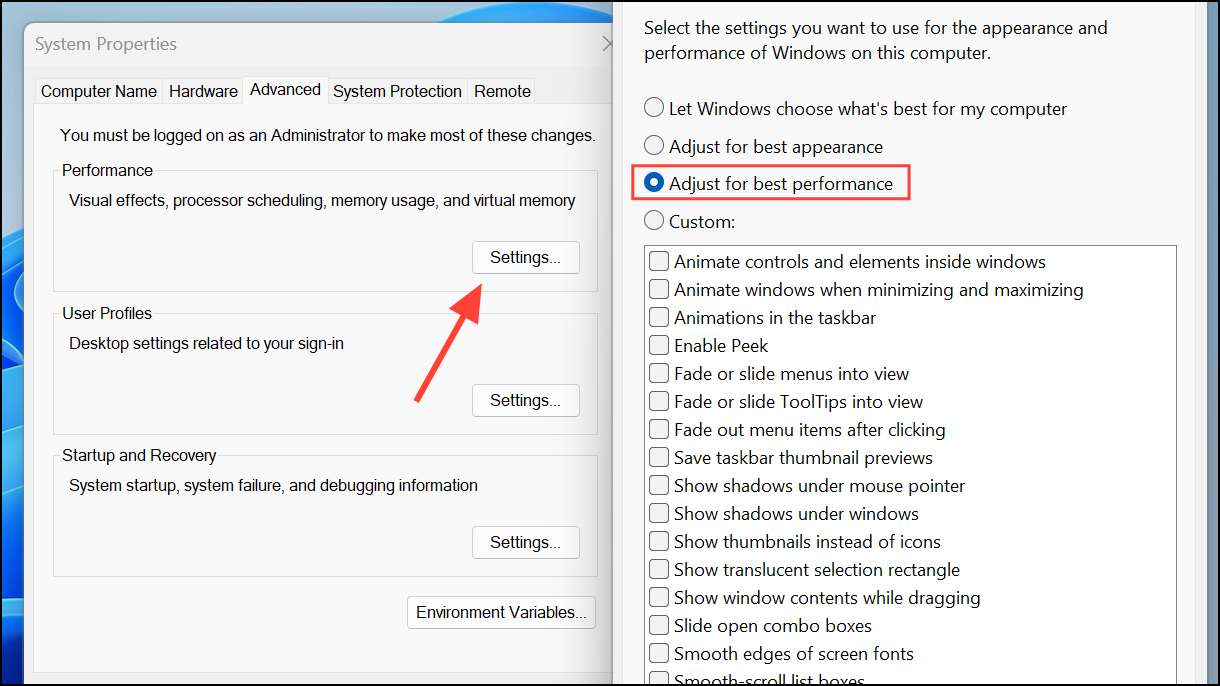
Step 3: For additional fine-tuning, type View advanced system settings in the search bar and open it. Under the Performance section, click Settings and select Adjust for best performance. This disables certain visual effects, freeing up CPU resources for core operations.
Disable or Isolate Problematic Windows Services
Step 1: Some Windows processes, such as svchost.exe or Windows Audio Device Graph Isolation, can consume excessive CPU due to underlying service conflicts or third-party software. If a service is bundled with others in a shared process, open an elevated Command Prompt and run:
sc config <service name> type= own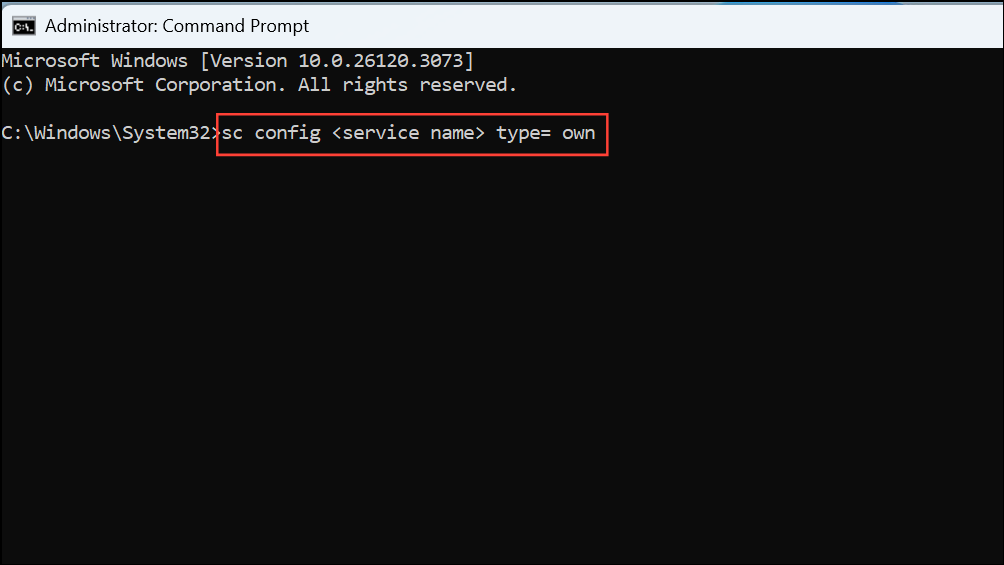
This command isolates the service in its own process, making it easier to identify the culprit. After isolating, restart the service and observe CPU usage in Task Manager.
Step 2: If a third-party application (e.g., Razer THX spatial audio, as seen with WADGI issues) is linked to the high CPU usage, disable or uninstall it and check for updates from the software vendor.
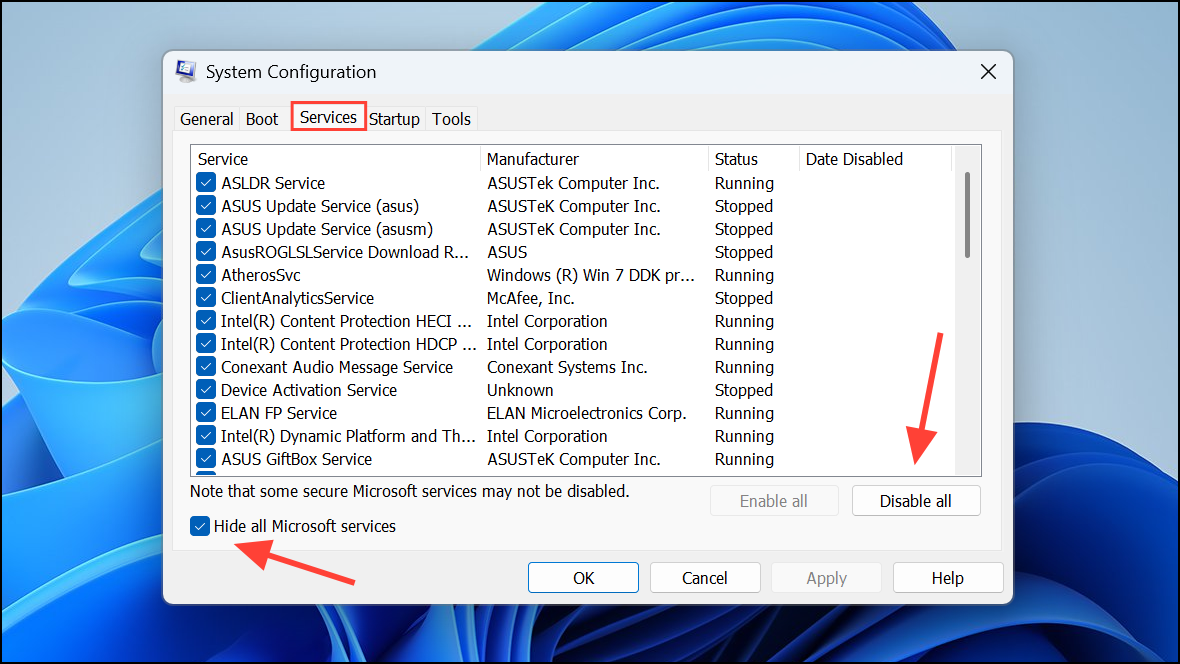
Step 3: For persistent issues, perform a clean boot. Open msconfig, hide all Microsoft services, and disable remaining third-party services. Reboot and monitor CPU usage. Gradually re-enable services to find the problematic one.
Restart or Reset Core Windows Components
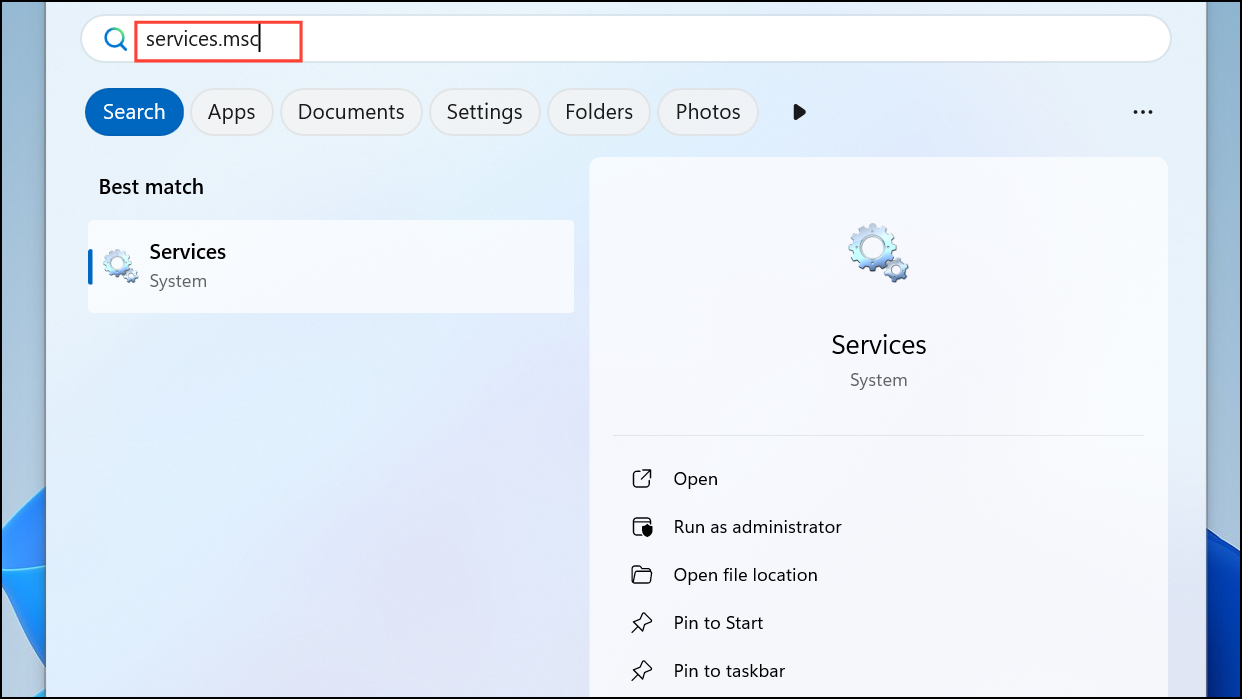
Step 1: The WMI Provider Host and other core services may become bloated over time. To restart these, type services.msc in Windows Search and hit Enter.
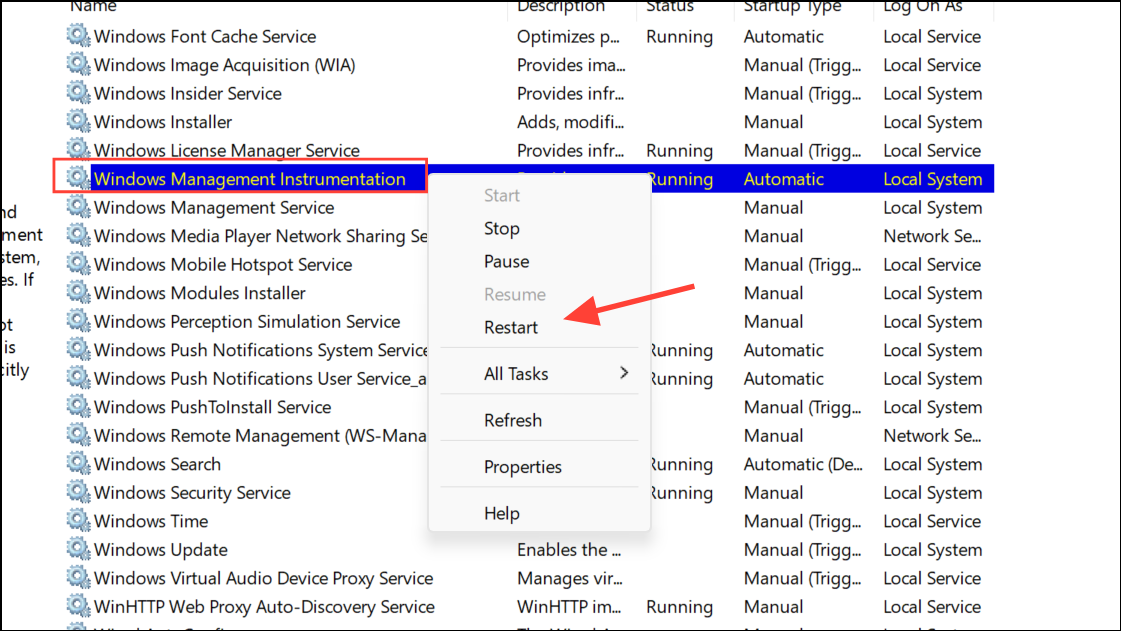
Step 2: Locate Windows Management Instrumentation and related services, right-click, and choose Restart.
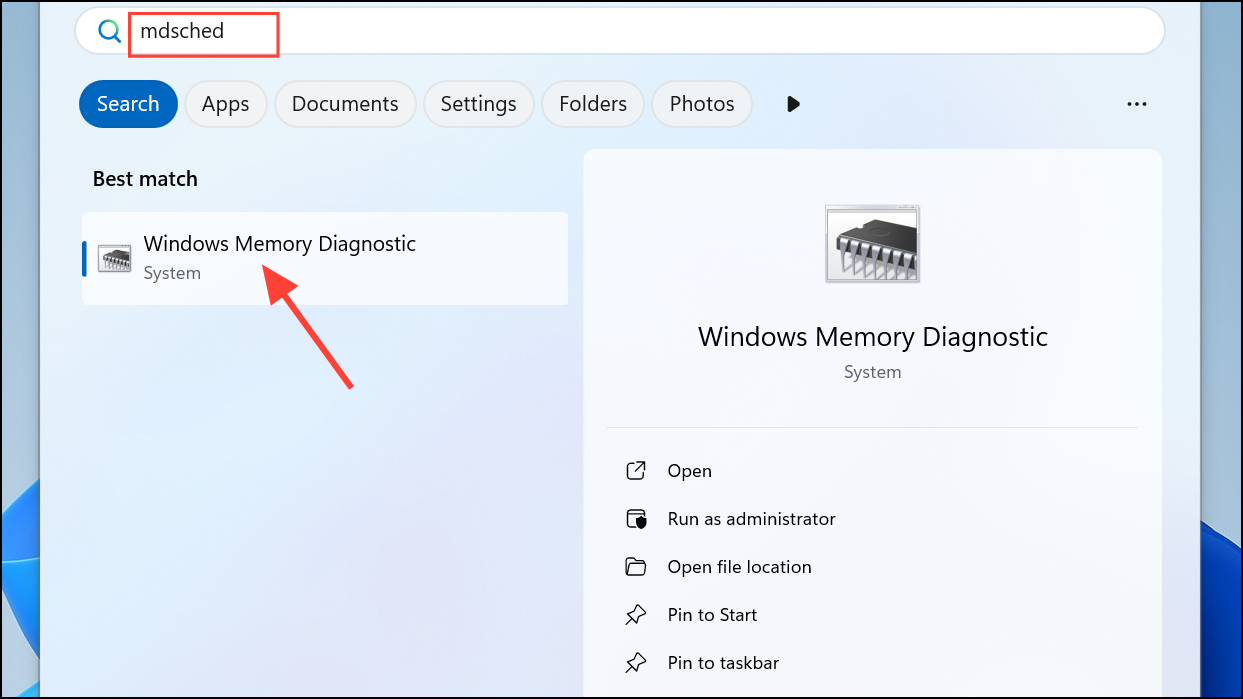
Step 3: If resetting services does not resolve the issue, consider running built-in diagnostic tools such as Windows Memory Diagnostic (mdsched.exe) or Performance Monitor (perfmon) to identify hardware or software bottlenecks.
Reinstall Windows or Roll Back Updates as a Last Resort
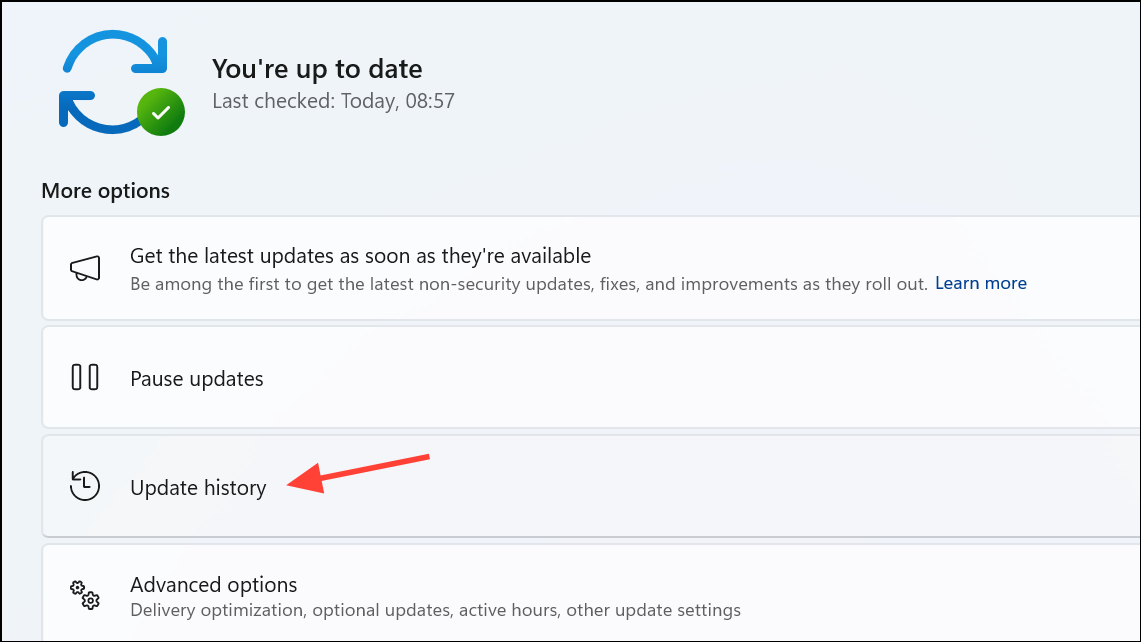
Step 1: If all troubleshooting steps fail and CPU usage remains abnormally high, consider rolling back recent Windows updates, especially if the problem began after a major feature update. Go to Settings > Windows Update > Update history.
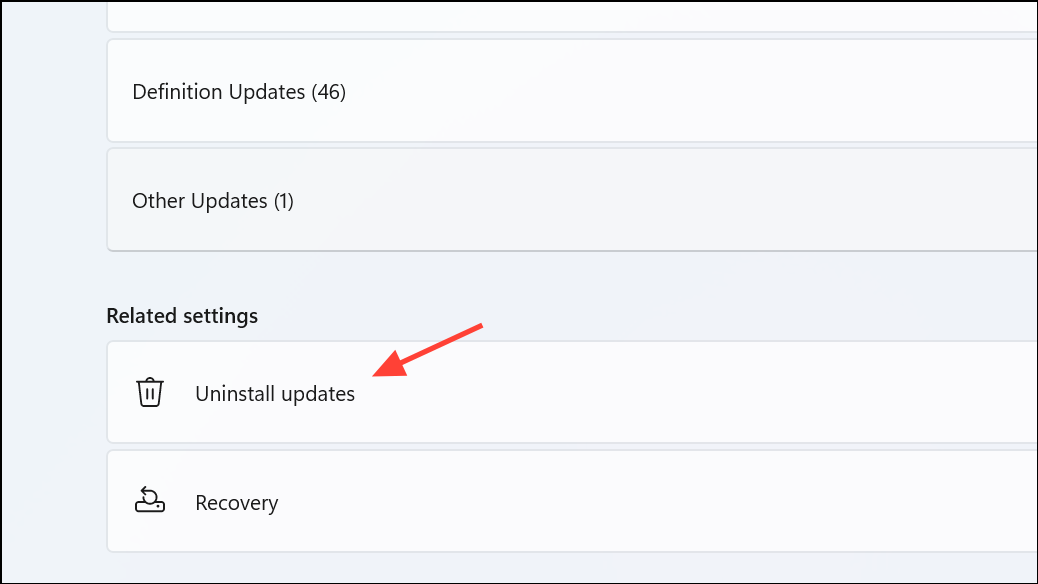
Step 2: Select Uninstall updates and you will see a list of recently installed updates. Click on Uninstall next to the update you want to remove.
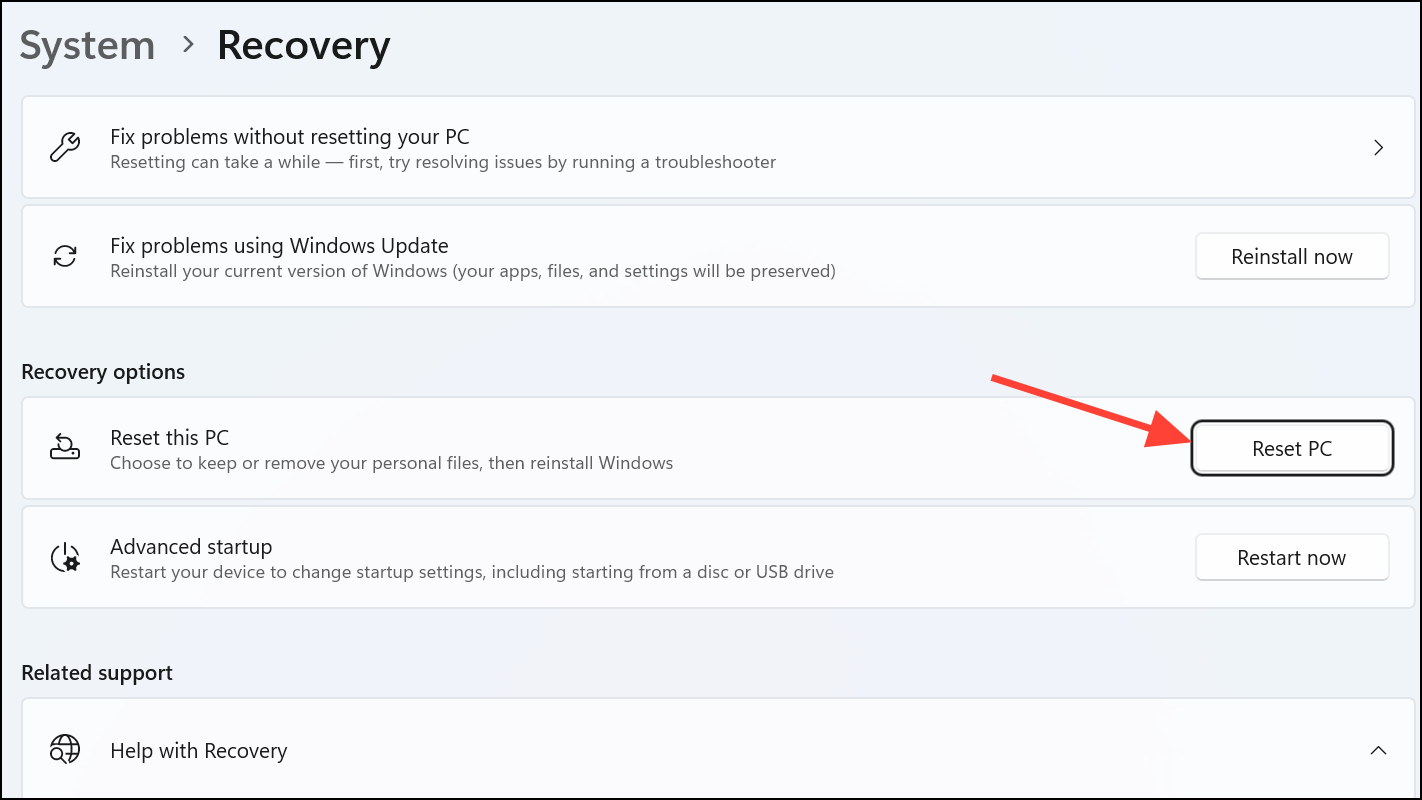
Step 3: For persistent, system-wide issues, a full Windows reinstall can remove accumulated registry errors and misconfigured settings. Before proceeding, back up important files. To reset, open Settings, type Reset this PC, and follow the prompts to reinstall Windows while keeping or removing your personal files as needed.
Resolving high CPU usage from Windows processes involves isolating the root cause, updating drivers, scanning for malware, and adjusting system settings. Consistent monitoring and timely troubleshooting keep your system running smoothly and prevent unnecessary slowdowns.