The Minotaur Raid is the endgame group activity on Blue Planet in Sea 2 of Sailor Piece. It locks the Dual Wielder sword behind its drop table, scales the boss across four difficulties, and uses a two-stage fight with a lever puzzle in between. Clearing it consistently comes down to entering with Raid Keys, bringing a build that can survive the modifiers, and handling the shield phase before the boss heals back up.
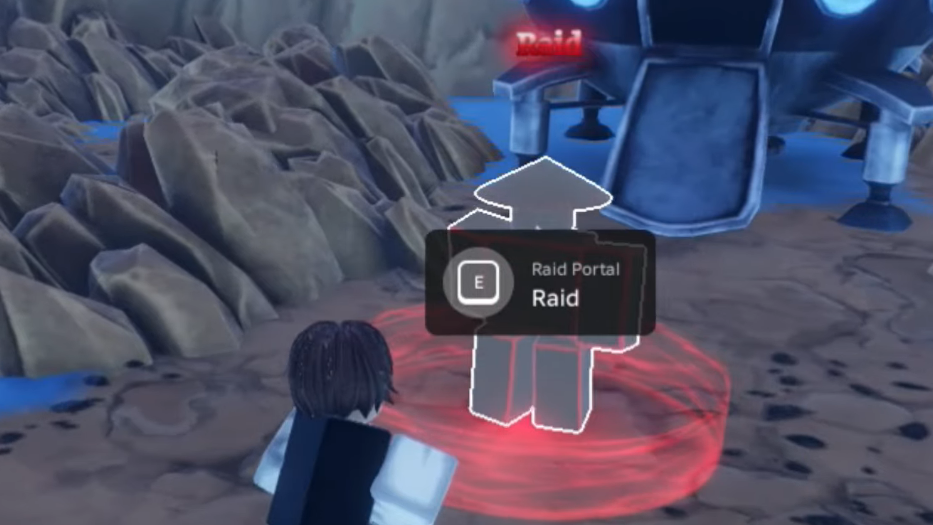
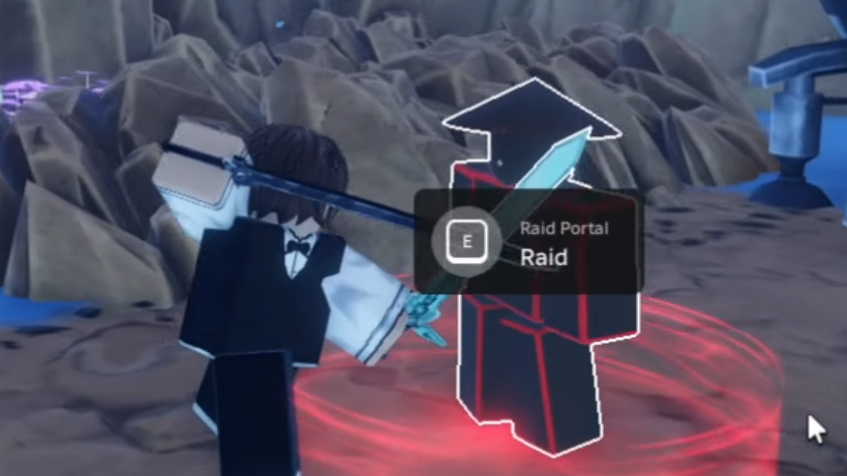
Quick answer: Farm Raid Keys from unarmed NPCs in Sea 2, travel to Blue Planet, hold E on the black-and-red Raid Portal NPC, spawn the Minotaur Raid, burst the boss in Phase 1, pull every lever during the Shield Phase, then finish it off from range in Phase 2.
Requirements to enter the Minotaur Raid
You need access to Sea 2 and at least one Raid Key per attempt. Raid Keys drop only from NPCs that fight unarmed, so enemies wielding swords or other weapons will not give them. Spirit Fighter NPCs in Sea 2 are a reliable source, and AoE-heavy fighting styles or wide-hitting swords speed the farm up significantly.
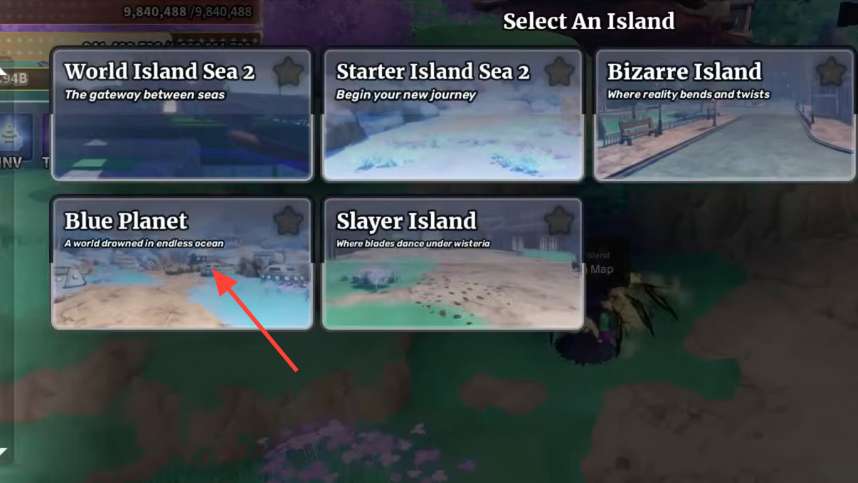
Once you have keys, fast travel to Blue Planet. The Raid Portal NPC stands slightly to the right of the island spawn, near a capsule, and is recognisable by his black and red colour scheme.
How to start a run
Difficulty modifiers
Each difficulty layers on handicaps that strip away survivability tools and raise the boss’s damage reduction. Pick the lowest tier your build can comfortably clear, since drop rates are the same and Raid Coins still accumulate.
| Difficulty | Damage Reduction | IFrames | Lifesteal | Observation Haki |
|---|---|---|---|---|
| Easy | +35% | 2 uses | -50% | 1 use |
| Medium | +40% | 1 use | Disabled | 1 use |
| Hard | +45% | Disabled | Disabled | 1 use |
| Extreme | +50% | Disabled | Disabled | Disabled |
The Minotaur’s HP also scales with party size, rising by roughly 35% for each extra player. More teammates make survival easier, but demand proportionally more total damage to keep the fight short.

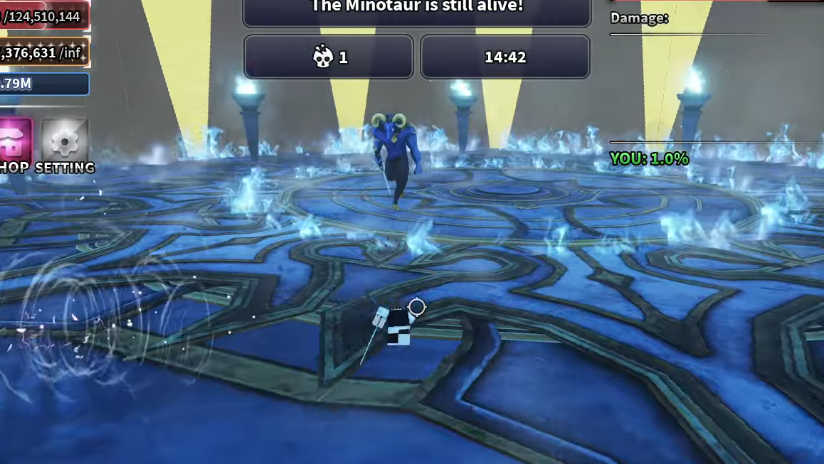
Phase 1: burst window
The opening phase is the cleanest damage window in the fight. The Minotaur uses only basic attacks and does not pressure the arena, so unload your strongest cooldowns immediately. Skill rotations, ultimate abilities, and any consumable buffs should all go out here before the shield mechanic begins.
Phase 1 ends when the boss drops to roughly 50% HP, which triggers the Shield Phase automatically.
Shield Phase: lever puzzle
At 50% HP, the Minotaur walks to the centre of the arena and raises a shield that blocks all damage. Between 3 and 6 levers spawn at random points around the room, and every lever must be pulled before damage can resume.
If the team takes too long, the boss heals 15% of its maximum HP every 30 seconds while the shield is up. That heal is the single biggest wipe risk in the raid, especially on Hard and Extreme, where damage reduction is highest.
Split the arena between teammates before the run so each player knows which sector to sweep. Solo players need to move quickly and check the outer ring as well as the centre, since lever placement is randomised every attempt.
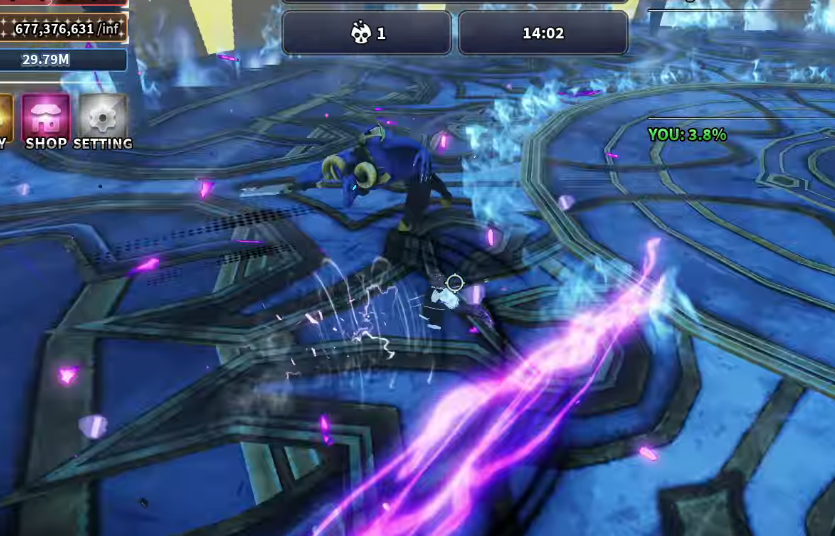
Phase 2: ranged finish
Breaking the shield drops the Minotaur into Phase 2 with a new attack set. The new moves hit hard enough to one-shot players who stand close, and the danger spikes on Extreme where iframes and Observation Haki are both disabled.
Keep distance, favour ranged abilities, and save any cooldowns that came back up during the shield break for the opening seconds of this phase. The boss takes full damage again, so the kill window is short if your group sustains pressure from outside its melee range.
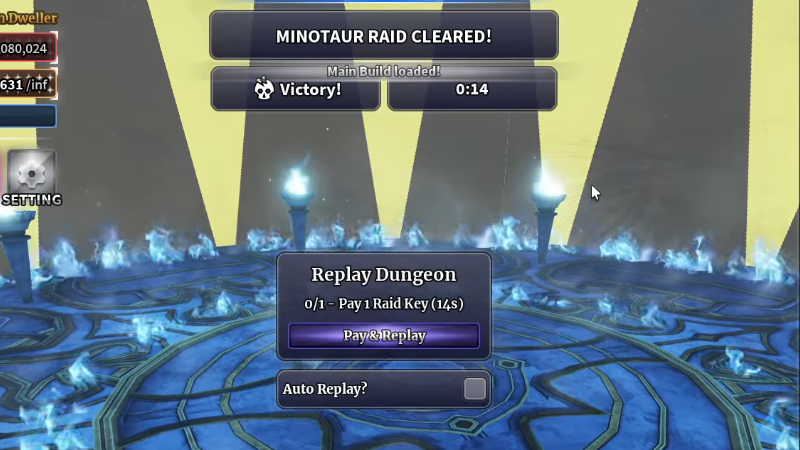
The run ends when the Minotaur dies. The completion screen lists Raid Coins earned and any rolled drops, so a successful clear is confirmed by the reward summary rather than the boss simply falling over.
Drop table
Defeating the Minotaur rolls against four exclusive drops. The Dual Wielder sword (Kirito’s blade) is the headline reward and is not obtainable from any other source. The Dual Swordsman Title uses a 100-clear pity system, so a guaranteed unlock is reachable even on the lower roll rate.
| Item | Drop Rate |
|---|---|
| Dual Swordsman Title | 0.85% – 2.5% (100 pity) |
| Dual Outfit | 8% |
| Dual Wielder | 2% |
| Celestial Aura | 1.5% |
Tip: Switch to a luck-focused build right before the last hit. Run your damage loadout to push the boss into the low-HP range, then swap to luck gear, so the final strike rolls drops at a higher chance.
Raid Coin shop
Every clear pays out Raid Coins regardless of whether a rare drop rolls. Spend them at the Raid Merchant NPC on Blue Planet. The Celestial Aura is the highest-value purchase, while the cheaper chests and keys are useful for steady progression between runs.
| Item | Price |
|---|---|
| Common Chest | 1 Raid Coin |
| Rare Chest | 3 Raid Coins |
| Epic Chest | 9 Raid Coins |
| Legendary Chest | 15 Raid Coins |
| Mythical Chest | 50 Raid Coins |
| Secret Chest | 400 Raid Coins |
| Aura Crate | 500 Raid Coins |
| Cosmetic Crate | 650 Raid Coins |
| Boss Key | 3 Raid Coins |
| Dungeon Key | 3 Raid Coins |
| Tower Key | 7 Raid Coins |
| Trait Reroll | 3 Raid Coins |
| Race Reroll | 3 Raid Coins |
| Clan Reroll | 7 Raid Coins |
| Bloodline Stone | 11 Raid Coins |
| Dual Outfit | 500 Raid Coins |
| Celestial Aura | 2,500 Raid Coins |
Common reasons runs fail
- Levers left unpulled during the Shield Phase, allowing the 15% per 30 seconds heal to outpace the team.
- Attempting Hard or Extreme without enough damage to break the shield before multiple heal ticks land.
- Standing in melee range during Phase 2, where the new attacks reliably one-shot under-geared characters.
- Entering Extreme without the iframe, lifesteal and Observation Haki tools the difficulty disables.
Push Easy and Medium first to build a Raid Coin reserve, finish the Dual Swordsman pity track, and refine your damage rotation. Once you can clear Medium under a couple of minutes solo or in a duo, Hard becomes a realistic target, and Extreme is best saved for full parties with maxed-level builds.