
Single‑digit FPS dips in Senua’s Saga: Hellblade II often coincide with VRAM spikes during cutscenes or scene changes, or with GPUs downclocking due to conservative power policies. The most reliable improvements come from reducing memory pressure, forcing maximum GPU performance, and stabilizing the game’s upscaler path.
The steps below are based on player reports and repeatable workarounds. Apply one change at a time and monitor the in‑game VRAM meter; aim to keep at least ~0.5 GB of headroom below your GPU’s capacity. Technical reviewers also noted that 8 GB cards at 1440p are particularly vulnerable to heavy scenes; lowering texture memory requirements helps more than you might expect.
Method 1: Reduce VRAM pressure and heavy effects
Step 1
Set Texture Quality to Low. This single change cuts VRAM allocation substantially and has been reported to stop crashes to 5–10 FPS in heavy scenes, especially on 8 GB GPUs at 1440p. Technical testing cited that visual differences are minor compared to the stability gain. After changing textures, restart the game to ensure streaming budgets are recalculated cleanly. Revisit this setting later—if your VRAM headroom remains healthy, you can try Medium and retest.
Step 2
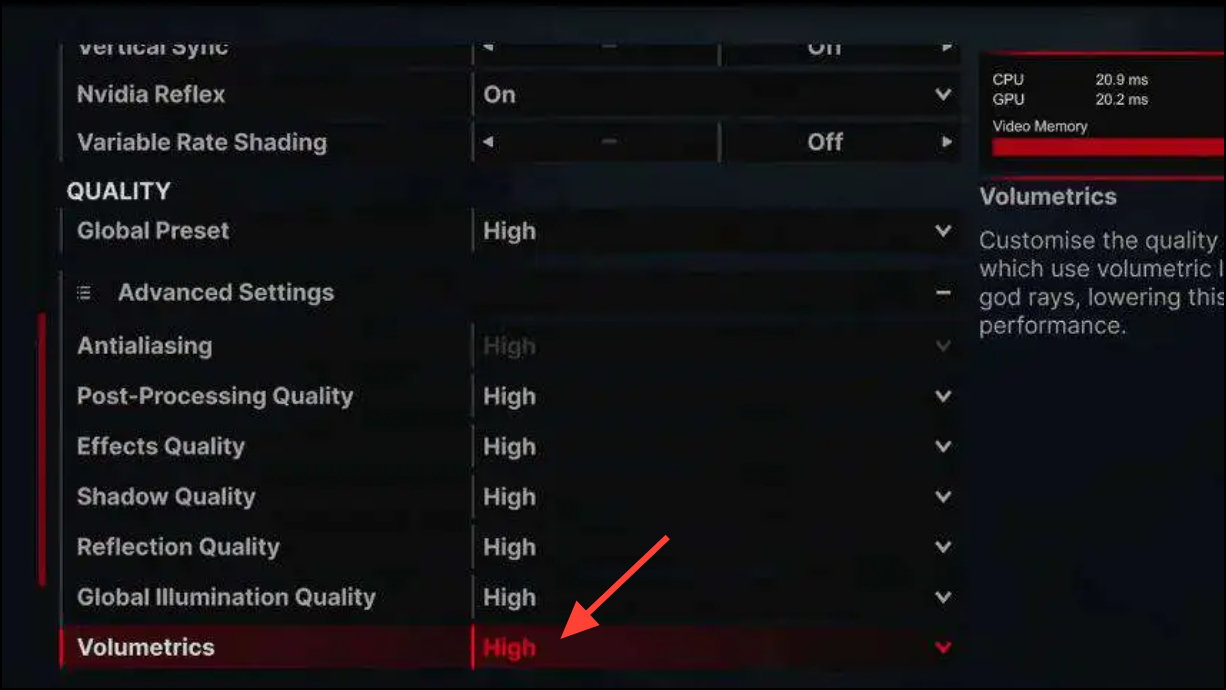
Lower Volumetric Effects (fog/smoke/atmospherics) to Low. Players frequently see big drops when the scene fills with volumetric fog or particle-heavy cuts. Lowering this setting reduces transient memory spikes and smooths frame times during scene transitions. If you prefer a middle ground, test Medium and watch the in‑game VRAM meter; if it nears capacity, step back to Low.
Step 3
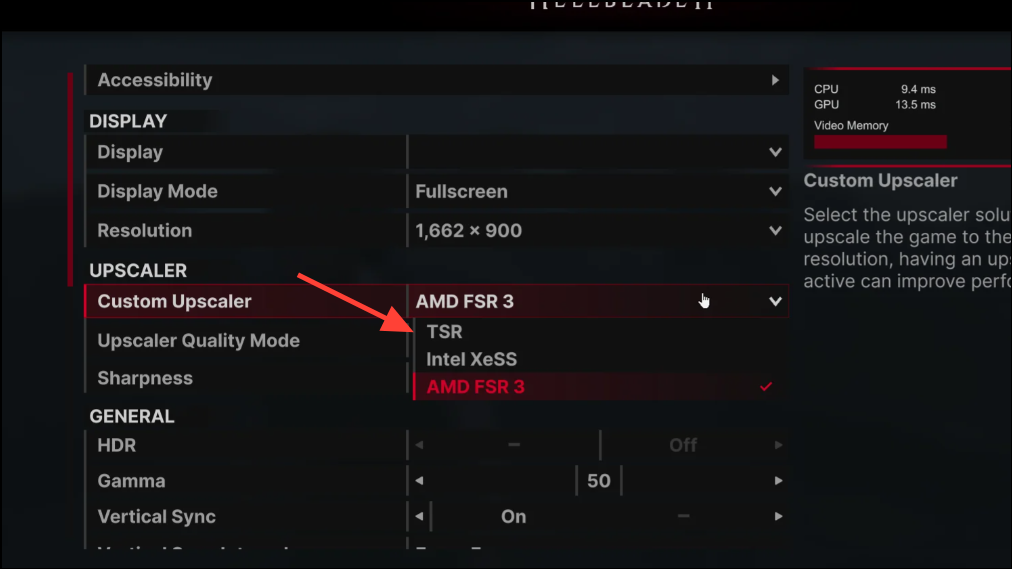
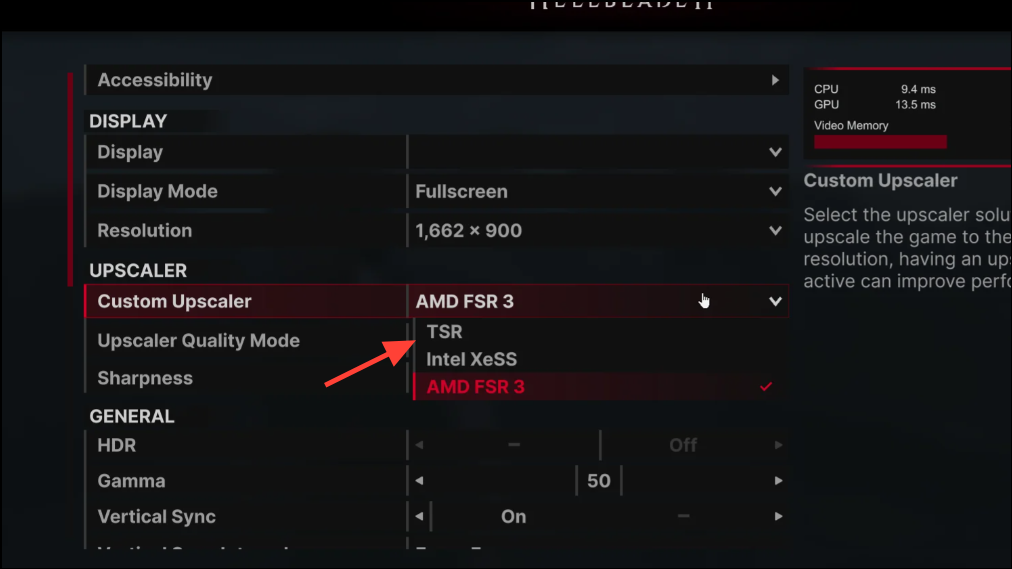
Switch the game’s upscaler to TSR for stability testing. Several users reported inconsistent behavior with DLSS/FSR in this title; TSR (the engine’s native temporal upscaler) can reduce micro-stutter on some setups. Use TSR Quality first, then Balanced if you still bump into VRAM ceilings. Monitor frame pacing after a few scene changes to judge the result.
Step 4
If you keep DLSS/FSR, downshift the mode (Quality → Balanced or Performance) to lower render resolution. This trims VRAM use during cutscenes and busy effects and can stop the slide into single‑digit FPS without a major loss of clarity. Recheck the in‑game VRAM meter after the shift; keep ~0.5 GB of buffer under your GPU’s limit to avoid sudden stalls.
Method 2: Force maximum GPU performance (desktop and laptop)
Step 1
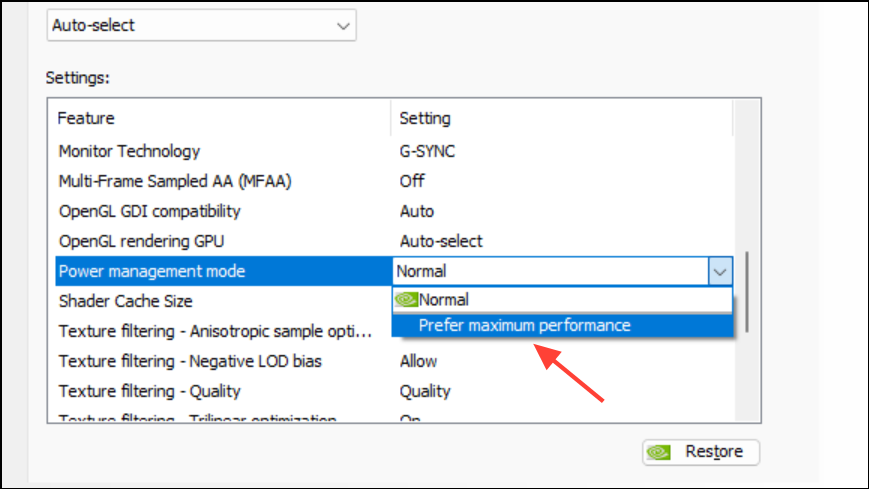
In NVIDIA Control Panel, set Power management mode to Prefer maximum performance for Hellblade2‑Win64‑Shipping.exe. Multiple users with 30‑series GPUs reported this immediately stopped dramatic dips in cutscenes and combat. Path: Manage 3D settings → Program Settings → add the game EXE → Power management mode → Prefer maximum performance. This keeps clocks high during scene transitions where the engine briefly idles, preventing aggressive downclocking.
Step 2
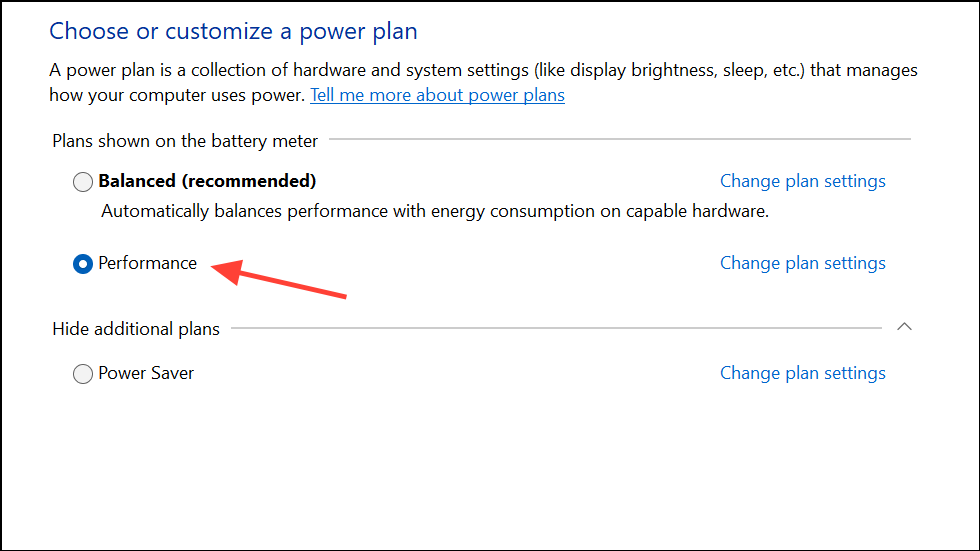
Set Windows Power mode to Best performance. On Windows 11, open Settings and search for “Power mode,” then choose Best performance to reduce CPU/GPU power gating. At least one AMD user reported this alone stopped persistent drops after scene changes. This setting complements the NVIDIA/AMD driver profile by keeping the system out of restrictive power states.
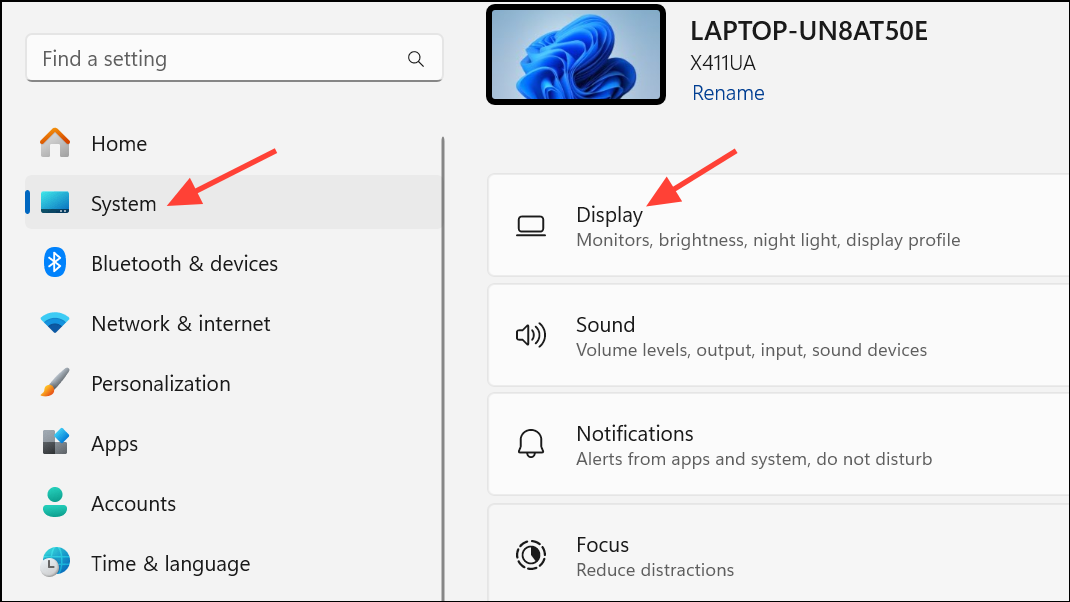
Step 3
Force the game to use the high‑performance (discrete) GPU in Windows Graphics settings. Go to Settings → System → Display → Graphics, add Hellblade 2 if needed, and set its Graphics preference to High performance. This avoids the game falling back to the integrated GPU on hybrid laptops, which can trigger severe dips or odd power behavior.
Step 4
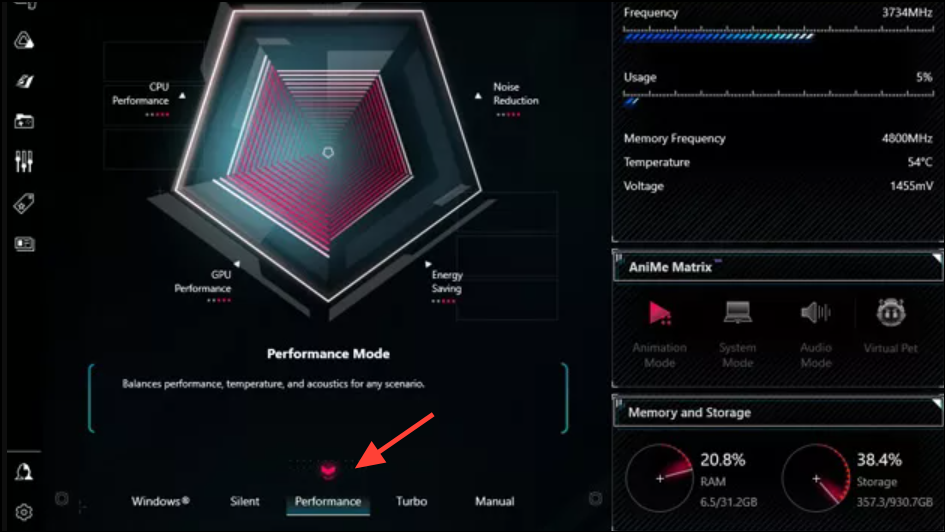
If you use ASUS Armoury Crate (TUF/ROG laptops), switch GPU mode out of “Ultimate” to Standard/Performance and reboot when prompted. Several TUF owners reported that the Ultimate (dGPU‑only) mode caused recurring stalls, while Standard restored stable 50–60 FPS even on battery testing. Treat this as a vendor‑specific fix; if your model behaves differently, revert the change.
Method 3: Update drivers and adjust shader cache (NVIDIA)
Step 1
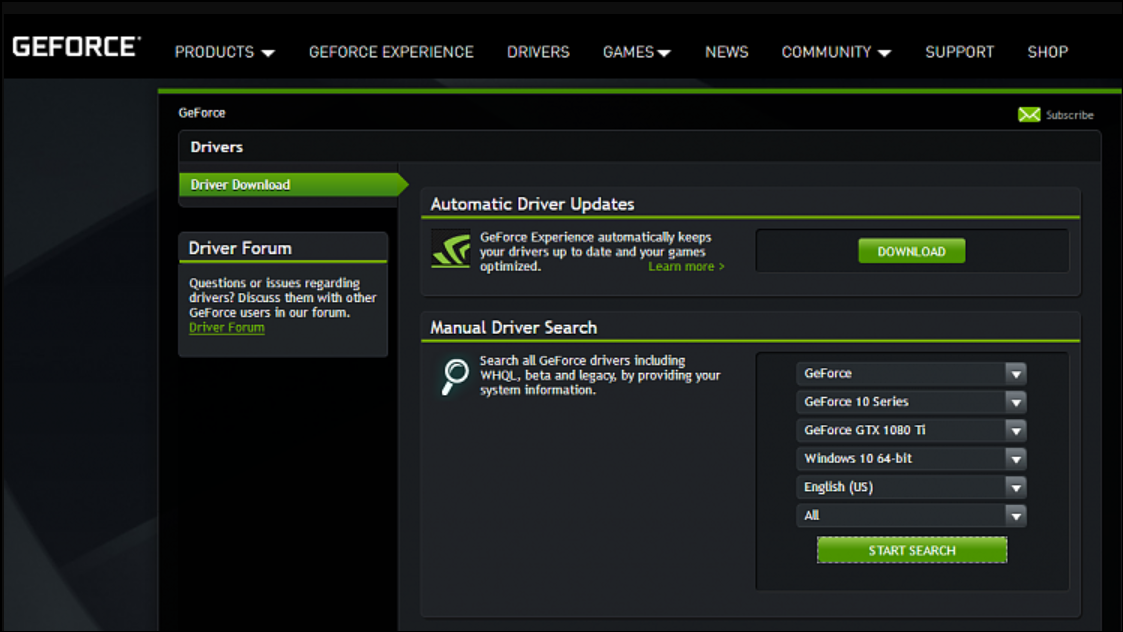
Update your GPU drivers to the latest release (NVIDIA Game Ready or AMD Adrenalin) and reboot. A Game Ready driver released shortly after launch improved stability for some users, particularly around VRAM usage spikes. Driver fixes won’t solve every case, but they can reduce micro‑stutters and odd frame pacing during cutscenes. Always cleanly restart Windows after a driver update to reload the graphics stack.

Step 2
On NVIDIA, set Shader Cache Size to Unlimited. Open NVIDIA Control Panel → Manage 3D settings → Global or Program Settings → Shader Cache Size → Unlimited. A few players reported fewer stalls and smoother recovery from scene changes after lifting this cap. If you see no benefit or you’re tight on system drive space, restore the default value.
Method 4: Upscaler and frame generation choices

Step 1
Turn off Frame Generation if you’re using DLSS 3 on RTX 40‑series. Several reports noted brief hitches or prolonged slowdowns clearing up with FG disabled. Disabling FG reduces input latency and lowers the workload on the optical flow path, which can help during particle‑heavy transitions or blue‑flame scenes described by players.
Step 2
If DLSS/FSR continues to behave erratically, switch to TSR and test across two or three scene loads. Some high‑end users observed fewer micro‑stutters on TSR compared with third‑party upscalers in this game. Keep your cap at 60–90 FPS during testing to evaluate frame pacing rather than chasing peak framerate.
Method 5: Quick recovery during a severe drop
Step 1
Exit to the Main Menu, wait for FPS to stabilize, then Continue. Many players report that the menu clears memory pressure, restoring normal frame rate for the next segment. This takes 10–30 seconds and is often the fastest way to recover mid‑chapter without restarting the executable.
Step 2
Temporarily switch the Global Preset to Low for 5–10 seconds, then restore your previous preset. Users seeing VRAM creep or “memory leak‑like” behavior report this flush brings usage back within limits without a full restart. Watch the in‑game VRAM meter when you revert to confirm it stays below capacity.
Step 3
Reset the graphics driver with the keyboard shortcut Win+Ctrl+Shift+B. Windows will beep and briefly flash; the driver reloads and can recover a stuck low‑FPS state without killing the game. Use this sparingly; it is safe, but any overlays may reconnect after the reset.
Method 6: Advanced .ini tweaks (optional)
Step 1
Apply a vetted Engine.ini optimization file (e.g., “Ultimate Engine Tweaks”) to the game’s config folder. For Xbox/Game Pass, use %localappdata%\Hellblade2\Saved\Config\WinGDK; for Steam/GOG, use %localappdata%\Hellblade2\Saved\Config\Windows. These curated settings target stutters, latency, clarity, and letterboxing. Always back up your original Engine.ini before replacing it.
- Do not combine multiple “optimization” mods.
- To uninstall, delete the modded Engine.ini; the game will regenerate a default file.
Step 2
Set the modded Engine.ini to Read‑only after copying. Right‑click the file → Properties → check Read‑only → Apply/OK. This prevents the game from overwriting the custom settings on launch. If you need to tweak values later, uncheck Read‑only temporarily, edit, then re‑enable it.
Extra checks and notes:
- Watch the in‑game VRAM usage indicator. Drops often begin when usage exceeds your GPU’s capacity; keep at least ~0.5 GB free.
- 8 GB GPUs at 1440p are prone to scene‑change dips; low textures plus a Balanced/Performance upscaler typically stabilizes performance without major visual loss.
- Close overlays (e.g., Discord) and consider disabling Windows Hardware‑accelerated GPU scheduling if you see periodic hitches.
- If you use controller emulation (e.g., x360ce), test without it; a few players traced stutter to the emulator path.
- Some users report the Game Pass build behaves differently from Steam; the fixes above apply to both platforms.
Start by reducing texture memory load and forcing maximum GPU performance—those two changes fix the majority of hard drops. If issues persist, work through the upscaler, driver, and quick‑recovery steps, then consider the .ini tweaks as a final polish.