
StarRupture throws survival systems, factory logistics, and roaming alien bugs at you within the first hour. The difference between flailing and settling into a smooth loop is decided by a handful of early decisions: where you build, what you unlock first, and how you move around the planet between Rupture cycles.
Choose any character, then swap later
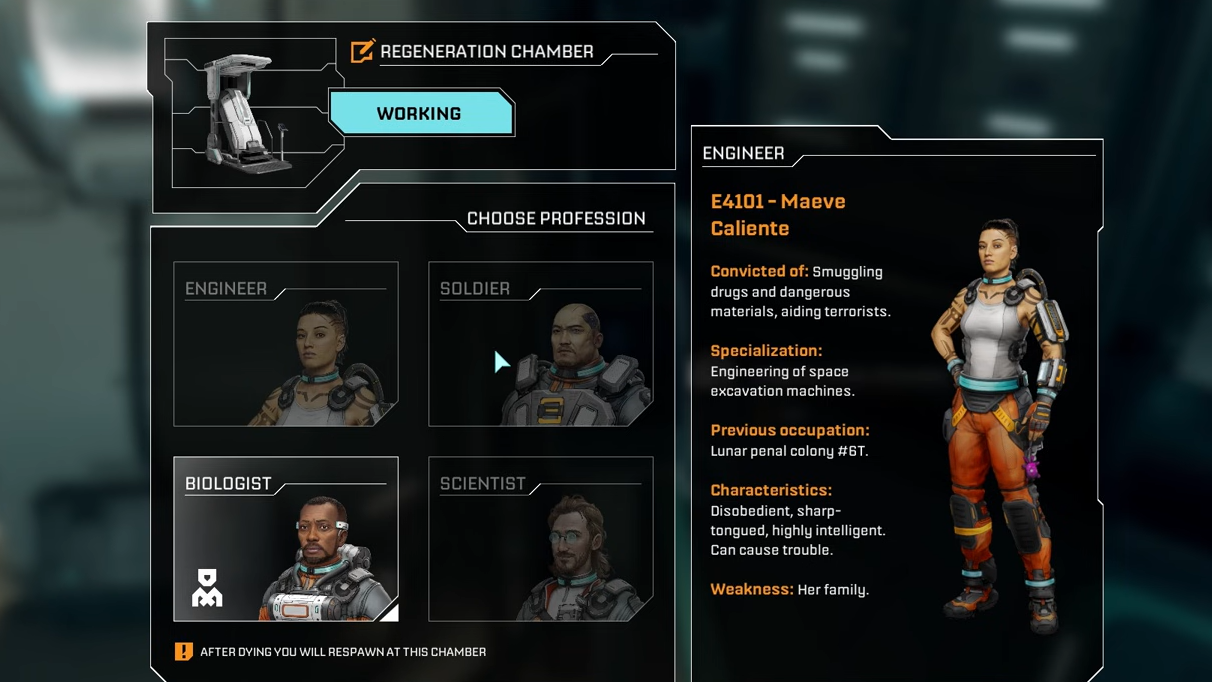
The four starting characters don’t lock you into a build. They differ in voice lines and personality, not in stats or unique perks during Early Access. Pick whoever you like visually; it will not change your access to technologies, weapons, or base parts.
Regeneration Chambers let you change your character at any time. There is one inside the starting orbital lander, and you can build more inside any Habitat. Each chamber also doubles as a respawn point, but only one can be active for you at a time, so set the one you actually want to return to before pushing into dangerous areas.
Unlock the map early
The planet feels much harsher until you have a map. Exploration is slow; it’s easy to get turned around between identical rock formations, and revisiting good spots is guesswork.
The map unlocks from Moon Energy Corporation once you reach its early milestone level. That requires finishing a couple of basic orders after the tutorial, either with data or material shipments. Once unlocked, press M to open it. Everything you have walked through up to that point appears immediately, and you clear more fog of war just by moving around.
There is no mini-map. Plan to pop the full-screen view regularly, especially when placing new Base Cores or scouting resource clusters.

Use the Rupture cycle instead of fighting it
Ruptura activity defines the rhythm of the game. A warning callout announces rising activity, then you see a short on-screen countdown. When the wave hits, a planetary firestorm sweeps Arcadia‑7.
If you are outside a Habitat when the wave lands, you die instantly. Afterward, the ambient temperature stays high for a while and will burn through your shield and health unless you are indoors. Caves and abandoned outposts do not protect you from this heat; only a proper Habitat does.
Two patterns make Ruptures work in your favor:
- Always have shelter materials on you. Keep at least one Meteorite Heart and a stack of Basic Building Materials in your inventory. If you misjudge the timer while exploring, you can drop a small Base Core and Habitat wherever you are and duck inside instead of eating a death and losing part of your inventory.
- Loot immediately after the firestorm. The wave wipes every creature on the surface. For several minutes, the planet is completely quiet: no bugs, no patrols. That window is perfect for raiding infested outposts, clearing rubble piles, opening glowing containers, and looting wrecks that would be dangerous otherwise.
Ruptures also reset the world. Newly spawned boulders replace mined ones, plants and wildlife disappear briefly, then return as the planet regenerates. Treat the post-Rupture lull as a scheduled harvest and looting cycle.
Manage your basic survival: rations, water, and field food
Hydration and calories drain constantly in the background while you build and explore. Dehydration is the real killer; if it reaches its final stage your health bar starts draining steadily even if you are not under attack.
Early on, you are supposed to lean on the supplies that came with you:
- Grab the rations from both storage containers inside your starting Habitat. There are around 20 portions in total; enough to carry you through the first several in‑game hours.
- Top up with local food like Polifruit and Hydrobulb. These grow all over the safer southwest and on the routes to early base spots. They handle calories and hydration, respectively.
The dedicated Food Station unlocks later in the Future Health Insurance/Future Health Solutions track, not in the first few levels. Until then, plan exploration loops around pockets of fruit and water ponds, and empty your inventory before long trips so you can haul back a large stockpile.
Mining: avoid overheating and abuse the combo meter
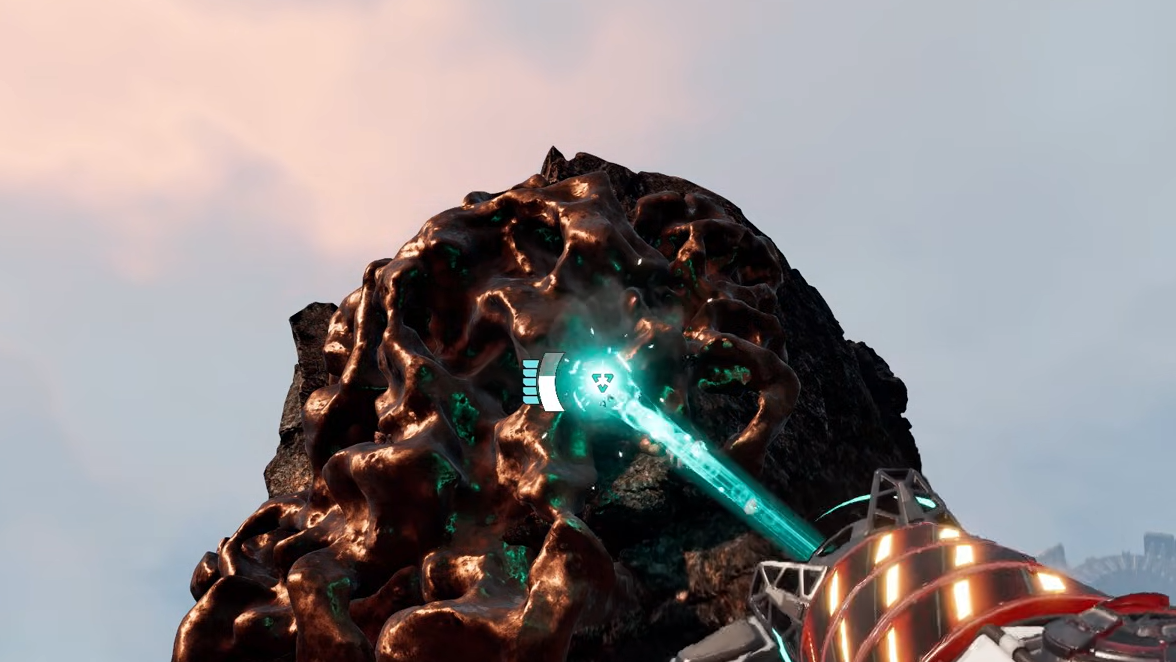
Your Harvester is your first and most important tool. Used well, it mines much faster than it looks on paper.
Two small habits make a big difference:
- Keep the heat bar from maxing. Each continuous beam raises the Harvester’s heat bar at the bottom of the screen. If it fills completely, the tool overheats and takes much longer to cool down. Tap reload (
Rby default) between rocks or while moving to vent excess heat before it hits the cap. - Focus inclusions to charge your combo. The larger boulders contain visible inclusions of different ore. Fully mining a material raises your mining combo bar by one segment, and each segment speeds up further mining. Picking off inclusions one by one ramps the combo fast. You still need to chew through the rest of the rock to grab the Meteorite Heart inside, but the combo state makes everything afterwards much quicker.
Once you unlock basic ore extractors, you can also use them as passive miners. An extractor with power will keep pulling ore even if nothing is requesting it over the rails. Dropping one with a solar panel on a distant deposit is an easy way to stockpile material you can pick up manually later.
Pick the right place for your first serious base
Dropping a quick Habitat next to the lander is fine for learning the UI, but your first “real” base should sit in a resource‑dense and defensible spot.
Two areas stand out early on:
- Near the starting lander, by clustered titanium and wolfram. The tutorial walks you past titanium and wolfram deposits in the starting zone. A Base Core covering those plus nearby calcium gives you nearly every early ore in walking distance, along with a flat plain, a pond for water, and plenty of Polifruit. Enemy traffic is light in the first few cycles.
- Further east, around the lake and helium/sulfur fields. Traveling east from the starting crater past sulfur, you eventually reach a small lake. Just north of it is a broad plateau where titanium, copper, helium, calcium, and multiple sulfur nodes are all within range of a couple of Base Cores. Enemy density is still modest, and there are large flat bands of land for factory floors.
In both regions, you can mark the edge of a Base Core’s coverage on the build hologram and place the core so that important deposits (titanium, copper, helium, sulfur, calcium) sit just inside the ring. If one core cannot comfortably cover everything, drop a second core near the outlying deposits and rail materials back into your main platform.
When you place Habitats and production, elevate them a little using the mouse wheel. That avoids terrain clipping and leaves room for platforms, stairs, and rails underneath.
Build on platforms, not bare ground
StarRupture’s building grid is forgiving, but flatness still matters. Constructing directly on the terrain makes it harder to route rails, extend later, or see under your own factory when you are hunting for bugs.
Lay down a platform deck first:
- Place a platform tile, then hold the right mouse button while moving the cursor to drag out a line or block of tiles. Left‑click to confirm.
- If the game complains that a tile is “not stable”, add support pillars or a support platform beneath that section.
- Press
Ywhile looking at an existing platform to lock its height. New pieces will snap to that elevation, which keeps floors, machines, and walkways aligned without fighting the mouse wheel.
The extendable walkways that auto‑curve between platforms share power and act as rails, so you can fan production out instead of cramming everything into a tiny square. A wider, lower‑density layout is easier to navigate, easier to debug, and leaves clear lines of fire for future turrets.
Read structure lights instead of guessing
Every powered building shows its status through a colored indicator. Learning that language saves you from digging through menus when something stalls.
| Light color | Meaning |
|---|---|
| Blue | Operating normally with enough power and valid inputs. |
| Red | Grid underpowered. Add more solar panels or better generators feeding the connected platforms and rails. |
| Yellow | Building cannot run: missing a recipe, missing input items, blocked output, or similar configuration issues. |
Outside your own bases, yellow lights are useful too. In abandoned outposts, any object with a yellow glow—rubble piles, machines, cabinets—can be looted.
Automate ore early, but don’t over‑complicate it
Once you have ore extractors, smelters, and an Orbital Cargo Launcher (OCL), the loop becomes: pull ore, smelt into bars, then either ship those bars or turn them into higher‑value parts before shipping.
A simple, efficient early line looks like this:
- One ore extractor on a titanium or wolfram deposit, output pointed toward your factory.
- One smelter directly downstream, with its yellow arrows (input) facing the extractor and green arrows (output) facing the rest of the line.
- Two fabricators making titanium rods or other basic parts, fed from a smelter output via a rail connector that splits the bars evenly.
- Two or three OCLs receiving the finished parts on rails.
Rails only move items when a building requests them. If you have an extractor powered, but the smelter recipe is unset, nothing will leave the mine. Always set recipes as soon as you place a machine.
Electricity is intentionally generous. Solar panels are cheap, rails and platforms conduct power, and you get a full refund when you deconstruct a building. Err on the side of too many panels so you rarely have to babysit power levels.
At the same time, you do not need to hard‑wire every possible route. It is often faster to grab a stack from a storage box or machine and drop it into an OCL by hand than to spend 20 minutes weaving extra rails for a marginal gain.

Use commissions and corporations to drive progression
Progression is tied to offworld corporations. Each corporation offers a technology tree, and you advance those trees either by sending data or by shipping requested materials through OCLs.
Some broad priorities help:
- Favor material shipments early. The first orders want simple items: ore bars and basic manufactured parts. These are trivial to automate at scale. Data, by contrast, requires more exploration and analyzing specific finds, and it’s also used by the Recipe Station later to unlock advanced materials and plates. Hoard data points until you know what recipes you want.
- Stack multiple OCLs on the same order. If a corporation wants a large number of one item, assign that commission on several launchers in parallel. The required points accumulate faster without changing your actual production line.
- Unlock utility tech before heavy combat gear. The map from Moon Energy, factory tools, and Recipe Station unlocks often provide more value than an early weapon upgrade. A basic pistol and lots of cheap ammo are enough to handle starting threats while you focus on building capacity.
When a commission offers a choice between items, prefer the higher‑value one if you can unlock its recipe at the Recipe Station. For example, titanium plates may be worth significantly more commission points than rods; feeding a few smelters into a dedicated plate line can shrink grindy orders dramatically.
Unlock and use your first weapon before real exploration
The Harvester can technically hurt enemies, but it is a poor main weapon. It deals low damage and forces you to stand still, which is dangerous once bigger bugs appear.
Before you push far from your base, unlock the early pistol through its corporation track and craft plenty of ammunition at an Item Printer using basic materials. For longer expeditions, treat 100 rounds as a minimum; you can easily dump several hundred bullets in a single loop if you insist on clearing every group you see.
Later, assault rifles, shotguns, and machine guns unlock through War Bonds spent at the Equipment Upgrade Station. Those shine during base defense waves and deep‑inland outpost runs, but they are not required for your first day on Arcadia‑7.
Fight smarter: weak spots, sliding, and retreat plans
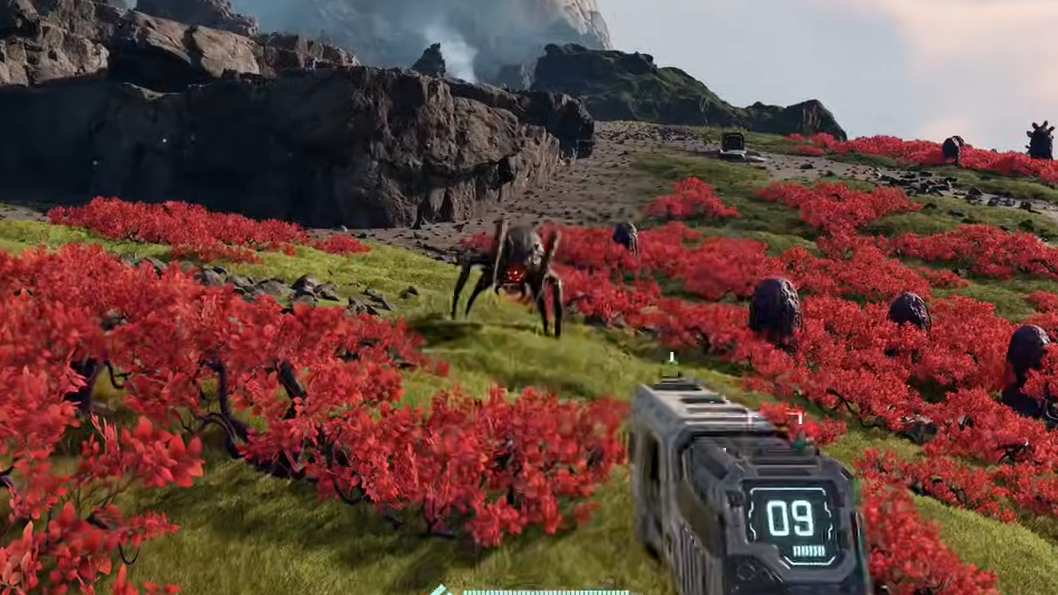
Enemy packs are not meant to be tanked face‑on forever. A few combat habits stretch your ammo and prevent chain deaths far from home.
- Aim for weak spots. Most enemies have vulnerable points that take extra damage, often glowing red eyes. Others hide a soft spot on a particular limb or tail. Targeting those points drops them with far fewer shots.
- Use terrain and sliding. Holding sprint and tapping crouch on a downhill slope lets you slide while regenerating stamina. That move can break line of sight and create distance without draining your stamina bar, especially helpful when a Rupture countdown forces a last‑minute dash back to a Habitat.
- Carry a fallback respawn. Before entering dense hive areas or heavily infested outposts, build a small Habitat with a Regeneration Chamber nearby and claim it. Dying then sends you back a short run from the fight instead of all the way to your starter base.
Explore abandoned outposts and caves early, but with limits
Abandoned outposts are some of the most rewarding locations on the map. They usually contain:
- Large caches of food, useful before you have automated cooking.
- Multiple LEMs, which slot into your character to boost health, stamina, damage, and resistances.
- Blueprints and logic boards needed for mid‑game technologies and upgrades.
The catch is that these places are stacked with enemies until a Rupture clears the surface. The safest pattern is to locate an outpost, retreat before fully committing, wait for the next Rupture, then sprint back in the silent window afterward when every bug has been vaporized. Loot everything glowing yellow before wildlife respawns.
Hidden caves often sit behind vine‑covered holes that only open once a Rupture burns the plants away. Keep mental notes of suspicious blocked entrances and revisit them after the next wave.
Inventory, storage, and small interface tricks
The game doesn’t explain some of its more useful quality‑of‑life touches, and a few behaviors can catch you out:
- Dropped items are not permanent. If your inventory is full and you pick something up or merge stacks, overflow is packed into a small box on the ground. Those containers do not last forever, especially across reloads and Ruptures. Avoid using the terrain as long‑term storage.
- Use existing storage in the lander. The starting ship has a Personal Storage container that is available long before you can build your own. Treat it as a bank for rare items and blueprints you won’t need for some time.
- Rename everything. Containers, machines, cores, and habitats can be renamed via the small icon next to their default name. Clear labels like “Titanium Bars – Plates Line” or “East Helium Core” save a lot of confusion once you have multiple factories.
There is room for more inventory shortcuts in future builds, so for now expect to drag items manually and be deliberate about what you lug into the field. Heading out with nearly empty pockets and returning full is far more efficient than constantly juggling partial stacks.
The early game in StarRupture becomes much more manageable once you stop treating it as a traditional open‑world shooter and start planning around cycles, logistics, and safe windows. A solid starter base in a good spot, a pistol and a pile of ammo, and a habit of building shelter before you need it are enough to carry you through the first few Ruptures while you learn the planet’s shape.