
The Stabilizer is one of the first major component bottlenecks in StarRupture. You can see it listed at the Recipe Station early on, but you cannot craft it until you track down its blueprint and feed in a large pile of other parts. The game never really explains how any of that works, which is why many players stall right at the point where turrets and higher-tier tech come into reach.
What the Stabilizer does and why the blueprint matters
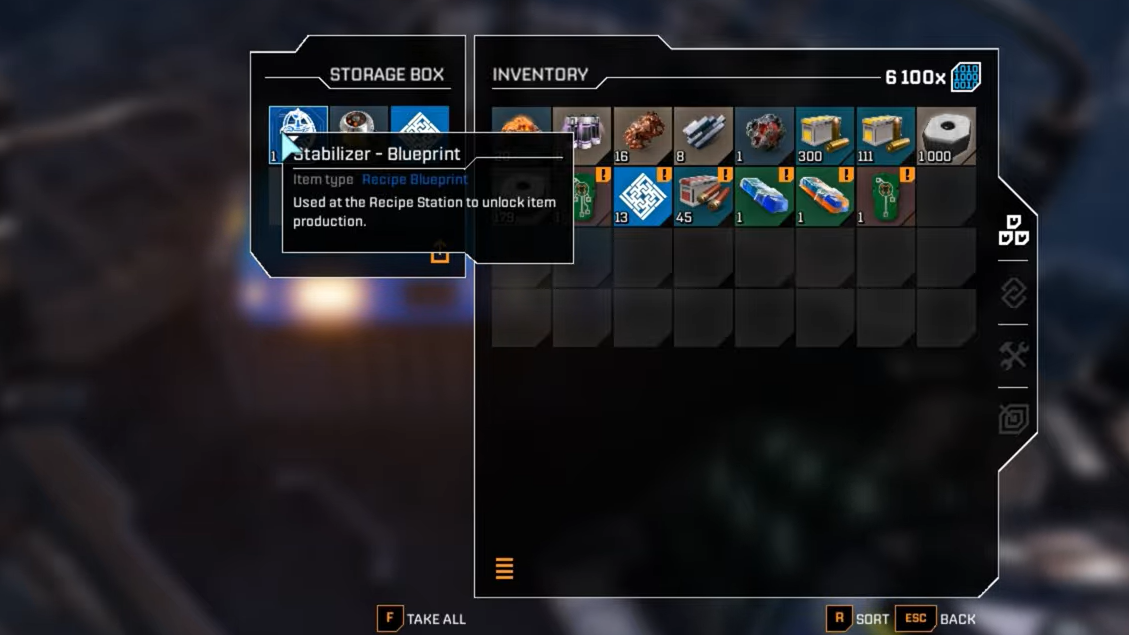
The Stabilizer is a mid-game component used in key fabrication and base-defense technologies. It sits behind a hard gate: until you unlock its recipe with the correct blueprint, the Recipe Station simply shows it as unavailable, regardless of how many raw materials you have.
Unlocking the Stabilizer recipe has two parts:
- You must collect the Stabilizer blueprint as a story item out in the world.
- You must then contribute the blueprint plus a set of crafted materials and Data Points at a Recipe Station in your base.
Blueprints are persistent story items. Once picked up, they stay with your character even if you die or get caught in a Raptura solar storm, and they appear in the special story tab of your inventory. That makes the trip to the Stabilizer site risky but low stakes: you may lose time and resources, not progression.
Stabilizer blueprint location (Claywood's Research Outpost)
The Stabilizer blueprint is stored in a blue chest on top of a tower in CRO "Grey Owl", better known as Claywood's Research Outpost. This facility is built into the mountains northeast of your starting lander.
From your initial base at the orbital lander, you’re looking for two strong landmarks:
- The mountain range that rises to the northeast.
- The enormous crashed ship engine embedded between the peaks.
Claywood's Research Outpost sits on the slopes before you reach that engine. It is an industrial complex with large metal pipes, a long staircase, and a tower at the back that overlooks the valley. On the map, it appears in the hills to the northeast of the lander, relatively close to one of the best Helium-3 areas you will visit later.

How to reach Claywood's Research Outpost
Step 1: Leave the orbital lander and head roughly northeast across the open terrain. Keep the huge crashed engine ahead of you in the distance; that line will naturally pull you towards the correct part of the mountain range.
Step 2: As the ground starts to rise, stay to the left of any obvious cave archways and continue climbing into the hills. Your goal is not the underground cave entrance but the slopes above it.
Step 3: Keep moving until you see industrial structures cut into the rock: thick pipes, scaffolded walkways along the cliff, and a wide metal staircase. This marks the lower edge of Claywood’s Research Outpost.
There is an alternate route that approaches from the north. If you have already visited Griffith's Research Outpost directly north of your base, you can take the path just northeast of Griffith, then hug the mountain range as you move east. That path eventually brings Claywood’s towers and walkways directly into view ahead of you.

Enemy pressure and timing your run
Claywood’s outpost is heavily infested with Vermin. Expect constant spawns as you enter the area, including ranged variants that spit venom from perches on the cliffs and on building edges.
For a "normal" planetary state run:
- Bring at least the starter Reaper pistol and several hundred rounds of ammo.
- If you have an Assault Rifle, the climb is noticeably easier because you can thin out spitters at range.
- Expect additional enemies to spawn when you open the chest containing the blueprint, effectively creating a mini-ambush at the top of the tower.
There is a safer window after a Raptura event. Once the solar flare has passed and the planet shifts into a scorched, barren state, outposts briefly empty out. During this period, Claywood’s will be devoid of enemies, turning the whole climb into a simple platforming exercise. It looks more ominous but plays much more quietly.
Climbing to the Stabilizer chest
Reaching the chest is less about raw stats and more about reading the level geometry. The path up the tower uses narrow platforms, short jumps, and a staircase segment near the top.
Step 1: Approach the outpost from the southwest side, climbing the outer rock until you are beneath the metal walkway bolted to the cliff face. Look for a section where the walkway passes overhead, and there is open space beneath it.

Step 2: Crouch to slip under the walkway and emerge at the base of a staircase that leads up to a raised platform. Take the stairs and step out onto this platform, which serves as the entry point to the tower climb.
Step 3: From the platform, look toward the nearby tower. On the northwest side of the tower, there is a jutting bit of walkway that sits within jumping distance. Line up a short jump and cross over to this ledge.
Step 4: Work your way around the tower by jumping from one small platform or ledge to the next. The route loops around the exterior rather than going inside; each jump is short but usually has a drop beneath it, so take your time lining up.
Step 5: Eventually, you will reach a section where the remaining flight of stairs resumes. Follow these stairs up to the top of the tower.

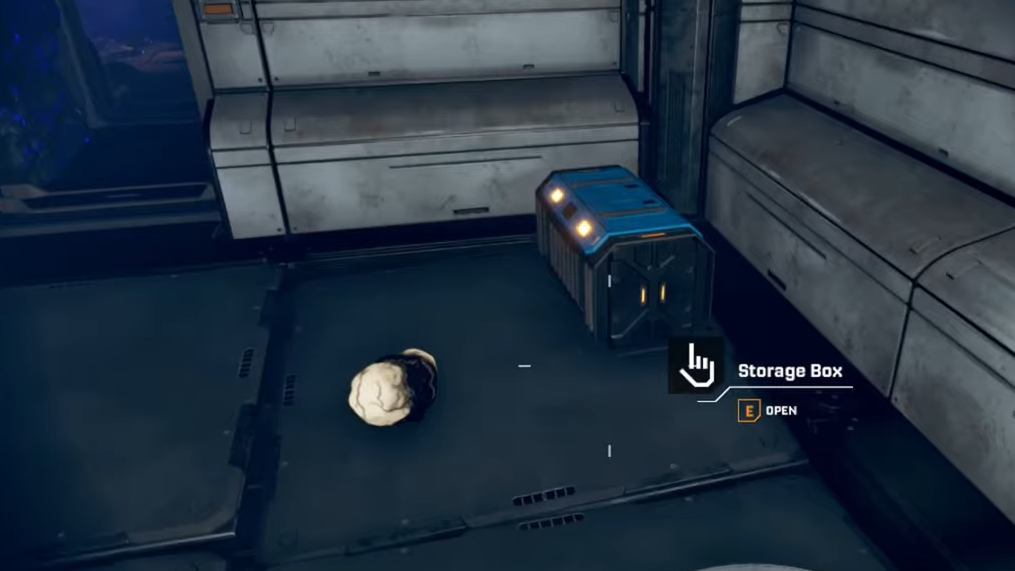
At the top, in one corner of the platform, sits a blue storage box. This same blue chest model is used for other early component blueprints in the game, so it should look familiar if you have already collected the Rotor or Tube blueprints elsewhere.
Loot inside the tower chest
Opening the blue chest at the summit of the tower grants the Stabilizer blueprint as a story item. In the immediate area around the chest you can also find:
- War Bonds, which you can use for limb or gear upgrades.
- Damaged tech that can be analyzed for a quick burst of Data Points.
The moment you take the blueprint, be ready for another Vermin wave if you visited during normal planetary conditions. The safest option is often to let enemies cluster and then use a grenade: StarRupture’s grenades pull enemies toward them before detonating, which can wipe out most of the ambush in one blast and leave only a few survivors to clean up as you retreat down the stairs.
Once the area is clear enough, or once you’ve simply sprinted away, you can fast-travel or run back to your base. The blueprint is now permanently in your story inventory and visible under the story tab.
Feeding the Stabilizer blueprint into the Recipe Station
After securing the blueprint, the next step is unlocking the actual Stabilizer recipe at your base.
Step 1: Return to your base and interact with the Recipe Station. This is where all blueprint-gated recipes are finalized.
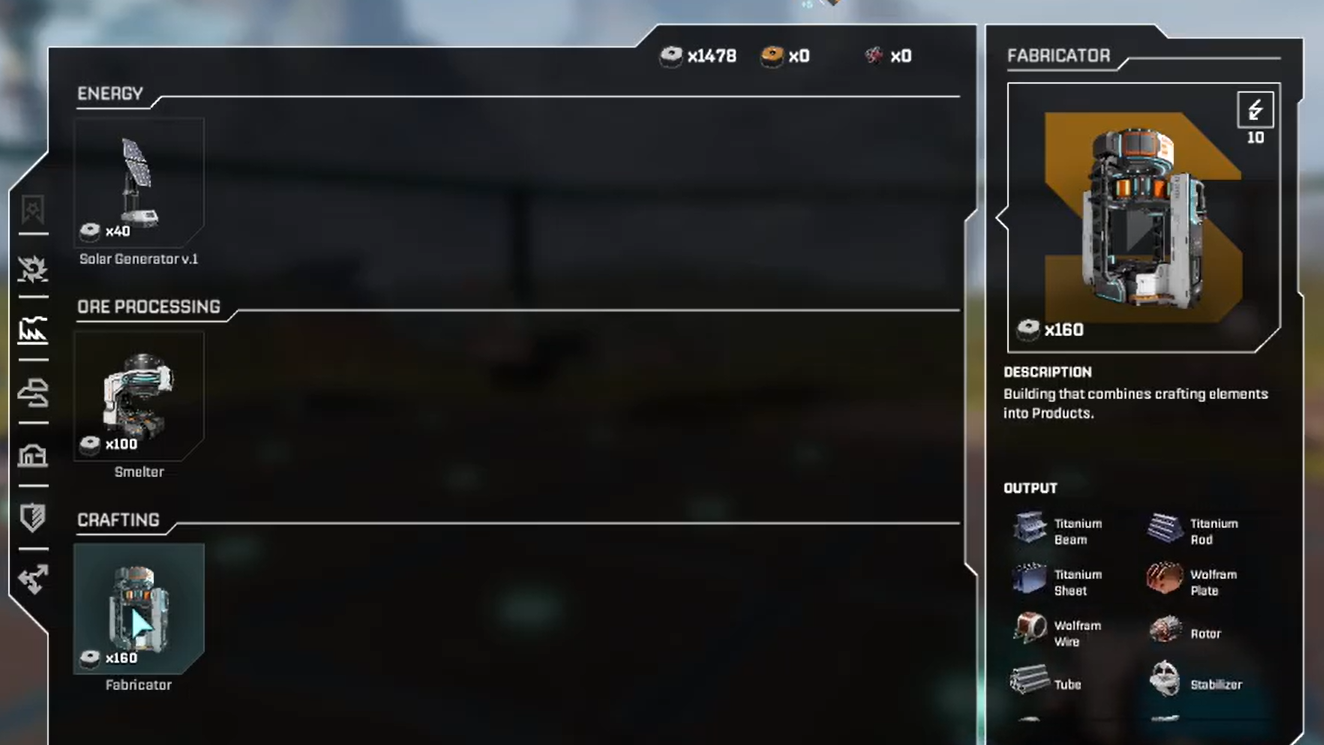
Step 2: Navigate to the Fabricator sub-menu and locate the Stabilizer entry. With the blueprint in your inventory, the station will allow you to "Insert" it into the recipe slot.
Step 3: Select the insert option to contribute the blueprint. The Stabilizer entry now shows the remaining material requirements you must satisfy before the recipe unlocks fully.
The precise material list differs slightly between accounts, but two consistent requirements are:
- Rotors – 100 units, produced using the Rotor recipe once you have that blueprint.
- Titanium-based parts – a few hundred units, commonly Titanium Tubes or Titanium Rods.
- Data Points – a substantial number gathered by scanning tech and wreckage in the field.
Earlier coverage of the same unlock mentions one configuration that uses 100 Rotors, 300 Titanium Tubes, and 600 Data Points. Another describes the Game Rant run using 100 Rotors and 300 Titanium Rods. The common thread is simple: you must already be mass-producing Rotors and titanium components before the Stabilizer becomes practical.
Prerequisite blueprints and recommended order
The Stabilizer’s material cost makes it a poor candidate for your very first blueprint expedition. A smoother progression looks like this:
- Rotor blueprint – Found to the east in a small gulch with a tower. This unlocks mass production of Rotors, which the Stabilizer recipe later consumes.
- Tube blueprint – Located at a blown-out Helium facility to the northwest, often in the same general run where you can pick up another Rotor blueprint copy.
- Stator blueprint – North or north-northeast at Griffith's Research Outpost, atop one of the structures via another jumping route.
- Stabilizer blueprint – The Claywood’s Research Outpost tower in the northeast, once your production of Rotors and titanium parts is stable.
All of these early blueprints sit in a rough ring around the starting lander and can be seen from high vantage points near your first base: tower silhouettes in gulches, satellite dishes jutting from mountains, and industrial scaffolding in the hills.
Because the Stabilizer recipe explicitly consumes Rotors and titanium products, you gain more from grabbing the Rotor, Tube, and Stator blueprints first. That way, by the time you fight through Claywood’s infestation, your factories are ready to convert raw ore into the exact components the Recipe Station demands.
Once the Stabilizer recipe is unlocked and running, several mid-game structures and defensive options open up quickly. Treat Claywood’s Research Outpost as both a combat challenge and a production milestone: when you can hold that tower long enough to loot the chest and escape, your base is ready to step up into the heavier industrial and combat tier that defines StarRupture’s next phase.