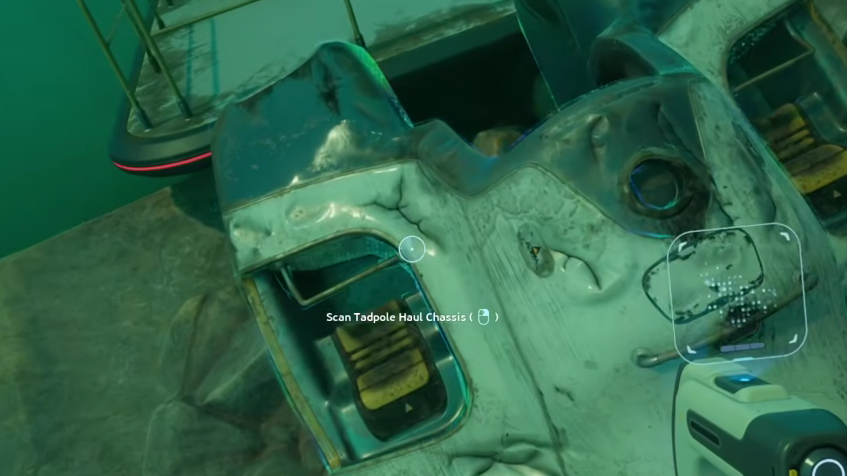
The Tadpole Haul Chassis is one of two swappable rigs for the Tadpole submersible in Subnautica 2, trading speed and agility for cargo pods, extra seating, and a second hardpoint. To unlock the blueprint, you need to scan three Haul Chassis fragments out in the world, which are clustered around the eastern stretch of the map.
What the Haul Chassis does
The Haul rig (Heavy Utility Lifter) clamps onto the Tadpole’s command module and turns it into a catamaran-style transport. It adds built-in cargo pods, seating, and handholds for up to four pioneers, and an extra hardpoint for mounting utility gear like a deployable locker, work light, or oxygen generator.
The tradeoff is significant. The Haul Chassis is heavier, slower, and far less maneuverable than the Scout Ray Chassis, so it is not the rig you want when threading past Leviathans or making fast escapes. Use it for resource runs, co-op cargo trips, and ferrying gear between bases.
| Chassis | Strengths | Best use |
|---|---|---|
| Scout Ray | Fast, agile, low profile | Scouting, evading predators |
| Haul | Two hardpoints, cargo pods, 4-seat capacity | Resource hauling, co-op transit |
Prerequisites before hunting fragments
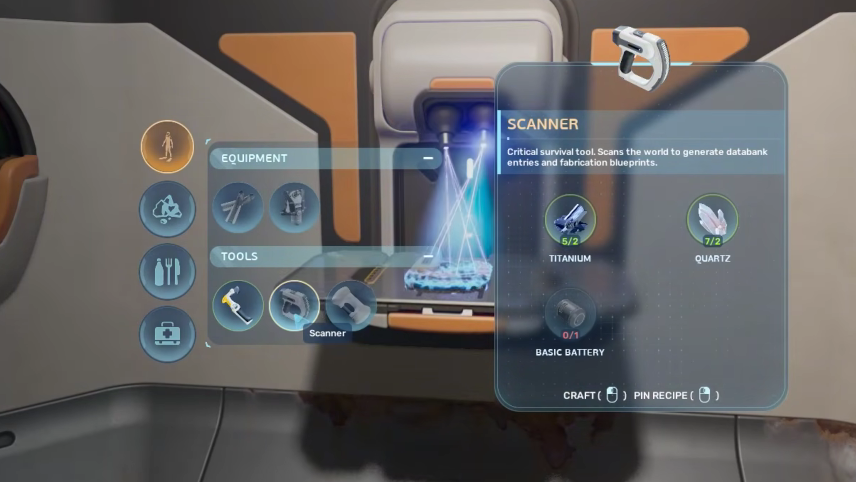
You need the Scanner equipped before any fragment counts. Craft it inside the Lifepod fabricator using titanium, quartz, and a basic battery. You should also have the base Tadpole blueprint completed first, since the Haul rig only makes sense once you have a Tadpole to dock it onto.
Several of the fragment sites sit in warmer eastern water and around wreck debris. Pack food, water, a repair tool if you have one, and a spare oxygen tank before pushing out from the Lifepod.
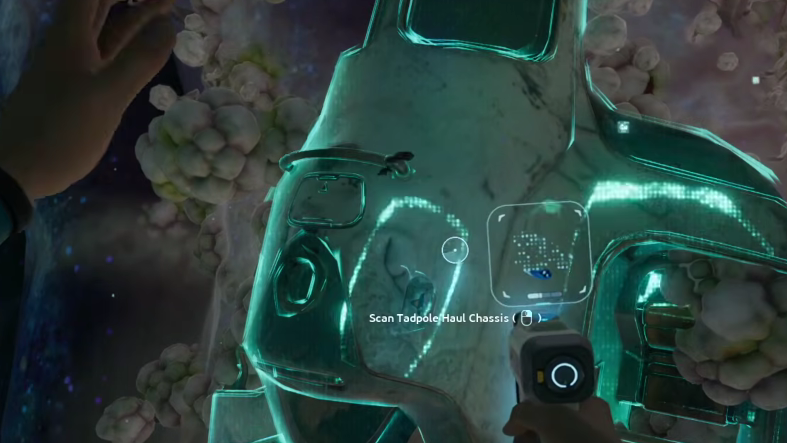
Where to find Tadpole Haul Chassis fragments
Three scans are required to complete the blueprint. The fragments are scattered along the eastern half of the starting region, mixed in with the same wreck fields and colonist outposts where you find Tadpole fragments, Bioreactors, and Hydroelectric Turbines.
Cicada Wreck debris field (east-northeast of the Lifepod): Follow the current that runs down the canyon east-northeast of the Lifepod toward the Cicada Wreck – Lander Garage. Haul Chassis fragments appear among the scattered cargo containers and scannable wreckage in this corridor, in the same general area as Tadpole fragments and a Bioreactor.
Colonist outpost south of the Cicada Wreck: From the Cicada Wreck, head south through the natural arch tunnel formation and turn right past the second arch. The colonist outpost there has loose tech on the seabed near a metal platform, and a Haul Chassis fragment can be scanned alongside the other debris.
Eastern plateaus near Blackbox – Ruby: About 400 meters northeast of the Lifepod, around the small plateau where the Ruby blackbox recording sits beside the half-buried fish skeleton, additional fragments spawn among the rocky crags, pushing further east-northeast toward the Behemoth Finger-Legged Jelly territory.
How to know the blueprint unlocked
After your third successful scan, the PDA will play the unlock chime and add the Tadpole Haul Chassis entry to your blueprints under the Vehicle Bay category. Any further Haul Chassis fragments you scan after that point will award one Titanium each instead of progress.
You can confirm the unlock by opening the Vehicle Fabricator at your Moonpool. The Haul Chassis will appear as a buildable option next to the Scout Ray Chassis.
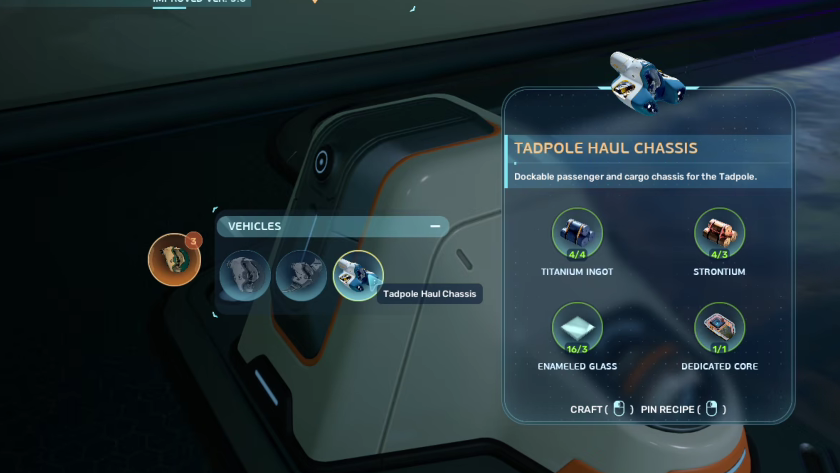
Building and docking the Haul Chassis
The Haul Chassis is built at the Vehicle Fabricator, the same station you used for the Tadpole itself. You will need plasteel-tier materials, so make sure your Processor is set up, and you have access to celestine and the wiring components.
Once built, dock your Tadpole at the Moonpool and select the chassis swap option. The Tadpole will visibly change silhouette as the Haul rig clamps on, with the cargo pods extending to either side. Only one chassis can be fitted at a time, so undocking and re-equipping at the Moonpool is how you switch back to the Scout Ray.
When to use Haul over Scout Ray
Pick the Haul Chassis for trips where capacity matters more than survival speed. Resource ferrying between a forward outpost and your main base, multi-player co-op runs where friends ride on the side pods, and mounting a Portable Locker plus an extra utility item on the dual hardpoints are the strongest use cases.
Avoid the Haul rig when pushing into Leviathan territory or unmapped deep biomes. The reduced maneuverability and slower top speed make it a poor fit for anything that requires dodging, and it has the same crush depth limits as the base Tadpole until you fit a Depth Module.