The Thundercry Blade is the Mo Blade martial art tied to the Stonesplit – Might arsenal in Where Winds Meet. It plays the tank role: soaking damage with large HP-based shields, locking down groups of enemies, and converting charged attacks into real damage once it is set up. Mobility is the trade-off, and mastering Fighting Spirit management is what separates a sluggish greatsword from a reliable frontline weapon.
How to unlock Thundercry Blade
Thundercry Blade can be unlocked in three main ways. All three are surfaced in the in-game Develop menu under Martial Arts, where you can select Thundercry Blade and press Obtain to see your options on the map.
Unlock method 1: Skill Theft at Well of Heaven Martial Camp
Step 1: Reach the Kaifeng region by finishing Chapter 1, “Heaven Has No Pier”. Once Kaifeng is open, travel to the southern Well of Heaven Martial Camp outpost. If the map is still dark, you can still walk there; the fog only hides map details.
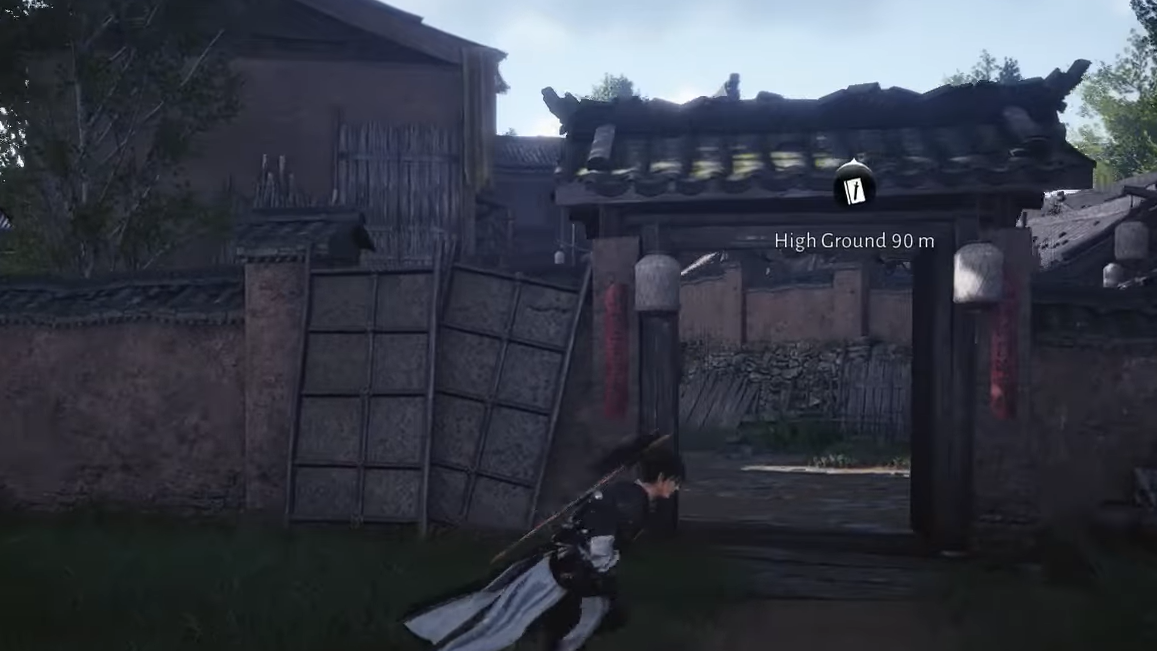
Step 2: Before you infiltrate, unlock the Touch of Death Mystic Art. That requires completing “The Realm Endures” Jianghu Legacy side story. Touch of Death lets you quietly remove specific guards who block your route to chests and the sanctum.
Step 3: Enter the camp and work your way through the stealth route. Along the way, there are nine chests scattered across rooftops, scaffolding, interiors, and tightropes. They are optional if you only care about the martial art, but they are built into the same infiltration flow.
Step 4: Progress deeper into the camp until you reach the elevated sanctum area. A blue ring on the platform marks the Skill Theft zone. Step into the ring to initiate the Skill Theft minigame on the camp master and, if you succeed, you obtain the Thundercry Blade Martial Art.

Unlock method 2: Join the Well of Heaven Sect
Step 1: Progress the story until you can approach the Well of Heaven Sect and begin its initiation questline.
Step 2: Complete the initiation objectives. Finishing this Sect initiation unlocks Thundercry Blade as part of the sect’s martial arts rewards, without needing to perform Skill Theft.

Unlock method 3: Choose Thundercry Blade from Qi Sheng
Step 1: Collect your first Oddity and bring it to Qi Sheng, an NPC tied to the Oddities system.
Step 2: When you submit your first Oddity, you can choose from several rewards. Picking Thundercry Blade here grants the martial art earlier than a Kaifeng run, which can be valuable if you want a heavy Mo Blade option as soon as possible.
This reward choice is one-time, so only take Thundercry Blade here if you are sure you want to build around it.

Thundercry Blade’s role and Stonesplit – Might path
Thundercry Blade sits in the Stonesplit – Might development path. In practice, that means three things: very high survivability, strong control over packs of enemies, and slower, charge-centric damage.
| Aspect | Thundercry Blade (Stonesplit – Might) |
|---|---|
| Combat Type | Melee Combat |
| Role | Tank |
| Arsenal | Stonesplit |
| Key Resource | Fighting Spirit |
| Primary strengths | Survivability, crowd control, charged DPS |
| Primary weaknesses | Mobility, party support, execution difficulty |
The design is simple: you trade speed for durability and the freedom to stand in front of bosses without constantly dodging. Your gameplay loop is built around keeping HP shields active, provoking enemies when needed, and converting safe blocks into high-value charged attacks.
Core mechanics: Fighting Spirit, shields, Fortitude, and Focus
Fighting Spirit is a shared resource between Thundercry Blade and Stormbreaker Spear. You gain it in three main ways:
- Blocking with Mo Blade – Defense successfully.
- Activating Predator’s Shield (base Q skill).
- Activating the Perception variant Shifting Heaven when triggered.
You then spend Fighting Spirit on:
- Stage 3 releases of Galecloud Cleave and Avalanche to boost damage.
- The follow-up Varied Combo skills after those charges.
- The special AoE skill Sunrush Gale.
Thundercry Blade also layers several defensive flags:
- Shield is a separate HP buffer that absorbs both HP and most Qi damage. Predator’s Shield and Shifting Heaven both generate a shield equal to 25% of your max HP for 8 seconds.
- Fortitude is granted during major charged skills like Galecloud Cleave, Avalanche, the Varied Combos, and Sunrush Gale. While Fortitude is active, you ignore damage interruptions from regular hits and only crowd control can stop your animation. This is crucial for PvP and boss fights, where obvious heavy attacks are easy to punish without super armor.
- Focus is gained from Sunrush Gale and causes your next charged skill within 5 seconds to charge 50% faster, giving you one quick heavy window after pulling enemies in.
- Breakthrough, applied by Shifting Heaven, boosts charged skill damage by 30% and removes the Endurance cost of charging for 12 seconds.

Thundercry Blade skills and combos
Martial Art skills (Q)
Predator’s Shield (base Q) grants a 25% max HP shield for 8 seconds and instantly adds 2 bars of Fighting Spirit. If you are carrying the Stormbreaker Spear buff Drumbeat, using Predator’s Shield consumes Drumbeat and triggers your Perception skill instead of the base effect.
Shifting Heaven (Perception Q) is the perception variant. It also grants a 25% max HP shield for 8 seconds, 2 bars of Fighting Spirit, and applies Breakthrough, letting your charged attacks hit harder and charge for free for a short window.
Special skill (~): Sunrush Gale
Sunrush Gale is the AoE special tied to the tilde key. It consumes 2 bars of Fighting Spirit to slam the Mo Blade into the ground, creating a vortex that pulls nearby non-boss enemies toward you, then follows up with a sweeping spin. During the entire sequence, you gain Fortitude, and at the end, you gain Focus, accelerating your next charged attack.
In practice, this is your primary setup tool for trash packs: suck enemies in, eat their response with your shields and Fortitude, then cash in with Galecloud Cleave or Avalanche while Focus is active.

Light attacks and Galecloud Cleave
Thundercry Blade’s light chain is straightforward, but the charged variation is where most AoE damage comes from.
- Mo Blade – Light Attack is a three-hit light chain with low damage but quick recovery.
- Galecloud Cleave is the light charged skill. Holding light attack spins the Mo Blade for a wide double sweep. It has three charge stages, each raising damage. At Stage 3, if you have 1 bar of Fighting Spirit, Galecloud Cleave will automatically consume it for 20% bonus damage and unlock the Light Attack Varied Combo.
- Light Attack Varied Combo is triggered by pressing light attack right after a Stage 3 Galecloud Cleave. It spends another bar of Fighting Spirit to perform a large-sweeping reverse strike with Fortitude.
This chain – Focus from Sunrush Gale, then Stage 3 Galecloud Cleave into the Varied Combo – is the core loop for clearing groups while remaining almost impossible to interrupt.
Heavy attacks, Avalanche, and the Varied Combo
Heavy attacks are slower and more single-target focused, but they hit significantly harder.
- Mo Blade – Heavy Attack is a simple three-hit heavy chain with relatively low damage per swing, mainly used for filler when you cannot safely charge.
- Avalanche is the heavy charged skill. Holding heavy attack slashes upward and then slams down in a small radius. Like Galecloud Cleave, it has three charge stages and grants Fortitude while active. A Stage 3 release can consume 1 bar of Fighting Spirit to add 20% damage and unlock the Heavy Attack Varied Combo.
- Varied Combo (heavy) is triggered by pressing heavy attack after a Stage 3 Avalanche. It spends 1 bar of Fighting Spirit, leaps up, and flips down into a high-damage slam that knocks targets down, also under Fortitude.
On bosses and tougher elites, this chain is your primary single-target burst during Exhausted windows, often combined with Breakthrough from Shifting Heaven to stack damage multipliers.

Dual-weapon Conversion
Mo Blade – Conversion is the dual-weapon switch skill. Pressing it swaps from your current weapon (for example, Stormbreaker Spear) to the Mo Blade while delivering a small hit. The cooldown is short, which makes weaving in and out of Thundercry Blade form very practical in a Stonesplit Arsenal build.
Internal Arts that synergize with Thundercry Blade
Several Internal Arts are explicitly tied to Stonesplit – Might and the Thundercry Blade + Stormbreaker Spear pairing:
- Exquisite Scenery adds a unique counter to Thundercry Blade. A successful block with the blade activates a special follow-up: pressing your Perception Skill or Heavy Attack unleashes a first-stage Charged Heavy Attack instantly with no charge time. This can occur once every 10 seconds and, when combined with Adaptive Steel and charged-crit talents, turns every good block into a free chunk of damage. Exquisite Scenery also restores 1 bar of Battle Will when you land a Varied Combo, helping sustain your resource loop.
- Trapped Beast adds a last-resort shield. When your HP drops below 30%, and you take damage, it triggers Cornered Beast, giving you a shield worth up to 30% of your max HP for 4 seconds. It can only happen once every 300 seconds, but it often saves failed tanking attempts.
- Art of Resistance extends the duration and bonus effects of your own HP shields by 4 seconds, directly strengthening Predator’s Shield, Shifting Heaven, and any other source of personal shields.
- Rock Solid is aimed at the Stormbreaker Spear half of the arsenal. After taunting a boss with Storm Roar, it increases your damage reduction by a large amount, with a smaller stacking reduction for non-bosses, at the cost of 10% damage output while active. This shores up your tanking role in group content when rotating between spear and blade.
Recommended gear sets and tuning
Two Stonesplit-flavored armor sets naturally pair with Thundercry Blade’s kit.
| Gear Set | 2-piece bonus | 4-piece bonus | Content source |
|---|---|---|---|
| Rainwhisper Set | Max HP +40 | +10% all Critical DMG and healing, +15% more when you have an HP Shield | Campaign – Unbound Cavern, Sword Trial, Group Dungeons |
| Moonflare Set | Max HP +40 | When attacking while defending, 30% chance to create a shield for 10% max HP (20s); if a shield exists, restore 2% HP instead (60s cooldown) | Campaign – Unbound Cavern, Furnace of Righteousness, Sword Trial, Group Dungeons |
Running a mix of Rainwhisper and Moonflare makes sense for most Thundercry Blade builds: both sets scale off max HP, both reward operating with a shield up, and they fit the defensive theme. Gear tuning priorities should favor Max HP first, so all percentage-based shields and set bonuses scale harder.

Thundercry Blade talents and scaling
Weapon-specific talents unlock every 10 levels, through Breakthroughs on the Thundercry Blade Martial Art. They lean heavily into charged attacks and Stonesplit scaling:
- Charge Calculation Enhancement (on learning the martial art) prevents Charged Skills and Varied Combos from becoming Abrasion and raises their Critical Damage. This keeps your core rotations from degrading in long fights.
- Max HP Increases (Tier 1 Breakthrough) lets your Body stat push max HP higher, which flows directly into larger shields and better Stonesplit tanking.
- Charge Critical Hit Enhancement (Tier 2 Breakthrough) raises the Critical Rate of your charged skills and associated Varied Combos, improving burst reliability.
- Stonesplit Increase (Tier 3 Breakthrough) boosts your Stonesplit Attribute Attack and adds Stonesplit Penetration based on your max Stonesplit Attack, making your attribute damage less mitigated.
- Attribute Attack Damage Enhancement (Tier 3 second pick) makes all skills deal damage based on Attribute Attack, with an extra boost for Stonesplit damage.
The pattern is clear: the more you lean into charged skills and attribute attack scaling, the more you get out of Thundercry Blade. Flat light attack spam is not the design intent.
How to actually play Thundercry Blade
Fighting Spirit management
Thundercry Blade feels weak if you spend Fighting Spirit inefficiently. A simple discipline keeps the resource healthy:
- Block instead of dodging whenever it is safe. Every successful Mo Blade – Defense block generates Fighting Spirit and can trigger Exquisite Scenery’s instant heavy counter.
- Rotate Predator’s Shield and Shifting Heaven on cooldown where possible. Both add 2 bars of Fighting Spirit in addition to shields, so they are not just defensive buttons.
- Reserve Fighting Spirit for Stage 3 charges and Varied Combos rather than spending it on partial charges. The 20% damage bonuses and extra combo hits are a big part of your DPS budget.
- Save 2 bars if you know you will need Sunrush Gale to group mobs or to quickly build Focus for a key charged attack.

Shield cycling and tanking
Thundercry Blade lives or dies on shield uptime. A basic loop for general PvE looks like this:
Step 1: Start combat with Predator’s Shield or Shifting Heaven to establish a 25% HP shield and stock Fighting Spirit.
Step 2: Walk into enemy attacks with Mo Blade – Defense active, fishing for proper blocks. Each successful block both restores Fighting Spirit and can trigger Exquisite Scenery’s free heavy counter, so you are not just turtling.
Step 3: When shields are about to fall off, refresh them with whichever Q skill is off cooldown and available. With Art of Resistance equipped, the extended duration gives you room for small mistakes.
Step 4: In group content, weave in Stormbreaker Spear to taunt with its defensive skills and apply damage reduction (especially with Rock Solid), then swap back via Conversion to cash in with Thundercry Blade’s charges while protected.
AoE rotation for packs
For large groups of standard enemies, a streamlined flow works well:
Step 1: Cast Predator’s Shield to gain a shield and 2 bars of Fighting Spirit before diving in.
Step 2: Use Sunrush Gale to pull surrounding enemies into a tight cluster and gain Focus, knowing you are under Fortitude during the animation.
Step 3: Immediately hold light attack for Galecloud Cleave, charging to Stage 3. Focus halves the charge time, so the window is small but manageable.
Step 4: Release Galecloud Cleave at Stage 3 to consume 1 bar of Fighting Spirit for enhanced damage, then press light attack again to fire the Light Attack Varied Combo if you still have a bar left.
Step 5: If enemies are still alive, fall back on light chains, another Sunrush Gale once it is ready, or swap to Stormbreaker Spear to finish with its Stonesplit tools.
Single-target rotation for bosses
Bosses put Thundercry Blade’s tank identity to the test. A standard pattern is:
Step 1: Enter the fight with a shield active (Predator’s Shield or Shifting Heaven). If possible, open with Dragon’s Breath or other Mystic Skills that can be animation-cancelled with parry for free damage over time.
Step 2: Block standard boss strings with Mo Blade – Defense, triggering Exquisite Scenery’s free heavy counters whenever the F prompt appears. This adds regular burst without committing to long, obvious charges.
Step 3: During Exhausted windows, when the boss’ Qi shield breaks and the execute prompt appears, prioritize Stage 3 Avalanche into the heavy Varied Combo, stacked with Breakthrough from Shifting Heaven if it is available.
Step 4: When time allows in a longer Exhausted window, weave in a Focus-granting Sunrush Gale before Avalanche to cut charge time and squeeze in extra heavy hits.
Step 5: If you are running Stormbreaker Spear, use its taunt and vulnerability debuff skills to keep bosses on you and briefly vulnerable, then Conversion back to Mo Blade for charged punishments while their resistance is down.

Best weapon combination: Thundercry Blade and Stormbreaker Spear
Thundercry Blade is built to share an arsenal with Stormbreaker Spear. Both use Fighting Spirit and belong to the Stonesplit – Might tree, and they share Internal Arts and gear assumptions. The pairing works because:
- You maintain a single resource system (Fighting Spirit) rather than juggling different gauges.
- Stormbreaker Spear brings taunts, direct damage reduction, and boss vulnerability tools, letting you lock aggro and set up safe windows.
- Thundercry Blade then capitalizes on those windows with high-damage, super-armor-heavy charged skills and large shields.
- Rock Solid specifically raises Storm Roar’s damage reduction after taunting, while your overall damage is already focused into bursts during safe periods rather than constant output.
Many players also pair Thundercry Blade with a healing-focused Fan early on to offset limited potion stocks, then transition into the full Mo Blade + Spear Stonesplit arsenal once healing capacity and gear catch up.
Thundercry Blade rewards patience. The weapon’s slow swings and heavy focus invite mistakes in PvP and tight boss fights if you commit recklessly, but the kit offers tools to make heavy attacks safer: Fortitude, instant counters from Exquisite Scenery, and overlapping shields. With the right Stonesplit build, it stops feeling like a clumsy greatsword and starts functioning as a steady front line that can shrug off punishment while still delivering real damage when the timing is right.

